In this tutorial, we will build a complete Blazor Server CRUD application using SQL Server and .NET 8. This guide is beginner-friendly and walks you through project setup, database integration, and testing.
- Advantages of Using Blazor Server
- Prerequisites
- Step 1: Create a New Project
- Step 2: Install Required NuGet Packages
- Step 3: Create Database and Table
- Step 4: Create Model Class
- Step 5: Create DbContext
- Step 6: Configure Connection String
- Step 7: Register DbContext
- Step 8: Create Employee Service
- Step 9: Register Service
- Step 10: Create CRUD UI Page
- Testing the Application
- Common Errors and Fixes
- Download Source Code
- FAQ
- Summary
- Next Step
By the end, you will be able to:
- Create records
- Read data
- Update existing entries
- Delete records
Advantages of Using Blazor Server
- ✔ No need for JavaScript (C# only)
- ✔ Real-time UI updates using SignalR
- ✔ Faster development for .NET developers
- ✔ Full-stack C# development
Prerequisites
- Visual Studio 2022
- .NET 8 SDK
- SQL Server
- Basic knowledge of C#
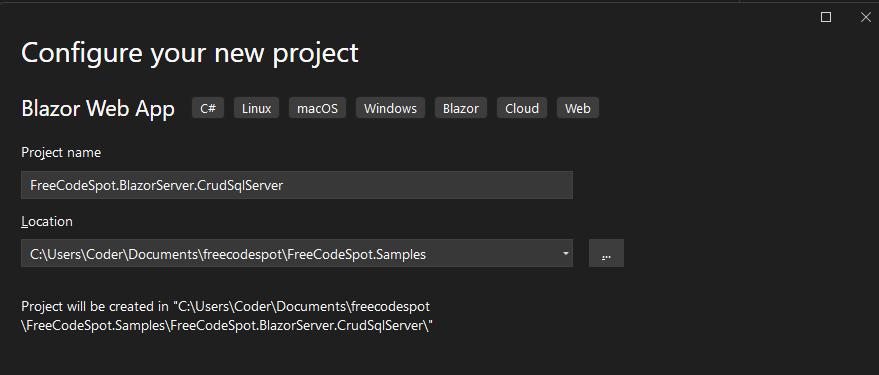
Step 1: Create a New Project
Create a new Blazor Server App in Visual Studio using .NET 8.
Step 2: Install Required NuGet Packages
Open Nuget package manager and search for these packages and install.
Microsoft.EntityFrameworkCore.SqlServer
Microsoft.EntityFrameworkCore.Tools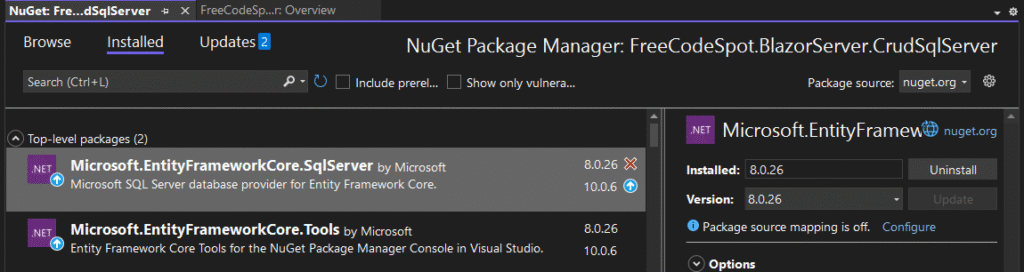
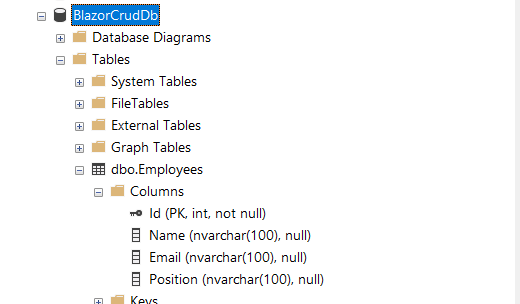
Step 3: Create Database and Table
Navigate to your SQL Server Management Studio, open a new SQL query window, and run the command below to create a database and a demo table, Employees.
CREATE DATABASE BlazorCrudDb;
GO

USE BlazorCrudDb;

CREATE TABLE Employees (
    Id INT PRIMARY KEY IDENTITY(1,1),
    Name NVARCHAR(100),
    Email NVARCHAR(100),
    Position NVARCHAR(100)
);
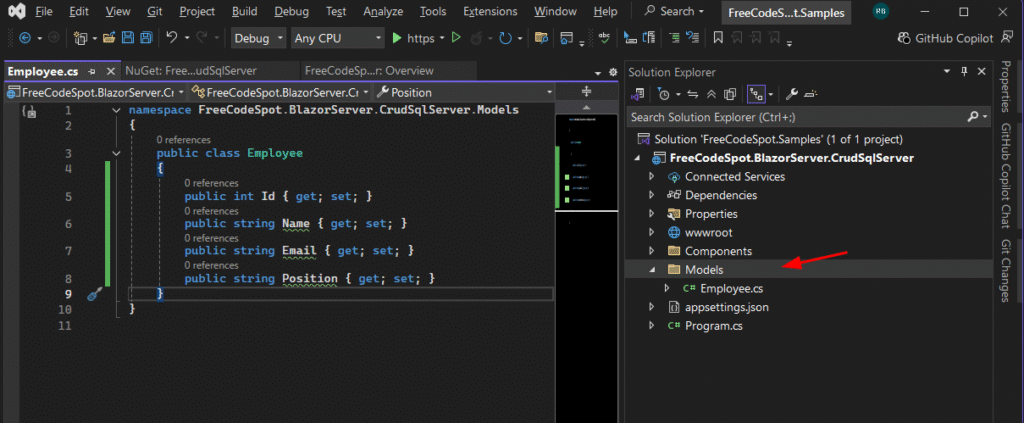
Step 4: Create Model Class
Create a Models folder if it doesn’t exist, and create a new class named Employee.
public class Employee
{
    public int Id { get; set; }
    public string Name { get; set; }
    public string Email { get; set; }
    public string Position { get; set; }
}
Step 5: Create DbContext
Create a new folder, Data, and inside it, create the DB context class, as below.
public class AppDbContext : DbContext
{
    public AppDbContext(DbContextOptions<AppDbContext> options)
        : base(options)
    {
    }

    public DbSet<Employee> Employees { get; set; }
}
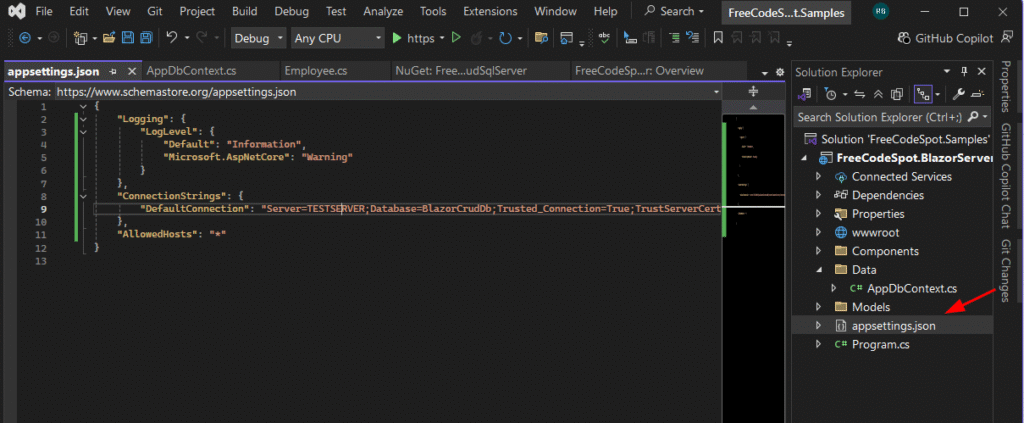
Step 6: Configure Connection String
Register your connection string, open appsettings.json. Use the format below and replace it with your own database connection string.
 "ConnectionStrings": {
  "DefaultConnection": "Server=YOUR_SERVER_NAME;Database=BlazorCrudDb;Trusted_Connection=True;TrustServerCertificate=True;"
}
Step 7: Register DbContext
Then, register the DBContext in your program.cs.
builder.Services.AddDbContext<AppDbContext>(options =>
    options.UseSqlServer(builder.Configuration.GetConnectionString("DefaultConnection")));
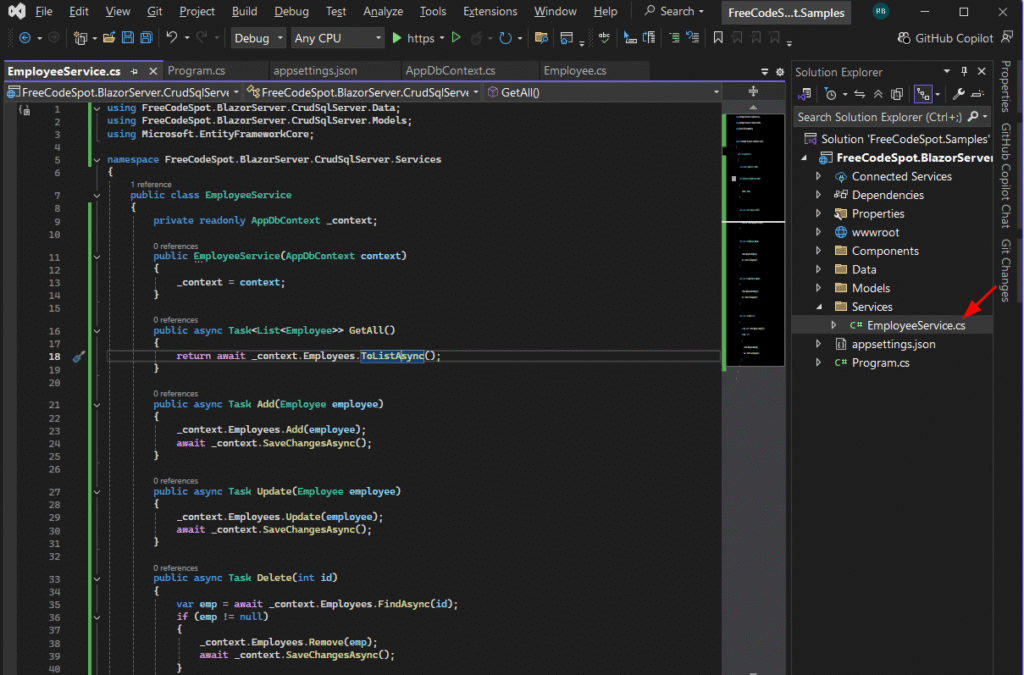
Step 8: Create Employee Service
Create a new folder Services, and create the EmployeeService class as follows.
public class EmployeeService
{
    private readonly AppDbContext _context;

    public EmployeeService(AppDbContext context)
    {
        _context = context;
    }

    public async Task<List<Employee>> GetAll()
    {
        return await _context.Employees.ToListAsync();
    }

    public async Task Add(Employee employee)
    {
        _context.Employees.Add(employee);
        await _context.SaveChangesAsync();
    }

    public async Task Update(Employee employee)
    {
        _context.Employees.Update(employee);
        await _context.SaveChangesAsync();
    }

    public async Task Delete(int id)
    {
        var emp = await _context.Employees.FindAsync(id);
        if (emp != null)
        {
            _context.Employees.Remove(emp);
            await _context.SaveChangesAsync();
        }
    }
}
Step 9: Register Service
Then register the EmployeeService class in program.cs.
builder.Services.AddScoped<EmployeeService>();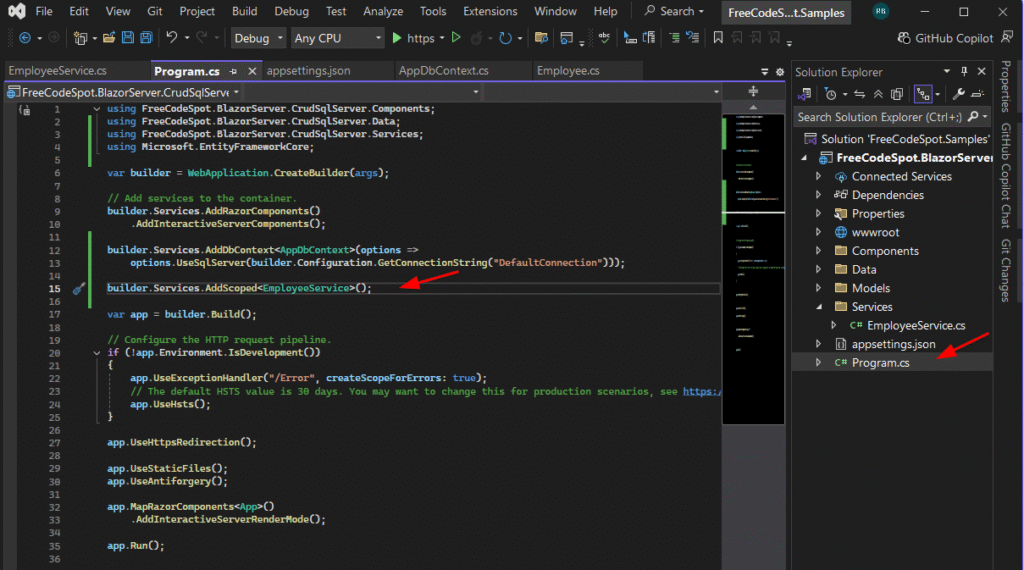
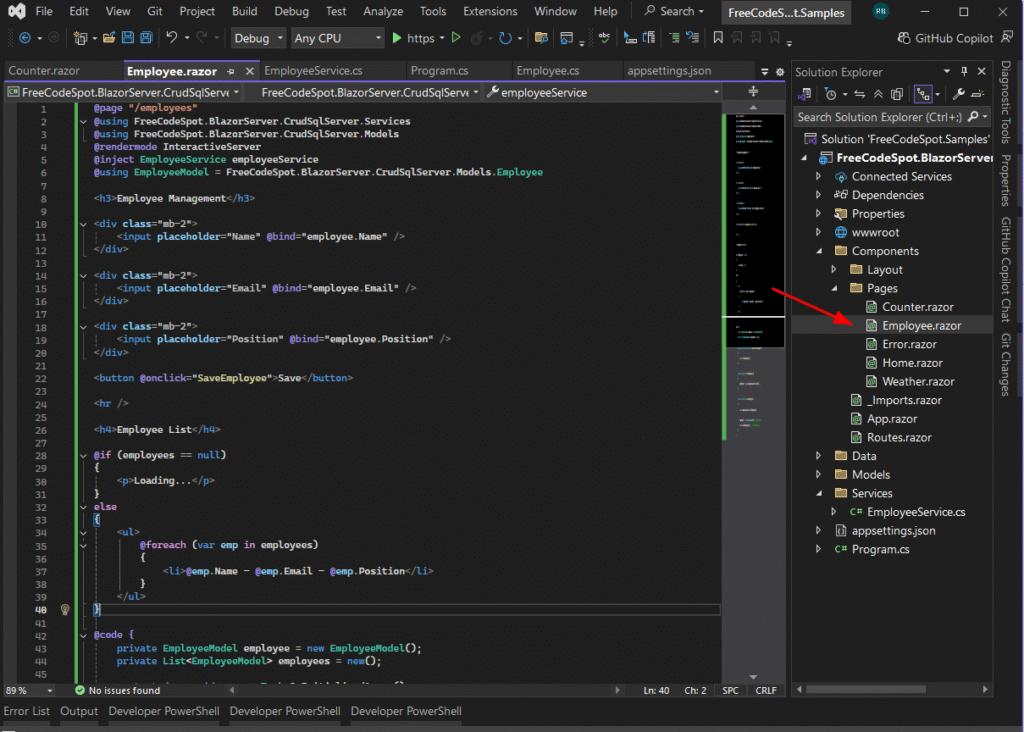
Step 10: Create CRUD UI Page
Create the UI inside Components -> Pages. Add a new razor component page and add the following code snippet.
@page "/employees"
@using FreeCodeSpot.BlazorServer.CrudSqlServer.Services
@using FreeCodeSpot.BlazorServer.CrudSqlServer.Models
@rendermode InteractiveServer
@inject EmployeeService employeeService
@using EmployeeModel = FreeCodeSpot.BlazorServer.CrudSqlServer.Models.Employee

<h3>Employee Management</h3>

<div class="mb-2">
    <input placeholder="Name" @bind="employee.Name" />
</div>

<div class="mb-2">
    <input placeholder="Email" @bind="employee.Email" />
</div>

<div class="mb-2">
    <input placeholder="Position" @bind="employee.Position" />
</div>

<button @onclick="SaveEmployee">Save</button>

<hr />

<h4>Employee List</h4>

@if (employees == null)
{
    <p>Loading...</p>
}
else
{
    <ul>
        @foreach (var emp in employees)
        {
            <li>@emp.Name - @emp.Email - @emp.Position</li>
        }
    </ul>
}

@code {
    private EmployeeModel employee = new EmployeeModel();
    private List<EmployeeModel> employees = new();

    protected override async Task OnInitializedAsync()
    {
        await LoadEmployees();
    }

    private async Task LoadEmployees()
    {
        employees = await employeeService.GetAll();
    }

    private async Task SaveEmployee()
    {
        await employeeService.Add(employee);

        employee = new EmployeeModel(); // reset form
        await LoadEmployees();     // refresh list
    }
}
Testing the Application
Run the project and navigate to:
https://localhost:xxxx/employees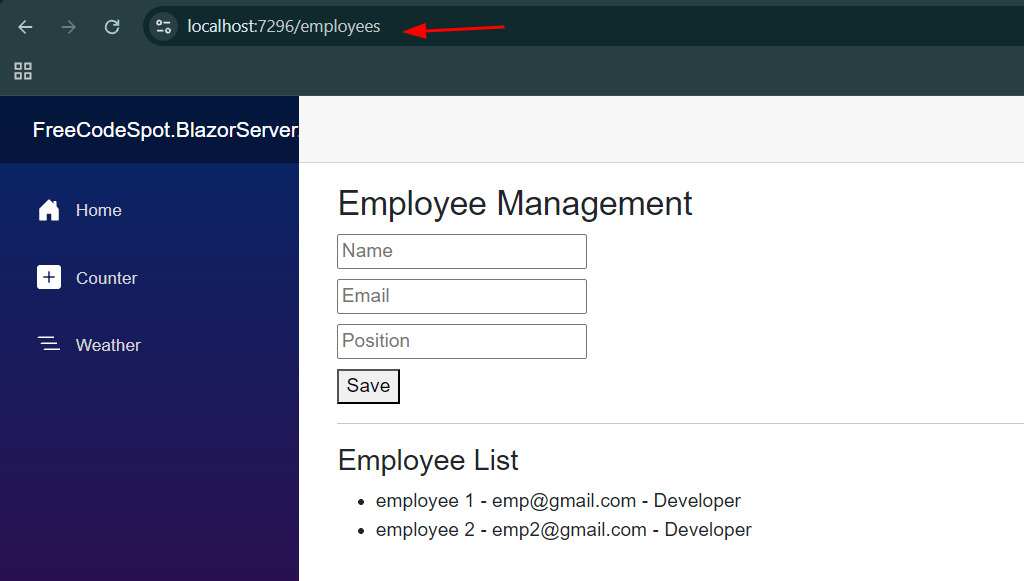
Common Errors and Fixes
Database Connection Error
✔ Check your connection string
✔ Ensure SQL Server is running
Page Not Found
@page "/employees"Dependency Injection Error
builder.Services.AddScoped<EmployeeService>();Download Source Code
👉 Use the Download Link below.
🔐 Password: freecodespot
Note: Extract the file using 7Zip
FAQ
What is Blazor Server?
Blazor Server is a framework that allows you to build interactive web apps using C# instead of JavaScript.
Is Blazor Server good for CRUD apps?
Yes, it is perfect for internal tools and business applications.
Can I use SQL Server with Blazor?
Yes, using Entity Framework Core makes integration easy.
Summary
In this tutorial, you learned how to build a complete Blazor Server CRUD application using SQL Server and .NET 8.
Next Step
👉 Next tutorial: Blazor Server Authentication and Login System