This tutorial will guide you on how to Generate a Self-Signed Certificate on Windows. To do that, we are going to use a software called OpenSSL. OpenSSL is an open-source command-line tool commonly used to generate private keys, create CSRs, install your SSL/TLS certificate, and identify certificate information.
Self-signed Certificate
If you are a developer, you might be assigned to integrate a Third-party API to use a token-based authentication that will require you to use a self-signed certificate. A self-signed certificate secure online communication between a web browser and web servers. This will helps decrease the risk of exposing your personal information such as password, email, Card account number, etc.
SSl Certificate have two main functions:
- Authenticate user server identity » This way; we can validate every user or application that we allow to connect to our server.
- Encrypts the communication between the Web browser and Web Servers » Encrypts all transmitted data.
Before you proceed with generating a self signed ceriticate. We need to install OpenSSL.
I. Install OpenSSL software
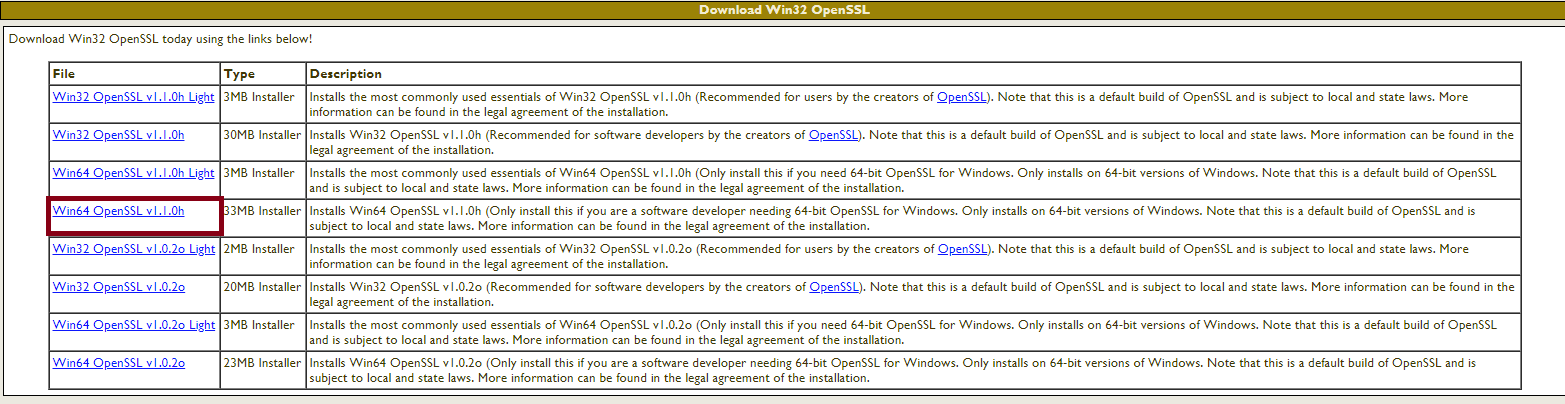
Download OpenSSL for windows. You may click on the link below to download. Download the file that is compatible to your windows version. That means if your windows is 64 bit you must download the 64bit application.
Installation and Setup
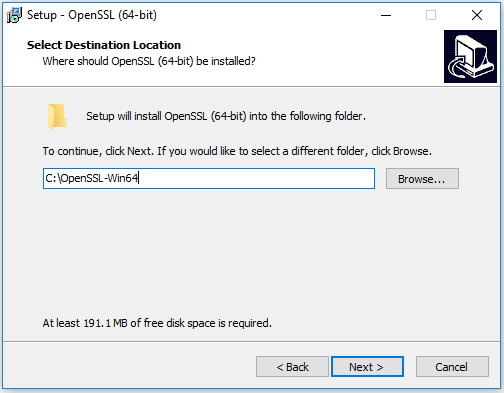
If you have already downloaded the file, you may proceed with installing the software. Install it under C: » OpenSSL-Win64. If you are not sure what your version simultaneously press the [Windows] key and the [Pause] key. This shortcut will open your system properties where you can check your system version.
- Open the installer package of OpenSSL then choose your installation directory. Click next to proceed.
2. After the installation, navigates to your installation folder. In my case, it is located at C: » OpenSSL-Win64 » bin. Copy the full path and paste it into your Environment Variable. See the image below.
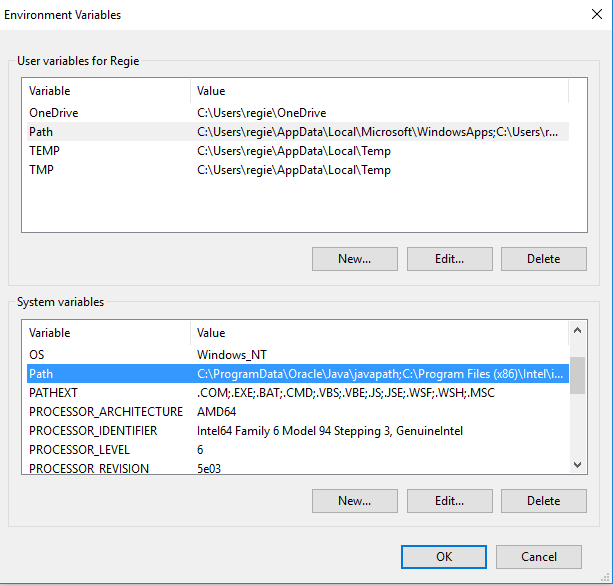
3. Register OpenSSL path to the Environment Variable. These settings will allow us to access OpenSSL using the System Command prompt.
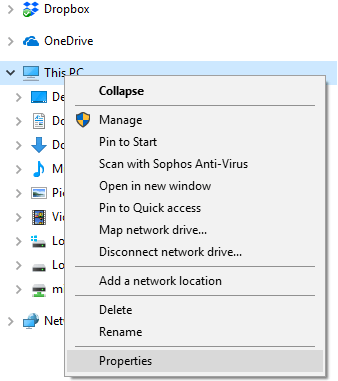
3.1 To open environment variables right click on My Computer or This PC for Windows 10 and choose properties.
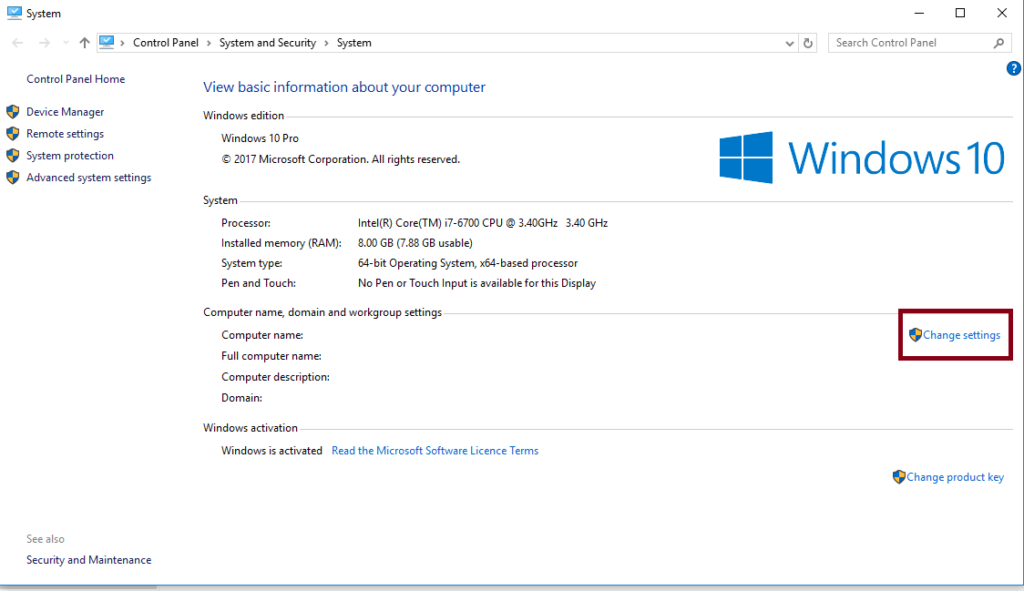
3.2 Once System windows is open. Click on change settings.
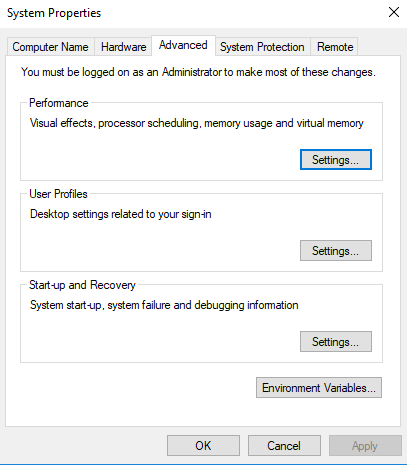
3.3 From the System properties windows, Select the Advanced tab and open Environment Variables located at the bottom right of the advance tab.
3.4 Now, you can open Environment Variables. Please copy and paste your installation directory (C:\OpenSSL-Win64\bin) to your Environment Variables path, separating it with a semicolon. Now you can directly access OpenSSL using cmd. You may refer to the image below.
II. Generate Self-signed Certificate
Now, that we have successfully installed OpenSSL on windows, We can now start to Generate a Self-Signed Certificate on Windows.
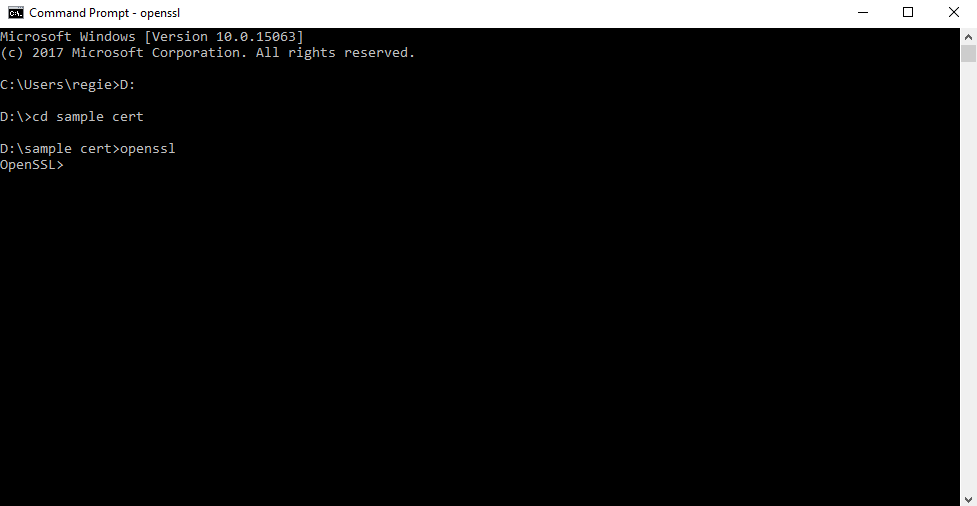
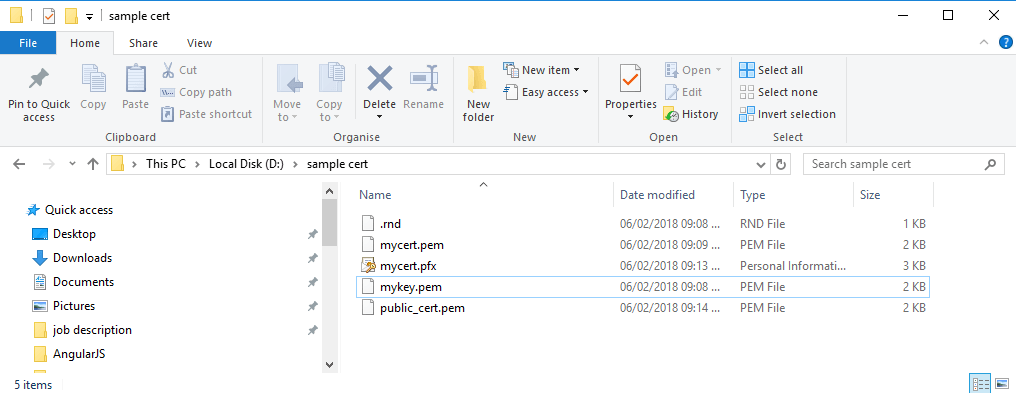
- Open your command prompt from the start menu, then navigate to the folder location where you want to put your self-signed certificate. In this tutorial, I’ll put it under D: » sample cert. You may refere to the image below.
2. Create a key and a certificate using the command below. Fill in additional details for your Self-Signed certificate. Refer to the image shown below.
Details:
- Country Name » Country Code
- State or Province Name »
- Locality Name »
- Organization Name »
- Organizational Unit Name »
- Common Name »
- Email Address »
openssl req -x509 -days 365 -newkey rsa:2048 -keyout mykey.pem -out mycert.pem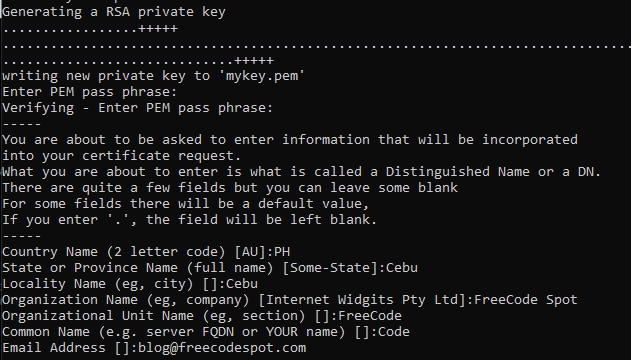
After the command above is executed below is the output certificate and key file that is generated.

3. Generate a .pfx file. A PFX file, also known as PKCS #12, is a single, password-protected certificate archive that contains the entire certificate chain plus the matching private key. The code snippet below will import your key file and certificate to a pfx file.
- mycert.pem » Certificate file
- mykey.pem » Key file
openssl pkcs12 -export -in mycert.pem -inkey mykey.pem -out mycert.pfxOutput File

4. If you need to extract the public certificate from a pfx. Use the command snippet below.
openssl pkcs12 -in mycert.pfx -clcerts -nokeys -out public_cert.pemOutput File

This are the summary of all the files we generated using the steps above. See the image below.
And now your Self Signed certificate is now ready for live action.
Summary:
In this article, we have discussed a brief definition and usage of a Self-Signed certificate. We also provided OpenSSL installation steps and a download link. We also provided an OpenSSL command to walk thru generating a self-signed certificate. Hopefully, this can guide you to secure your future projects. Continue coding. Happy coding!!