Here, we’ll go into the topic of effective logging for your web apps and discuss how to implement Serilog in ASP.NET Core. Modern logging libraries like Serilog have made it easier for developers to analyze and troubleshoot the behavior of software systems, which is why logging is so important.
In this article, we will explore how to integrate Serilog, a popular logging framework, into your ASP.NET Core projects. We’ll cover the basics of Serilog, and provide step-by-step instructions to seamlessly incorporate it into your ASP.NET Core application. By the end of this guide, you’ll have a solid foundation for efficient logging in your web applications, empowering you to gain valuable insights and effectively debug your code.
What is Serilog?
Serilog is a portable and structured logging framework to record diagnostic logs into files, console and SQL databases. Serilog makes it easy to record custom object properties and even output your logs to JSON. This logging provider also has enrichers that help you logs event such as Serilog.Enrichers.Environment which logs events with properties from System.Environment.
Benefits of Serilog:
- Flexible Configuration: Serilog provides a highly configurable logging pipeline that allows you to tailor the logging behavior to your specific needs. With its expressive and easy-to-understand syntax, you can define log levels, format log messages, and choose the desired sink (e.g., console, file, database) for storing logs.
- Structured Logging: Serilog embraces structured logging, enabling developers to log structured data that can be easily parsed and analyzed. By logging events as structured objects or using property-based logging, you can easily query and filter logs, making troubleshooting more efficient.
- Integration with ASP.NET Core: Serilog integrates seamlessly with the ASP.NET Core logging infrastructure, enabling you to leverage its features alongside other logging providers. This flexibility empowers you to mix and match logging strategies based on your application’s requirements.
In the upcoming sections, we’ll guide you through the process of implementing Serilog in your ASP.NET Core application. We’ll cover the installation process, configuration options, and demonstrate how to log events with Serilog’s expressive syntax.
Before we start please make sure to have this following application installed on your machine.
- The latest version of Visual Studio
- Alternatively, you can also use Visual Studio Code
- SQL SERVER
- .Net Core SDK 3.1
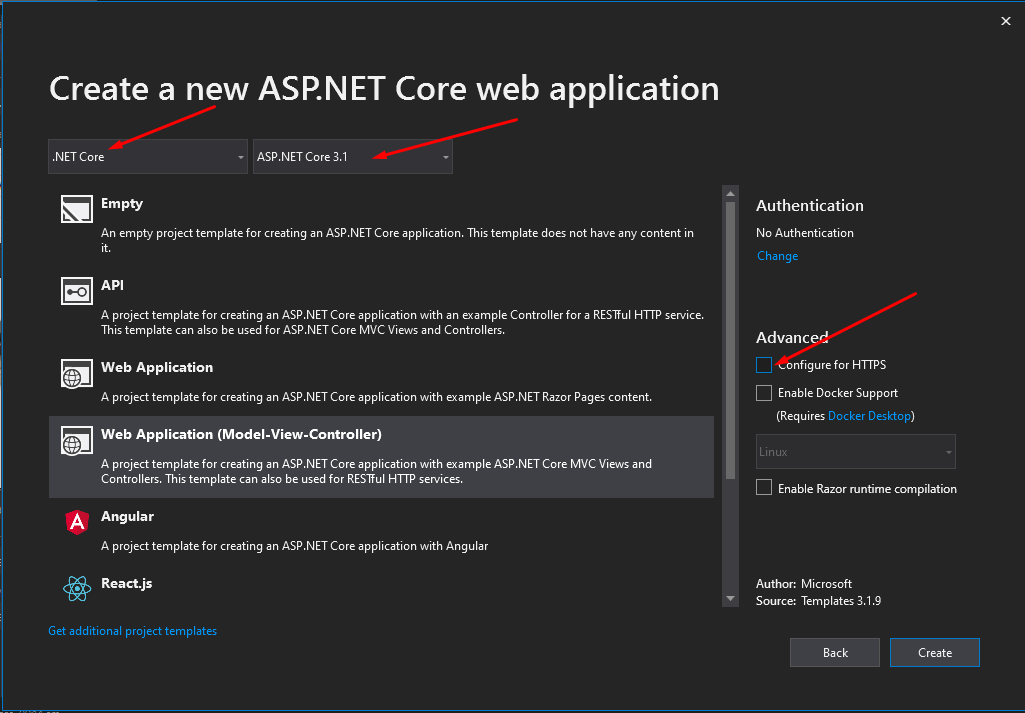
I. Create a new ASP.NET Core Web Application
- First, create your ASP.NET Core Web Application. To do that just follow the steps below.
- Select File > New > Project.
- Select ASP.NET Core Web Application. Name the project SerilogDemo to have the same namespace as my project. Click OK.
- Select an ASP.NET Core Web Application. and then uncheck Configure for HTTPS.
- Lastly, Click on Create.
2. Now we need to install required packages for this project. I have listed it all below.
| Package | Description |
| Serilog.AspNetCore | Serilog support for ASP.NET Core logging |
| Serilog.Settings.Configuration | Microsoft.Extensions.Configuration (appsettings.json) support for Serilog. |
| Serilog.Enrichers.Environment | Enrich Serilog log events with properties from System.Environment. |
| Serilog.Enrichers.Process | The process enricher for Serilog. |
| Serilog.Enrichers.Thread | Enrich Serilog events with properties from the current thread. |
| Serilog.Sinks.Seq | Serilog sink that writes to the Seq log server over HTTP/HTTPS. |
Use NuGet Package Manager to install this package. If this is your first time using this, you can visit this article.
II. Configure Serilog on Program.cs
- Add the following code snippet on your program.cs under Main method.
        var configuration = new ConfigurationBuilder()
                 .AddJsonFile("appsettings.json")
                 .Build();

             Log.Logger = new LoggerConfiguration()
                 .ReadFrom.Configuration(configuration)
                 .CreateLogger();
             try
             {
                 Log.Information("Application starting up");
                 CreateHostBuilder(args).Build().Run();
             }
             catch (Exception ex)
             {
                 Log.Error(ex, "The application failed to start");
                 throw;
             }
             finally
             {
                 Log.CloseAndFlush(); //close logs that is not written yet
             }
2. Add Serilog provider inside CreateHostBuilder method using the code below.
Host.CreateDefaultBuilder(args)
                 .UseSerilog()
                 .ConfigureWebHostDefaults(webBuilder =>
                 {
                     webBuilder.UseStartup();
                 });
Below is the full program.cs code:
 using Microsoft.AspNetCore.Hosting;
 using Microsoft.Extensions.Configuration;
 using Microsoft.Extensions.Hosting;
 using Microsoft.Extensions.Logging;
 using Serilog;
 using System;
 using System.Collections.Generic;
 using System.Linq;
 using System.Threading.Tasks;

 namespace SerilogDemo
 {
     public class Program
     {
         public static void Main(string[] args)
         {
             var configuration = new ConfigurationBuilder()
                 .AddJsonFile("appsettings.json")
                 .Build();

             Log.Logger = new LoggerConfiguration()
                 .ReadFrom.Configuration(configuration)
                 .CreateLogger();
             try
             {
                 Log.Information("Application starting up");
                 CreateHostBuilder(args).Build().Run();
             }
             catch (Exception ex)
             {
                 Log.Error(ex, "The application failed to start");
                 throw;
             }
             finally
             {
                 Log.CloseAndFlush(); //close logs that is not written yet
             }

         }

         public static IHostBuilder CreateHostBuilder(string[] args) =>
             Host.CreateDefaultBuilder(args)
                 .UseSerilog()
                 .ConfigureWebHostDefaults(webBuilder =>
                 {
                     webBuilder.UseStartup<Startup>();
                 });
     }
 }
III. Add dummy logs
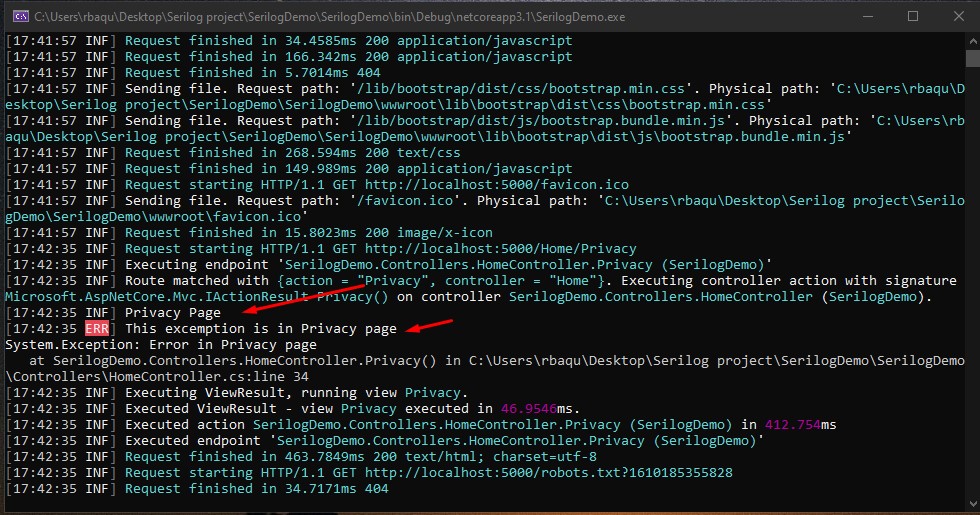
Open HomeController, let’s add some logs information to be displayed. I added the logs from the default method of my HomeController, which is the index and the privacy page. See the code snippet below.
Index Method » Home Page:
public IActionResult Index()
         {
             _logger.LogInformation("This is the Home Page");
             return View();
         }
Privacy Method » Privacy Page
 public IActionResult Privacy()
         {
             _logger.LogInformation("Privacy Page");


             try
             {
                 throw new Exception(); //dummy excemption error for our logs
             }
             catch (Exception ex)
             {
                 _logger.LogError(ex, "This excemption is in Privacy page");
             }
             return View();
         }
IV. Configure Serilog Console Logging
Since we added appsettings.json to our configuration on the program.cs class, we will use appsettings.json for our serilog configuration. Open your appsettings.json and add the following code snippet. This snippet also applies serilog enriched, which we added a while ago using the NuGet Package Manager.
 {
   "AllowedHosts": "*",
   "Serilog": {
     "Using": [],
     "MinimumLevel": {
       "Default": "Information",
       "Microsoft": "Warning",
       "System": "Warning"
     },
     "Enrich": [ "FromLogContext", "WithMachineName", "WithProcessId", "WithThreadId" ],
     "WriteTo": [
       { "Name": "Console" }
     ]
   }
} 
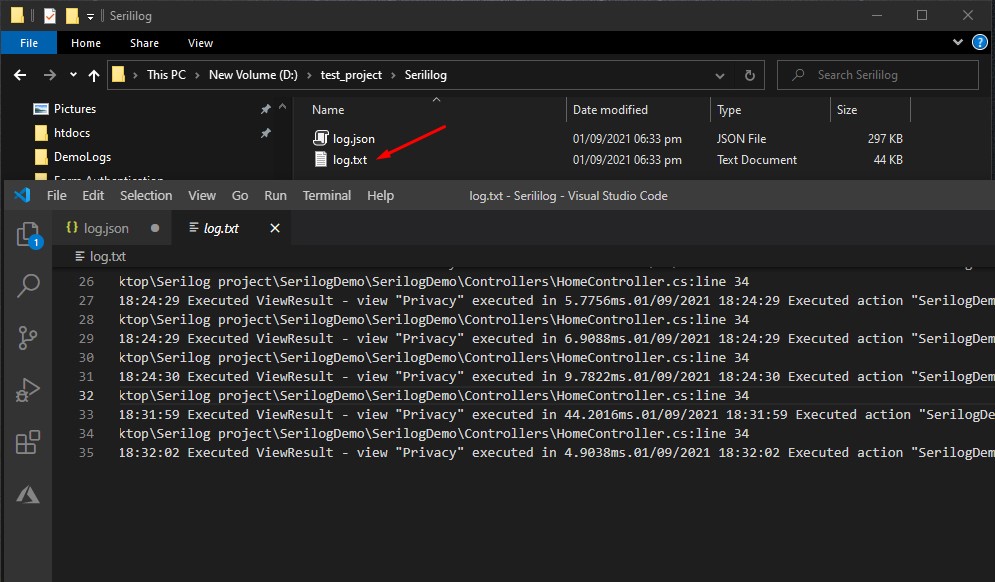
V. Configure Serilog File Logging
To enable file logging use the code below. This will create a txt file with log.txt filename.
{
         "Name": "File",
         "Args": {
           "path": "D:\test_project\Serililog\log.txt",
           "outputTemplate": "{Timestamp:G} {Message}{NewLie:1}{Exception:1}"
         }
  }
Your appsettings.json will now look like this.
 {
   "AllowedHosts": "*",
   "Serilog": {
     "Using": [],
     "MinimumLevel": {
       "Default": "Information",
       "Microsoft": "Warning",
       "System": "Warning"
     },
     "Enrich": [ "FromLogContext", "WithMachineName", "WithProcessId", "WithThreadId" ],
     "WriteTo": [
       {
         "Name": "File",
         "Args": {
           "path": "D:\\test_project\\Serililog\\log.txt",
           "outputTemplate": "{Timestamp:G} {Message}{NewLie:1}{Exception:1}"
         }
       }
     ]
   }
 }
Here is how my file look like.
VI. Configure Serilog Json File Logging
To enable file logging use the code below.
{
         "Name": "File",
         "Args": {
           "path": "D:\test_project\Serililog\log.json",
           "formatter": "Serilog.Formatting.Json.JsonFormatter,Serilog"
         }
       }
Your appsettings.json will now look like this.
 {
   "AllowedHosts": "*",
   "Serilog": {
     "Using": [],
     "MinimumLevel": {
       "Default": "Information",
       "Microsoft": "Warning",
       "System": "Warning"
     },
     "Enrich": [ "FromLogContext", "WithMachineName", "WithProcessId", "WithThreadId" ],
     "WriteTo": [
       {
         "Name": "File",
         "Args": {
           "path": "D:\\test_project\\Serililog\\log.json",
           "formatter": "Serilog.Formatting.Json.JsonFormatter,Serilog"
         }
       }
     ]
   }
 }
This is my JSON file look like. See the image below.

VII. Configure Serilog Seq Sink
If you review the NuGet Packages that we added a while ago you will see that we added Serilog.Sinks.Seq. This sink will allow us to writes to the Seq log server over HTTP/HTTPS. Seq offers an admin dashboard where you can view your logs.
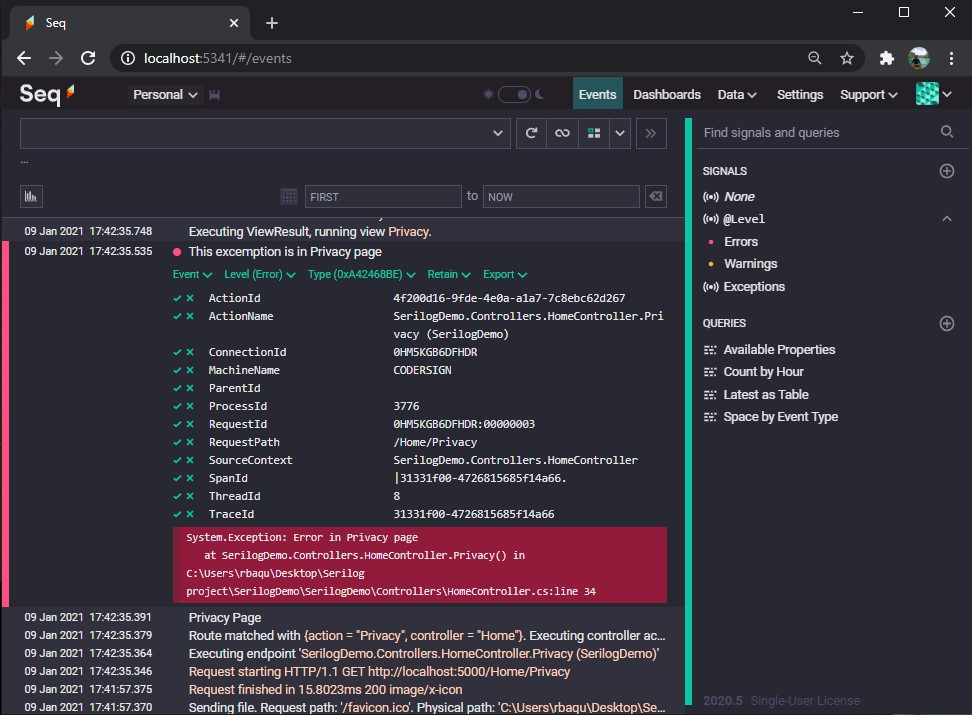
- Below is the seq event logs where you can browse the details of the error or information that you logs.
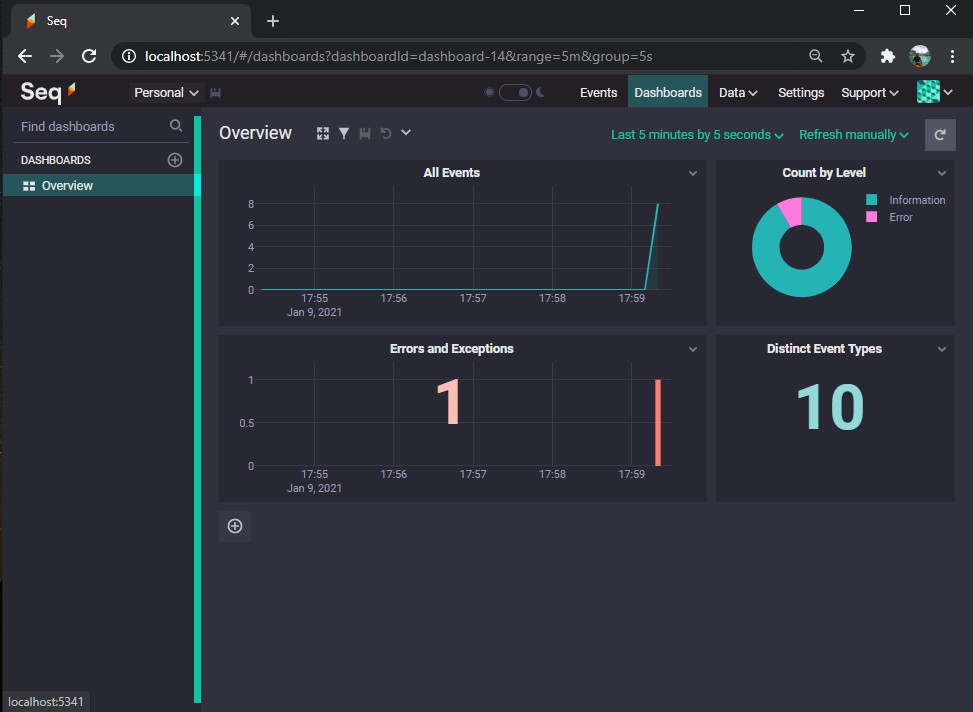
2. Seq also provided a dashboard the errors and exception that is encountered by your application. See the image below.
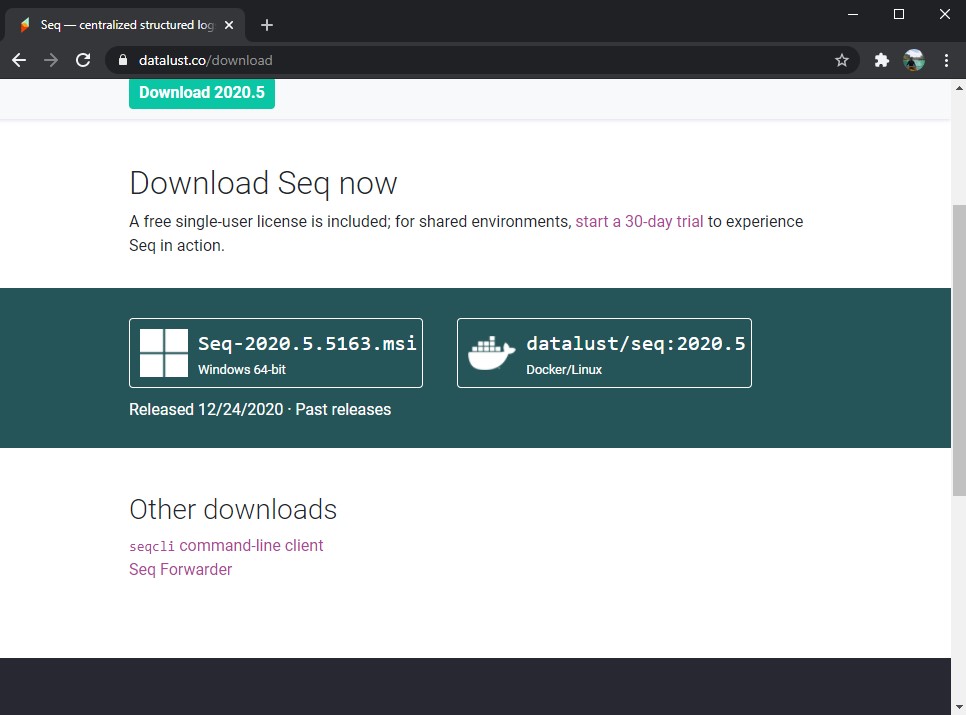
3. To install Seq you may go to Seq download page which is here. You have two available option if you are in windows you can directly download the msi installer. You can also use docker to install seq.
4. Here’s is how you can configure seq sink. Please see the code snippet below.
{
   "AllowedHosts": "*",
   "Serilog": {
     "Using": [],
     "MinimumLevel": {
       "Default": "Information",
       "Microsoft": "Warning",
       "System": "Warning"
     },
     "Enrich": [ "FromLogContext", "WithMachineName", "WithProcessId", "WithThreadId" ],
     "WriteTo": [
       {
         "Name": "Seq",
         "Args": {
           "serverUrl": "http://localhost:5341/"
         }
       }
     ]
   }
 }
Here’s a seq documentation on how you can install it on windows. Install Seq on WIndows.
You can download the source code in my GitHub account @coderbugzz.
Summary
In this blog article, we look at Serilog’s integration with ASP.NET Core, highlighting effective logging techniques for web applications. For understanding and debugging software systems, logging is crucial, and Serilog has strong capabilities in this area.
We cover the significance of logging in ASP.NET Core and emphasize Serilog’s benefits, including customizable configuration, structured logging, and easy integration. The article explains in detail how to integrate Serilog into ASP.NET Core projects, enabling developers to improve their logging capabilities and receive helpful debugging insights.
We also added a Seq sink which offers more than just logging to a file. If this tutorial helps you please share this post to your friends. Thank you!
KEEP CODING!