In this tutorial, we will create a project that Submit a Form with Model Validation using JQuery. Applications always need data input from the end-user, and additional validation would help us validate the information that needs to fill out by the user. This way, we can reduce the risk of invalid input. Using ASP.NET, we can easily apply this validation using Model Data Annotation. In Web Application, we have two types of validation.
- Client-side form validation
- Server-side form validation
Client-Side Validation
Client-Side form validation is a validation handle at a browser level. This validation includes checking empty inputs, required fields, etc.
Server-Side Validation
Server-Side validation is done on the server-side of your application. This validation happens when you submit the user data from the browser form to a controller or any medium that will perform a more thorough validation on your server-side.
Now, Before we proceed please make sure to install the Visual Studio from this link.
I. Setup ASP.NET Web Application Project
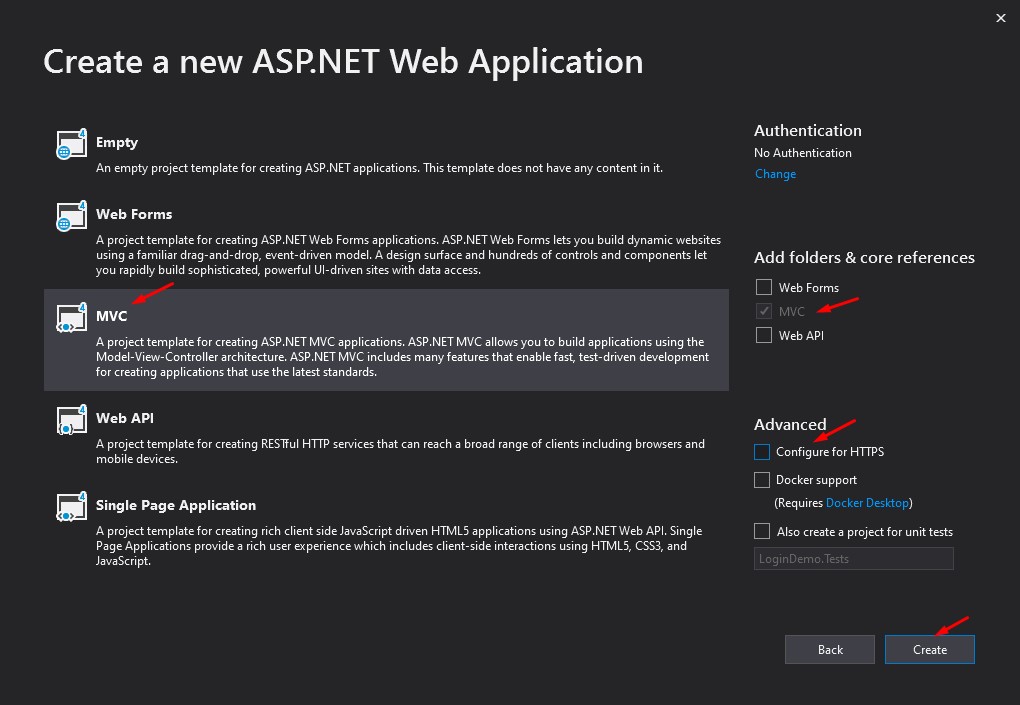
Let’s start by creating a new ASP.NET Web Application. Open your Visual Studio IDE and proceed with the steps below.
- Select File > New > Project.
- Select ASP.NET Web Application(.NET Framework). Name the project AjaxValidationDemo to have the same namespace as my project. Click OK.
- Select MVC template and then check Configure for HTTPS.
- Lastly, Click on Create.
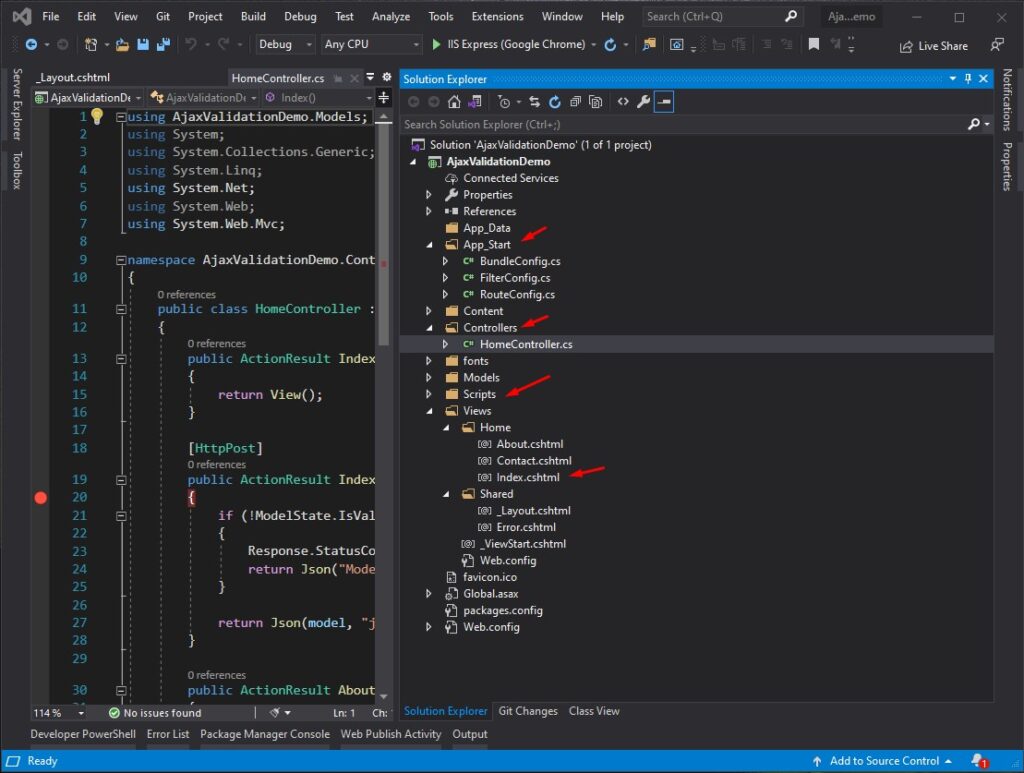
Since we use the MVC template our project solution would look like this. See the image below.
II. BundleConfig.cs
BundleConfig class is where we declare all our scripts. Since we are using the default template, we don’t need to change anything. Below is the code from my BundleConfig.cs.
 using System.Web;
 using System.Web.Optimization;

 namespace AjaxValidationDemo
 {
     public class BundleConfig
     {
         // For more information on bundling, visit https://go.microsoft.com/fwlink/?LinkId=301862
         public static void RegisterBundles(BundleCollection bundles)
         {
             bundles.Add(new ScriptBundle("~/bundles/jquery").Include(
                         "~/Scripts/jquery-{version}.js"));

             bundles.Add(new ScriptBundle("~/bundles/jqueryval").Include(
                         "~/Scripts/jquery.validate*"));

             // Use the development version of Modernizr to develop with and learn from. Then, when you're
             // ready for production, use the build tool at https://modernizr.com to pick only the tests you need.
             bundles.Add(new ScriptBundle("~/bundles/modernizr").Include(
                         "~/Scripts/modernizr-*"));

             bundles.Add(new ScriptBundle("~/bundles/bootstrap").Include(
                       "~/Scripts/bootstrap.js"));

             bundles.Add(new StyleBundle("~/Content/css").Include(
                       "~/Content/bootstrap.css",
                       "~/Content/site.css"));
             BundleTable.EnableOptimizations = true;
         }
     }
 }
To use this bundle you can render this using the snippet below.
@Scripts.Render("~/bundles/jquery")
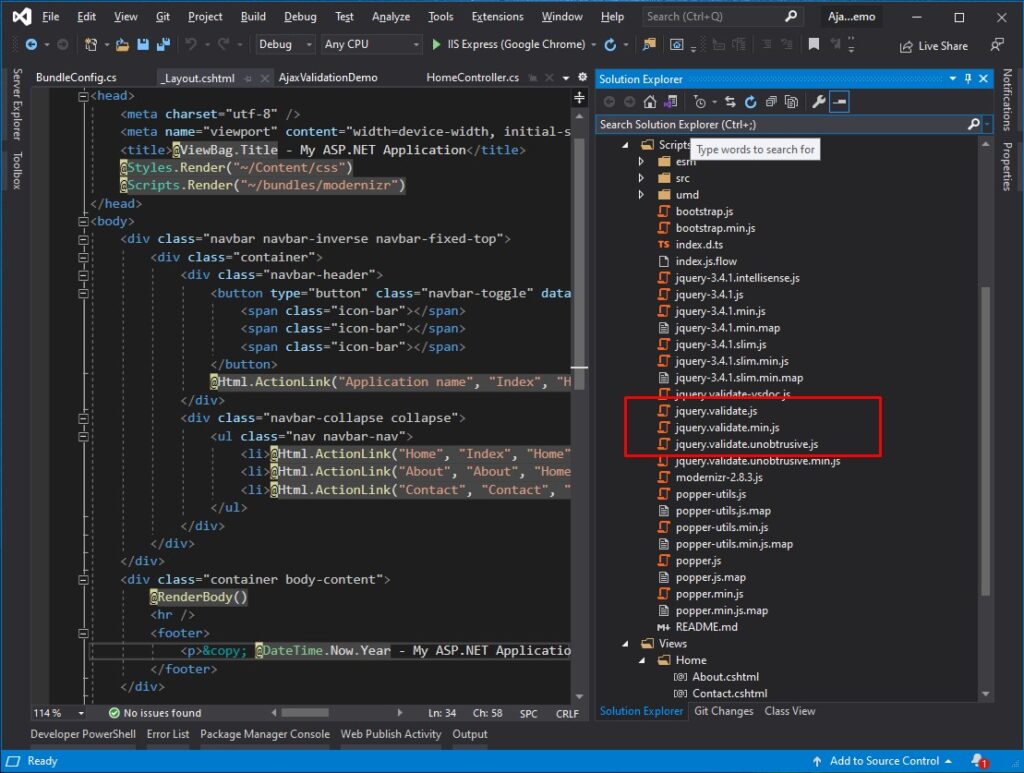
@Scripts.Render("~/bundles/bootstrap")Make sure that you have installed the following:
- jquery.validate.js
- jquery.validate.unobtrusive.js
III. UserViewModel.cs
To use DataAnnotations, we will create a class file that will contain our User model properties. This property will be binded with our index view form.
 using System;
 using System.Collections.Generic;
 using System.ComponentModel.DataAnnotations;
 using System.Linq;
 using System.Web;

 namespace AjaxValidationDemo.Models
 {
     public class UserViewModel
     {
         [Required]
         [Display(Name = "First Name")]
         public string FirstName { get; set; }
         [Required]
         [Display(Name = "Last Name")]
         public string LastName { get; set; }

         [Required]
         [EmailAddress]
         [Display(Name = "Email")]
         public string Email { get; set; }
     }
 }
IV. HomeController.cs
Now, let’s add an index Post action from HomeController. Open HomeController and use the method below.
 [HttpPost]
 public ActionResult Index(UserViewModel model)
   {
       if (!ModelState.IsValid)
           {
             Response.StatusCode = (int)HttpStatusCode.BadRequest;
                 return Json("Model is not valid");
           }

        return Json(model);
 }
V. Index.cshtml
Navigate to your HomeController Index View and create a user registration form. You may also use the code below.
 @model  AjaxValidationDemo.Models.UserViewModel

 @{
     ViewBag.Title = "Registration Form";
 }
 <div class="row">
     <br />
     @using (Html.BeginForm("Index", "Home", FormMethod.Post, new { id = "UserForm", name = "UserForm", @class = "form-horizontal", role = "form" }))
     {
 <fieldset>
     @Html.ValidationSummary(true, "", new { @class = "text-danger" })   <!--Enable Data Anotation-->
     <div class="form-group">
         @Html.LabelFor(m => m.FirstName, new { @class = "col-lg-2 control-label" })
         <div class="col-lg-10">
             @Html.TextBoxFor(m => m.FirstName, new { @class = "form-control" })
             @Html.ValidationMessageFor(m => m.FirstName, "", new { @class = "text-danger" }) <!--Display of Error Notification-->
         </div>
     </div>
     <div class="form-group">
         @Html.LabelFor(m => m.LastName, new { @class = "col-lg-2 control-label" })
         <div class="col-lg-10">
             @Html.TextBoxFor(m => m.LastName, new { @class = "form-control" })
             @Html.ValidationMessageFor(m => m.LastName, "", new { @class = "text-danger" })<!--Display of Error Notification-->
         </div>
     </div>
     <div class="form-group">
         @Html.LabelFor(m => m.Email, new { @class = "col-lg-2 control-label" })
         <div class="col-lg-10">
             @Html.TextBoxFor(m => m.Email, new { @class = "form-control" })
             @Html.ValidationMessageFor(m => m.Email, "", new { @class = "text-danger" })<!--Display of Error Notification-->
         </div>
     </div>
     <div class="form-group">
         <div class="col-lg-10 col-lg-offset-2">
             <button type="submit" id="btnSubmit" class="btn btn-primary">Submit</button>
         </div>
     </div>
 </fieldset>
     }
 </div>
VI. JQuery/Ajax Script
You can validate your registration form using the Ajax below.
- $(“#UserForm”).valid()
- $(‘#UserForm’).submit();
@section Scripts {
@Scripts.Render("~/bundles/jqueryval")
<script type="text/javascript">
$(document).ready(function () {
$('#btnSubmit').click(function () {
if ($("#UserForm").valid()) { //check if form is valid using model annotation
$('#UserForm').submit();
}
else {
return false;
}
});
$("#UserForm").on("submit", function (event) {
event.preventDefault();
$('#btnSubmit').attr('disabled', 'disabled');
var url = $(this).attr("action");
var formData = $(this).serialize();
$.ajax({
url: url,
type: "POST",
data: formData,
dataType: "json",
success: function (response) {
alert('Success! ' + JSON.stringify(response));
},
error: function (response) {
alert('Error!');
},
complete: function () {
$('#btnSubmit').removeAttr('disabled');
}
})
});
});
</script>
@Scripts.Render("~/bundles/jqueryval")
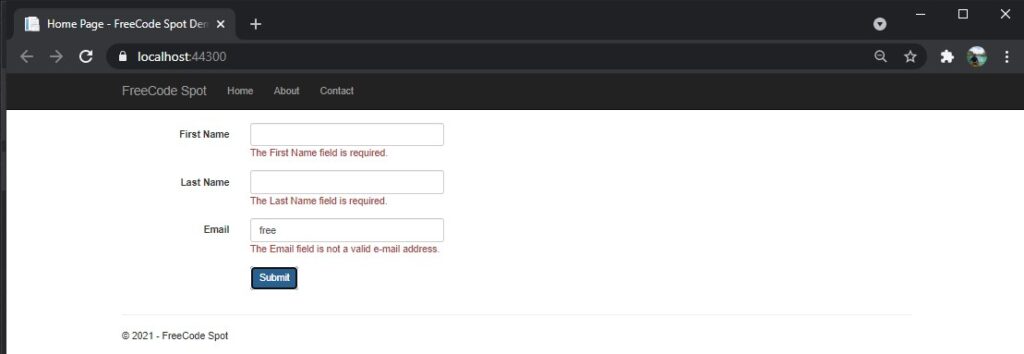
} Now, test your project and run to see if it works. You may also download the source code in my GitHub Account @coderbugzz.
Summary
In this tutorial, we have learned on Using jQuery AJAX with model validation to submit a form in ASP.NET MVC. This is just a simple example, but hopefully, this can help you understand how Client-Side validation is done using Ajax.
KEEP CODING!
Visit Blog Page for more Tutorial.
– freeCode Spot