In this tutorial, we will create a login, signup and logout using form authentication in ASP NET MVC. This functionality is very common to every application that we created and maybe just a piece of cake. If you are new to software development, this tutorial will guide you and hopefully help you.
- What is Form Authentication in ASP.NET?
- I. Setup ASP.NET Web Application Project
- II. Create SQL Database and Table
- III. Create a Model Class
- IV. Configure Connection String
- V. Enable Form Authentication
- VI. Create Repository Class
- VII. Create AccountController and HomeController
- VIII. Create login, Register and Logout ActionResult Method
- IX. Create Login and Register View
- X. Modify the Menu(_layout.cshtml)
- Summary
What is Form Authentication in ASP.NET?
Form authentication in ASP.NET is a ticket-based system. Using a Form authentication, whenever a user logs in, they receive a basic user information ticket. Forms authentication maintains an authentication ticket in a cookie or the URL so that an authenticated user does not need to supply credentials with each request.
Before we proceed with the steps below, please make sure to have the latest version of the following installer:
- Visual Studio
- SQL Server
If you already have installed all the application that we need on this tutorial, proceed on the steps below.
I. Setup ASP.NET Web Application Project
- Select File > New > Project.
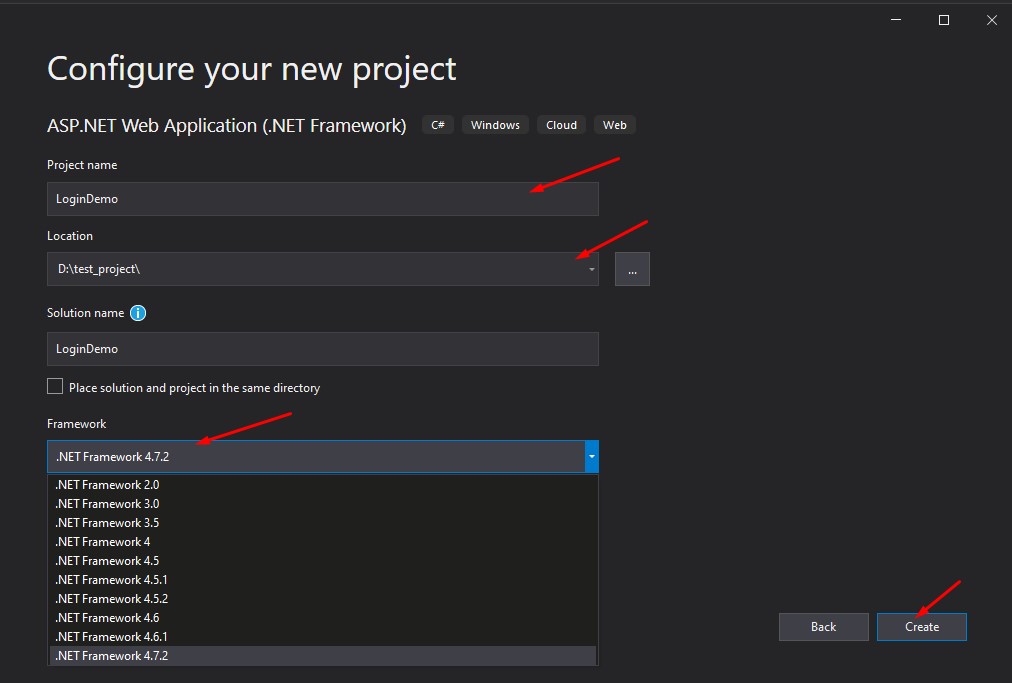
- Select ASP.NET Web Application(.NET Framework). Name the project LoginDemo to have the same namespace as my project. Click OK.
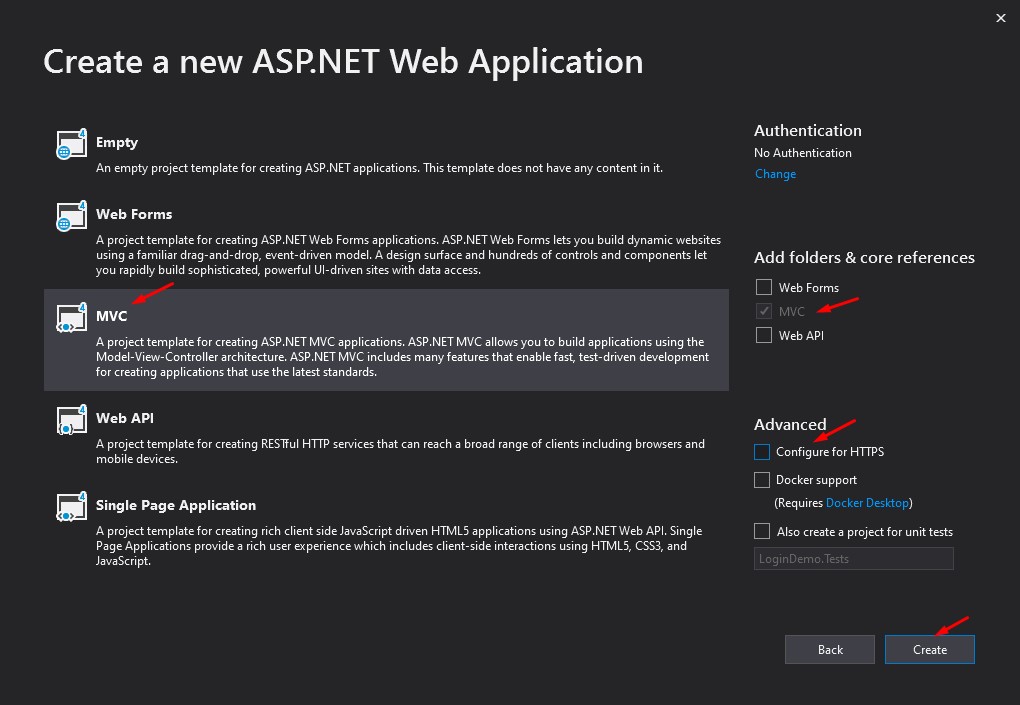
- Select MVC template and then uncheck Configure for HTTPS.
- Lastly, Click on Create.

II. Create SQL Database and Table
We have already set up a new ASP.NET Web Application project. Before we proceed with the coding part, let’s prepare and create a database. Just copy and execute the SQL command below.
1.To create a database, open your SQL Server Application and create a database using the command below
CREATE DATABASE LoginDemo;2. Now inside LoginDemo database, create a table using the command below.
USE [LoginDemo]
GO
SET ANSI_NULLS ON
GO
SET QUOTED_IDENTIFIER ON
GO
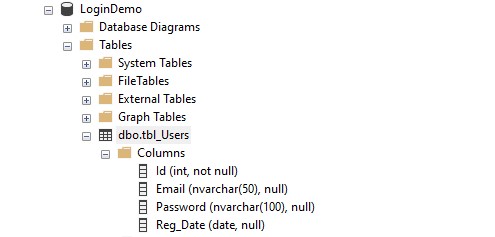
CREATE TABLE [dbo].[tbl_Users](
[Id] [int] IDENTITY(1,1) NOT NULL,
[Email] nvarchar NULL,
[Password] nvarchar NULL,
[Reg_Date] [date] NULL
) ON [PRIMARY]
GOBelow is the screenshot of my database structure.
III. Create a Model Class
Now, let’s create a model class name LoginViewModel. This class will be used later to map our table columns. Create a LoginViewModel.cs inside Models folder. See the code snippet below.
public class LoginViewModel
     {
         [Required]
         [Display(Name = "Email")]
         [EmailAddress]
         public string Email { get; set; }
     [Required]
     [DataType(DataType.Password)]
     [Display(Name = "Password")]
     public string Password { get; set; }
 }
I also created a ResponseModel. This step is optional, but this model will store the Repository class’s response that we will make later if you follow this tutorial. This Repository class contains the main functions of the login validation and register SQL command.
public class ResponseModel<T>
     {
         public T Data { get; set; }
         public int resultCode { get; set; }
         public string message { get; set; }
     }
IV. Configure Connection String
To establish a connection to the SQL Server Database, we need to generate the connection string to the SQL Server Database. Visit this article to get the default connection string format. If you already have the connection string, add the following line to your web.Config file and replace the value with your connection string.
 <connectionStrings>
     <add name="myConnectionString" connectionString="Data Source=DESKTOP-4DU98BI\SQLEXPRESS01;Initial Catalog=LoginDemo;User ID=freecode;Password=freecodespot;"/>
   </connectionStrings>
In your C# class you can call this value using this Configuration Manager.
- using System.Configuration;
string connectionstring = ConfigurationManager.ConnectionStrings["myConnectionString"].ConnectionString;V. Enable Form Authentication
Forms authentication is enabled by setting the mode attribute of the authentication configuration element to Forms. To do that, open web.config and search for <system.web> tags. Copy the code below.
   <authentication mode="Forms">
        <forms loginUrl="~/Account/Index" timeout="2880" />
  </authentication>
By enabling Form Authentication, we can require that all requests to our application contain a valid user authentication ticket using an authorization configuration element to deny the request for an unauthorized user.
VI. Create Repository Class
This class will handle the connection between our application and the database. Create a Service folder in your project root directory and create a class name Repository.cs. Proceed with the steps below.
- Retrieve the connection string from the web.config using the code snippet below.
string connectionstring = ConfigurationManager.ConnectionStrings["myConnectionString"].ConnectionString;2. Now, since we used md5 hashing in this tutorial, I will create a class that will hash the password value. See the code below.
 public string md5_string(string password)
         {
             string md5_password = string.Empty;
             using (MD5 hash = MD5.Create())
             {
                 md5_password = string.Join("", hash.ComputeHash(Encoding.UTF8.GetBytes(password)).Select(x => x.ToString("x2")));
             }

             return md5_password;
         }
3. Once you’ve done that, create a login method. This method will validate if the user that logs in exists in our database. We also use md5 hashing for our password. This way, we can secure the user’s password. See the code snippet below.
 public async Task<ResponseModel<string>> login(LoginViewModel user)
         {
             ResponseModel<string> response = new ResponseModel<string>();

             if (user != null)
             {
                 string md5_password = md5_string(user.Password);

                 using (SqlConnection conn = new SqlConnection(connectionstring))
                 {
                     SqlCommand cmd = new SqlCommand();
                     cmd.CommandText = string.Format("Select * FROM tbl_Users WHERE password = '{0}' and Email='{1}'", md5_password,user.Email);
                     cmd.Connection = conn;

                     SqlDataAdapter da = new SqlDataAdapter(cmd);
                     DataTable dt = new DataTable();
                     await Task.Run(()=> da.Fill(dt));

                     if (dt.Rows.Count > 0)
                     {
                         response.Data = JsonConvert.SerializeObject(dt);
                         response.resultCode = 200;
                     }
                     else
                     {
                         response.message = "User Not Found!";
                         response.resultCode = 500;
                     }


                 }
             }
             return response;
         }
4. We also need to create a Register method. See the code below.
    public async Task<ResponseModel<string>> Register(LoginViewModel user)
         {
             ResponseModel<string> response = new ResponseModel<string>();

             if (user != null)
             {
                 string md5_password = md5_string(user.Password);


                 using (SqlConnection conn = new SqlConnection(connectionstring))
                 {
                     SqlCommand cmd = new SqlCommand();
                     cmd.CommandText = string.Format("Insert INTO tbl_Users(Email,Password,Reg_Date) VALUES('{0}','{1}','{2}')", user.Email, md5_password, DateTime.Now.ToString());
                     cmd.Connection = conn;

                     conn.Open();
                     var result = await cmd.ExecuteNonQueryAsync();
                     conn.Close();
                     if (result == 1) //row changes in the database - successfull
                     {
                         response.message = "User has been registered!";
                         response.resultCode = 200;
                     }
                     else
                     {
                         response.message = "Unable to register User!";
                         response.resultCode = 500;
                     }

                 }
             }
             return response;
         }
VII. Create AccountController and HomeController
If you are using the default MVC template to create a new Web Application, you will definitely have the HomeController. To create a controller, follow the steps below.
- Right-click on the Controllers folder. Choose add then select controller.

2. Choose an Empty controller from the Add Scaffolded window.
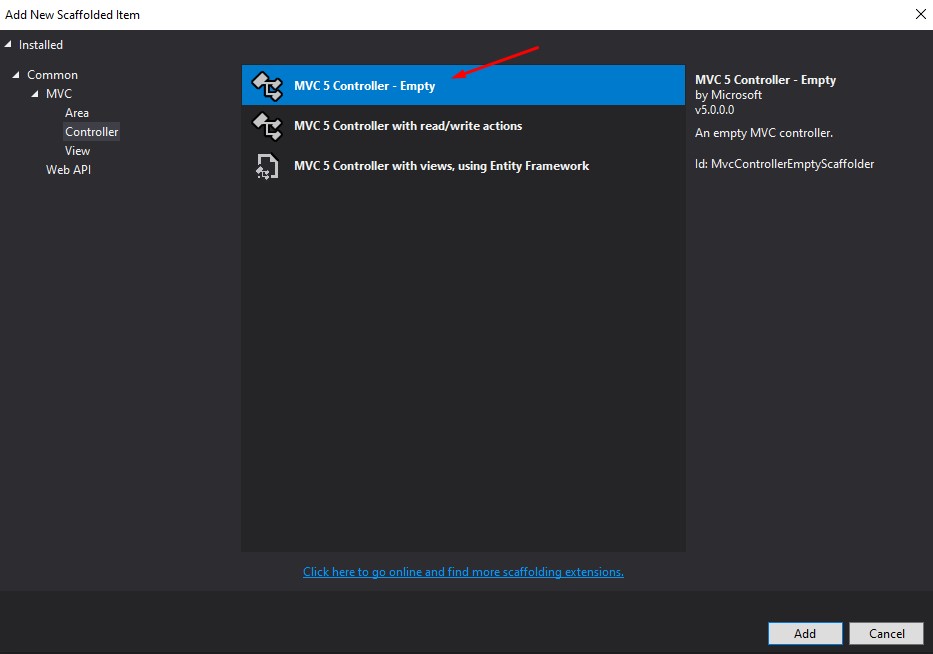
3. Name yours as AccountController. If you don’t a default HomeController, follow the steps above to create one.
VIII. Create login, Register and Logout ActionResult Method
Open AccountController then follow the steps below to create the login, register and logout method.
- To access the Repository class under the Service folder, we need to declare it inside AccountController. See the code snippet below.
Repository repository = new Repository();2. Let’s create the login method. We used the index method of account controller as the login action result. We need to create two action result for the index. One is for the GET login method, which displays the form view in the UI and a POST index method that processes the validation of an individual user’s login credential. See the code snippet below.
- FormsAuthentication.SetAuthCookie(User_Name, false); » this method allows us to set form authentication tickets for successfully validated user manually. This cookie tells the application that the user that has been store for these cookies is authorized to access the application.
- HttpContext.User.Identity.IsAuthenticated » will return a boolean response that will correspond to the status of the user logging in.
 public ActionResult Index()
         {
             if (HttpContext.User.Identity.IsAuthenticated) //check if authenticated user is available
             {
                 return RedirectToAction("Index", "Home"); //if yes redirect to HomeController - means user is still log in
             }

             return View();
         }

         [HttpPost]
         public async Task<ActionResult> Index(LoginViewModel model) //Login
         {
             if (!ModelState.IsValid)
             {
                 return View(model);
             }


             var result = await repository.login(model);
             if (result.resultCode == 200)
             {
                 FormsAuthentication.SetAuthCookie(model.Email, false);
                 return RedirectToAction("Index","Home",result.Data); //redirect to login form
             }
             else
             {
                 ModelState.AddModelError("", result.message);
             }

             return View();
         }
3. Let’s create a register action result method. Like the login method, we also need two action results for the register method. See the code snippet below.
 public  ActionResult Register() //Register
         {
             return View();
         }


         [HttpPost]
         public async Task<ActionResult> Register(LoginViewModel model) //Register
         {
             if (!ModelState.IsValid)
             {
                 return View(model);
             }


             var result = await repository.Register(model);

             if (result.resultCode == 200)
             {
                 return RedirectToAction("Index"); //redirect to login form
             }
             else
             {
                 ModelState.AddModelError("", result.message);
             }

             return View();
         }
4. The Last method that we need is the Logout method. To log out from a form authentication in ASP NET MVC, we need to call the form authentication sign out using the code below.
public ActionResult Logout() //Register
         {
             FormsAuthentication.SignOut();
         return RedirectToAction("Index"); //redirect to index
     }
IX. Create Login and Register View
To create a view Just follow the steps below.
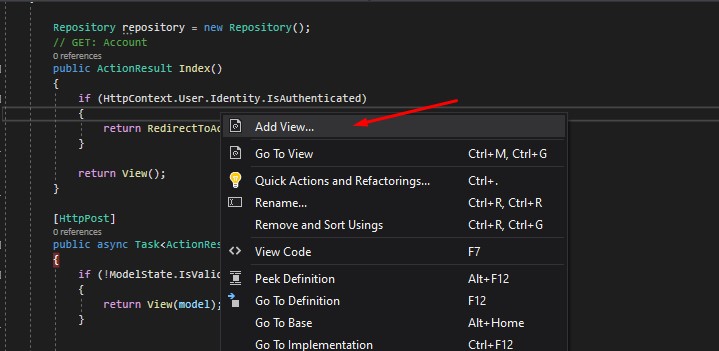
- Open AccountController. Right-click on the index method then choose Add View
2. Choose MVC 5 View. Click the Add button to proceed.
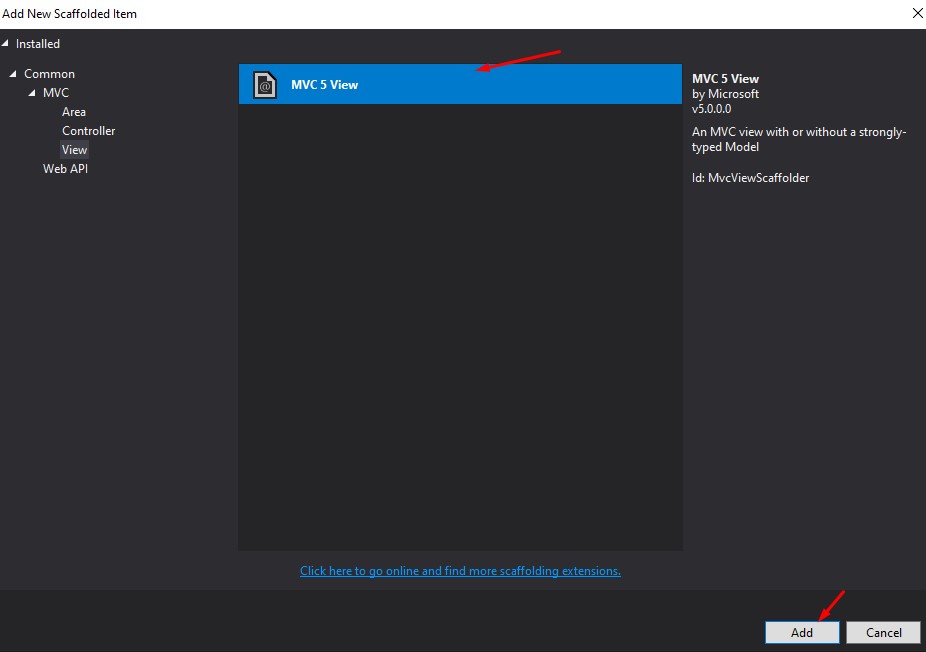
3. Then choose again on the next window. Once your view is created, please open the file and replace it with the code snippet below.
 @model LoginDemo.Models.LoginViewModel

 @{
     ViewBag.Title = "Index";
 }


 <div class="row">
     <br />
     @using (Html.BeginForm("Index", "Account", FormMethod.Post, new { @class = "form-horizontal", role = "form" }))
     {
         <fieldset>
             @Html.ValidationSummary(true, "", new { @class = "text-danger" })   <!--Enable Data Anotation-->
             <div class="form-group">
                 @Html.LabelFor(m => m.Email, new { @class = "col-lg-2 control-label" })
                 <div class="col-lg-10">
                     @Html.TextBoxFor(m => m.Email, new { @class = "form-control" })
                     @Html.ValidationMessageFor(m => m.Email, "", new { @class = "text-danger" }) <!Display of Error Notification-->
                 </div>
             </div>
             <div class="form-group">
                 @Html.LabelFor(m => m.Password, new { @class = "col-lg-2 control-label" })
                 <div class="col-lg-10">
                     @Html.PasswordFor(m => m.Password, new { @class = "form-control" })
                     @Html.ValidationMessageFor(m => m.Password, "", new { @class = "text-danger" })<!Display of Error Notification-->
                 </div>
             </div>
             <div class="form-group">
                 <div class="col-lg-10 col-lg-offset-2">
                     <button type="submit" class="btn btn-primary">Login</button>
                 </div>
             </div>
         </fieldset>
     }
 </div>
4. To create the view for the Register action result, repeat the steps above but use the code snippet below to create your form.
 @model LoginDemo.Models.LoginViewModel

 @{
     ViewBag.Title = "Register";
 }


 <div class="row">
     <br />
     @using (Html.BeginForm("Register", "Account", FormMethod.Post, new { @class = "form-horizontal", role = "form" }))
     {
         <fieldset>
             @Html.ValidationSummary(true, "", new { @class = "text-danger" })   <!--Enable Data Anotation-->
             <div class="form-group">
                 @Html.LabelFor(m => m.Email, new { @class = "col-lg-2 control-label" })
                 <div class="col-lg-10">
                     @Html.TextBoxFor(m => m.Email, new { @class = "form-control" })
                     @Html.ValidationMessageFor(m => m.Email, "", new { @class = "text-danger" }) <!Display of Error Notification-->
                 </div>
             </div>
             <div class="form-group">
                 @Html.LabelFor(m => m.Password, new { @class = "col-lg-2 control-label" })
                 <div class="col-lg-10">
                     @Html.PasswordFor(m => m.Password, new { @class = "form-control" })
                     @Html.ValidationMessageFor(m => m.Password, "", new { @class = "text-danger" })<!Display of Error Notification-->
                 </div>
             </div>
             <div class="form-group">
                 <div class="col-lg-10 col-lg-offset-2">
                     <button type="submit" class="btn btn-primary">Register</button>
                 </div>
             </div>
         </fieldset>
     }
 </div>
X. Modify the Menu(_layout.cshtml)
Layout.cshtml is the default master layout of ASP.NET Web Application. So if you want to modify the Menu, this is the place you should check.
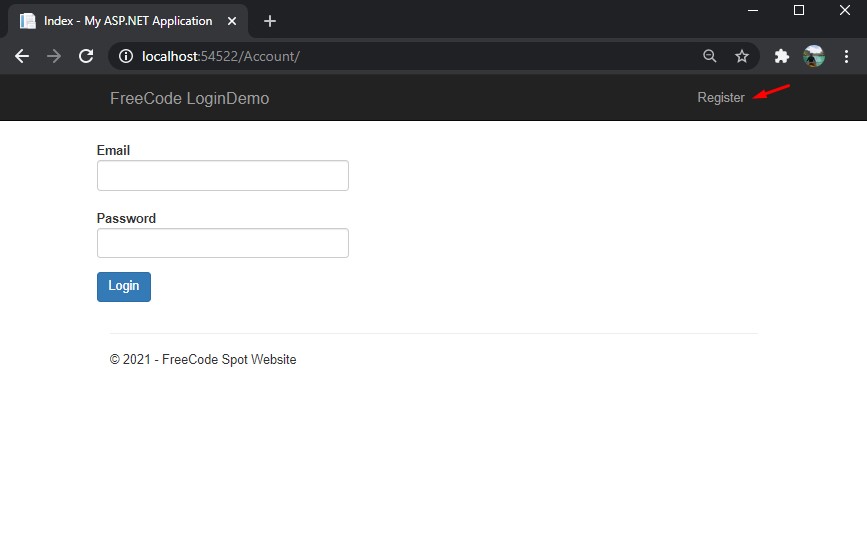
We want to display the login form and a Register option from the menu bar if a user is on the login page. See the image below.
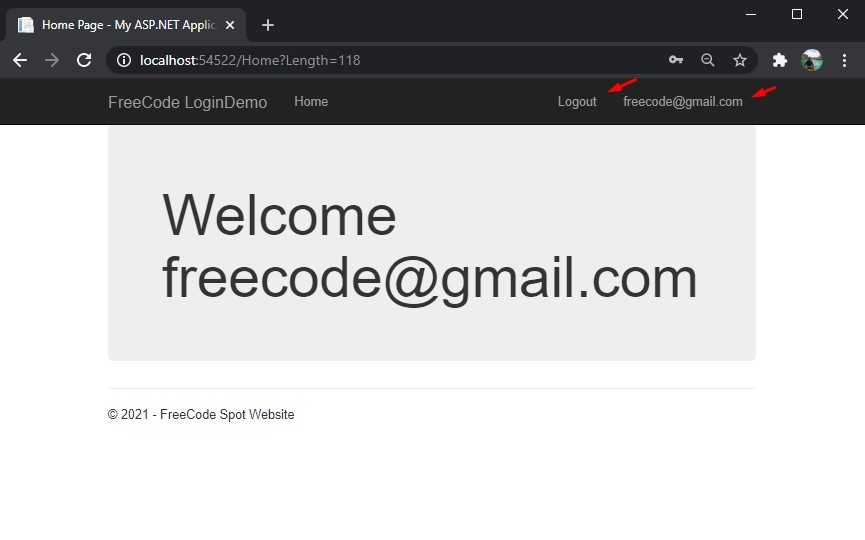
But if the user is authenticated, we will redirect it to the Home page, replace the register menu with the logout option, and then display the username, which is the email account. See the image below.
Below is the code snippet I used in my Layout for this function. You can copy the code below if you wish to have the same process.
 <div class="navbar-collapse collapse">

                 @if (User.Identity.IsAuthenticated)
                 {
                 <ul class="nav navbar-nav">
                     <li>@Html.ActionLink("Home", "Index", "Home")</li>
                 </ul>
                 <ul class="nav navbar-nav pull-right">
                     <li>@Html.ActionLink("Logout", "Logout", "Account")</li>
                     <li>@Html.ActionLink(User.Identity.Name, "", "")</li>
                 </ul>
                 }
                 else
                 {
                     <ul class="nav navbar-nav pull-right">
                         <li>@Html.ActionLink("Register", "Register", "Account")</li>
                     </ul>
                 }

 </div>
If your application does not work and you think I missed something, you can get my source on my GitHub account coderbugzz.
Summary
This tutorial teaches us how to create an ASP.NET Web Application and Implement Form Authentication in ASP NET MVC. We have also learned how you can use ADO.NET to read and insert data into the database. Hopefully, this tutorial guides you and helps you with your future projects.
KEEP CODING!