
In this article, I will show you how we can build restful APIs with ASP.NET Web API. In my previous blog, ASP.NET Web Application using MVC, I have created a simple project that explains how to create a Restful Web Services(WEB API) using the ASP.NET MVC template of Visual Studio. This time, I will do another project to show you how to create ASP.NET API using the API Controller class. In this project, we are going to use an empty template for ASP.NET MVC in Visual Studio.
Let’s Start:
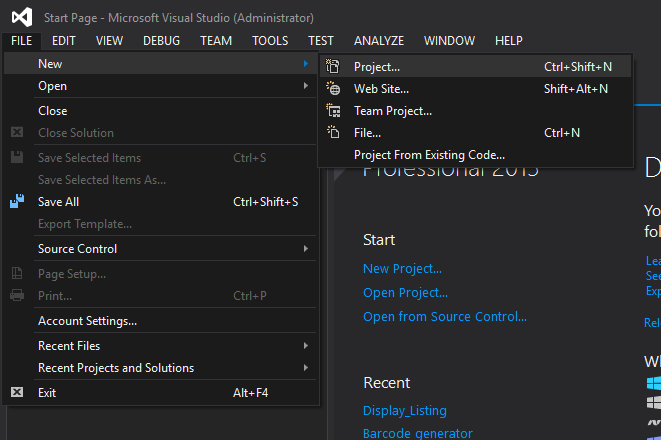
Step 1. Open your visual studio and create new Project.
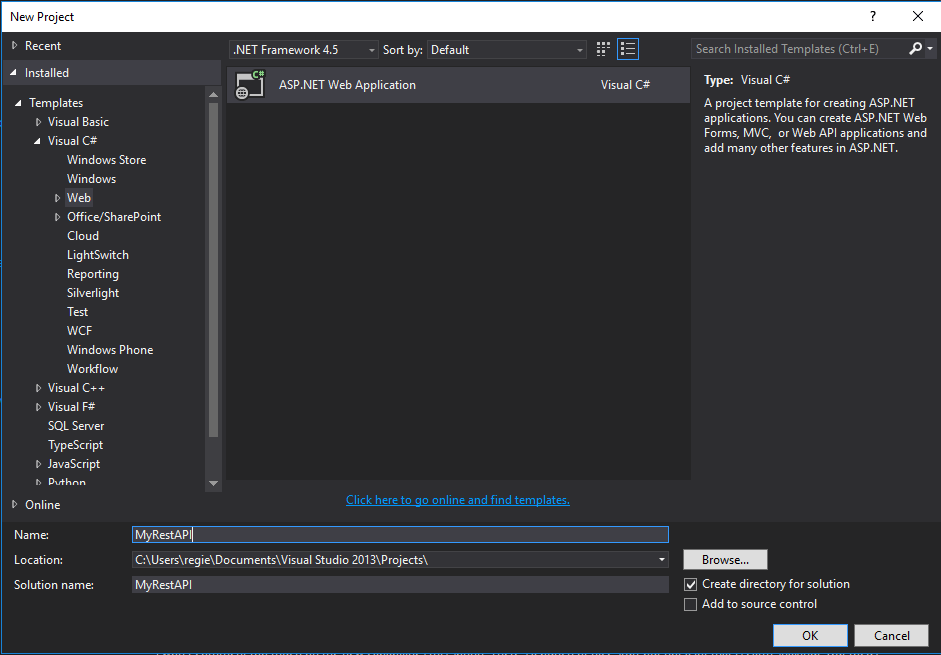
Step 2. Name your Project to your preference. In my case I name it as myRestAPI. Then press “OK”.
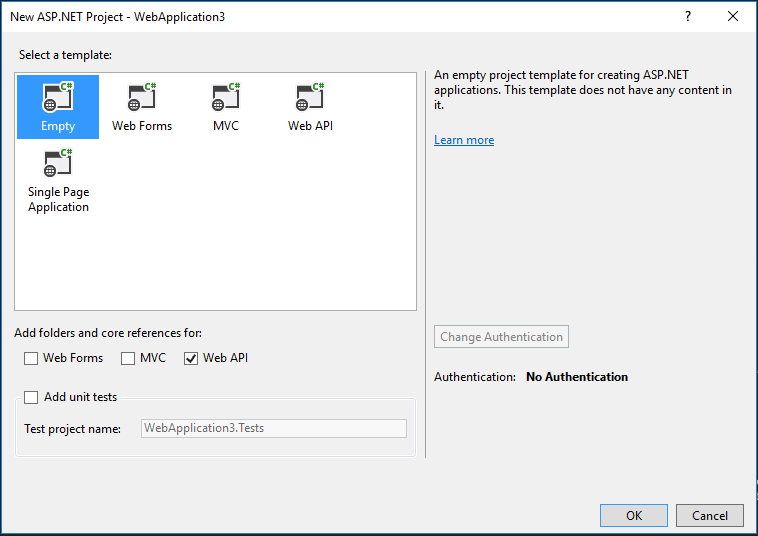
Step 3. Select Empty from your template window shown below and check Web API from the checkbox below the template option.
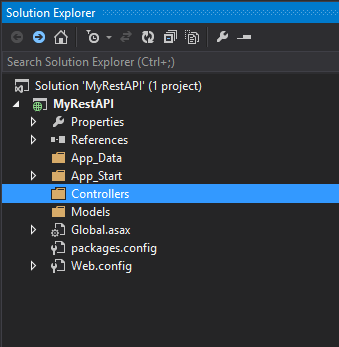
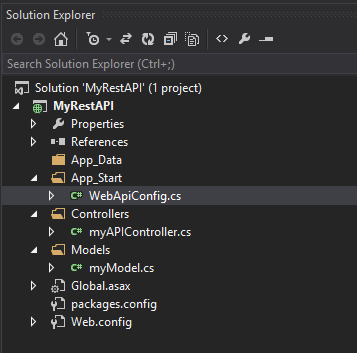
This is how your solution explorer looks for an Empty template project
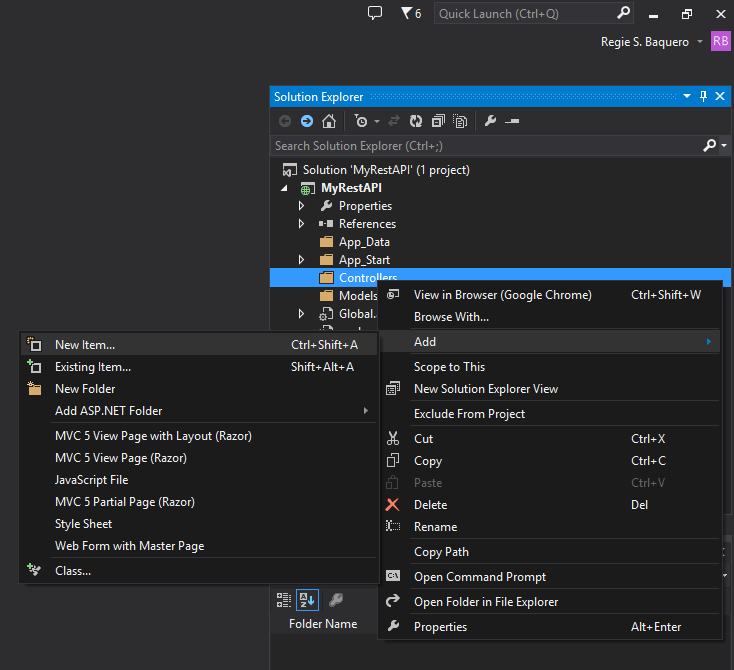
Step 4. Now add Web API Controller class inside your Controllers folder. To add right click on your Controller folder, select Add then choose New Item.
Step 5. From the New Item window search for Web API Controller Class(v2) . Name your class controller then press Add.

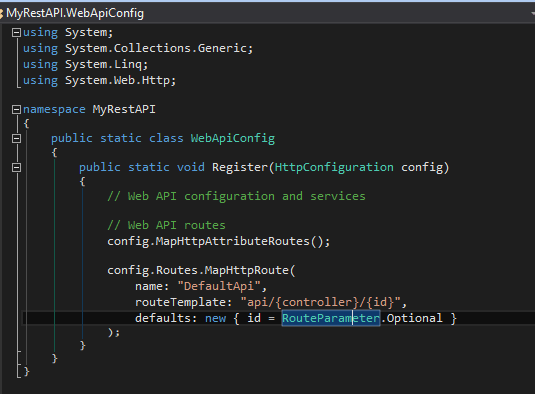
The image below is the API Controller Default route:
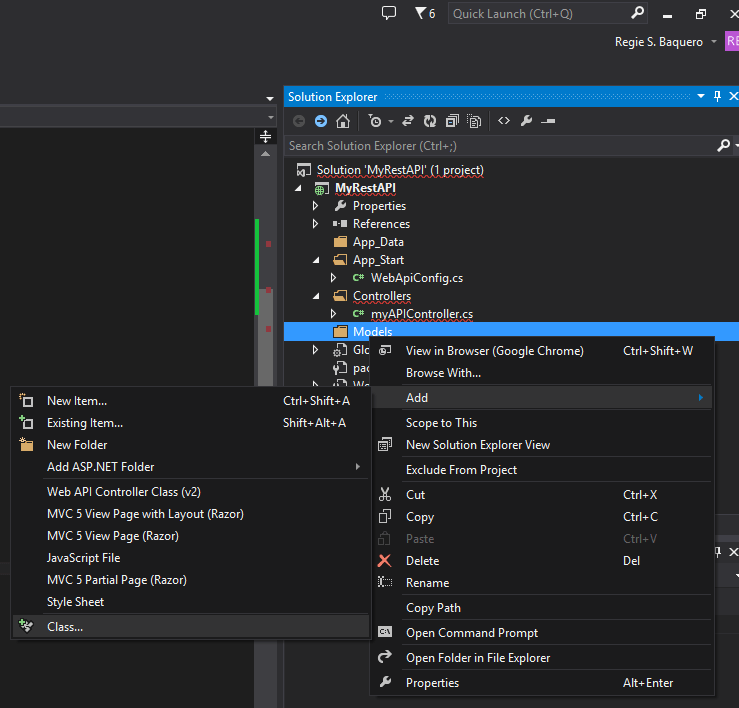
Step 6. Before we proceed with this file (MyAPController), let’s create an additional class inside the Model folder. This will be used as a model to create our sample data later. To add, right-click on your Model folder, select Add, then choose New Item.
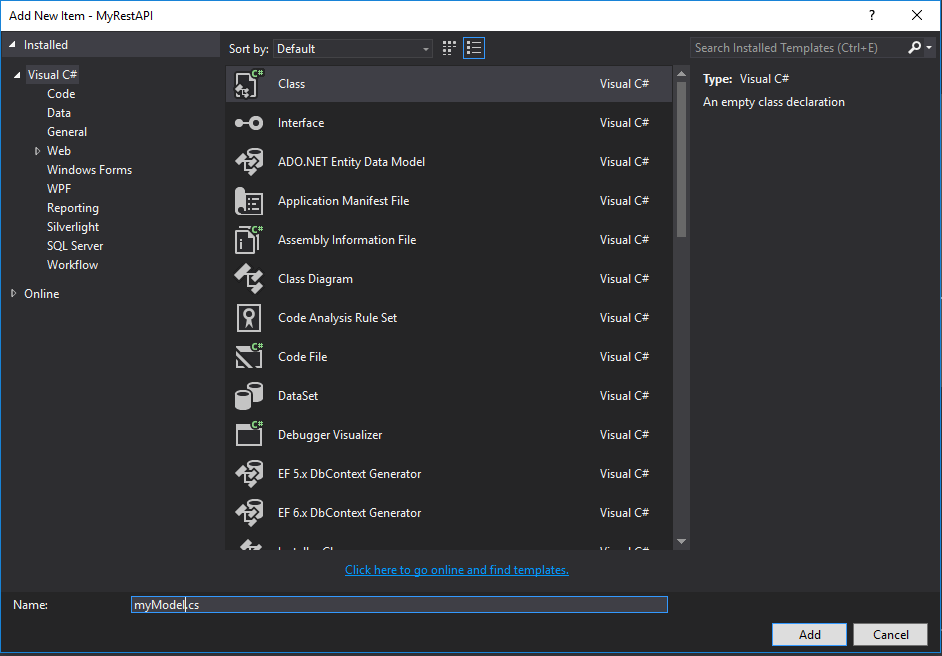
Step 7. Name your model. In my case, I name it as myModel.
Step 8. Open myModel class then declare properties below.
 public int Id { get; set; }
 public string Name { get; set; }
 public string  LastName { get; set; }
 public string Number { get; set; }
Step 9. Open MyAPIController inside your Controller folder. If you name your API Controller the same as mine, you can copy and replace your code with the code below. If not, manually create the method from the code below.
Method:
- GetList() >> Return all data we created with our model.
- GetName(int id) >> Return specific data by id.
- Model >> Dummy list we create base on our myModel class.
using System;
using System.Collections.Generic;
using System.Linq;
using System.Net;
using System.Net.Http;
using System.Web.Http;
using MyRestAPI.Models;
namespace MyRestAPI.Controllers
{
public class myAPIController : ApiController
{
myModel[] model = new myModel[]
{
new myModel {Id=1,Name="Regie",LastName="Baquero",Number="12345"},
new myModel {Id =2,Name="Regie",LastName="Baquero",Number="12345" },
new myModel { Id = 3,Name="Regie",LastName="Baquero",Number="12345" }
};
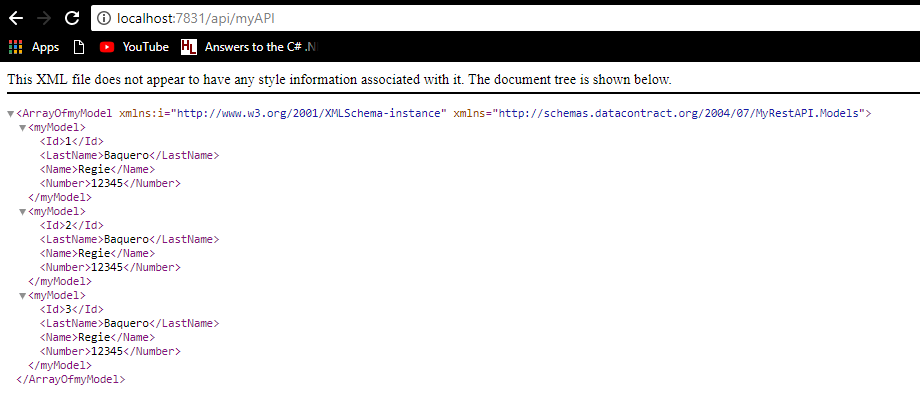
public IEnumerable<myModel> GetList()
{
return model;
}
public List<myModel> GetName(int id)
{
List<myModel> list = new List<myModel>();
var name = model.FirstOrDefault(m => m.Id == id); //Select data we which id is equal to id
if (name == null)
{
return list; //if null return empty list.
}
list.Add(new myModel //if not equal to null return list
{
Id = name.Id,
Name = name.Name,
LastName = name.LastName,
Number = name.Number
});
return list;
}
}
}Solution Explorer Overview – Restful Web Services
- WebApiConfig >> contains default url route for Api Controller
- myAPIController >> Api controller that contains our method
- myModel >> Contains model data properties.
Step 10. To access GetList(). Run your project and navigate to this URL localhost:7831/api/myAPI
Step 11. To access GetName(int id) >> localhost:7831/api/myAPI/GetName?id=1

Code Summary:
MyAPIController
using System;
using System.Collections.Generic;
using System.Linq;
using System.Net;
using System.Net.Http;
using System.Web.Http;
using MyRestAPI.Models;

namespace MyRestAPI.Controllers
{
  public class myAPIController : ApiController
   {
     myModel[] model = new myModel[]
      {
        new myModel {Id=1,Name="Regie",LastName="Baquero",Number="12345"},
        new myModel {Id =2,Name="Regie",LastName="Baquero",Number="12345" },
        new myModel { Id = 3,Name="Regie",LastName="Baquero",Number="12345" }
      };

  public IEnumerable<myModel> GetList()
   {
     return model;
   }

  public List<myModel> GetName(int id)
   {
     List<myModel> list = new List<myModel>();
     var name = model.FirstOrDefault(m => m.Id == id);
     if (name == null)
       {
        return list;
       }
     list.Add(new myModel
      {
        Id = name.Id,
        Name = name.Name,
        LastName = name.LastName,
        Number = name.Number
      });

    return list;
  }

 }
}
myModel:
using System;
using System.Collections.Generic;
using System.Linq;
using System.Web;

namespace MyRestAPI.Models
 {
  public class myModel
   {
     public int Id { get; set; }
     public string Name { get; set; }
     public string LastName { get; set; }
     public string Number { get; set; }
   }
 }
Now we have successfully build restful APIs with ASP NET Web API. Hopes this gives you an idea for your future projects. Thank you for reading.
Happy coding!!