In this tutorial, we will explore the basics of the Django framework by creating a basic Django app. Django is a high-level Python web framework that follows the Model-View-Controller (MVC) architectural pattern. Understanding this architecture is crucial for building scalable and maintainable web applications. Let’s look at this concept in more detail.
- I. MVC architectural design.
- II. Creating Your First Django App
- III. Set up a Django Project
- IV. Django Setting
- V. Create Models
- VI. Running Migrations
- VII. Create a View
- VIII. Create A Template
- IX. Django Forms
- X. Handling User Input
- XI. URLs and Routing in Django
- XII. Create Admin Access
- XIII. Run Application
- Download Source Code
- Summary
I. MVC architectural design.
1. Model
In Django, the Model represents the data structure and database schema of the application. It defines the data models and how they interact with the database. Models are Python classes that inherit from Django’s `models.Model` class and allow us to create database tables without having to write any SQL queries.
Example:
from django.db import models

class Book(models.Model):
    title = models.CharField(max_length=200)
    author = models.CharField(max_length=100)
publication_date = models.DateField()
As seen in this example, Django comes with field types that allow us to describe the type of data we want to store and their value representations (we’ll see how this works in the admin)
2. View
The View is responsible for processing user requests and returning appropriate responses. The response can vary from returning an HTML file/template to triggering a file download on the user’s browser. Django views are simply Python functions or classes that handle HTTP requests and produce HTTP responses. Views can also interact with the Model to create, retrieve, or update data.
from django.shortcuts import render
from .models import Book

def book_list(request):
    books = Book.objects.all()
    return render(request, 'books/book_list.html', {'books': books})
3. Controller – Django’s URL Routing
Django uses a URL dispatcher as the Controller. It maps URLs to the corresponding views. This means that Django will serve different pages based on the route/url it receives on a request. The URL patterns are defined in the `urls.py` file for each app.
In your `my-site/urls.py` file, you should see something like this:
from django.contrib import admin
from django.urls import path, include

urlpatterns = [
    path('admin/', admin.site.urls)
]
This is the main URL Controller for your entire application, and each route your application should return a response for is put in the `urlpatterns` list and created using the path() function, which takes in the route/url to serve in this case ‘admin/’, and the view function or a sub-controller to handle that URL. We’ll see an example of this later when we’re creating our app.
II. Creating Your First Django App
Now, let’s create a simple Django Todo application to demonstrate and further illustrate these concepts. We’ll be picking up the codebase from the previous article to fast-track this app, you can check out that article here(Set Up Python and Development Environment).
Download the source code from this article.
III. Set up a Django Project
Once you downloaded the source code from the previous article mentioned above. Follow the steps below to set up the project.
1. Open the project downloaded from the previous article and open the directory in a terminal or command prompt.
2. If you don’t have a virtual environment setup yet, you can create one by running this command.
py -m venv my-app-venv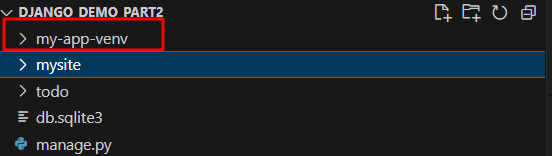
3. Activate the Virtual Environment by running the command below.
.\\my-app-venv\Scripts\activate4. Now, install Django in your virtual environment.
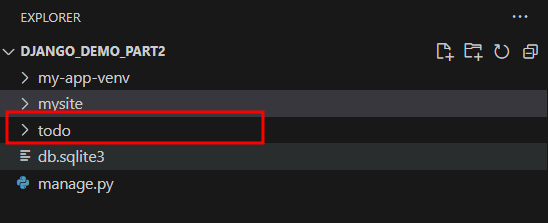
py -m pip install django5. For this demo tutorial, we will create a new app for the Django project that we downloaded from the previous article. To do that, run the following command. Make sure that the directory of your terminal or command prompt is pointing in the root folder where manage.py is located.
py manage.py startapp todoThis command will create a new application in your Django project named my todo.
IV. Django Setting
In Django, the settings.py file is a crucial part of a Django project. It contains various configuration settings for your Django application, allowing you to customize and control the behavior of your project. Here are some key aspects of the settings.py file:
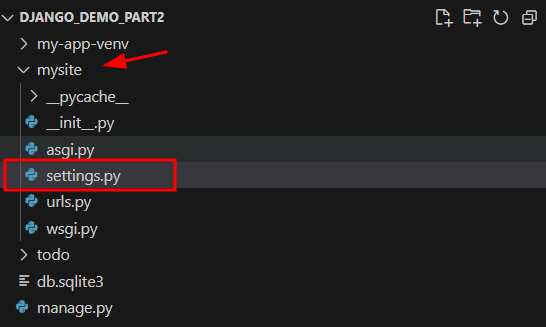
To view settings.py, open mysite » settings.py
1. Database Configuration:
You specify the database engine, name, user, password, host, and other database-related settings in the DATABASES section.
DATABASES = {
    'default': {
        'ENGINE': 'django.db.backends.sqlite3',
        'NAME': BASE_DIR / "db.sqlite3",
    }
}
2. Debug Mode:
The DEBUG setting determines whether your application is in debug mode. It should be set to False in a production environment for security reasons.
DEBUG = True
3. Static and Media Files:
You can configure the directories where Django looks for static files (CSS, JavaScript, images) and media files (user-uploaded content) using the STATIC_URL, STATICFILES_DIRS, MEDIA_URL, and MEDIA_ROOT settings.
STATIC_URL = '/static/'
STATICFILES_DIRS = [BASE_DIR / "static"]

MEDIA_URL = '/media/'
MEDIA_ROOT = BASE_DIR / "media"
4. Installed Apps:
The INSTALLED_APPS setting lists all the applications installed in your Django project. Django uses this to know which apps are available and should be included in the project.
INSTALLED_APPS = [
    'django.contrib.admin',
    'django.contrib.auth',
    'django.contrib.contenttypes',
    'django.contrib.sessions',
    'django.contrib.messages',
    'django.contrib.staticfiles',
    # Your custom apps
]
5. Middleware:
The MIDDLEWARE setting defines the order in which middleware components are executed. Middleware components process requests and responses globally.
MIDDLEWARE = [
    'django.middleware.security.SecurityMiddleware',
    'django.contrib.sessions.middleware.SessionMiddleware',
    'django.middleware.common.CommonMiddleware',
    'django.middleware.csrf.CsrfViewMiddleware',
    'django.contrib.auth.middleware.AuthenticationMiddleware',
    'django.contrib.messages.middleware.MessageMiddleware',
    'django.middleware.clickjacking.XFrameOptionsMiddleware',
]
6. Timezone and Language Settings:
You can set the time zone and language for your project.
TIME_ZONE = 'UTC'
LANGUAGE_CODE = 'en-us'
These are just a few examples, and there are many more settings you can configure in the settings.py file. It serves as a central place to manage the configuration of your Django project.
V. Create Models
Models in Django are Python classes that describe the structure of your data, the value type for each field, and methods that can customize the behavior of that data. With this in mind, let’s create our Todo Item Model.
Edit your `todo/models.py` and type in the following code (if you’re copying and pasting, beware of python’s indentation error):
from django.db import models

class TodoListItem(models.Model):
    label = models.CharField(max_length=100)
    done = models.BooleanField(default=False)

    def __str__(self):
        return self.label
The code above defines a simple Django model TodoListItem with two fields (label and done). Where label is the name of the todo task and done which is a boolean type that corresponds to whether the task is done or not.
VI. Running Migrations
A migration is a schema that tells Django’s db engine how to create datatables from models, this is mostly because of the type of database you might decide to use for your project when deploying it for production, by default Django uses an SQLite3 database which is good for development and testing purposes and small-scale internal applications as it does not require a separate server to run.
After creating your model, head over to your terminal and type in these commands:
py manage.py makemigrationspy manage.py migrateThe “makemigrations” generates your database migrations and saves them to a file in the migrations folder for each installed app, while the “migrate” command takes those migrations and uses them to create the actual database tables.
VII. Create a View
Views are Python functions that accept an HTTP request and process the request to perform an action based on the request properties, parameters, and data, and return either an HTML template or an HTTP response.
In your todo app’s views.py file, create a view function that retrieves data from the model and passes it to index.html template.
from django.shortcuts import render, redirect
from .forms import TodoForm
from .models import TodoListItem

def home_view(request):
	form = TodoForm() # create an empty instance of the TodoForm
	todo_list = TodoListItem.objects.all().order_by('-id').exclude(done=True)
	template = 'index.html'
	done = request.GET.get('todo_id', None)

	if done:
		item = todo_list.get(id=done)
		item.done = True
		item.save()
		return redirect('todo:home')

	if request.method == "POST":
		todo = TodoForm(request.POST)
		if todo.is_valid():
			todo.save()
			return redirect('todo:home')

	# Data to be passed to the template/html
	context = {
		'form': form,
		'todo_list': todo_list
	}

	return render(request, template, context)
The code above defines a view function, home_view, which is responsible for rendering our home page which is a to-do list application. The key functionalities include:
1. Imports:
First, we import the TodoListItem model from our “todo/models.py” and a TodoForm from “todo/forms.py”. We also need to Imports essential functions (render and redirect) from Django’s shortcuts module.
from django.shortcuts import render, redirect
from .forms import TodoForm
from .models import TodoListItem
2. View Function:
Next, we define the home_view which is a function-based view that handles requests to render the home page of our todo list app.
def home_view(request):3. Form Handling:
Next, we create an empty instance of the TodoForm to facilitate user input and processes form data submitted via both GET and POST methods.
form = TodoForm() 4. To-Do List Display:
Then, we retrieve all todo list items from the database in descending order based on ID and exclude completed items.
todo_list = TodoListItem.objects.all().order_by('-id').exclude(done=True)5. Marking Items as Done:
Here, we check the URL for a parameter (todo_id) to determine if a user wants to mark a todo item as completed. If the parameter is present, fetch the corresponding todo item and update the status to “done,” and redirects to the home page.
done = request.GET.get('todo_id', None)

	if done:
		item = todo_list.get(id=done)
		item.done = True
		item.save()
		return redirect('todo:home')
6. Rendering HTML Template:
Now, let’s specify an HTML template to be used for rendering the page. For this demo, I’ll use index.html.
template = 'index.html'Then, we pass the form instance(TodoForm()) and the filtered todo list(todo_list) as context data to the template.
context = {
		'form': form,
		'todo_list': todo_list
	}

	return render(request, template, context)
6. Handling Form Submission:
Now, we listen for a POST request. This happens when the form is submitted by a user from the template/front end. If the request form data is valid, we create a new instance of the TodoListItem with the submitted data and save it to the database, if the values check out, we can redirect back to the home page.
if request.method == "POST":
		todo = TodoForm(request.POST)
		if todo.is_valid():
			todo.save()
			return redirect('todo:home')
VIII. Create A Template
Now let’s build out our template/ html file. This file will contain HTML file that we use to render our Home Page. To do that, follow the steps below.
1. Create a template folder
In your todo app directory ie “mysite/todo” create a new folder and name it “templates”.
2. Create index.html
Inside the newly created templates folder, create a file named index.html
3. Add HTML code
Copy the HTML form below. This code contains a navigation bar with an Todo and Admin link in the menu. In the body, we render the form and data context we specify in the views.py file
<!DOCTYPE html>
<html lang="en">
<head>
    <meta charset="utf-8">
    <meta name="viewport" content="width=device-width, initial-scale=1">
    <link rel="stylesheet" href="https://cdn.jsdelivr.net/npm/bootswatch@4.5.2/dist/cerulean/bootstrap.min.css" integrity="sha384-3fdgwJw17Bi87e1QQ4fsLn4rUFqWw//KU0g8TvV6quvahISRewev6/EocKNuJmEw" crossorigin="anonymous">

    <script src="https://cdn.jsdelivr.net/npm/@popperjs/core@2.9.2/dist/umd/popper.min.js" ></script>
    <script src="https://cdn.jsdelivr.net/npm/bootstrap@5.0.1/dist/js/bootstrap.min.js" integrity="sha384-Atwg2Pkwv9vp0ygtn1JAojH0nYbwNJLPhwyoVbhoPwBhjQPR5VtM2+xf0Uwh9KtT" crossorigin="anonymous"></script>
    {% load static %}
    <link rel="stylesheet" type="text/css" href="{% static 'css/styles.css' %}">
    <title>My Todo App</title>
</head>
<body>

    <nav class="navbar navbar-expand-lg navbar-dark bg-primary">
        <a class="navbar-brand" href="#">DJango Demo</a>
        <button class="navbar-toggler" type="button" data-toggle="collapse" data-target="#navbarColor01" aria-controls="navbarColor01" aria-expanded="false" aria-label="Toggle navigation">
          <span class="navbar-toggler-icon"></span>
        </button>

        <div class="collapse navbar-collapse" id="navbarColor01">
          <ul class="navbar-nav mr-auto">
                <li class="nav-item">
                    <a class="nav-link" href="/admin">Admin</a>
                </li>
                <li class="nav-item">
                    <a class="nav-link" href="/">Todo</a>
                </li>
          </ul>
        </div>
      </nav>
      <div class="row justify-content-center">
        <div class="col-md-8">
            <div class="container my-5">
                 <div class="todo">
                    <label class="todo_label" for="todo">Add a new todo:</label>
                    <form method="post">
                        {% csrf_token %}
                        {{ form.label }}
                        <input type="submit" value="Add Todo">
                    </form>

                    <ul>
                        {% for todo in todo_list %}
                            <li>
                                <span>{{ todo.label }}</span>
                                <a class="done-link" href="?done=true&todo_id={{ todo.id }}">Mark as Done</a>
                            </li>
                        {% endfor %}
                    </ul>
                 </div>
            </div>
       </div>
      </div>
</body>
</html>
As you observe above we use bootswatch theme for this HTML UI and also create a custom styles.
This is the bootswatch script:
<link rel="stylesheet" href="https://cdn.jsdelivr.net/npm/bootswatch@4.5.2/dist/cerulean/bootstrap.min.css" integrity="sha384-3fdgwJw17Bi87e1QQ4fsLn4rUFqWw//KU0g8TvV6quvahISRewev6/EocKNuJmEw" crossorigin="anonymous">

    <script src="https://cdn.jsdelivr.net/npm/@popperjs/core@2.9.2/dist/umd/popper.min.js" ></script>
    <script src="https://cdn.jsdelivr.net/npm/bootstrap@5.0.1/dist/js/bootstrap.min.js" integrity="sha384-Atwg2Pkwv9vp0ygtn1JAojH0nYbwNJLPhwyoVbhoPwBhjQPR5VtM2+xf0Uwh9KtT" crossorigin="anonymous"></script>
For the custom script, we use this script:
{% load static %}
 <link rel="stylesheet" type="text/css" href="{% static 'css/styles.css' %}">
4. Create a Custom Style
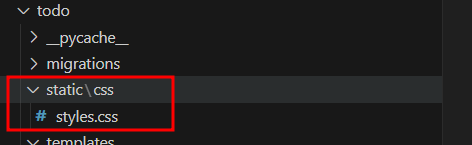
Now, to create the new style create a new folder named static inside your todo app. In that folder, create an inner folder named css then create a styles.css file.
Open styles.css and use the CSS styles below.
.todo {
    text-align: center;
}
.todo form {
    display: flex;
    justify-content: center;
    align-items: center;
    margin-bottom: 20px;
}

.todo_label {
    font-size: 1.2em;
    margin-bottom: 10px;
}

.todo input[type="text"] {
    padding: 8px;
    width: 200px;
    font-size: 1em;
}

.todo input[type="submit"] {
    background-color: #2fa4e7;
    color: white;
    border: none;
    padding: 10px 16px;
    text-decoration: none;
    font-size: 1em;
    cursor: pointer;
    transition: background-color 0.3s;
}

.todo input[type="submit"]:hover {
    background-color: #68bbeb;
}

.todo ul {
    list-style-type: none;
    padding: 0;
    margin: 0;
    max-width: 750px;
    margin-left: auto;
    margin-right: auto;
}

.todo li {
    background-color: #fff;
    margin: 10px 0;
    padding: 10px;
    border-radius: 5px;
    box-shadow: 0 0 10px rgba(0, 0, 0, 0.1);
    display: flex;
    justify-content: space-between;
    align-items: center;
}

.done-link {
    color: #3498db;
    text-decoration: none;
    cursor: pointer;
}

.done-link:hover {
    text-decoration: underline;
}
5. Register Custom Style
We are not quite done yet, in order for us to access the style that we created we need to register the folder on our django project settings. To do that, open mysite » settings.py. Then add the following script.
import os #place this on top of the other code
STATIC_URL = 'static/'
STATICFILES_DIRS = [
    os.path.join(BASE_DIR, 'todo', 'static')
]
You’ve created your first Django templates, and a few things may seem off to you for example you may have noticed some special tags like the {{ form.label }} and the {% for %}{% endfor %} tag.
The dual curly braces, {{ }}, serve as placeholders for variables in a template file. When Django renders the template, these braces are substituted with the respective values passed to it. In this context, they represent a form input element, as demonstrated shortly. On the other hand, the {% %} tag is a specialized tag permitting the incorporation of Python-like expressions in the template. These expressions get evaluated during Django’s rendering process. In the presented example, we iterate through the “todo_list” items, and the {{ todo.label }} tag within the span tag dynamically displays the label for each ‘todo’ item during each iteration.
A Django template is, at its core, an HTML file enriched with distinctive tags and filters. These unique features empower us to perform advanced operations on our data, all before the template is presented to the user.
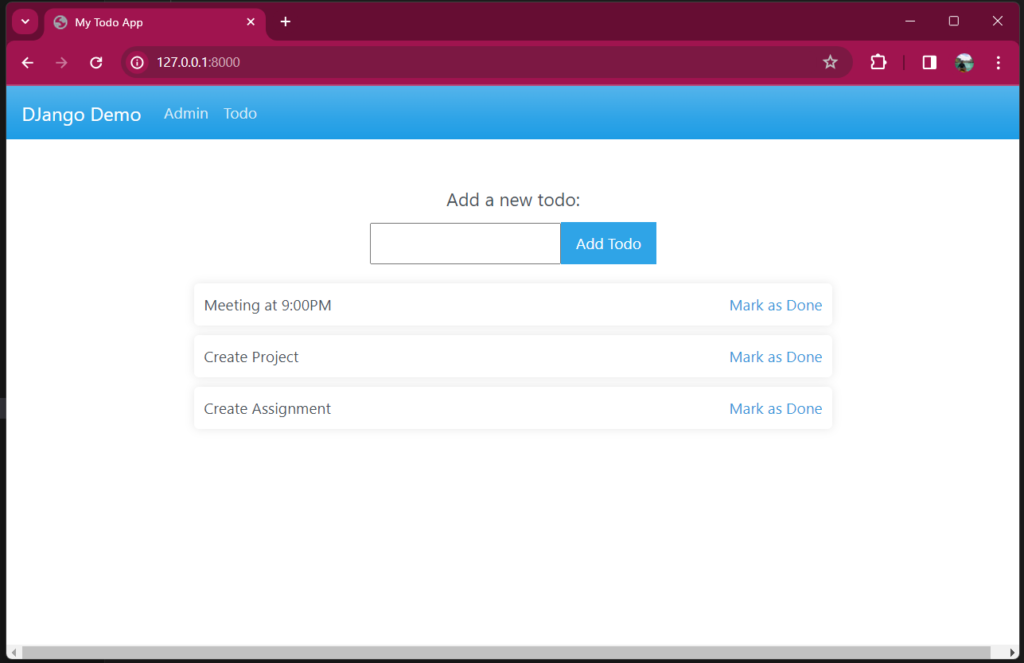
This is the final look of our home page view:
IX. Django Forms
In Django, forms play a pivotal role in handling user input, and they come in two main types: pure HTML forms or Django-based forms. For the purpose of this tutorial, we’ll focus on Django Forms. All form classes are essentially created as subclasses of either django.forms.Form or django.forms.ModelForm. You can consider ModelForm as a specialized subclass of Form.
To craft a form, you simply need to create a Python class that inherits from Django’s forms.Form class or any of its subclasses.
Here’s a step-by-step guide:
1. Create a file named forms.py in your ‘todo’ directory, for instance, “todo/forms.py”.
2. Then, this is how we create the actual form class.
from django import forms
from .models import TodoListItem

class TodoForm(forms.ModelForm):
	label = forms.CharField()

	class Meta:
		model = TodoListItem
		fields = ['label', ]
In the provided example, we’ve crafted a form called TodoForm, which inherits from django.forms.ModelForm and contains a single field, namely ‘label’. This field is intended for display in the HTML template.
Take note of the Meta subclass within our form. This class holds meta-information about the form, and it requires two essential variables for a ModelForm – namely, model and fields. These variables inform the form about the associated model and the list of specified form fields, respectively.
X. Handling User Input
Let’s go back to our views.py;
if request.method == "POST": # when the todo form is submitted
		todo = TodoForm(request.POST) # create a new instance of the TodoForm with the form data

		# check if the values are correct/valid
		# ie a string is sent when a string is expected and not an integer
		if todo.is_valid():
			todo.save() # create a todo item
			return redirect('todo:home') # return to the home page
When we receive a POST request, we use the data submitted through the form in our template to create a “TodoForm” instance with request.POST. This instance represents the form and, since our TodoForm class specifies the label field as an HTML text input, request.POST becomes a Python dictionary like {‘label’: ‘User’s input’}.
Django Forms simplify the handling of forms by taking care of tasks like data validation and cleaning. We can check if a form has passed validation by using the is_valid() method on the form instance, which returns either True or False.
In our case, because we’ve created a bound form (ModelForm), we can use the form instance to directly create an instance of the associated Model. By calling the save function, we can skip the manual process, allowing the form to handle Validation, Serialization, and Creation effortlessly.
XI. URLs and Routing in Django
URLs serve as paths directing your application to different pages or files on your server. Django provides a handy feature to enhance URL management, allowing you to abstract and decouple your project’s routing for better maintenance and scalability.
In your project’s urls.py file (e.g., “mysite/urls.py”), you’ll find a urlpatterns list containing path objects representing the URLs your app can handle.
from django.contrib import admin
from django.urls import path, include

urlpatterns = [
    path('admin/', admin.site.urls)
]
The path() function requires two arguments: the URL address and the handler function/view. The latter can be a view function or a string path to a Python URL module (e.g., ‘app.urls’) using the include function. Additionally, there’s an optional name argument, serving as a shorthand for the full URL.
Now, let’s update your application to properly serve the right URL. Create a new file in your ‘todo’ directory (e.g., “todo/urls.py”) and add the following code:
from django.urls import path
from .views import home_view

app_name = 'todo'

urlpatterns = [
	path('', home_view, name='home'),
]
Note the app_name which specifies how Django’s view controller should reverse shorthand URLs, as seen in the redirect('todo:home').
Return to your mysite project’s urls.py file (e.g., “mysite/urls.py”), remove unnecessary comments, and replace the old code with this:
from django.contrib import admin
from django.urls import path, include

urlpatterns = [
    path('admin/', admin.site.urls),
    path('', include('todo.urls', namespace='todo'))
]
In this updated code, we’ve imported the include function, allowing you to link another urls.py file with URL patterns to handle all sub-routes of a given path. For instance, include('todo.urls', namespace='todo') will direct any path not matching ‘admin’ to be handled by the urlpatterns in the ‘todo.urls’ module.
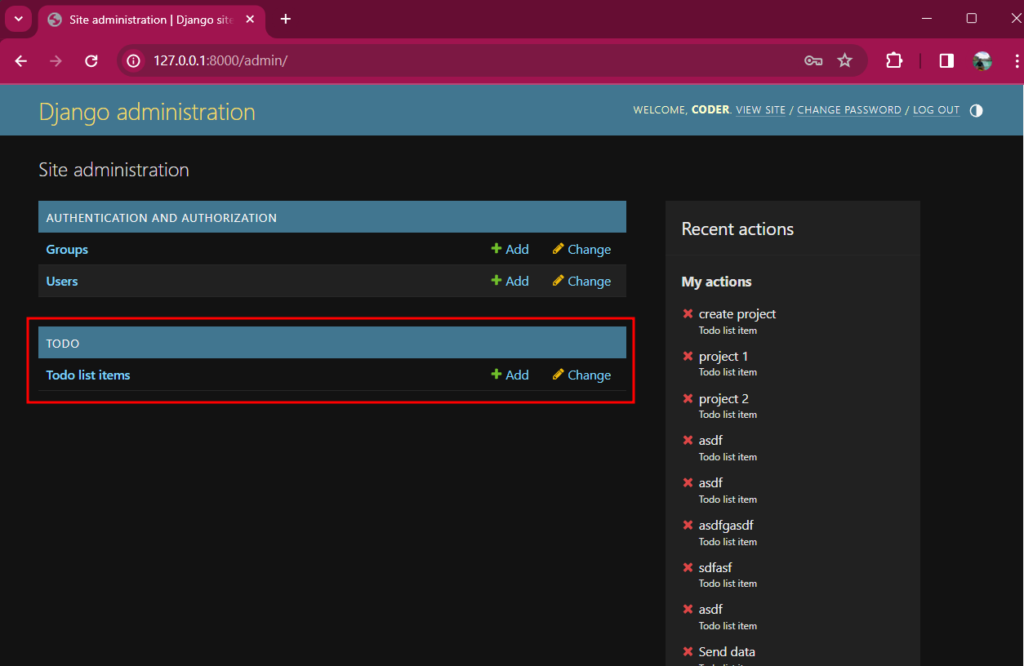
XII. Create Admin Access
Using the DJango admin dashboard you will be able to check all the data we created when we run the migration, On this demo, you can access the admin dashboard which is the mysite project using this URL http://127.0.0.1:8000/admin/
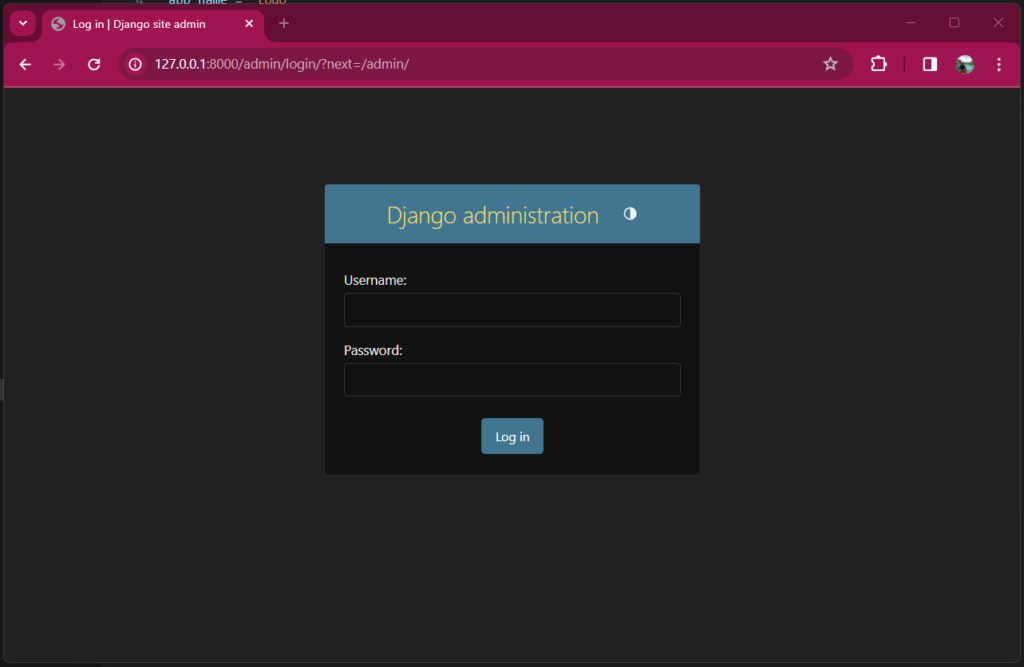
When you logged in, this is how it looks like.
Now, if you download the source code from the previous you probably don’t know what the password is. So let’s create one.
1. I assume you have already setup your Virtual Environtment. So open terminal or command prompt and point it to the root directory of your project. Then run the command below to activate your Virtual Environment. Skip if it’s already activated.
.\\my-app-venv\Scripts\activate2. Then create a user by running the following command.
py manage.py createsuperuser3. Now, run the server and test if you are able to login.
py manage.py runserver
Here’s a full tutorial on how to set up Django project(mysite project)
XIII. Run Application
Now, we are ready to run our project. But if you haven’t perform any migration yet, you can use the command below to create the migration file.
py manage.py makemigrationsThen execute the migration using the command below.
py manage.py migrateNow, run your server.
py manage.py runserverYou will be prompted with this message if you have successfully run your server.
System check identified no issues (0 silenced).
March 07, 2024 - 09:50:07
Django version 5.0.3, using settings 'mysite.settings'
Starting development server at http://127.0.0.1:8000/
This means, that you can access your server using this URL http://localhost:8000/. See the preview below.
Download Source Code
You can download the source code from GitHub. Don’t forget to follow us for more tutorials like this.
Summary
In this beginner-friendly guide, we explore how the Model, View, and Controller (MVC) architecture fits into the structure of Django. We also explore the process of building your first Django application, covering key elements such as views, templates, and models. Hopefully, you’ll possess a solid foundation to start crafting your web applications using Django.
Keep Coding!