In this article, we will be using Dapper in ASP.NET Core Web API. I will create an ASP.NET Core WEB API, and we will be using SQL Stored procedure on this project. This tutorial will help us to understand how Dapper works and how to implement them.
- What is Dapper?
- I. Create and Setup a new ASP.NET Core Web API
- II. Install Dapper Nuget Package
- III. Configure Database Connection:
- IV. Create Database table
- V. Create Stored Procedure
- VI. Create Repositories
- VII. Create model properties
- VIII. Create API Controller
- IX. Enable CORS
- X. Run and Test ASP.NET Core Web API
- Download Source
- Summary
What is Dapper?
Dapper is a micro ORM. It is a simple object mapper framework that helps map the native query output to a model class. This framework is built by the StackOverflow team and released as open-source. This tool is available on NuGet Packages
Before we start, Please make sure to have installed the following
- The latest version of Visual Studio
- Alternatively, you can also use the Visual Studio Code.
- SQL Server
If you already have installed all of that , then let’s start.
I. Create and Setup a new ASP.NET Core Web API
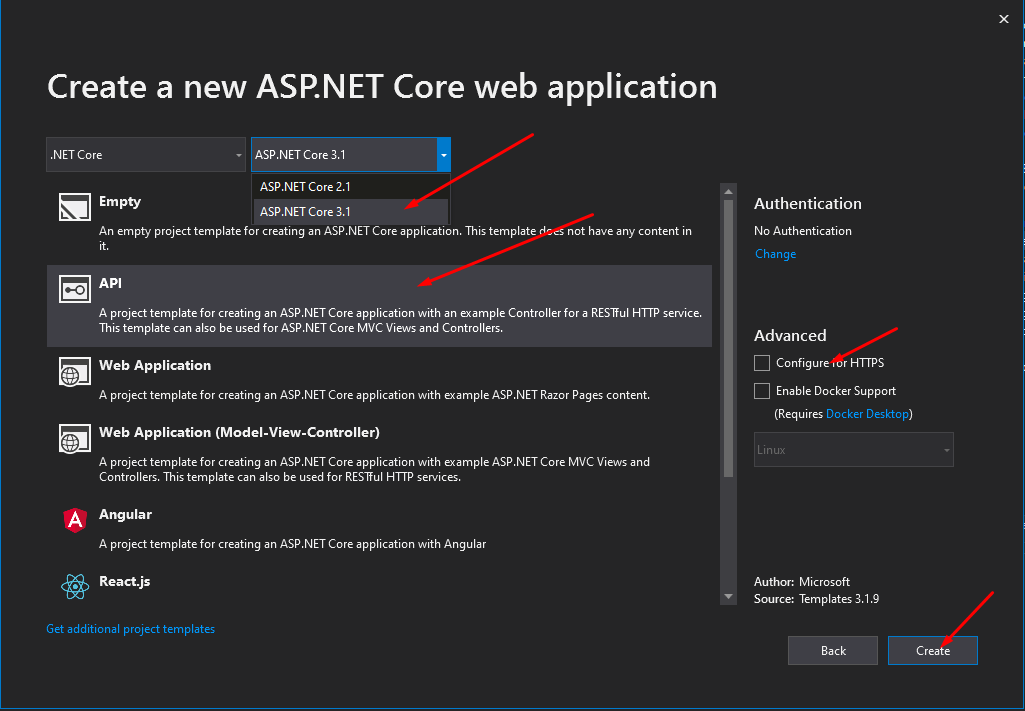
- First, create your ASP.NET Core Web API. To do that just follow the steps below.
- Select File > New > Project.
- Select ASP.NET Core Web Application. Name the project DpCoreAPI to have the same namespace as my project. Click OK.
- Select API and then uncheck Configure for HTTPS.
- Lastly, Click on Create.
II. Install Dapper Nuget Package
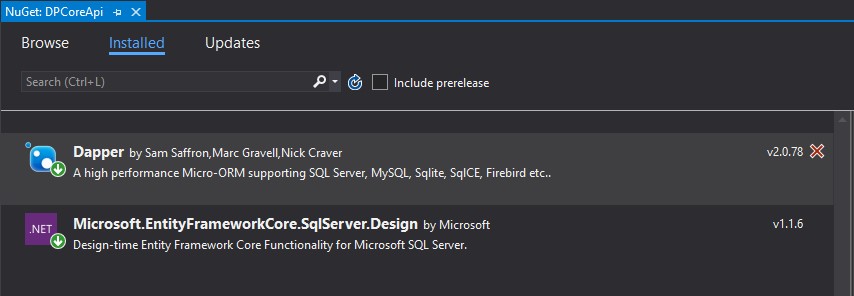
Now, we need to install the required packages for this project. I have listed it all below.
- Dapper
- Microsoft.EntityFrameworkCore.SqlServer.Design
Use NuGet Package Manager to install this package. If this is your first time using this, you can visit this article.
or edit the .csproj file:
   <PackageReference Include="Dapper" Version="2.0.78" />
   <PackageReference Include="Microsoft.EntityFrameworkCore.SqlServer.Design" Version="1.1.6" />
III. Configure Database Connection:
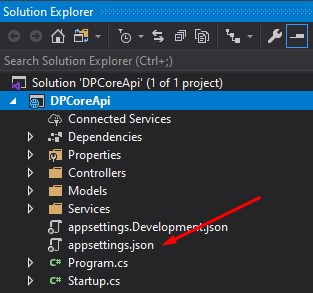
After installation of all the necessary packages that we need. Add your connection string configuration inside appsettings.json.
"ConnectionStrings": {
     "default": "Data Source=DESKTOP-4DU98BI\SQLEXPRESS01;Initial Catalog=DBTest;User ID=freecode;Password=freecodespot;Connect Timeout=30;Encrypt=False;TrustServerCertificate=False;ApplicationIntent=ReadWrite;MultiSubnetFailover=False"
   }
IV. Create Database table
To create database and table using SQL, you can use a tool like SQL Server Management Studio (SSMS). Here are the basic steps:
1. Open your SQL tool (like SSMS).
2. Create the database using the following script
CREATE DATABASE YourDatabaseName;
GO
Replace YourDatabaseName with the desired name for your database.
3. To use the database on your query you can add the following script
USE YourDatabaseName;
GO
4. Then create the tables by simply running the following script.
CREATE TABLE members (
    Id int NOT NULL AUTO_INCREMENT,
    Name varchar(30),
    Contact varchar(30),
    Address varchar(100),
    PRIMARY KEY (Id)
);
Below is the table I used for this tutorial:
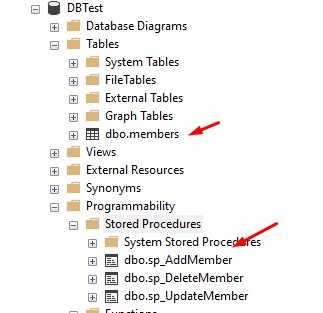
As you can observe in the image above, I also created three stored procedures. That is sp_AddMember, sp_DeleteMember and sp_UpdateMember.
V. Create Stored Procedure
We will also use a stored procedure, to explore how to execute a stored procedure call in Dapper. You can execute the script below to create all stored procedures we will be using later in this tutorial. Make sure to change the Database Name [DBTest] with your local database name.
- sp_AddMember
- sp_DeleteMember
- sp_UpdateMember
sp_AddMember
Add new member from members table
USE [DBTest]
 GO
 ALTER PROCEDURE [dbo].[sp_AddMember]
 @id int, @Name Nvarchar(50) , @Contact nvarchar(50), @Address Nvarchar(50), @retVal int output
 AS
 BEGIN
     SET NOCOUNT ON;
     Insert into members([Name],Contact,[Address],RegDate) VALUES(@Name,@Contact,@Address,GETDATE())
     if @@ROWCOUNT > 0
     BEGIN
     SET @retVal = 200
     END
     ELSE
     BEGIN
     SET @retVal = 500
     END
 END
sp_DeleteMember
Delete member from members table
USE [DBTest]
 GO
 ALTER PROCEDURE [dbo].[sp_DeleteMember]
 @id int, @retVal int output
 AS
 BEGIN
     SET NOCOUNT ON;
     Delete members where Id = @id
 if @@ROWCOUNT > 0 BEGIN SET @retVal = 200 END ELSE BEGIN SET @retVal = 500 END
 END
sp_UpdateMember
Update record in the members table
USE [DBTest]
 GO
 ALTER PROCEDURE [dbo].[sp_UpdateMember]
 @id int, @Name Nvarchar(50) , @Contact nvarchar(50), @Address Nvarchar(50), @retVal int output
 AS
 BEGIN
     SET NOCOUNT ON;
     UPDATE members SET [Name] = @Name, Contact=@Contact, [Address] = @Address where Id = @id
 if @@ROWCOUNT > 0 BEGIN SET @retVal = 200 END ELSE BEGIN SET @retVal = 500 END
 END
VI. Create Repositories
This part handles the main functions of our application this is where we can see Dappers in action.

- Create a Service folder inside your projects. Create an interface class; you can name it IDapperRepository. Place the code snippet below.
T execute_sp(string query, DynamicParameters sp_params, CommandType commandType = CommandType.StoredProcedure);
 List GetAll(string query, DynamicParameters sp_params, CommandType commandType = CommandType.StoredProcedure);
This is what my IDapperRepository full code looks like.
using Dapper;
 using System;
 using System.Collections.Generic;
 using System.Data;
 using System.Linq;
 using System.Threading.Tasks;
 namespace DPCoreApi.Services
 {
     public interface IDapperRepository
     {
         T execute_sp<T>(string query, DynamicParameters sp_params, CommandType commandType = CommandType.StoredProcedure);
         List<T> GetAll<T>(string query, DynamicParameters sp_params, CommandType commandType = CommandType.StoredProcedure);
 }
 }
2. Now create the implementation class for IDapperRepository. In my case, I named it DapperRepository. This repository is where we will place the method for our crud operation.
using Dapper;
 using Microsoft.Extensions.Configuration;
 using System;
 using System.Collections.Generic;
 using System.Data;
 using System.Data.SqlClient;
 using System.Linq;
 using System.Threading.Tasks;
 namespace DPCoreApi.Services
 {
     public class DapperRepository : IDapperRepository
     {
         private readonly IConfiguration _configuration;
     public DapperRepository(IConfiguration configuration)
     {
         _configuration = configuration;
     }
     public List<T> GetAll<T>(string query, DynamicParameters sp_params, CommandType commandType = CommandType.StoredProcedure)
     {
         using IDbConnection db = new SqlConnection(_configuration.GetConnectionString("default"));
         return db.Query<T>(query, sp_params, commandType: commandType).ToList();
     }
     public T execute_sp<T>(string query, DynamicParameters sp_params, CommandType commandType = CommandType.StoredProcedure)
     {
         T result;
         using (IDbConnection dbConnection = new SqlConnection(_configuration.GetConnectionString("default"))) {
             if (dbConnection.State == ConnectionState.Closed)
                 dbConnection.Open();
             using var transaction = dbConnection.BeginTransaction();
             try
             {
                 dbConnection.Query<T>(query, sp_params, commandType: commandType, transaction: transaction);
                 result = sp_params.Get<T>("retVal"); //get output parameter value
                 transaction.Commit();
             }
             catch (Exception ex)
             {
                 transaction.Rollback();
                 throw ex;
             }
         };
             return result;
      }
   }
 }
VII. Create model properties
Now, we need a Model to class to Map output data from the Dapper query. This model represents our table properties. I place my member model inside the Models folder.

public int Id { get; set; }
public string Name { get; set; }
public string Contact { get; set; }
public string Address { get; set; }
VIII. Create API Controller
Now, all we need to do is create an API Controller to output the repository method that we created. To do that, add a new API Controller.
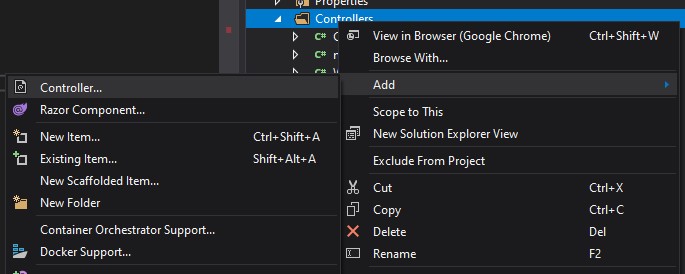
- Right-click on the controller folder. Select add then choose Controller.
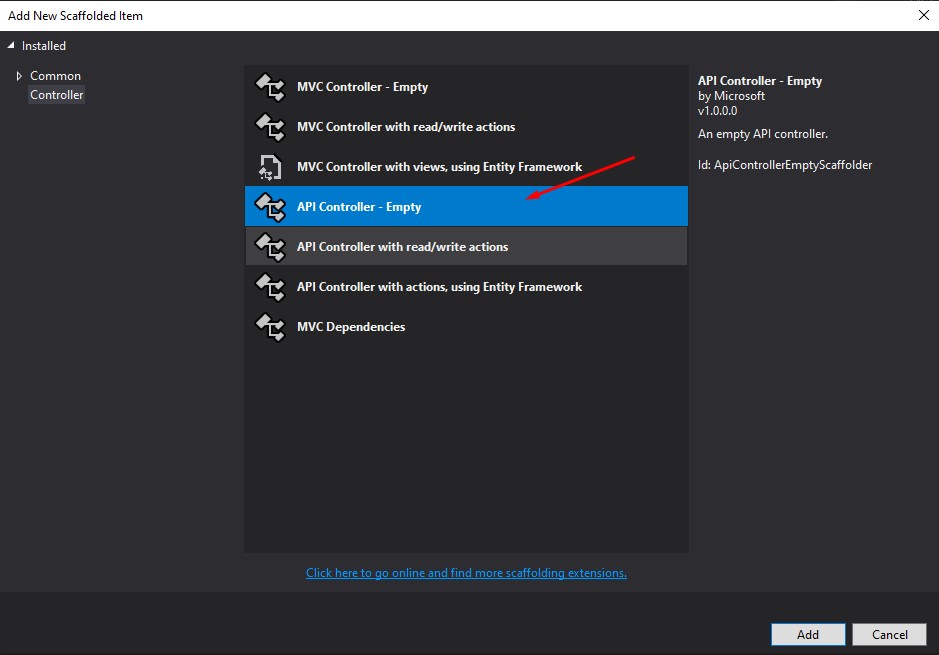
2. A new window will pop up choose an Empty API Controller. See the image below.
3. Name your API controller as CRUDController. Copy and paste the code below inside your controller. This snippet contains the CRUD operation.
using System;
 using System.Collections.Generic;
 using System.Data;
 using System.Linq;
 using System.Threading.Tasks;
 using Dapper;
 using DPCoreApi.Models;
 using DPCoreApi.Services;
 using Microsoft.AspNetCore.Http;
 using Microsoft.AspNetCore.Mvc;
 namespace DPCoreApi.Controllers
 {
     [Route("api/[controller]")]
     [ApiController]
     public class CrudController : ControllerBase
     {
         private readonly IDapperRepository _repository;
     public CrudController(IDapperRepository repository)
     {
         _repository = repository;
     }
     [HttpPost(nameof(Create))]
     public async Task<int> Create(member data)
     {
         var dp_params = new DynamicParameters();
         dp_params.Add("Id", data.Id, DbType.Int32);
         dp_params.Add("Name", data.Name, DbType.String);
         dp_params.Add("Address", data.Address, DbType.String);
         dp_params.Add("Contact", data.Contact, DbType.String);
         dp_params.Add("retVal", DbType.String,direction:ParameterDirection.Output);
         var result = await Task.FromResult(_repository.execute_sp<int>("[dbo].[sp_AddMember]"
             ,dp_params,
             commandType: CommandType.StoredProcedure));
         return result;
     }
     [HttpGet(nameof(GetMembers))]
     public async Task<List<member>> GetMembers()
     {
         var result = await Task.FromResult(_repository.GetAll<member>($"Select * from [members]", null, commandType: CommandType.Text));
         return result;
     }
     [HttpPost(nameof(Update))]
     public async Task<int> Update(member data)
     {
         var dp_params = new DynamicParameters();
         dp_params.Add("Id", data.Id, DbType.Int32);
         dp_params.Add("Name", data.Name, DbType.String);
         dp_params.Add("Address", data.Address, DbType.String);
         dp_params.Add("Contact", data.Contact, DbType.String);
         dp_params.Add("retVal", DbType.String, direction: ParameterDirection.Output);
         var result = await Task.FromResult(_repository.execute_sp<int>("[dbo].[sp_UpdateMember]"
             , dp_params,
             commandType: CommandType.StoredProcedure));
         return result;
     }
     [HttpDelete(nameof(Delete))]
     public async Task<int> Delete(int Id)
     {
         var dp_params = new DynamicParameters();
         dp_params.Add("Id", Id, DbType.Int32);
         dp_params.Add("retVal", DbType.String, direction: ParameterDirection.Output);
         var result = await Task.FromResult(_repository.execute_sp<int>("[dbo].[sp_DeleteMember]"
             , dp_params,
             commandType: CommandType.StoredProcedure));
         return result;
     }
 }
 }
By this time we are ready to test our application and see if this web application works.
IX. Enable CORS
Before we proceed with testing here’s a bonus round if you are planning to deploy an API to a Server and use it in one of your many Applications, You may encounter a CORS Exception. To get rid of this we can add policy to our API application inside your Startup.cs and inside the ConfigureService() method by using the following lines of code.
            services.AddCors(option => option.AddPolicy("APIPolicy", builder => {
                builder.AllowAnyOrigin().AllowAnyHeader().AllowAnyMethod();
            }));
Then, use this CORS policy inside the Configure method.
app.UseCors("APIPolicy");X. Run and Test ASP.NET Core Web API
Before you proceed with your testing, please ensure that the connection string you set inside the appsettings.json is correct and is pointing to the right database. We will use a Postman application for this testing.
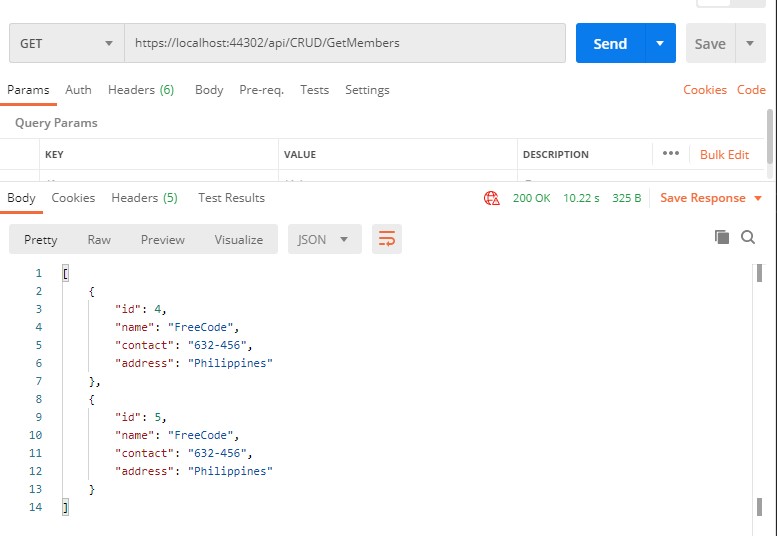
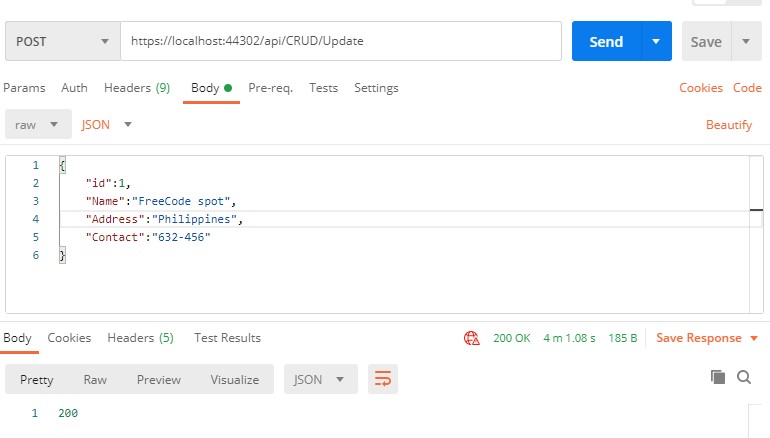
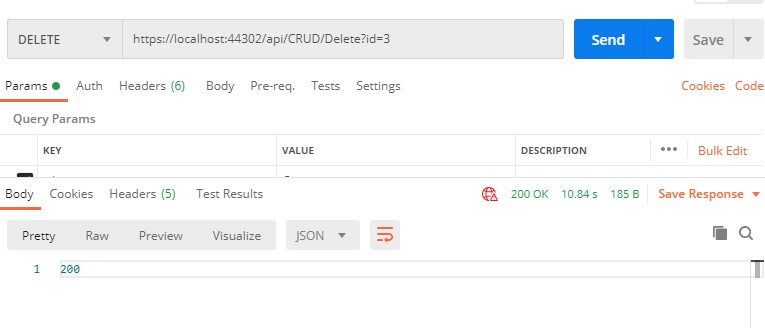
Once you run the application, below are the URL’s to access the method via the Postman application. I have also included images of the postman requests.
| Url | Method |
| https://localhost:44302/api/CRUD/GetMembers | GET |
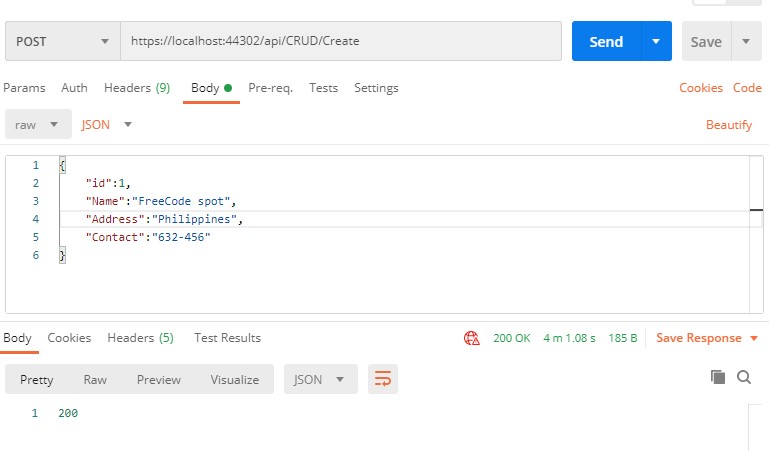
| https://localhost:44302/api/CRUD/Create | POST |
| https://localhost:44302/api/CRUD/Delete?id=3 | DELETE |
| https://localhost:44302/api/CRUD/Update | POST |
Create
GetMembers
Get All Available records on members table
Update
Update record by Id
Delete
Delete existing record by Id
Download Source
You can download the source code for this tutorial from GitHub @coderbugzz.
Summary
In this tutorial, we have learned how to use Dapper in ASP.NET Core Web API. We demonstrate how we can install Dapper on a project using the NuGet package and execute a full crud operation. Hopefully, this simple Dapper tutorial will help you with your future projects, keep Coding!