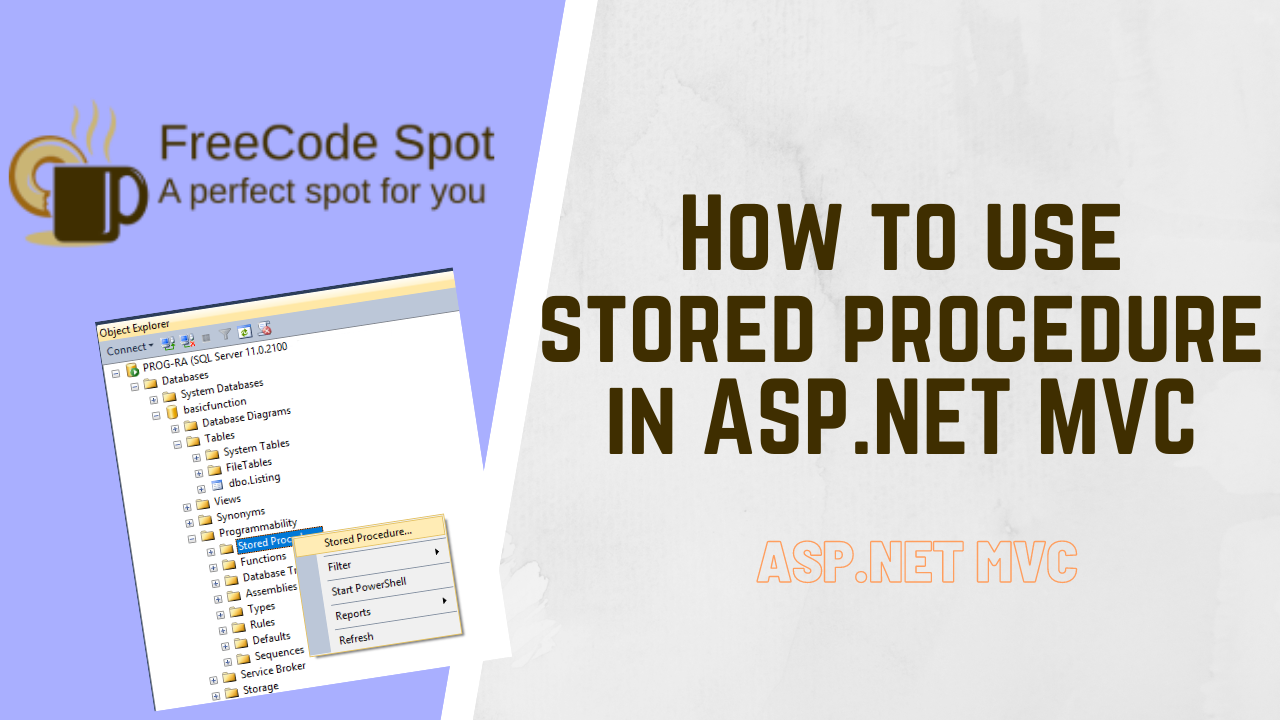
A stored procedure is a group of Transact-SQL statements compiled into a single function. If you are using ASP.NET MVC Application from your previous projects, this will be quite easy for you. Here is a sample project that will show you how to use SQL Stored procedure in ASP.NET MVC.
You can download SQL Server from this link.
C# Syntax to execute stored procedure:
using (var conn = new SqlConnection(connectionString))
            using (var command = new SqlCommand("ProcedureName", conn)
            {
                CommandType = CommandType.StoredProcedure
            })
            {
                conn.Open();
                command.ExecuteNonQuery();
            }
Procedure with parameter:
 using (var conn = new SqlConnection(connectionString))
            using (var command = new SqlCommand("ProcedureName", conn)
            {
                CommandType = CommandType.StoredProcedure

            })
            {
                command.Parameters.Add("@param", SqlDbType.NVarChar, 20).Value = "value1";
                conn.Open();
                command.ExecuteNonQuery();
            }
Procedure with return value:
using (var conn = new SqlConnection(connectionString))
            using (var command = new SqlCommand("ProcedureName", conn)
            {
                CommandType = CommandType.StoredProcedure

            })
            {
                command.Parameters.Add("@param", SqlDbType.NVarChar, 20).Value = "value1";
                command.Parameters.Add("@retval", SqlDbType.Int).Direction = ParameterDirection.Output;
                conn.Open();
                command.ExecuteNonQuery();

                var result = (int)command.Parameters["@retval"].Value;
            }
Procedure with table as return value:
using (var conn = new SqlConnection(connectionString))
            using (var command = new SqlCommand("ProcedureName", conn)
            {
                CommandType = CommandType.StoredProcedure

            })
            {
                SqlDataAdapter da = new SqlDataAdapter(command);
                DataTable dt = new DataTable();
                da.Fill(dt);
            }
Related Blog Article:
- Creating a Stored Procedure.
- Familiarize yourself with ASP.NET Application File Structure.
- Create your first ASP.NET MVC Application.
Project Objective
- Select data from a database using a SQL Stored Procedure
- How to use SQL stored procedure in ASP.NET
- Display the data in an HTML table element
Summary of the classes I used in creating this example
| File | Description |
| 1. index.cshtml | This is responsible for the UI design of your project. In this example, it would be the table design |
| 2.HomeController.cs | Controller class that is responsible for the processing of required data for our table |
| 3. function.js | The javaScript file that functions to populate the table without reloading the whole page |
| 4. function.cs | This class handles the execution of the SQL stored procedures. |
Now that you have known all of the classes and files I used for this example. I think we are good to go. Let’s start creating the project.
Note: In this example, I used the default ASP.NET MVC template of the visual studio. By default, I don’t need to create a controller because it was automatically created using the MVC template. If you are starting from scratch you have to manually add a controller.
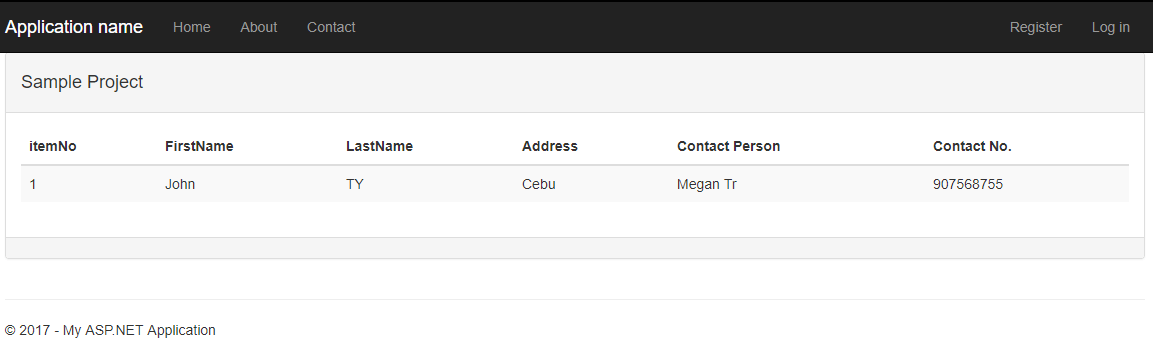
OUTPUT VIEW:
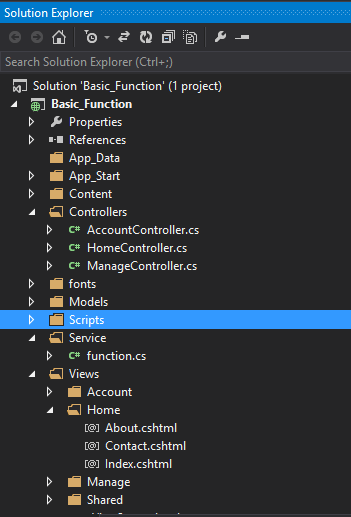
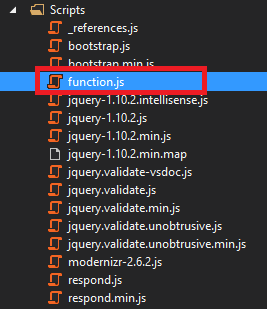
Project File structure:
This is how my file structure look like. You can revisit this later if you want to compare your file structure to mine.
1. Index.cshtml
This file was created automatically created using the default MVC template of the visual studio. You can select this option when you create a fresh copy of the .NET Project. You can visit this article. Create your first ASP.NET MVC application.
You can locate this file under Views > Home > index.cshtml. This was also associated with a default controller, which is HomeController. Observe that Home was the folder name. That is because we also have a controller named HomeController.
Views Behavior:
So if I added a controller name LoginController a folder named Login should also be created inside the Views folder.

Note:
- <script src=”~/Scripts/jquery-1.10.2.min.js”></script> -> include JQuery Script from Scripts folder
- <script src=”~/Scripts/function.js”></script> -> include function.js Script
Code:
Open your index.cshtml file then copy the code below.
@{
    ViewBag.Title = "Basic function";
}
<div class="row">
    <div class="body-content">
        <div class="panel panel-default">
            <div class="panel-heading"><h4>Sample Project</h4></div>
            <div class="panel-body">
                <table id="data" class="table table-striped table-hover"></table>
            </div>
            <div class="panel-footer">
            </div>
        </div>
    </div>
</div>
<script src="~/Scripts/jquery-1.10.2.min.js"></script>
<script src="~/Scripts/function.js"></script>
2. function.cs
Create a class file that will be in charge of all our Stored procedures associated command. I place the class file inside a folder named Service.
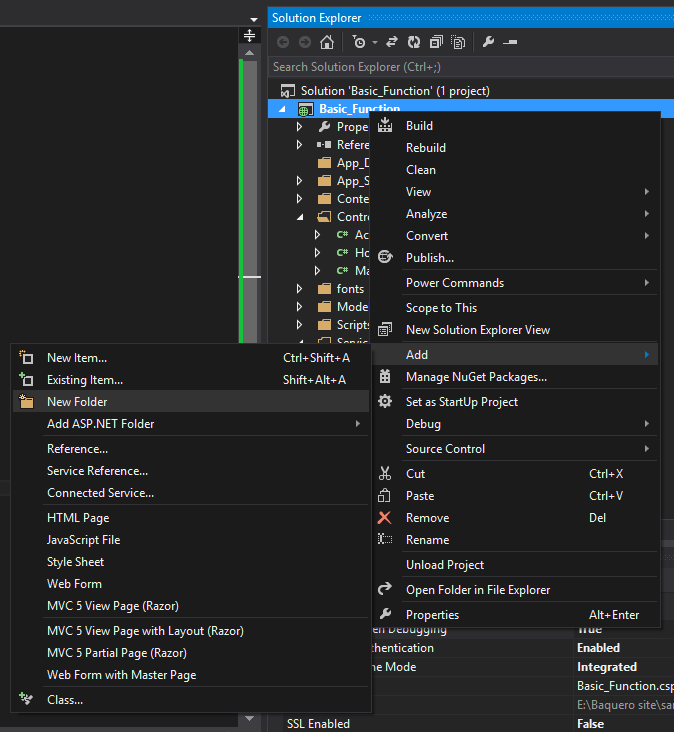
To create a folder, right-click on your project name, choose Add to show all available options, and then select New Folder. Name your folder as Service.
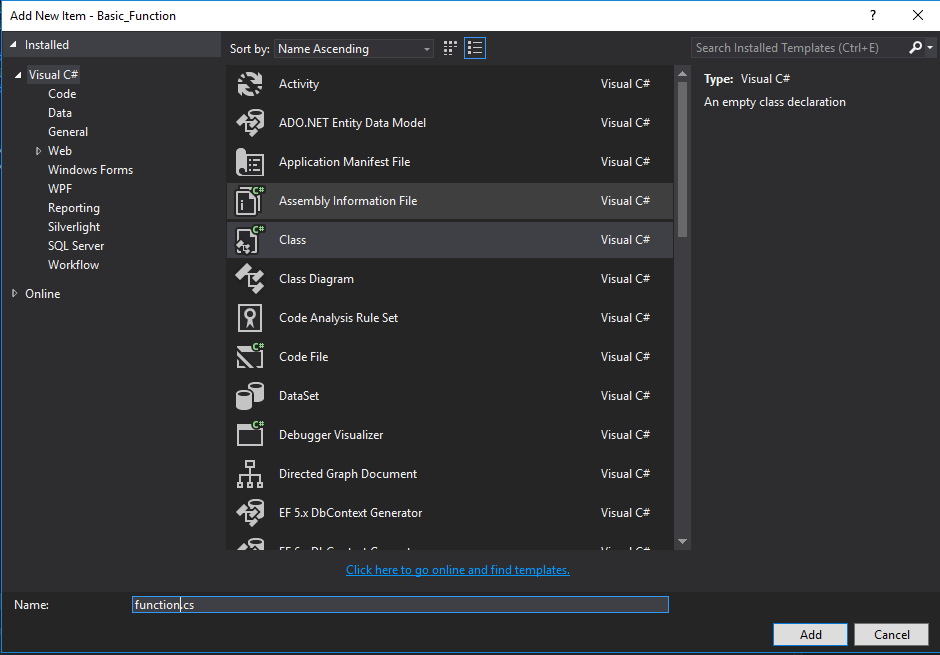
Create a new class name function.cs by right-clicking on the folder you have just created. Then Select Add and choose the class.
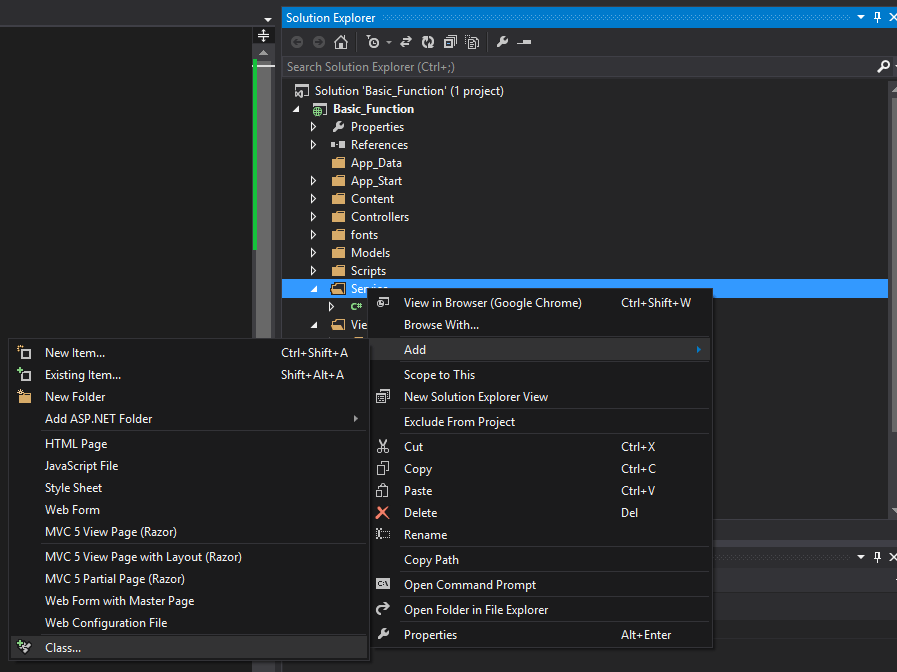
Name your class as function.cs
Open the file you have just created and copy the code below.

To manually view Database Connection string visit this blog post How to view Connection String in Visual Studio
Code:
using System;
using System.Collections.Generic;
using System.Linq;
using System.Web;
using System.Data;
using System.Data.SqlClient;

namespace Basic_Function.Service
{
    public class function
    {
        string Sqlconnection = "Data Source=PROG-RA;Initial Catalog=basicfunction;Integrated Security=True;Connect Timeout=15;Encrypt=False;TrustServerCertificate=False";
        public DataSet SelectListing()
        {
            DataSet ds = new DataSet();
            using (SqlConnection conn = new SqlConnection(Sqlconnection))
            {
                SqlCommand cmd = new SqlCommand("SelectFromTable", conn);
                SqlDataAdapter da = new SqlDataAdapter(cmd);
                da.Fill(ds);
            }
            return ds;
        }
    }
}
Note:
- SelectFromTable -> Name of Stored procedure we created from the previous tutorial. To view visit this blog Creating Stored Procedure.
3. HomeController.cs
This is the default Controller generated during the creation of the project. We will use this as our main controller for this project. Navigate to this file and copy and paste the code shown below.

Note:
- Service.function myservice = new function(); -> use to access our method from service-> function.cs class.
- Basic_Function -> Project Name
- Service -> Folder name where I created my function.cs
- function -> class Name
Code:
using Basic_Function.Service;
using Newtonsoft.Json;
using System;
using System.Collections.Generic;
using System.Data;
using System.Linq;
using System.Web;
using System.Web.Mvc;

namespace Basic_Function.Controllers
{
   public class HomeController : Controller
    {
          Basic_Function.Service.function myservice = new function();

        public ActionResult Index()
        {
           return View();
        }

        public ActionResult SelectListing()
        {
        DataSet ds = new DataSet();
        DataTable dt = new DataTable();
        ds = myservice.SelectListing();
        dt = ds.Tables[0];
        String jsonResult = JsonConvert.SerializeObject(dt);
        return Json(jsonResult, JsonRequestBehavior.AllowGet);
        }
    }
}
4. function.js
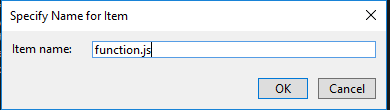
This script is used to update data to our HTML table in view. To create a script file right click on the Scripts folder, Select Add, then click on JavaScript File.
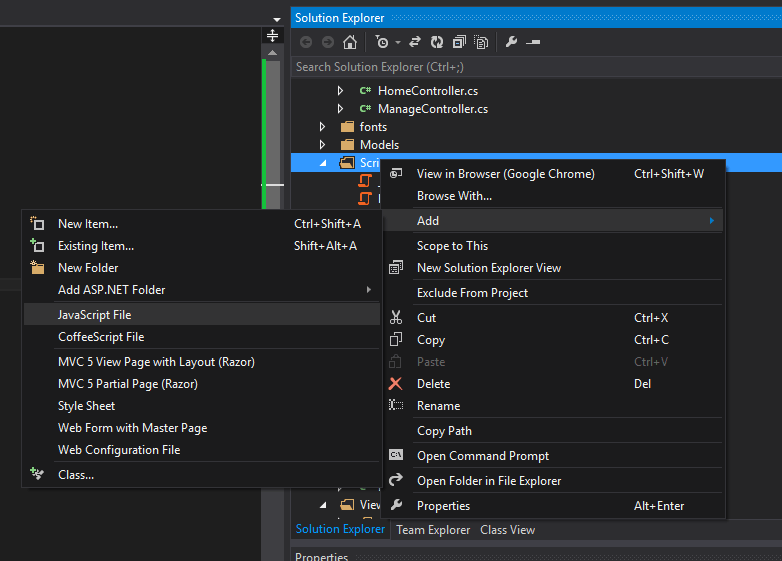
Name your script as function.js
Navigate and open your file. Copy and paste the code below.
Note: This is the route URL “/Home/SelectListing”
- Home-> Controller name
- SelectListing-> Method from HomeController
Code:
var Controller_url = { SelectListing: '/Home/SelectListing' };
$(document).ready(function () {
    var select = $(function () {
        $.ajax({
            url: Controller_url.SelectListing,  //Address to controller
            type: 'GET',
            cache: false,
            success: function (list) {
                var parse_list = JSON.parse(list);
                $("#data").html(table(parse_list)); //Fill Table from Database
            }
        });
    });
});

function table(data) // Javascript function for Table template
{
    var result = "";
    result += "      <thead>";
    result += "                      <tr>";
    result += "                          <th>itemNo</th>";
    result += "                          <th>FirstName</th>";
    result += "                          <th>LastName</th>";
    result += "                          <th>Address</th>";
    result += "                          <th>Contact Person</th>";
    result += "                          <th>Contact No.</th>";
    result += "                      </tr>";
    result += "                  </thead>";
    result += "                  <tbody>";
    for (var i = 0; i < data.length; i++) {
        result += "          <tr>";
        result += "              <td>" + (Number(i) + Number(1)) + "</td>";
        result += "              <td>" + data[i].FirstName + "</td>";
        result += "              <td>" + data[i].LastName + "</td>";
        result += "              <td>" + data[i].Address + "</td>";
        result += "              <td>" + data[i].Contact_Person + "</td>";
        result += "              <td>" + data[i].Contact_Number + "</td>";
        result += "          </tr>";
    }

    result += "";
    result += "          </tbody>";
    return result;
}
To run your project, hit the f5 button from your keyboard to run in debugging mode or hit Ctrl + f5 to run without debugging.
For more article visit my latest post. link and my bio in about page section. link