
Creating an ASP.NET MVC application with CRUD (Create, Read, Update, Delete) functionality allows you to build a dynamic web application that interacts with a database. ASP.NET MVC is a powerful framework that follows the Model-View-Controller pattern, providing a structured approach to developing web applications.
In this tutorial, we will create a fully working ASP.NET MVC web application that will interact with SQL server and manipulate data using CRUD function. Before we start please make sure to have this following application installed on your machine.
- Visual Studio » Download and install the latest version of Visual Studio, which includes the necessary templates and libraries for ASP.NET MVC development.
- .NET Framework » Ensure that you have the required version of the .NET Framework installed.
- SQL Server
I. Create a New ASP.NET MVC Project

For a detailed, step-by-step processing on creating new ASP.NET MVC you may visit this blog post:
1. Open Visual Studio and select “Create a new project.”
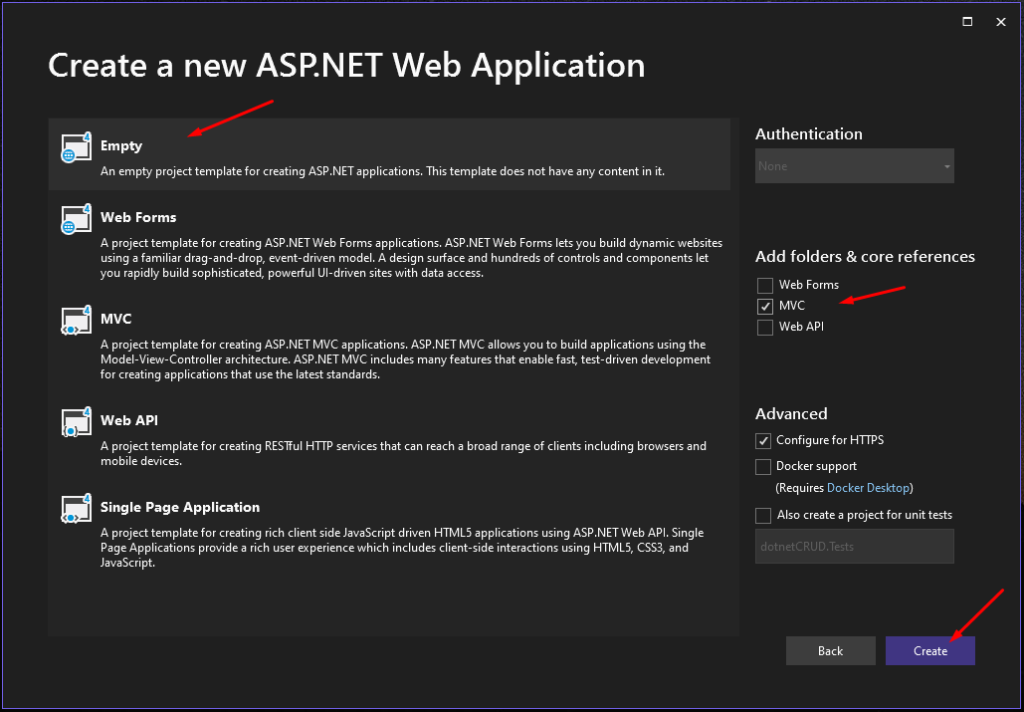
2. In the project template selection window, choose “ASP.NET Web Application.”
3. Provide a name for your project and choose a location to save it. Click “Create” to generate the project structure. In my cased I named it “dotnerCRUD”.
4. Select Empty MVC template then check the “MVC” checkbox option under “Add folder & core references”.
II. Add Nuget Package
Using an Empty MVC template will sometimes need to install the default package. To make sure of it you can check the following package if this exists on your solution.
- bootstrap 3.3.7
- Jquery 1.10.2
- Modernizr 2.6.2
If not, you can install the following, using NuGet Package Manager. Right-click solution explorer and select “Manage NuGet Packages” then search for the package you want to install.
III. Set up the Database
1. Open SQL Server Management Studio and connect to your local SQL Server.
2. Open New Query then execute the SQL command below to create a CRUDDemoDB database.
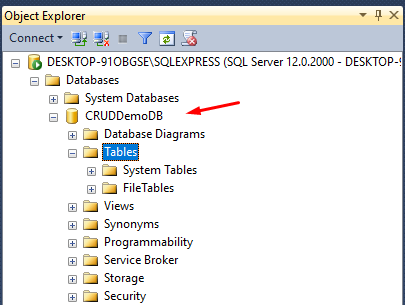
CREATE DATABASE CRUDDemoDB;3. Refresh your SQL server then look for CRUDDemoDB. This means you have create your database successfully.
4. Now, open a new SQL query again and this time we will create a “employees” table.
 USE [CRUDDemoDB]
GO

/****** Object:  Table [dbo].[employees]    Script Date: 28-May-23 9:49:05 AM ******/
SET ANSI_NULLS ON
GO
SET QUOTED_IDENTIFIER ON
GO

CREATE TABLE [dbo].[employees](
	[ID] [int] IDENTITY(1,1) NOT NULL,
	[Name] [nvarchar](50) NULL,
	[Position] [nvarchar](50) NULL
) ON [PRIMARY]
GO

Take note of your connection string because we will use it later on our ASP.NET web application. If you have no idea on the format on SQL Server connection string visit this blog post.
5. Now, going back to our ASP.NET MVC project. Open the web.config file and add your connection string. This should be placed inside <configuration> element.
	<connectionStrings>
		<add name="CRUDDemoConnection" connectionString="Data Source=SQLServer_Name;Initial Catalog=CRUDDemoDB;Integrated Security=True;Connect Timeout=30;Encrypt=False;" />
	</connectionStrings>
IV. Creating Model
Now, let’s add a model that we need for this tutorial. Which is the Employee Model. Right-click on the Models folder and select “Add” » “Class”.
    public class Employee
    {
        public int ID { get; set; }
        public string Name { get; set; }
        public string Position { get; set; }
    }
V. Creating CRUD function Class using ADO.NET
In this tutorial, we are going to use ADO.NET on connecting to a database. To do that, follow the step below.
1. Create a folder and named it “CRUDService”. We will place our CRUD class inside this folder.
2. Inside the “CRUDService” folder create a class “DBConnection” and use the code snippet below.
  public class DBConnection
    {
        public string ConnectionString { get; set; }
        public DBConnection()
        {
            ConnectionString = System.Configuration.ConfigurationManager.ConnectionStrings["CRUDDemoConnection"].ConnectionString;
        }
    }
This class will get the connection string value that we added in the previous step.
3. Create another class “Create”. This class will handle inserting a new employee record in the database.
    public class Create : DBConnection
    {
        public int AddEmployee(Employee employee)
        {
            SqlConnection conn = new SqlConnection(ConnectionString);
            string query = string.Format("INSERT INTO employees(Name,Position) VALUES('{0}','{1}')",employee.Name, employee.Position);
            SqlCommand cmd = new SqlCommand(query, conn);
            conn.Open();
            var result = cmd.ExecuteNonQuery();
            conn.Close();
            return result;
        }
    }
4. Create another class “Read”. This class will get the employee record saved in the database.
Inherit class to DBConnection to access Connection String
public class Read : DBConnectionGet all Employees:
        public List<Employee> GetEmployees()
        {
            List<Employee> employees = new List<Employee>();
            SqlConnection conn = new SqlConnection(ConnectionString);
            string query = "Select * from employees";
            SqlCommand cmd = new SqlCommand(query, conn);
            cmd.CommandType = CommandType.Text;
            conn.Open();
            using (SqlDataReader reader = cmd.ExecuteReader())
            {
                while (reader.Read())
                {
                    employees.Add(new Employee { ID = int.Parse(reader["ID"].ToString()), Name = reader["Name"].ToString(), Position = reader["Position"].ToString() });
                }
            }
            conn.Close();
            return employees;
        }
Get Employees by ID:
 public Employee GetEmployeeById(int id)
        {
            Employee employee = new Employee();
            SqlConnection conn = new SqlConnection(ConnectionString);
            string query = string.Format("Select * from employees WHERE ID = {0}",id);
            SqlCommand cmd = new SqlCommand(query, conn);
            cmd.CommandType = CommandType.Text;
            conn.Open();
            using (SqlDataReader reader = cmd.ExecuteReader())
            {
                while (reader.Read())
                {
                    employee.ID = int.Parse(reader["ID"].ToString());
                    employee.Name = reader["Name"].ToString();
                    employee.Position = reader["Position"].ToString();
                }
            }
            conn.Close();
            return employee;
        }
5. Create another class “Update” . This class will handle updating of records using ID.
    public class Update : DBConnection
    {
        public int UpdateEmployee(Employee employee)
        {
            SqlConnection conn = new SqlConnection(ConnectionString);
            string query = string.Format("UPDATE employees SET Name = '{0}', Position = '{1}' where ID = {2}", employee.Name, employee.Position,employee.ID);
            SqlCommand cmd = new SqlCommand(query, conn);
            conn.Open();
            var result = cmd.ExecuteNonQuery();
            conn.Close();
            return result;
        }
    }
6. Lastly, create class “Delete”.
   public class Delete : DBConnection
    {
        public int DeleteEmployee(int id)
        {
            SqlConnection conn = new SqlConnection(ConnectionString);
            string query = string.Format("DELETE employees where ID = {0}", id);
            SqlCommand cmd = new SqlCommand(query, conn);
            conn.Open();
            var result = cmd.ExecuteNonQuery();
            conn.Close();
            return result;
        }
    }
This time, we have just completed the CRUD function that will interact with our data in the database. The Next step would be to set up an ASP.NET MVC web application to use these classes.
VI. Creating Controllers
To create a controller,
1. right-click on the “Controllers” folder and select “Add” » “Controllers”.
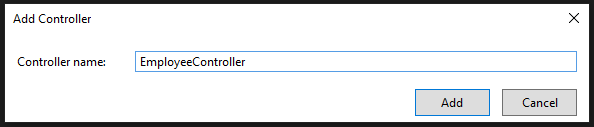
2. Choose “MVC 5 Controller – Empty” then click the “Add” button.
3. Assign name to controller. In my case it’s EmployeeController.
VII. Add CRUD class to Controller
Now, all we need is to integrate the CRUD service class that we created a while ago. To do that, use the code snippet below.
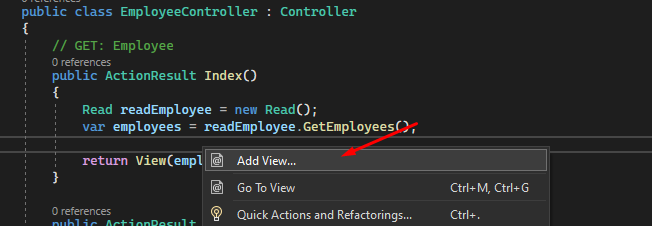
1. Open the newly created controller class “EmployeeController” then place this code in the index action.
public ActionResult Index()
        {
            Read readEmployee = new Read();
            var employees = readEmployee.GetEmployees();
            return View(employees);
        }
The code above will use the “Read” service class that we created a while ago and return the list of employees to the view.
2. Add the “Create” action method, this will return a “Create Views” and post a new employee record.
HTTPGET:
        public ActionResult Create()
        {
            return View();
        }
HTTPPOST:
        [HttpPost]
        public ActionResult Create(Employee employee)
        {
            if (ModelState.IsValid)
            {
                Create addEmployee = new Create();
                var employees = addEmployee.AddEmployee(employee);
                return RedirectToAction("Index");
            }

            return View(employee);
        }
3. Add the “Edit” action method. We also need to method for this function. A get method will return a view with employee records and a post method will process the post request for updating employee records.
HTTPGET:
        public ActionResult Edit(int id)
        {
            Read readEmployee = new Read();
            var employee = readEmployee.GetEmployeeById(id);

            return View(employee);
        }
HTTPPOST:
        [HttpPost]
        public ActionResult Edit(Employee employee)
        {
            if (ModelState.IsValid)
            {
                Update updateEmployee = new Update();
                updateEmployee.UpdateEmployee(employee);
               return RedirectToAction("Index");
            }

            return View(employee);
        }
4. We also need the “Details” action method. This will display records for selected employees.
  public ActionResult Details(int id)
        {
            Read readEmployee = new Read();
            var employee = readEmployee.GetEmployeeById(id);
            return View(employee);
        }
5. Lastly, the “Delete” action method. This will delete the records on the selected employee id.
  public ActionResult Delete(int id)
        {
            Delete deleteEmployee = new Delete();
            deleteEmployee.DeleteEmployee(id);
            return RedirectToAction("Index");
        }
VIII. Creating the Views
We have all the CRUD action methods in place. The last thing we must do is create a View or UI to display our data to our users. Luckily this is made easier in Visual Studio, follow the steps below.
Below are the views needed in this tutorial.
- Display List of Employee » Index method
- Create Employee Forms » Create method
- View Employee Details » Details method
- Edit employee form » Edit method
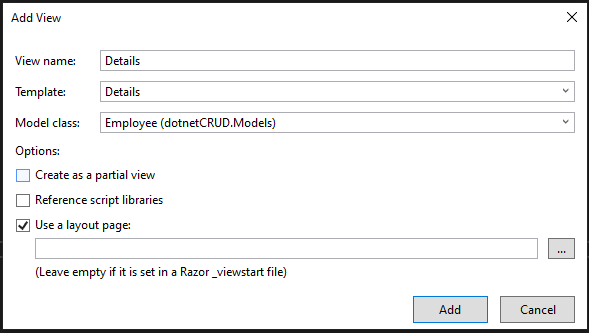
1. Move back to your EmployeeController, Right-click on the “Index” action method then select “Add View”
2. Select MVC 5 View then click the “Add” button
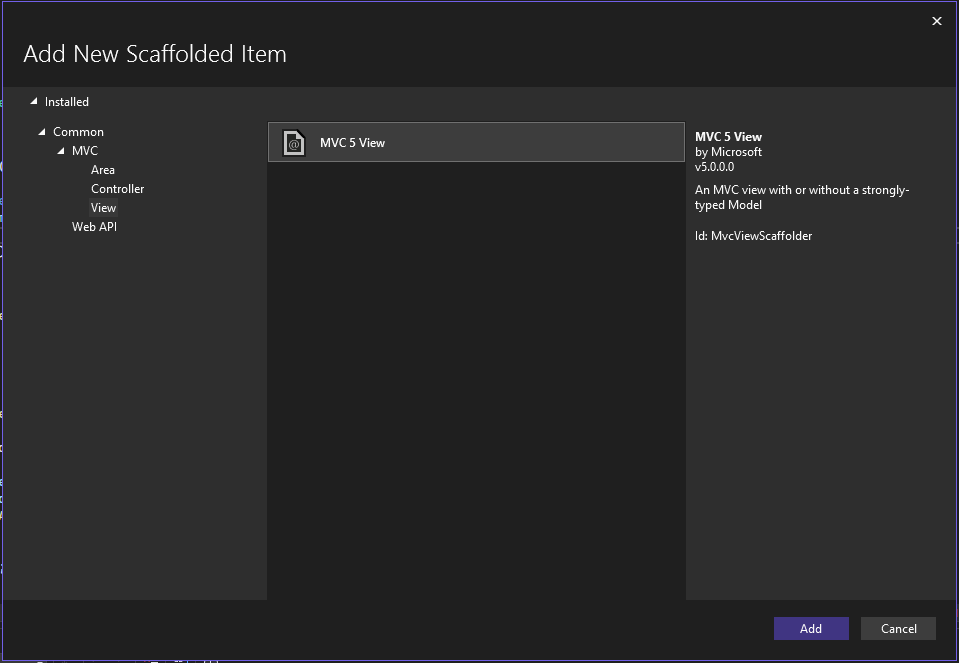
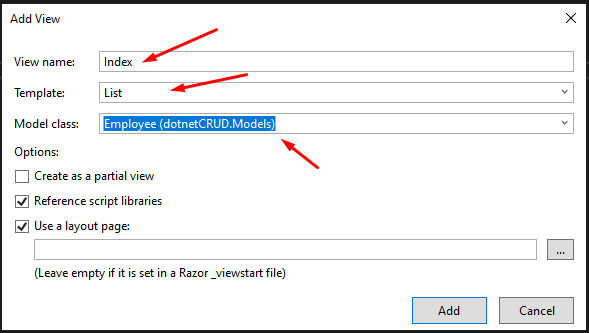
3. Choose the appropriate template for Index and click the “Add” button to generate the view.
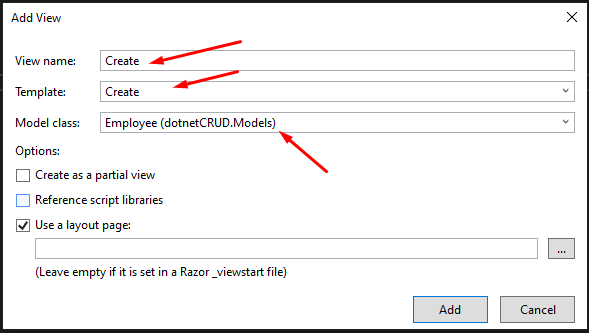
4. Just repeat the process above for creating views for the “Create” action method and use the “Create” template.
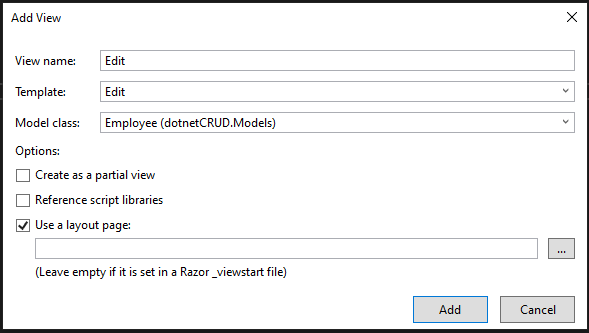
5. Same goes with the “Edit” action method and using the “Edit” template
6. Use the Details template for the “Details” action method.
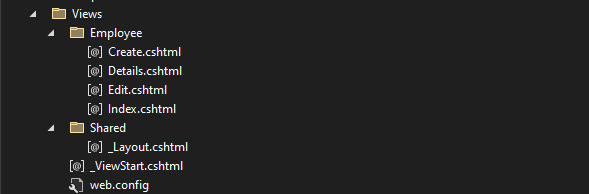
You can modify the generated view depending on your requirements but for this tutorial, we are not going to change anything. Verify the views by going to the “Views” folder and it should be under the “Employee” folder.
IV. Configure ASP.NET MVC Route
The default route for MVC is set to “Home/Index”, which will not work in our case since we use a newly created controller EmployeeController. To change the setting navigate to the “App_Start” folder and open RouteConfig.cs then replace the controller name.
         public static void RegisterRoutes(RouteCollection routes)
        {
            routes.IgnoreRoute("{resource}.axd/{*pathInfo}");

            routes.MapRoute(
                name: "Default",
                url: "{controller}/{action}/{id}",
                defaults: new { controller = "Employee", action = "Index", id = UrlParameter.Optional }
            );
        }
Source Code
You can download source code from GitHub @coderbugzz
Test the Application
Press “F5” or click on the “Start” button to run your ASP.NET MVC application. This will launch the application in your default web browser.
Congratulations! You have successfully created an ASP.NET MVC application with CRUD functionality.
Summary
In this article, we have implemented a basic ASP.NET MVC application with CRUD functionality. I hope that I demonstrated it clearly and hopefully this can help you on your coding journey. Thank you for reading. Keep Coding!