Flutter is Google’s portable UI toolkit for crafting beautiful, natively compiled applications for mobile, web, and flutter desktop from a single codebase. Flutter is free and open-source, and it is utilized by developers and organizations all over the world. Dart, a client-optimized language for fast apps on any platform, is the language used to create Flutter.
- I. Creating a New Flutter Project
- II. Building the UI for login, registration, and home screens
- III. Setting the up SQLite DB
- IV. Implementing the Login Functionality
- V. Implementing the Registration Functionality
- VI. Persisting the database
- VII. Storing the login state using Shared Preferences
- VIII. Creating Database Helper for maintainability
- IX. Building the Windows application
- X. Customizing the application’s icon
- XI. Source Code
In this tutorial, you will learn how to build a login App in flutter desktop using the SQLite database. This tutorial assumes you have prior knowledge of Dart and Flutter. This tutorial will work on Windows, MacOS, and Linux computers but a Windows computer is required to build the Windows app. To begin, make sure you have the following:
- A Windows device that has Flutter installed. You can follow the directions in the flutter desktop manual, which is located at https://docs.flutter.dev/get-started/install/windows, to install Flutter on your Windows device.
- A code editor. You may use Visual Studio Code (VS Code) or Android Studio as your editor but this tutorial uses VS Code; and
- A basic understanding of Dart, Flutter, and SQLite.
Overview:
Watch the video on Building a Windows App with Flutter Desktop here.
Without further ado, let’s start building!
I. Creating a New Flutter Project
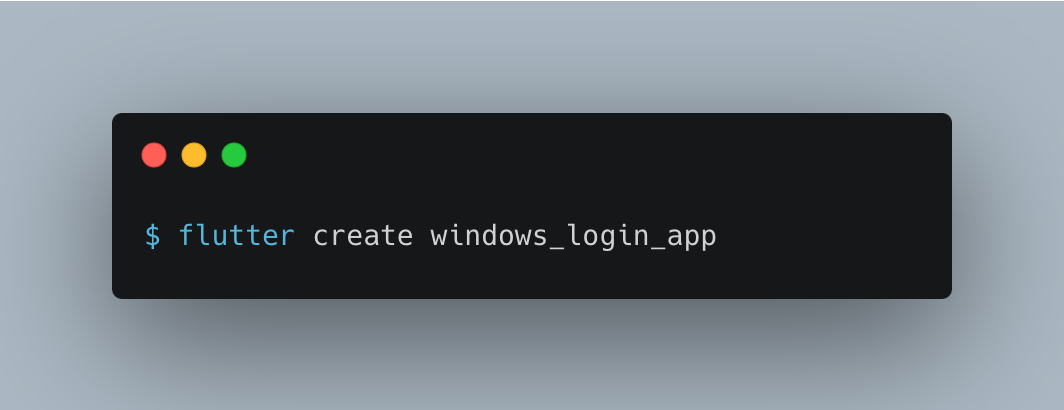
1. To create a new Flutter project, open the command prompt or Windows Powershell, type the following code and press enter. An Internet connection is required when creating a project. This command will create a folder in the directory you executed the command named “windows_login_app” or whatever you called your application.
2. Open the project folder in your preferred code editor. When working with a Flutter project, the most important folder to pay attention to is the lib folder where the entry point for every project can be found, the main.dart. This is where all your Dart code will go.
3. Open lib/main.dart.
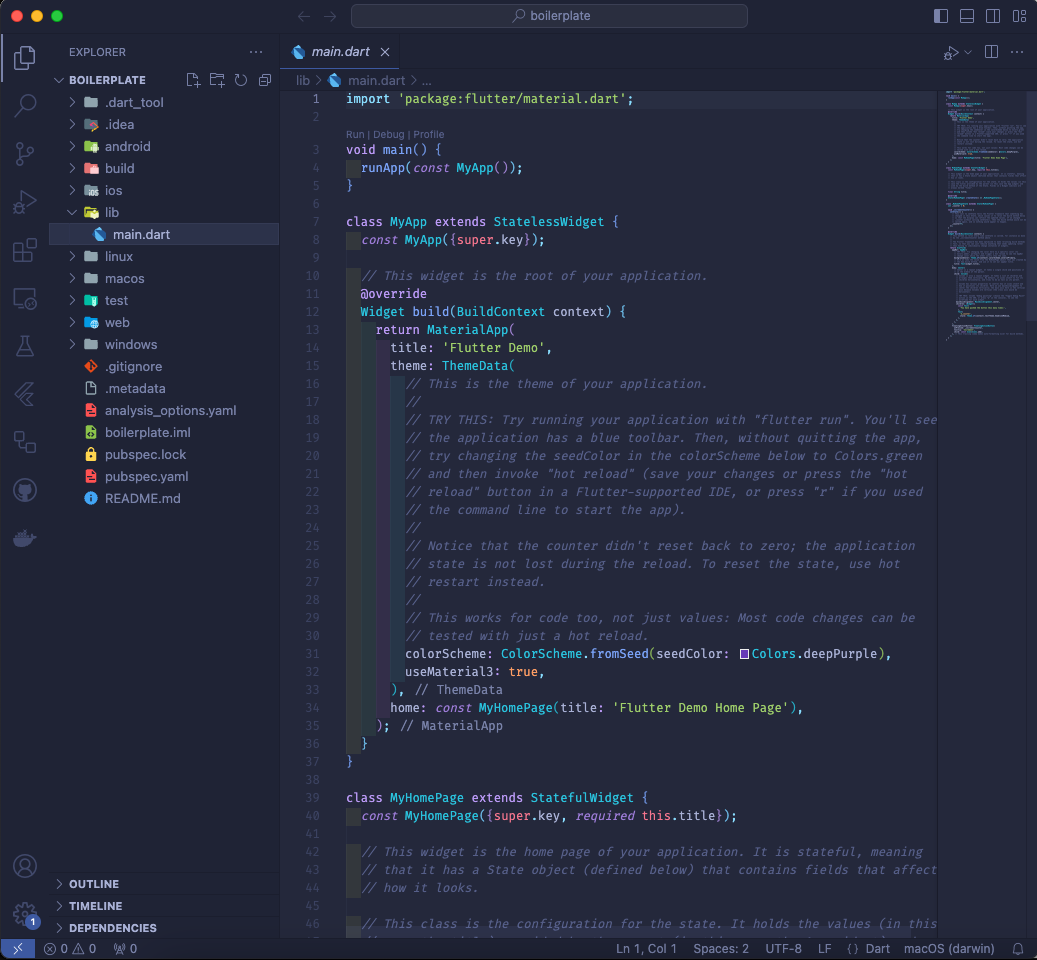
Figure . The Flutter Project boilerplate code.
4. Examine the contents of the main.dart file. You will see that a boilerplate code has been provided. The current code in the widget MyApp creates a simple Flutter application that has an AppBar, a text in the center of the screen, and a floating action button that increments the value of the text.
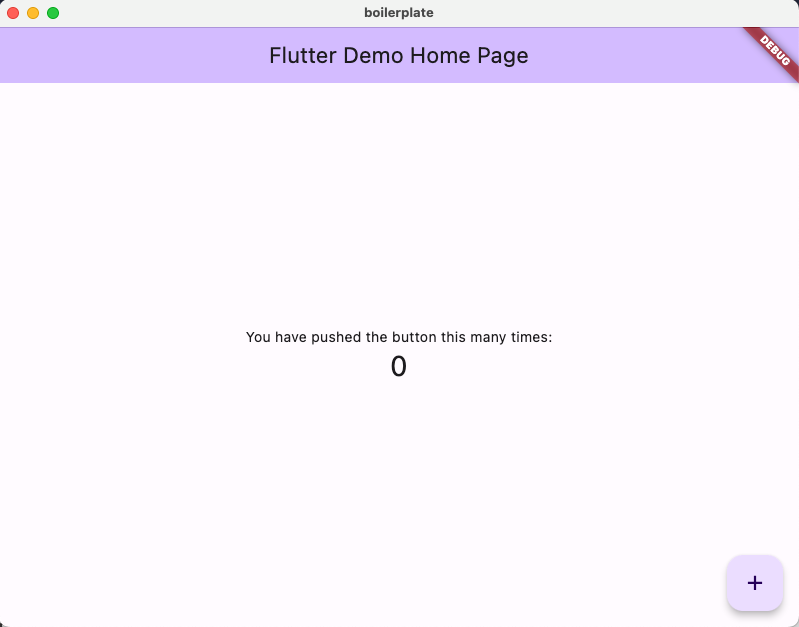
Figure. The initial Flutter project.
5. To ensure that your setup is working, open the Run and Debug tab(Ctrl+Shift + t) on Visual Studio Code. Then, click the Run and Debug button to run and debug your application. See the image below.
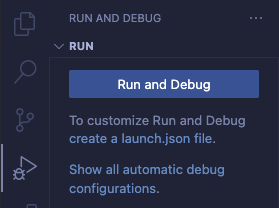
Figure. Run and debug feature of VS Code.
After confirming that this step is successful, you may proceed with the next steps by building the user interface.
II. Building the UI for login, registration, and home screens
To effectively demonstrate how we can create a simple Windows app powered by a SQLite database, you will create three screens for the application: the login screen, the register screen, and the home screen.
The login screen will have a username and password TextFormField and two buttons for login and navigating to the register screen. The register screen will have the same contents as the login screen except for the addition of another TextFormField for the user’s name. Lastly, the home screen displays the text “Welcome to Flutter!” and a logout button.
Let’s get started.
1. We will begin by cleaning up the existing boilerplate code. The remaining codes should look as follows after removing all the codes from the main.dart:
import 'package:flutter/material.dart';

void main() async {

  runApp(const MyApp());
}
class MyApp extends StatelessWidget {
  const MyApp({super.key});
@override
  Widget build(BuildContext context) {
      return MaterialApp(
   // hidet the debug banner shown at the top right of the screen
      debugShowCheckedModeBanner: false,
      title: 'Windows Login with SQLite DB',
      theme: ThemeData(
        colorScheme: ColorScheme.fromSeed(seedColor: Colors.deepPurple),
        useMaterial3: true,
      );
   }
}
2. Create a folder called screens inside of the lib folder. Create three files and name them login_screen.dart, register_screen.dart, and home_screen.dart. While there are no rules in naming dart files, prefixing “_screen” to the filename, makes it easier for you to have an idea of the contents of the file without opening them.
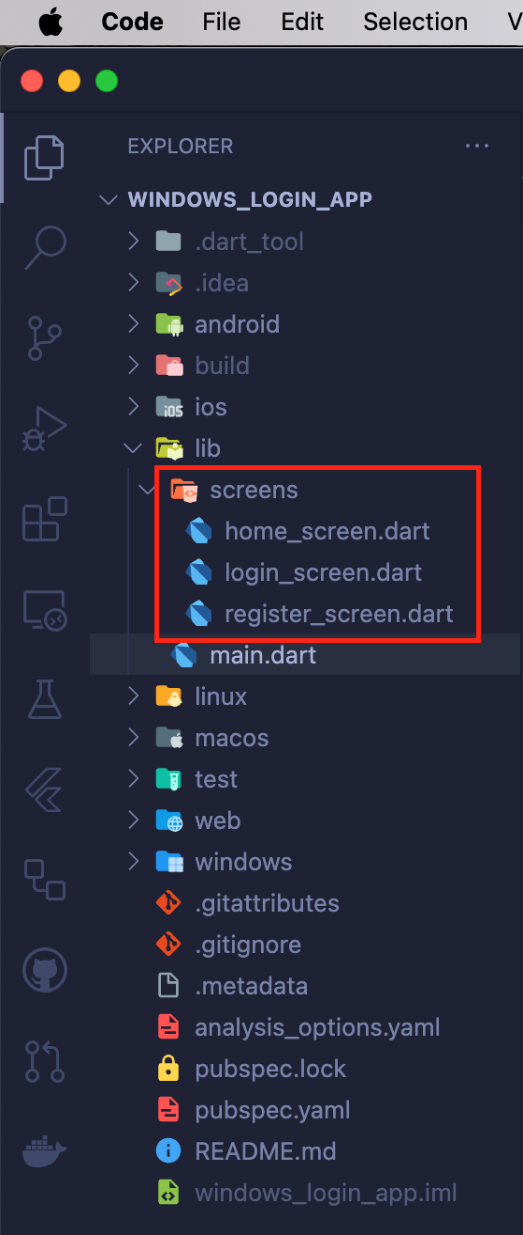
Figure. Created files for screens
3. Open login_screen.dart, and type in the codes as shown below:
import 'package:flutter/material.dart';
import 'package:windows_login_app/screens/home_screen.dart';
import 'package:windows_login_app/screens/register_screen.dart';

class LoginScreen extends StatefulWidget {
  const LoginScreen({super.key});

  @override
  State<LoginScreen> createState() => _LoginScreenState();
}

class _LoginScreenState extends State<LoginScreen> {
  @override
  Widget build(BuildContext context) {
    return Scaffold(
      body: Center(
        child: Container(
          decoration: BoxDecoration(
            border: Border.all(
              color: Colors.deepPurple,
            ),
            borderRadius: BorderRadius.circular(24),
          ),
          width: 400,
          child: Padding(
            padding: const EdgeInsets.all(24.0),
            child: Column(
              mainAxisSize: MainAxisSize.min,
              crossAxisAlignment: CrossAxisAlignment.center,
              children: [
                Text(
                  'Login to your Account',
                  style: Theme.of(context).textTheme.headlineMedium,
                ),
                const SizedBox(
                  height: 48,
                ),
                // Username
                TextFormField(
                  decoration: InputDecoration(
                    hintText: 'Username',
                    prefixIcon: const Icon(Icons.alternate_email),
                    border: OutlineInputBorder(
                      borderRadius: BorderRadius.circular(8.0),
                    ),
                  ),
                ),
                const SizedBox(
                  height: 24,
                ),
                // Password
                TextFormField(
                  decoration: InputDecoration(
                    hintText: 'Password',
                    prefixIcon: const Icon(Icons.key),
                    border: OutlineInputBorder(
                      borderRadius: BorderRadius.circular(8.0),
                    ),
                  ),
                  obscureText: true,
                ),
                const SizedBox(
                  height: 48,
                ),
                // Login button
                SizedBox(
                  height: 48,
                  width: double.infinity,
                  child: FilledButton(
                    style: FilledButton.styleFrom(
                      shape: RoundedRectangleBorder(
                        borderRadius: BorderRadius.circular(8.0),
                      ),
                    ),
                    onPressed: () {
                      Navigator.of(context).push(MaterialPageRoute(
                          builder: (context) => const HomeScreen()));
                    },
                    child: const Text('LOGIN'),
                  ),
                ),
                const SizedBox(
                  height: 48,
                ),
                SizedBox(
                  height: 48,
                  width: double.infinity,
                  child: TextButton(
                    style: FilledButton.styleFrom(
                      shape: RoundedRectangleBorder(
                        borderRadius: BorderRadius.circular(8.0),
                      ),
                    ),
                    onPressed: () {
                      //
                      Navigator.of(context).push(MaterialPageRoute(
                          builder: (context) => const RegisterScreen()));
                    },
                    child: const Text('Create Account'),
                  ),
                ),
              ],
            ),
          ),
        ),
      ),
    );
  }
}
This code will produce the following user interface. For now, we are setting the onPressed property of the login button to navigate to the home button. We will implement the login logic later.
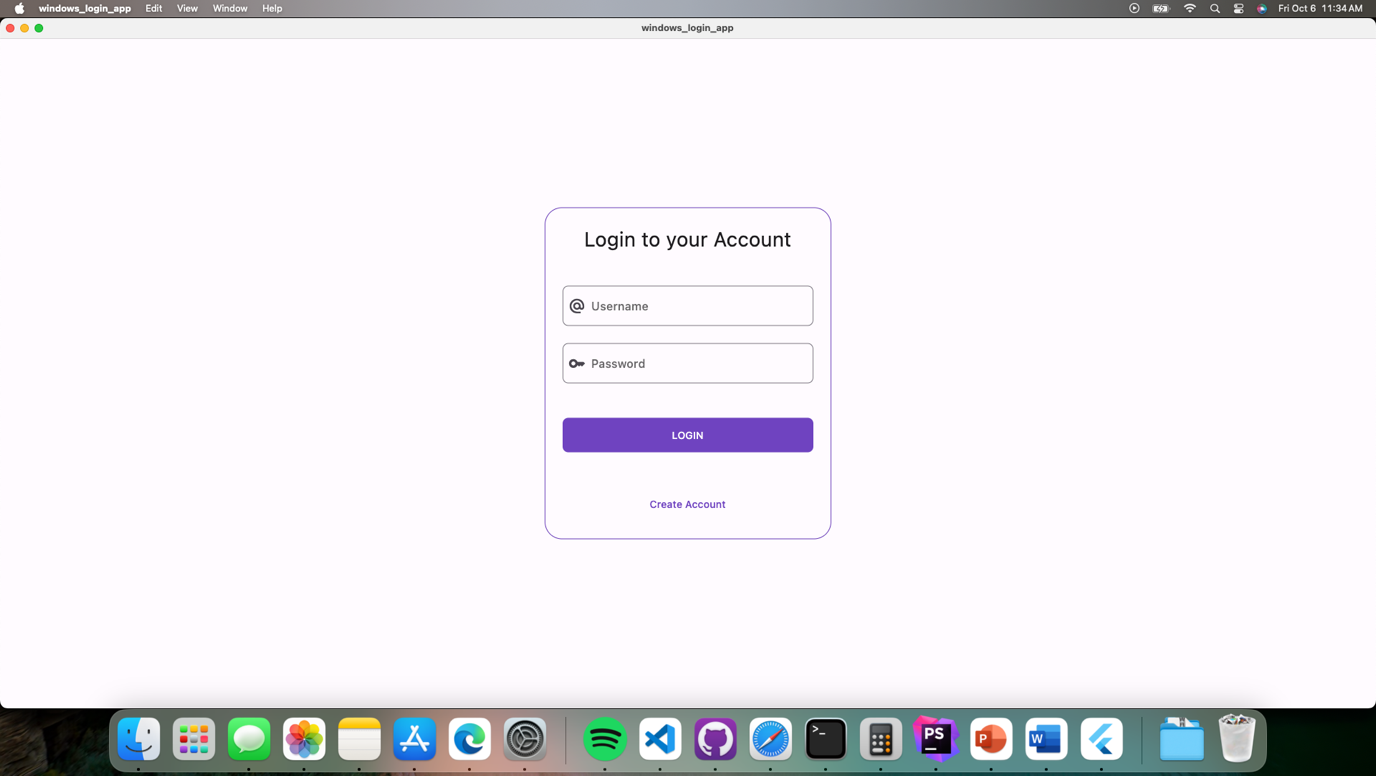
Figure. The login screen
4. Open register_screen.dart, and type in the codes as shown below:
import 'package:flutter/material.dart';
import 'package:windows_login_app/screens/login_screen.dart';

class RegisterScreen extends StatefulWidget {
  const RegisterScreen({super.key});

  @override
  State<RegisterScreen> createState() => _RegisterScreenState();
}

class _RegisterScreenState extends State<RegisterScreen> {
  @override
  Widget build(BuildContext context) {
    return Scaffold(
      body: Center(
        child: Container(
          decoration: BoxDecoration(
            border: Border.all(
              color: Colors.deepPurple,
            ),
            borderRadius: BorderRadius.circular(24),
          ),
          width: 400,
          child: Padding(
            padding: const EdgeInsets.all(24.0),
            child: Column(
              mainAxisSize: MainAxisSize.min,
              crossAxisAlignment: CrossAxisAlignment.center,
              children: [
                Text(
                  'Register a New Account',
                  style: Theme.of(context).textTheme.headlineMedium,
                ),
                const SizedBox(
                  height: 48,
                ),

                // User's name
                TextFormField(
                  decoration: InputDecoration(
                    hintText: 'Your name',
                    prefixIcon: const Icon(Icons.person),
                    border: OutlineInputBorder(
                      borderRadius: BorderRadius.circular(8.0),
                    ),
                  ),
                ),
                const SizedBox(
                  height: 24,
                ),

                // Username
                TextFormField(
                  decoration: InputDecoration(
                    hintText: 'Username',
                    prefixIcon: const Icon(Icons.alternate_email),
                    border: OutlineInputBorder(
                      borderRadius: BorderRadius.circular(8.0),
                    ),
                  ),
                ),
                const SizedBox(
                  height: 24,
                ),

                // Password
                TextFormField(
                  decoration: InputDecoration(
                    hintText: 'Password',
                    prefixIcon: const Icon(Icons.key),
                    border: OutlineInputBorder(
                      borderRadius: BorderRadius.circular(8.0),
                    ),
                  ),
                  obscureText: true,
                ),
                const SizedBox(
                  height: 48,
                ),

                // Register
                SizedBox(
                  height: 48,
                  width: double.infinity,
                  child: FilledButton(
                    style: FilledButton.styleFrom(
                      shape: RoundedRectangleBorder(
                        borderRadius: BorderRadius.circular(8.0),
                      ),
                    ),
                    onPressed: () {
                      Navigator.of(context).push(MaterialPageRoute(
                          builder: (context) => const LoginScreen()));
                    },
                    child: const Text('REGISTER'),
                  ),
                ),
                const SizedBox(
                  height: 48,
                ),

                // Back to login
                SizedBox(
                  height: 48,
                  width: double.infinity,
                  child: TextButton(
                    style: FilledButton.styleFrom(
                      shape: RoundedRectangleBorder(
                        borderRadius: BorderRadius.circular(8.0),
                      ),
                    ),
                    onPressed: () {
                      //
                      Navigator.of(context).push(MaterialPageRoute(
                          builder: (context) => const LoginScreen()));
                    },
                    child: const Text('Back to login'),
                  ),
                ),
              ],
            ),
          ),
        ),
      ),
    );
  }
}
This code produces the following user interface. Like the login button, we are only navigating back to the login screen when we click the register button here.

Figure. The registration screen
5. Open home_screen.dart, and type in the codes as shown below:
import 'package:flutter/material.dart';
import 'package:windows_login_app/screens/login_screen.dart';

class HomeScreen extends StatelessWidget {
  const HomeScreen({super.key});

  @override
  Widget build(BuildContext context) {
    return Scaffold(
      appBar: AppBar(
        title: const Text(
          'Home',
          style: TextStyle(
            color: Colors.white,
          ),
        ),
        backgroundColor: Theme.of(context).primaryColor,
        actions: [
          // logout button
          IconButton(
            onPressed: () {
              Navigator.of(context).pushAndRemoveUntil(
                MaterialPageRoute(
                  builder: (context) => const LoginScreen(),
                ),
                (route) => false,
              );
            },
            icon: const Icon(
              Icons.exit_to_app,
              color: Colors.white,
            ),
          ),
        ],
      ),
      body: Center(
        child: Text(
          'Welcome to Flutter!',
          style: Theme.of(context).textTheme.bodyLarge,
        ),
      ),
    );
  }
}
This produces the following user interface. The logout button currently navigates only to the login screen.
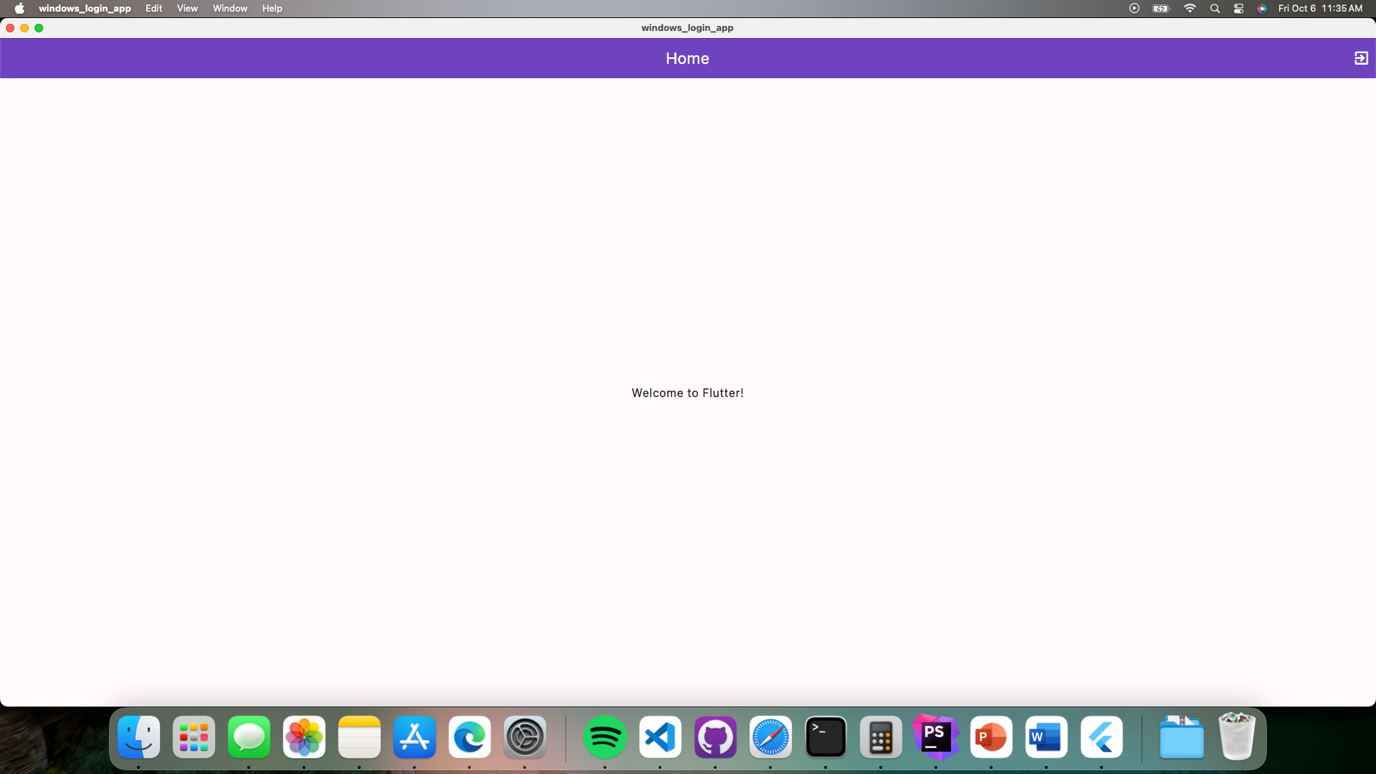
Figure. The home screen
6. Lastly, define a routes property inside your root widget (MyApp) and define the path that navigates to the specific screen. Set the initialRoute to the login screen.
import 'package:flutter/material.dart';

import 'package:windows_login_app/screens/home_screen.dart';
import 'package:windows_login_app/screens/login_screen.dart';
import 'package:windows_login_app/screens/register_screen.dart';


void main() async {
  runApp(const MyApp());
}

class MyApp extends StatelessWidget {
  const MyApp({super.key});

  @override
  Widget build(BuildContext context) {
    return MaterialApp(
      // hidet the debug banner shown at the top right of the screen
      debugShowCheckedModeBanner: false,
      title: 'Windows Login with SQLite DB',
      theme: ThemeData(
        colorScheme: ColorScheme.fromSeed(seedColor: Colors.deepPurple),
        useMaterial3: true,
      ),

      // when the application loads, show the login screen if the user is not logged in
      // else show home
      initialRoute:'/login',

      // define the routes for login and home screen
      routes: {
        '/register': (context) => const RegisterScreen(),
        '/login': (context) => const LoginScreen(),
        '/': (context) => const HomeScreen(),
      },
    );
  }
}
Building user interfaces in Flutter is made easy through its widgets. Currently, there are 14 different categories of widgets. Visit the Widget index in the Flutter docs to discover more about widgets.(https://docs.flutter.dev/reference/widgets).
The codes above only prepare the user interface that the user will interact with the application. To get the application to work, you will need a working database to store and retrieve the user’s information. In the next step, you will install the SQLite package for Windows.
III. Setting the up SQLite DB
To get SQLite to work in your application, you must find a package that supports its functionality in the selected platform, in this case, Windows.
1. To do so, go to pub.dev and search for SQLite packages. Ensure that the package you will use has Windows in the supported Platform.
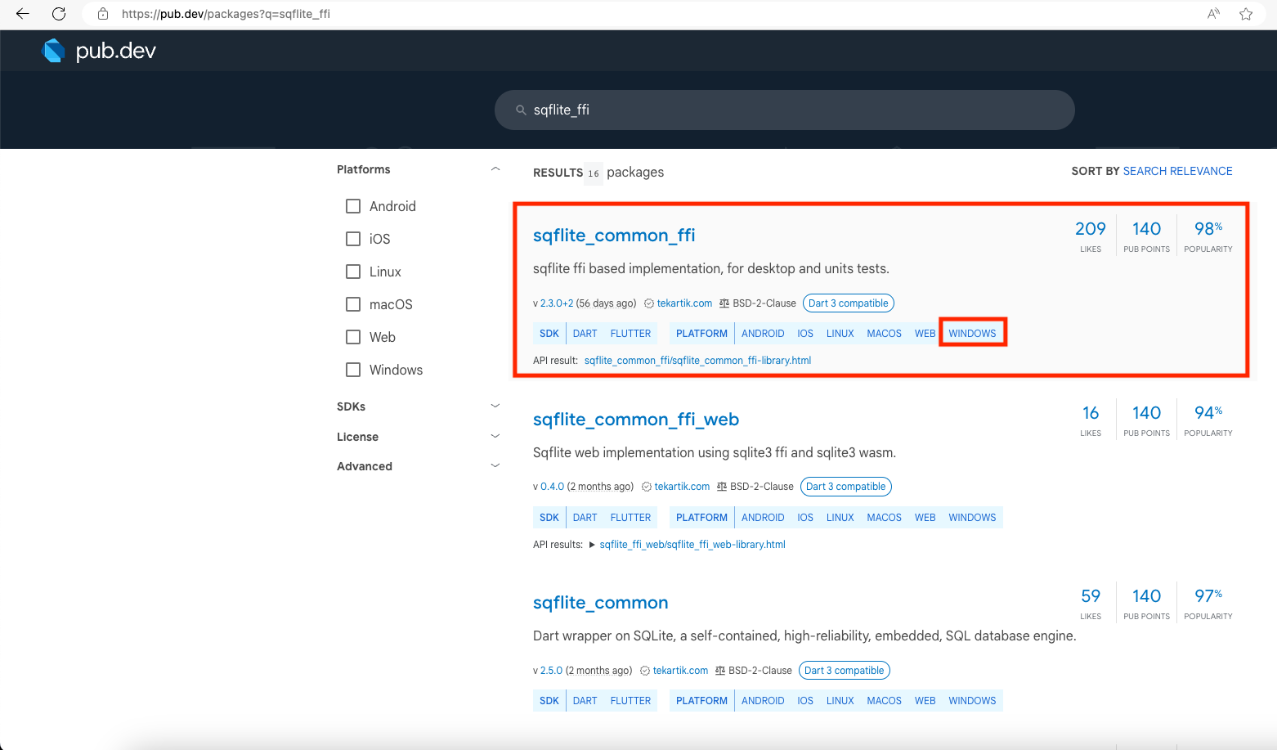
Based on the search result, sqflite_common_ffi seems to be the package for SQLite that supports the Windows platform. The most popular SQLite package does not support Windows.
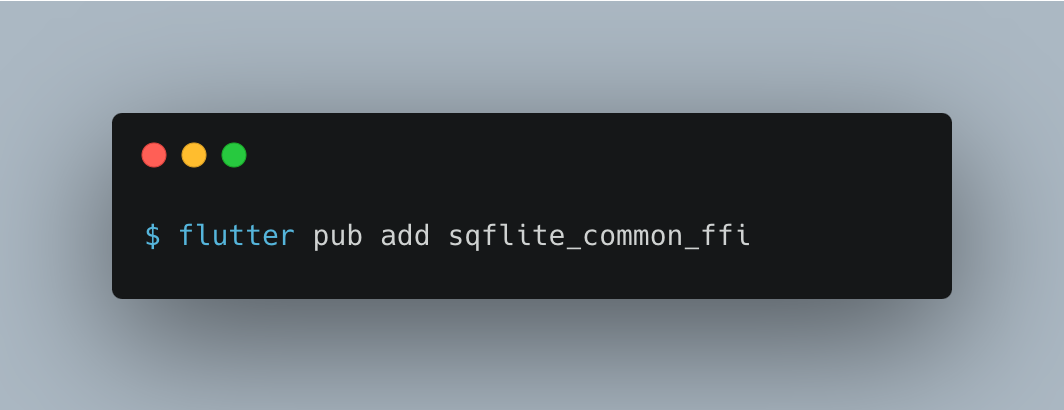
2. To install, run the following code in the command prompt/Powershell in the root of your project directory:
3. Once installed, import it in the main.dart file and initialize the database. Update your main.dart file to the following code snippet:
import 'package:flutter/material.dart';
import 'package:sqflite_common_ffi/sqflite_ffi.dart';
import 'package:windows_login_app/screens/home_screen.dart';
import 'package:windows_login_app/screens/login_screen.dart';
import 'package:windows_login_app/screens/register_screen.dart';
/// create a reference for the sqlite database that
/// we can refer to in other parts of the app
late Database db;
void main() async {
// need to be called when initializing the app asynchronously
WidgetsFlutterBinding.ensureInitialized();
// initialize the ffi loader
sqfliteFfiInit();
// create a database in-memory
// no file will be created
db = await databaseFactoryFfi.openDatabase(inMemoryDatabasePath);
// create a users table where we will store the credentials of the user
await db.execute('''
CREATE TABLE IF NOT EXISTS users (
id INTEGER PRIMARY KEY,
name TEXT,
username TEXT NOT NULL UNIQUE,
password TEXT NOT NULL
)
''');
// insert sample record
await db.insert('users', <String, Object?>{
'name': 'Windows User',
'username': 'user',
'password': 'password',
});
// retrieve the created record
var result = await db.query('users');
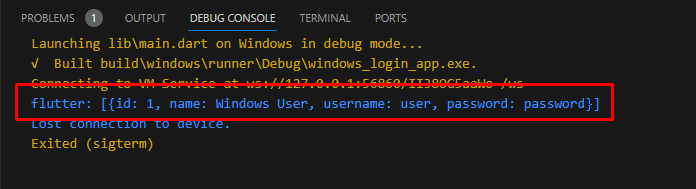
// this should print the text in the debug console
// flutter: [{id: 1, name: Windows User, username: user, password: password}]
print(result);
// close the database after creating
await db.close();
runApp(const MyApp());
}Since SQLite requires asynchronous initialization, the main function needs to be converted into an asynchronous function by adding the async keyword. WidgetsFlutterBinding.ensureInitialized() needs to be called before any other asynchronous functions inside the main. sqfliteFFiInit() is used to initialize the file loader.
4. Next, we define and open the database using the databaseFactory.openDatabase(inMemoryDatabasePath) and store it to the db variable defined before the main function. This will make the db variable available to be imported to other files in the project.
The rest of the code is to ensure that the SQLite setup is working by creating a table and inserting and retrieving methods.
5. Run your application and check for the result printed in the Debug console, that way, you can be sure that your setup is correct.
For now, it is enough to use the inMemoryDatabasePath for testing the setup since persisting the database requires more packages and more configuration.
IV. Implementing the Login Functionality
1. In this next step, the login functionality will be implemented. Copy the code below to the body of the _LoginScreenState.
// create controllers for the TextFormField to capture user inputs
final TextEditingController _usernameController = TextEditingController();
final TextEditingController _passwordController = TextEditingController();

  @override
  void dispose() {
    // dispose of the controllers before the widget is disposed
    // to prevent memory leaks
    _usernameController.dispose();
    _passwordController.dispose();

    super.dispose();
  }
This defines controllers that we can assign to the respective TextFormField which is done by assigning the variables to the controller property. To avoid memory leaks, the controllers need to be disposed of before the widget is destroyed.
2. Below is the code snippet that defines a controller for Username TextFormfield:
 TextFormField(
                  controller: _usernameController,
                  decoration: InputDecoration(
                    hintText: 'Username',
                    prefixIcon: const Icon(Icons.alternate_email),
                    border: OutlineInputBorder(
                      borderRadius: BorderRadius.circular(8.0),
                    ),
                  ),
                ),
3. Below is the code snippet that defines a controller for Password TextFormfield:
TextFormField(
                  controller: _passwordController,
                  decoration: InputDecoration(
                    hintText: 'Password',
                    prefixIcon: const Icon(Icons.key),
                    border: OutlineInputBorder(
                      borderRadius: BorderRadius.circular(8.0),
                    ),
                  ),
                  obscureText: true,
                ),
4. Next, create a function called _login which will call the login function, and copy the code below. The login function first assigns the value of the controllers to their respective variables.
5. Then, a user is retrieved from the database using the query function. Since the login function is asynchronous, it should be checked whether the context is still mounted or not. If it’s not, the function will throw an error.
6. Lastly, the value of the user is checked if a user was found. If it does, a Snackbar is shown to the user informing that the username and password matched a record in the database and the application navigates to the home screen. If not, a Snackbar showing that no user was found is shown instead.
Future<void> _login() async {
    final username = _usernameController.text;
    final password = _passwordController.text;

    final user = await db.query(
      'users',
      where: 'username = ? AND password=?',
      whereArgs: [
        username,
        password,
      ],
    );

    if (!context.mounted) return;

    // provide feedback to the user on whether the query succeeded or failed
    if (user.isNotEmpty) {
      // User found, login successful
      ScaffoldMessenger.of(context).showSnackBar(const SnackBar(
        content: Text('Login successful!'),
        backgroundColor: Colors.green,
      ));

      // This code will replace the current route with the new HomeScreen
      // and remove all routes on top of it from the navigation stack.
      // This will prevent the user from clicking back button
      Navigator.of(context).pushAndRemoveUntil(
          MaterialPageRoute(builder: (context) => const HomeScreen()),
          (route) => false);
    } else {
      // User not found or incorrect password
      ScaffoldMessenger.of(context).showSnackBar(const SnackBar(
        content: Text('Incorrect username or password!'),
        backgroundColor: Colors.red,
      ));
    }
  }
You now have a simple working login system. In the next step, you will learn how to register a new user.
V. Implementing the Registration Functionality
In the last step, you could use the login function through a default user added during the creation of the user’s table. In this step, the user will be allowed to create a new account that can be used to log in.
1. Open the registration_screen.dart and copy the code below.
final TextEditingController _nameController = TextEditingController();
final TextEditingController _usernameController = TextEditingController();
final TextEditingController _passwordController = TextEditingController();

  @override
  void dispose() {
    // ensure that the controllers are disposed off
    // to prevent memory leaks
    _nameController.dispose();
    _usernameController.dispose();
    _passwordController.dispose();

    super.dispose();
  }
The code is quite similar to the login_screen.dart except for the addition of the _nameController. Assign the respective controllers to the TextFormFields.
2. Next, define a register function, and copy the code below.
Future<void> _register() async {
    // store the values of controllers into variables for easy reference
    final name = _nameController.text;
    final username = _usernameController.text;
    final password = _passwordController.text;

    // result returns the ID of the latest inserted record
    int result = await db.insert(
      'users',
      <String, Object?>{
        'name': name,
        'username': username,
        'password': password
      },
      conflictAlgorithm: ConflictAlgorithm.replace,
    );

    if (!context.mounted) return;

    if (result > 0) {
      //
      // User found, login successful
      ScaffoldMessenger.of(context).showSnackBar(const SnackBar(
        content: Text('Successfully registered user!'),
        backgroundColor: Colors.green,
      ));

      // Navigate back to login screen so the user can test
      // the new account created
      Navigator.of(context).pushAndRemoveUntil(
          MaterialPageRoute(builder: (context) => const LoginScreen()),
          (route) => false);
    } else {
      //
      ScaffoldMessenger.of(context).showSnackBar(const SnackBar(
        content: Text('Failed to register user!'),
        backgroundColor: Colors.red,
      ));
    }
  }
If you noticed, the codes are quite similar to the login function, but this time the insert function is used. The conflictAlgorithm is important because this is how SQLite will resolve issues in the database operation.
In this insert transaction, if a similar record is found in the database, that record will be replaced with the incoming values.
3. Lastly, we display feedback to the user and go back to the login screen upon successful registration.
VI. Persisting the database
By now, you may have noticed that if you stop your application and restart it, the records you created through the register functionality are no longer present in the database. This is because you were using the inMemoryDatabasePath when you opened the database. As the variable name suggests, the inMemoryDatabasePath stores the data in memory, and so, once the application is restarted, the memory is cleared. Thus, you lose the existing data.
To persist the database, you need to create a file to store the data.
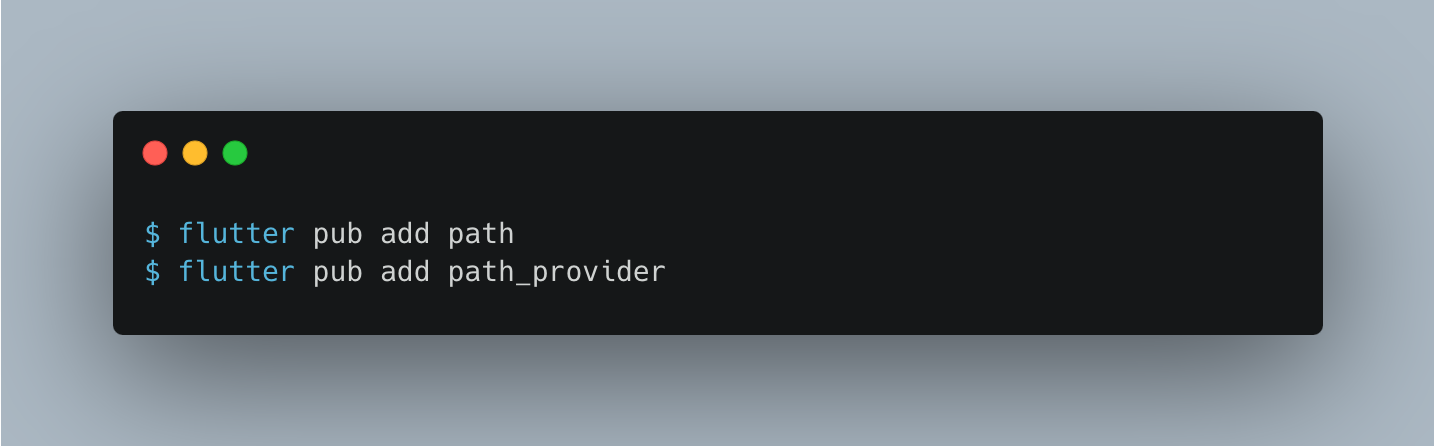
1. To do this, install the path and path_provider packages:
2. In the main.dart, define a file path that will serve as the destination for the database. Copy the code below and import the necessary packages above the file using the code below.
import 'dart:io' as io;
import 'package:path/path.dart' as p;
import 'package:path_provider/path_provider.dart';
3. Define the dbPath and replace the inMemoryDatabasePath with the new path.
// initialize the ffi loader
  sqfliteFfiInit();

//create path to store the database
  final io.Directory appDirectory = await getApplicationCacheDirectory();
  String dbPath = p.join(appDirectory.path, 'databases', 'mysqlite.db');

//verify the databse by navigating to this directory
  print(dbPath);

  //create the database in the dbPath
  db = await databaseFactoryFfi.openDatabase(dbPath);
4. Run your application and see the printed value on the Debug Console window. See the image below.

Now, even when you restart your application, because the database is saved into a file, you will be able to access it. However, when you restart the application, you may have noticed that even though you just logged in, you are still redirected to the login screen. In the next step, you will address this by persisting the logged-in information using another local storage solution, Shared Preferences.
VII. Storing the login state using Shared Preferences
Shared Preferences is a local storage solution that stores data in key-value pairs. Unlike SQLite, only the initialization and writing of data is asynchronous in Shared Preferences. Retrieval of data is synchronous.
Back to the application, you would want that when the application is started or restarted, the login state of the user will be preserved and ready for the next session.
1. Start by adding the shared_preferences to the dependencies of your project by running the code below.
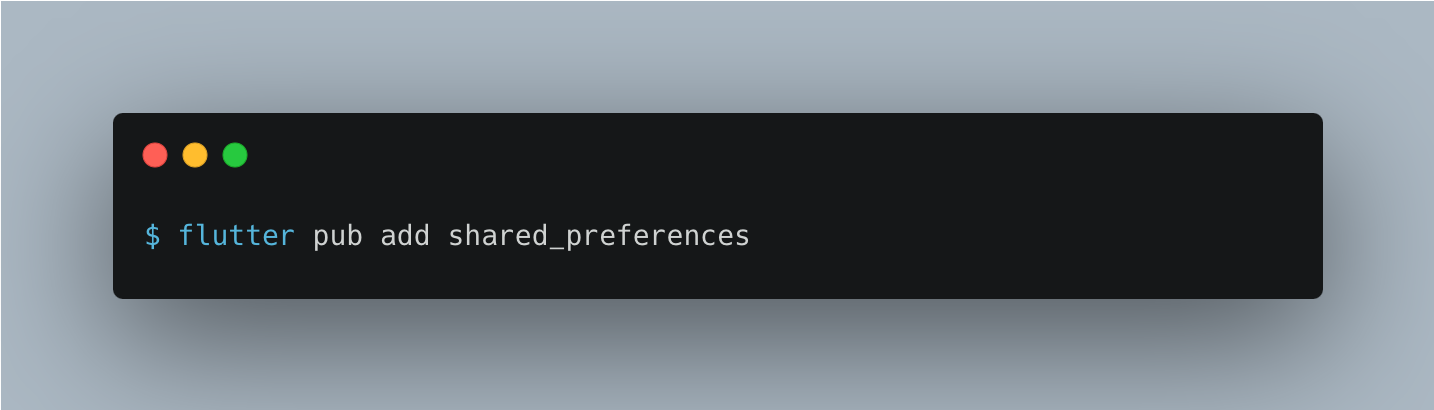
2. In the main.dart file, create a variable to store the reference for the SharedPreferences instance. Inside the main function, initialize the SharedPreferences. The rest of the code has been omitted for brevity.
import 'package:shared_preferences/shared_preferences.dart';

late SharedPreferences sharedPreferences;
void main() async {
// need to be called when initializing the app asynchronously
  WidgetsFlutterBinding.ensureInitialized();

//innitialize shared preference
  sharedPreferences = await SharedPreferences.getInstance();

  runApp(const MyApp());
}
Full code » main()
import 'dart:io' as io;
import 'package:path/path.dart' as p;
import 'package:flutter/material.dart';
import 'package:path_provider/path_provider.dart';
import 'package:shared_preferences/shared_preferences.dart';
import 'package:sqflite_common_ffi/sqflite_ffi.dart';

late Database db;
late SharedPreferences sharedPreferences;
void main() async {
// need to be called when initializing the app asynchronously
  WidgetsFlutterBinding.ensureInitialized();

//innitialize shared preference
  sharedPreferences = await SharedPreferences.getInstance();

  // initialize the ffi loader
  sqfliteFfiInit();

//create path to store the database
  final io.Directory appDirectory = await getApplicationCacheDirectory();
  String dbPath = p.join(appDirectory.path, 'databases', 'mysqlite.db');

  //create the database in the dbPath
  db = await databaseFactoryFfi.openDatabase(dbPath);

  runApp(const MyApp());
}
3. The next step is to store the login information inside the sharedPreferences variable. Copy the following code into the login function in the _LoginScreenState widget. The rest of the code was removed for brevity.
    if (user.isNotEmpty) {
      //store login state
      sharedPreferences.setBool('IS_LOGGED_IN', true);
}
4. The last step is to check for the IS_LOGGED_IN key in the MyApp widget and show the login or home screen in the initialRoute based on its value.
initialRoute: isLoggedIn == true ? '/' : '/login',class MyApp extends StatelessWidget {
const MyApp({super.key});
@override
Widget build(BuildContext context) {
final bool? isLoggedIn = sharedPreferences.getBool('IS_LOGGED_IN');
print('isLoggedIn $isLoggedIn');
return MaterialApp(
// hidet the debug banner shown at the top right of the screen
debugShowCheckedModeBanner: false,
title: 'Windows Login with SQLite DB',
theme: ThemeData(
colorScheme: ColorScheme.fromSeed(seedColor: Colors.deepPurple),
useMaterial3: true,
),
// when the application loads, show the login screen if the user is not logged in
// else show home
initialRoute: isLoggedIn == true ? '/' : '/login',
// define the routes for login and home screen
routes: {
'/register': (context) => const RegisterScreen(),
'/login': (context) => const LoginScreen(),
'/': (context) => const HomeScreen(),
},
);
}
}5. To log out, all you have to do is clear the sharedPreferences when the logout button is pressed. In the home_screen.dart, edit the logout button, and copy the code inside onPressed property below.
  // logout button
          IconButton(
            onPressed: () {
              //clear the shared preference
              sharedPreferences.clear();
              // go back to login page
              Navigator.of(context).pushAndRemoveUntil(
                MaterialPageRoute(
                  builder: (context) => const LoginScreen(),
                ),
                (route) => false,
              );
            },
            icon: const Icon(
              Icons.exit_to_app,
              color: Colors.white,
            ),
          ),
Now, your user can log in and log out of the application, and when the application is restarted, their login status is preserved.
Congratulations! You have a fully functional application!
VIII. Creating Database Helper for maintainability
While you now have a functional application, the implementation of the database is not optimal. This is because you need to keep the database open the whole time your application is running! If you close the db anywhere else in your code, your succeeding database calls will throw an error that the database connection is closed.
While you can keep the database connection open, it can lead to unnecessary memory consumption especially when you are not frequently using it. In this case, after the user logs in and the user information is retrieved, you no longer need the database. However, in a real-world application, you would expect that you will be frequently using the database but not as frequently that you would want to keep it open all the time. After all, your application has other functionalities that will be using memory, right?
To address this problem, creating a singleton for the database reference is a good solution. A singleton pattern is a software design pattern that restricts the instantiation of a class to a singular instance. In the case of your application, it is to ensure that you are only opening and referencing a single connection to the database. This is done by checking whether a connection to the database has been opened before opening a new connection.
- Create a folder inside lib called helpers and create a new file called database_helper.dart.
- Copy the code below to this file.
import 'dart:io' as io;

import 'package:path/path.dart' as p;
import 'package:path_provider/path_provider.dart';
import 'package:sqflite_common_ffi/sqflite_ffi.dart';

class DatabaseHelper {
  // returns the instance of DatabaseHelper
  static final DatabaseHelper instance = DatabaseHelper._privateConstructor();

  // reference to the database marked as private
  static Database? _database;

  // factory method that returns an instance of DatabaseHelper
  // to ensure that DatabaseHelper has only one instance in the application
  DatabaseHelper._privateConstructor();

  // get the database, if it is not initialized, initialize it first
  Future<Database> get database async {
    if (_database != null) return _database!;

    _database = await _initDatabase();

    return _database!;
  }

  Future<Database> _initDatabase() async {
    // initialize the ffi loader to ensure that sqlite will work
    sqfliteFfiInit();

    // create path to store the database
    final io.Directory appDirectory = await getApplicationDocumentsDirectory();
    String dbPath = p.join(appDirectory.path, 'databases', 'mysqlite.db');

    final dbFactory = databaseFactoryFfi;

    // Open the database and return the reference
    return await dbFactory.openDatabase(
      dbPath,
      options: OpenDatabaseOptions(
        version: 1,
        onCreate: _onCreate,
      ),
    );
  }

  Future<void> _onCreate(
    Database db,
    int version,
  ) async {
    // create 'users' table where the user credential will be stored
    await db.execute('''
      CREATE TABLE IF NOT EXISTS users (
        id INTEGER PRIMARY KEY,
        name TEXT,
        username TEXT NOT NULL UNIQUE,
        password TEXT NOT NULL
      )
    ''');
  }
}
3. The function responsible for creating the singleton is _privateConstructor which returns an instance of the class. The private property _database stores the database connection which is initialized through the database getter which in turn calls the _initDatabase function. The database initialization has been moved to this file from main.dart.
4. In the _initDatabase function, the _onCreate method is called to create the users table if it does not exist yet. This is also a good place to put other database operations to create the tables for your database. The functions for createUser and loginUser have also been moved here to make it easier to refer to them in your code.
With that, you can replace the database initialization inside main.dart with a simple call to retrieve the database.
import 'package:flutter/material.dart';
import 'package:shared_preferences/shared_preferences.dart';
import 'package:windows_login_app/helpers/database_helper.dart';
import 'package:windows_login_app/screens/home_screen.dart';
import 'package:windows_login_app/screens/login_screen.dart';
import 'package:windows_login_app/screens/register_screen.dart';

late SharedPreferences sharedPreferences;
void main() async {
// need to be called when initializing the app asynchronously
  WidgetsFlutterBinding.ensureInitialized();

  //initialize the database
  await DatabaseHelper.instance.database;

//innitialize shared preference
  sharedPreferences = await SharedPreferences.getInstance();

  runApp(const MyApp());
}
5. Inside your login function, you can replace the manual db reference with DatabaseHelper as shown below.
From:
    final user = await db.query(
      'users',
      where: 'username = ? AND password=?',
      whereArgs: [
        username,
        password,
      ],
    );
To:
 final user = await DatabaseHelper.instance
.loginUser(username: username, password: password);
6. And in the register function…
From:
   int result = await db.insert(
      'users',
      <String, Object?>{
        'name': name,
        'username': username,
        'password': password
      },
      conflictAlgorithm: ConflictAlgorithm.replace,
    );
To:
int result = await DatabaseHelper.instance
.createUser(name: name, username: username, password: password);
You can add more functions inside your DatabaseHelper that you can use in various parts of your application. This is a good pattern because it makes your code cleaner and more maintainable. Now, we have a maintainable application!
In the next step, you will learn how to build your Windows application so you can share it with your users.
IX. Building the Windows application
Building a Windows application in Flutter is simple. Just run the following command in your command prompt.
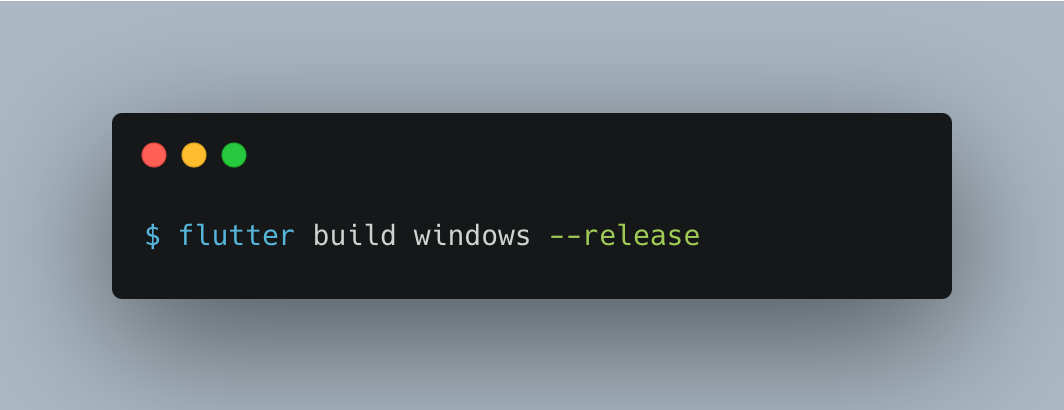
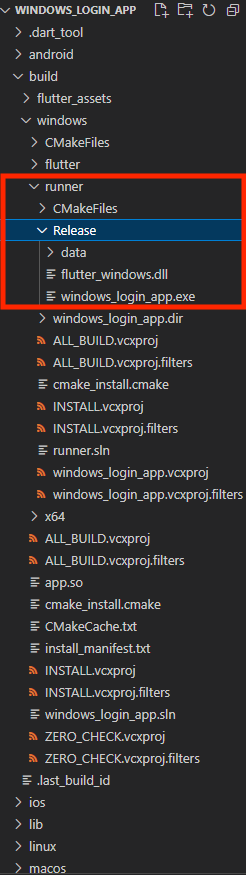
Figure. Initial build folder.
Currently, opening the windows_login_app.exe from the build folder will run your application. However, when you try to compress and distribute your application using the Release folder, you may have encountered that your application does not open. This is because if you looked at the documentation of the lite package you used, there is an additional instruction when used in Windows:
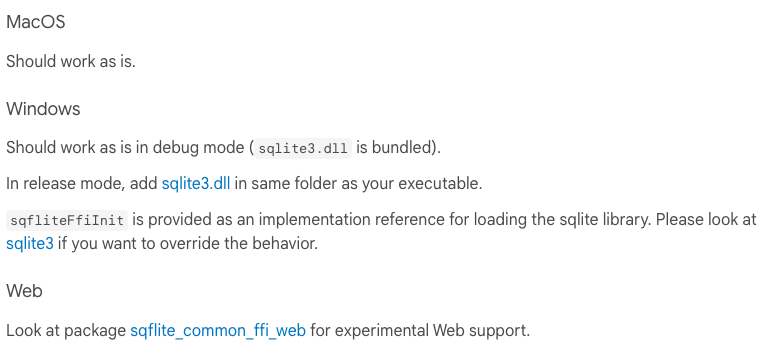
Figure. Additional instructions when building and distributing the app for different platforms.
This indicates that you need to download the sqlite3.dll and add it to your build folder inside the Release folder. You can download the file here: sqllite3.dll.
Your final Release folder should now look like this:
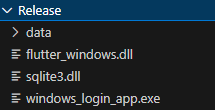
Figure. Final build directory
Finally, you can zip this entire folder and distribute it to other users so they can use your application. You can also use tools like Inno Setup to create a setup.exe installer for your application.
X. Customizing the application’s icon
Right now, the application uses the default Flutter icon. Of course, you would want your application to look unique. To achieve that, you can add your application icon.
To do so, you must have a .ico file of your icon. Ideally, it should have a dimension of 48×48 pixels. Replace the app_icon.ico file in windows/runner/resources with your file with the same name. If the name of the icon is other than app_icon.ico, proceed to change the IDI_APP_ICON value in the windows/runner/Runner.rc file to point to the new path.
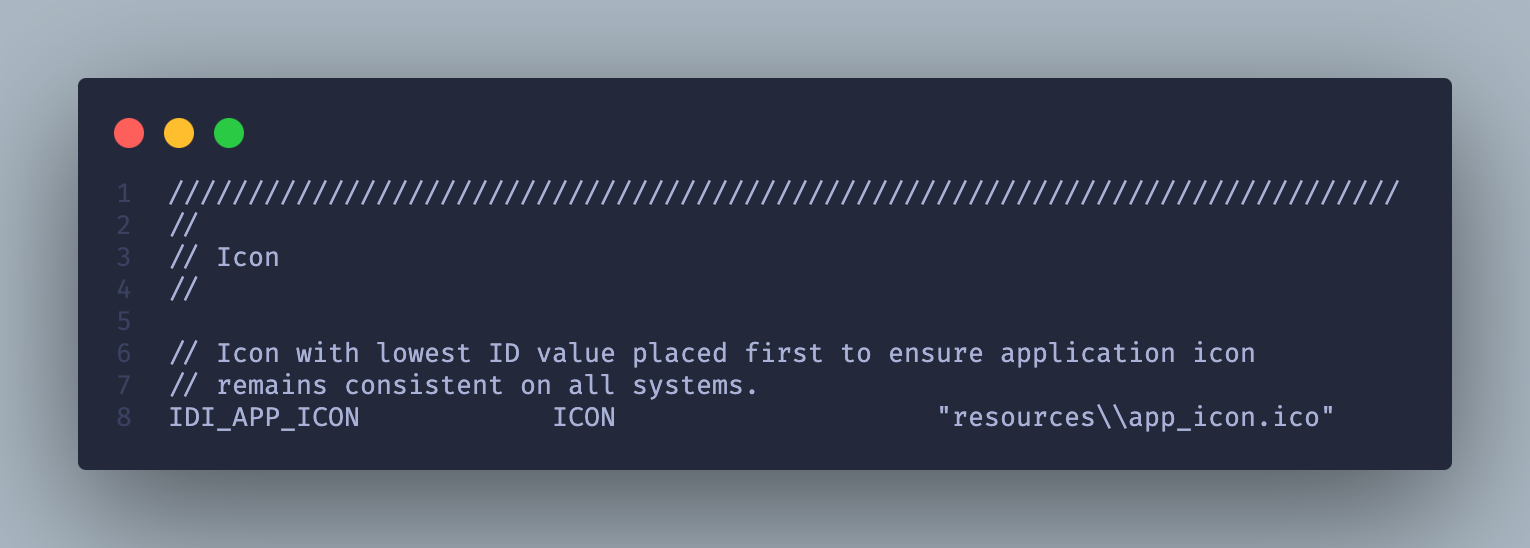
Figure. Runner.rc
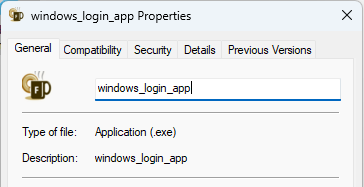
Figure. Final executable with an updated icon.
Note: If the application icon did not change after running the build command, run flutter clean first then run the flutter build windows –release again.
And you’re done! You have just created and built a Windows application using flutter desktop. To learn more about Flutter, you can visit the Flutter documentation at flutter.dev.
Keep coding!
Note: Currently, and quite possibly to remain the same in the future, the Flutter team does not have a plan to support 32-bit Windows as a target. See https://github.com/flutter/flutter/issues/37777 if you wish to track this issue
XI. Source Code
For your reference, you may download the source code from the Github repository.
For more flutter visit the Website Blog page » freecodespot.