In this tutorial, we are going to learn how to deploy ASP.NET web application in IIS on a Windows Machine. IIS or Internet Information Services are used to host ASP.Net Web applications to either show your development progress for a client or for a test run of your websites. If you are a freelancer and want to show your sites to your customers, IIS might be your best and easiest way.
Also visit : how to enable IIS How to enable Internet Information Services
Before we start make sure that you have enabled IIS on your Windows machine. If not, follow the steps provided below.
I. Enable IIS on Windows 10
It’s really easy to enable Internet Information Services in Windows 10. Internet Information Services (IIS) is a Microsoft-developed extended web server that may be used with Windows NT; also, ASP.NET developers will want to enable IIS, since it is required to host ASP.NET. IIS has an interactive user interface that makes configuring the server simple.
To enable IIS and the required IIS components on Windows 10, do the following:
- Open the Control Panel and click Programs and Features » Turn Windows features on or off.
- Enable Internet Information Services.
- Expand the Internet Information Services feature and verify the web server components that is needed for IIS to work. Refer to the required IIS component listed below.
- Click OK.
Required IIS components
- Web Management Tools
- IIS 6 Management Compatibility
- IIS Metabase and IIS 6 configuration compatibility
- IIS Management Console
- IIS 6 Management Compatibility
- World Wide Web Services
- Application Development Features
- .NET Extensibility 4.5
- ASP.NET 4.5
- ISAPI Extensions
- ISAPI Filters
- WebSocket Protocol
- Common HTTP Features
- Default Document
- Static Content
- Security
- Basic Authentication
- Request Filtering
- Windows Authentication
- Application Development Features
II. How to Check IIS Version on Windows 10
- Open Run Command using the shortcut Win Key + R.
- Search for inetmgr.
- Internet Information Services(IIS) manager will open.
- Click on Help.
- Go to “About Internet Information Services“
- “About Internet Information Services manager dialog box will now open, where you can view details on about your IIS.
III. Set Up IIS on Windows
To deploy your ASP.NET web application, you’ll need to configure IIS. Follow these steps:
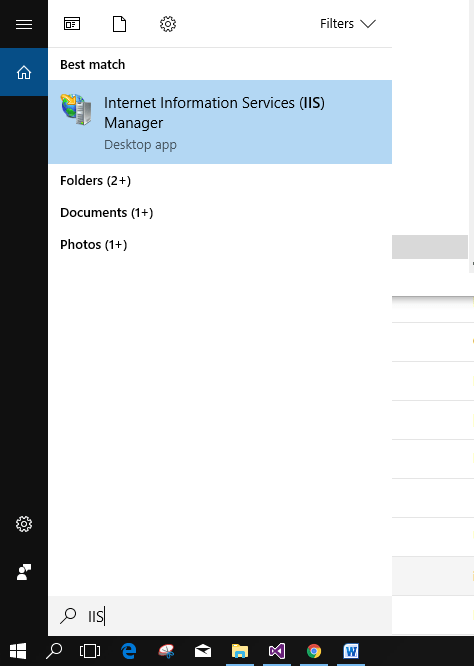
- First, open your IIS Manager by going to the start menu and searching for Internet Information Services(IIS), and open Internet Information Services from the search result. Refer to the image shown below.
You may also use Run then input inetmgr to open IIS Manager.
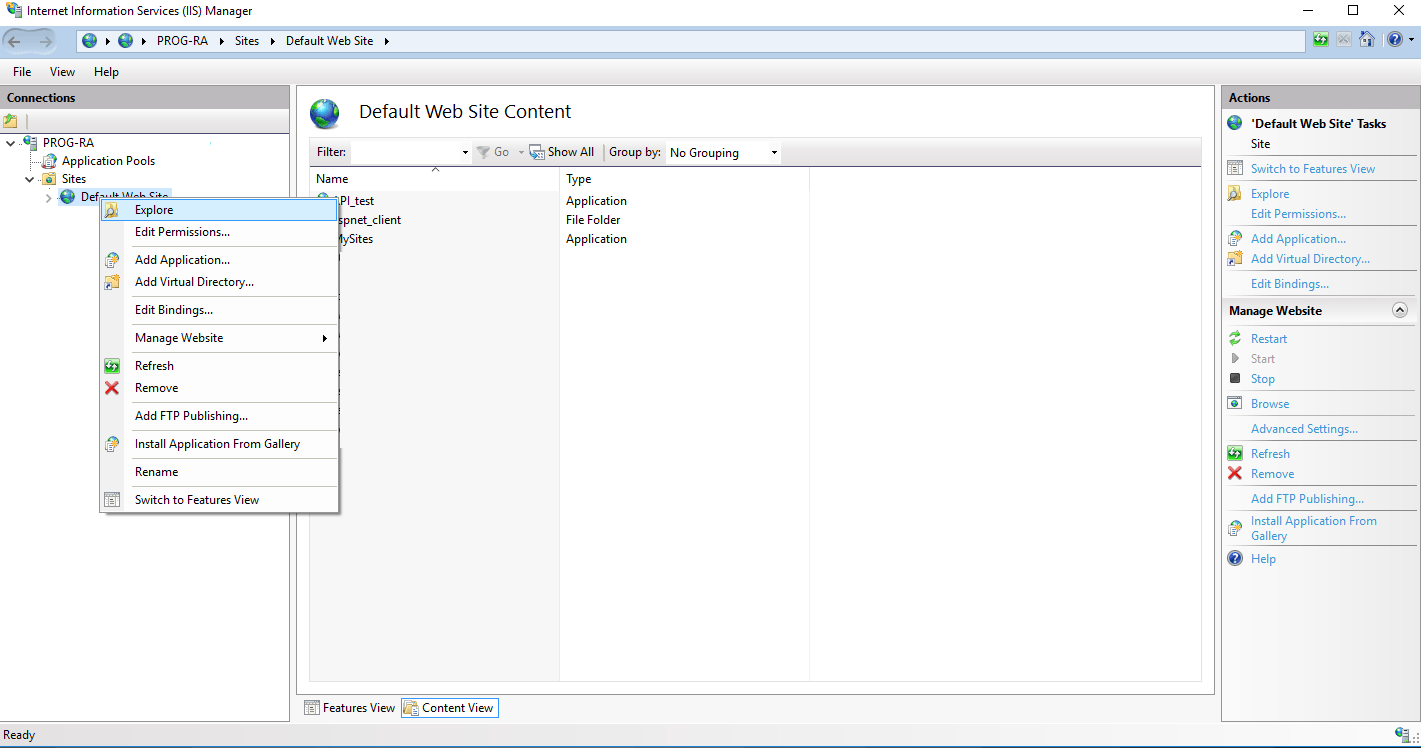
2. In your IIS manager, expand the sites folder and right-click on Default Web Sites. Then select Explore to open the root directory.
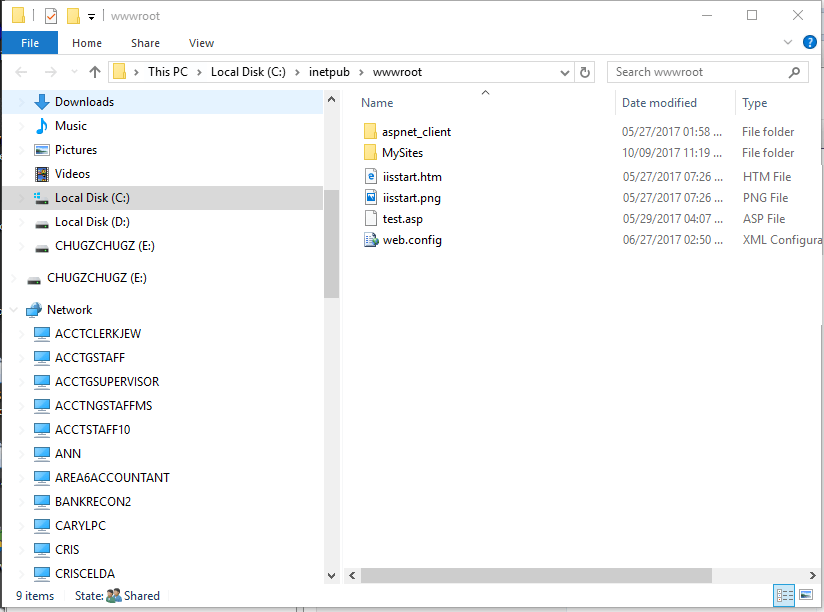
3. Once the root directory is open, we can create a folder for our ASP.NET directory location. wwwroot is the default IIS directory, but if you want to select a different location, you can specify it later after we are done creating the build files for our ASP.NET MVC Application. In this tutorial, this is the directory that I use. wwwroot » MySites.
IV. Publish Your ASP.NET Web Application
To deploy a web application, you need to have a fully functional ASP.NET web application ready. This includes creating the application, developing its features, and thoroughly testing it to ensure it functions as intended.
1. Create a build file for our sample ASP.NET App. In my case I just picked up a random project I created from my previous tutorial, you may check out this link for a sample ASP.NET App “Login App using Form Authentication in ASP.NET MVC“. You may also create a new project just to test IIS deployment.
This is what my sample Web Application looks like.

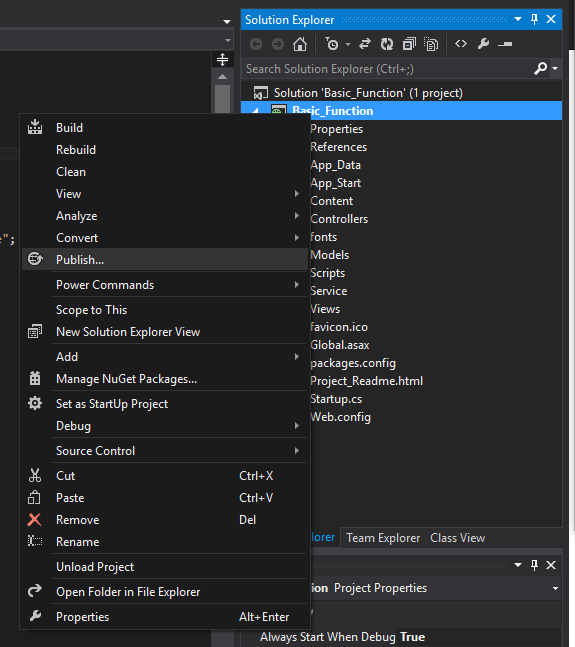
2. Open your project in Visual Studio and navigate to the solution explorer. Right-click on your project name and select publish.
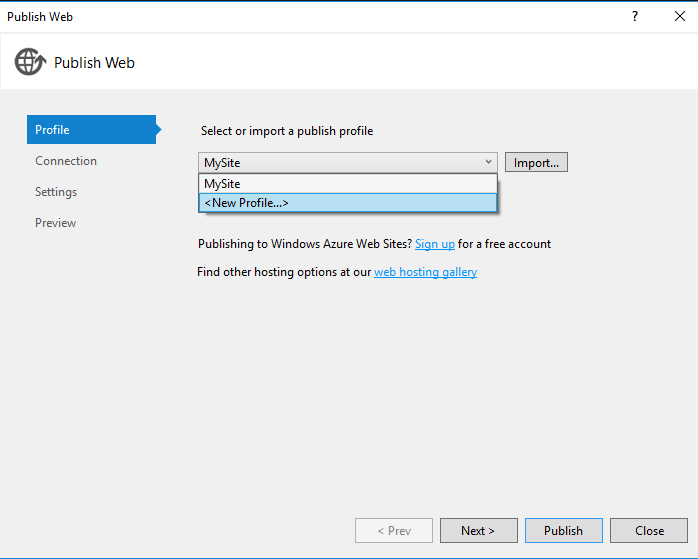
3. In the Publish Web Window choose Profile and create a name for your publish profile.
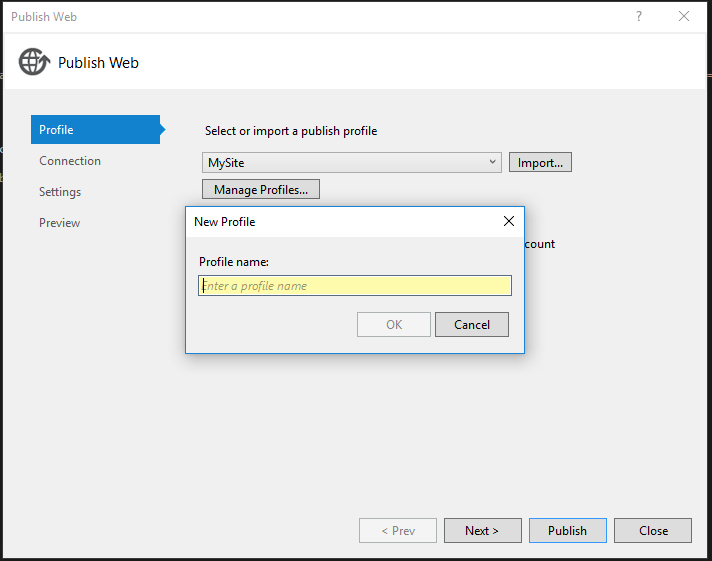
4. To customize the profile name for this setting you may set a familiar name to easily identify it for the next time you deploy this application. Enter your desired published profile name. Then press “OK”.
5. Click “Next” to proceed. Select File System as your publish method.
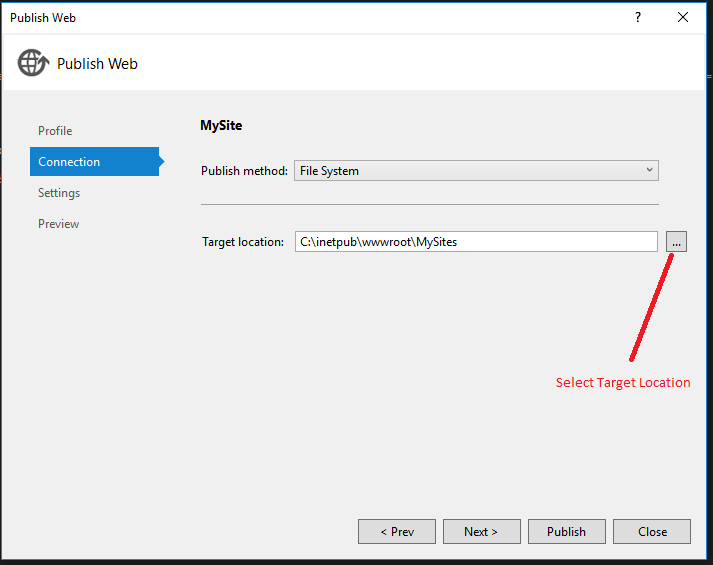
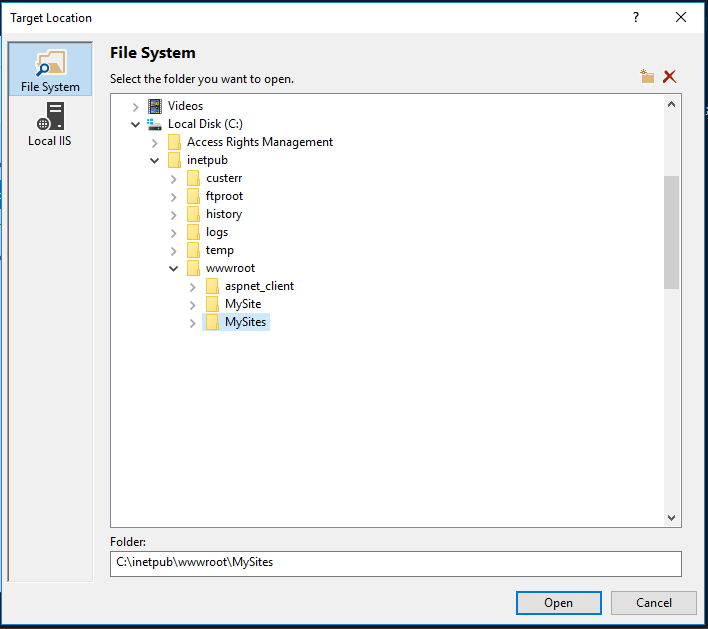
6. Select your published directory. In my case, it is C:\inetpub\wwwroot\MySites, which is the default website directory of IIS. Then click “Open.”
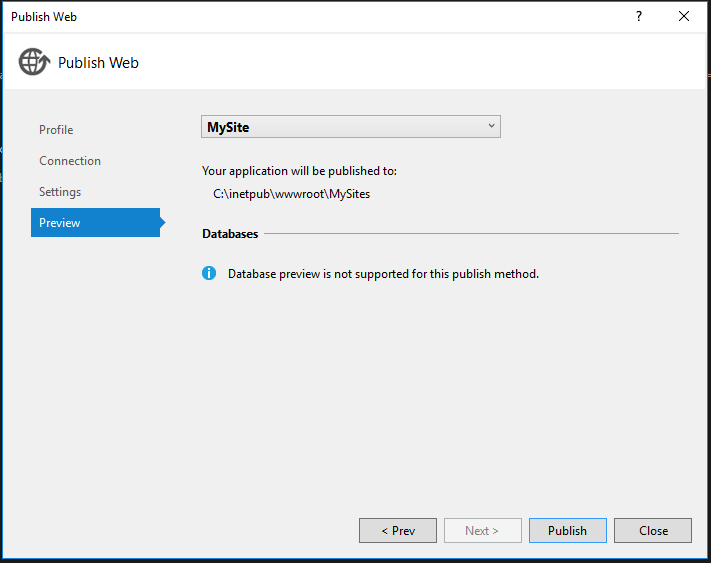
7. Lastly click on the publish button to proceed. See the image below.
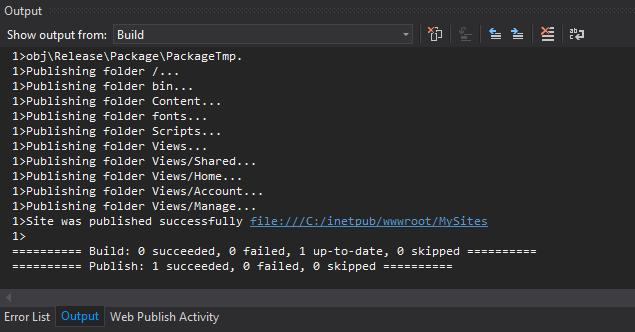
8. It may take a while to finish an application to publish. Once, done you can see the notification from the Output windows like the screenshot shown below.
V. Convert your website to an Application
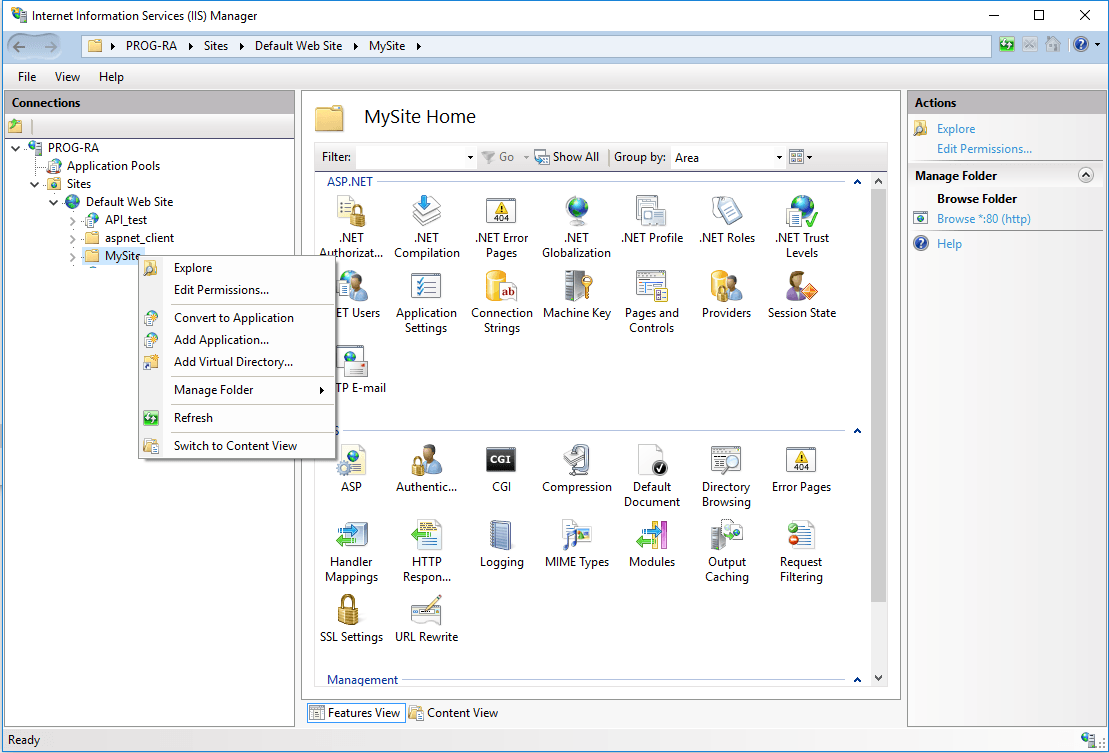
Navigate back to your IIS Manager and go to Sites » Default Web Sites. Then search for your folder name where we published our websites. In my case, I name it MySites. Right-click on the folder name MySites and select Convert to Application.
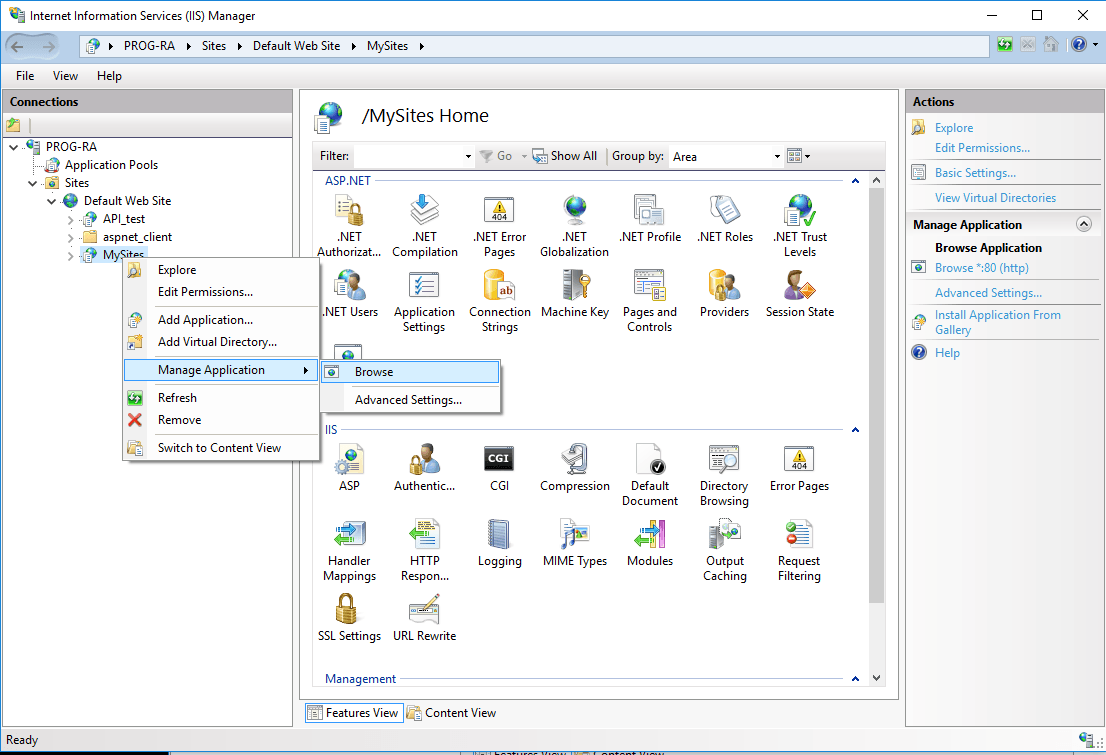
You’re done!! To open your website application right-click on MySites. Select Manage Application then choose browse.
The browser will pop up and display your deployed ASP.NET Application. See the image below.
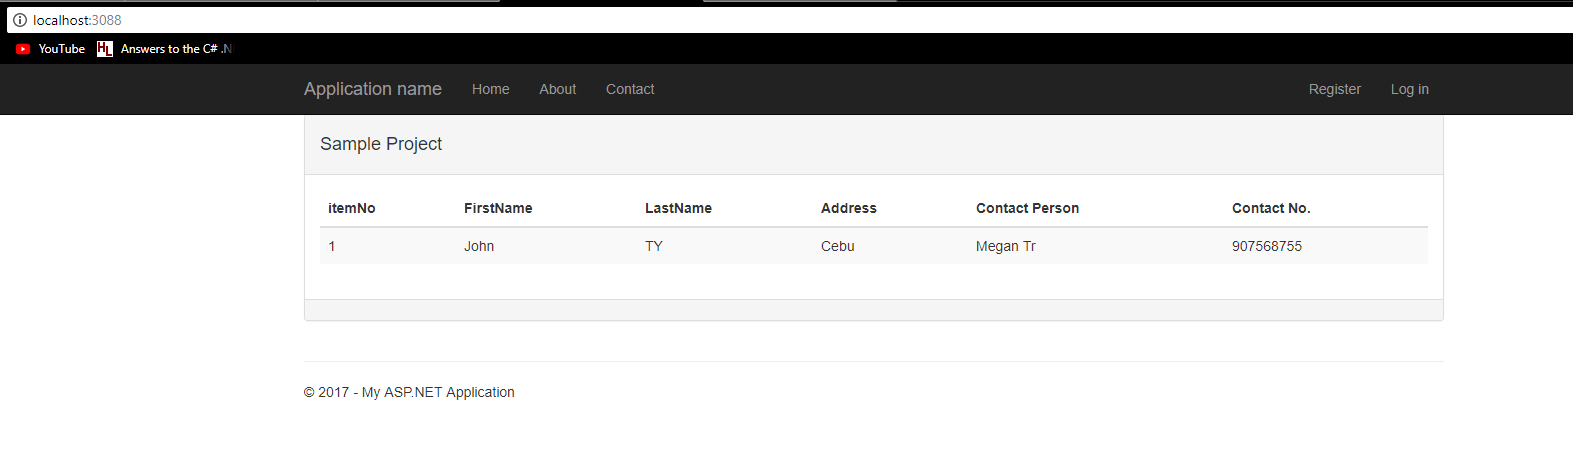
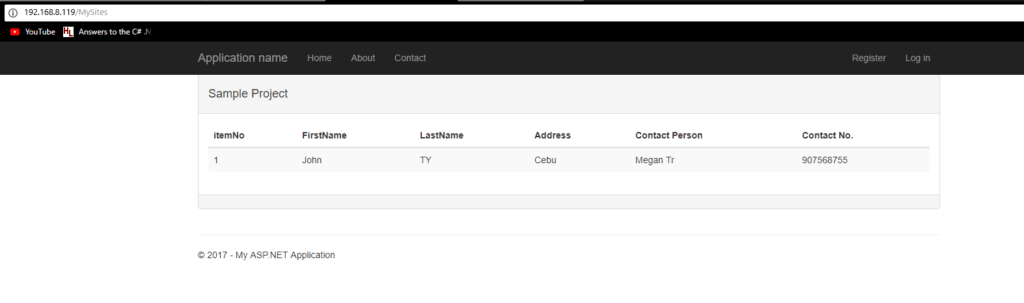
You may also access your websites using your local IP ex. http://192.168.1.2/MySites
Summary
In this tutorial, we have learned how to deploy ASP.NET web application in IIS on a Windows Machine. We also learned how we can enable and configure IIS on Windows 10. If you want to share your website with your team on your local network you can visit this article to learn how you can configure IIS to use your local IP address Deploy and Share ASP NET Core WebApp to a Local Network using IIS
That’s it you have successfully published your website into IIS. Hopefully, this article will give you an idea and can be used with your future project.
Follow us on Facebook.
KEEP CODING!