
In this tutorial, we will learn how to implement the Database First Approach in ASP.NET MVC using Entity Framework. To do that we will create a new ASP.NET MVC project from scratch. This approach will help you connect your web application to an existing database structure. If this is what you are looking for, this is the right place for you.
What is the Database First Approach in EF?
The Database First Approach provides an alternative to the Code First, and Model First approaches to the Entity Data Model. It creates model codes (classes, properties, DbContext, etc.) from the project database, and those classes become the link between the database and the controller.
Pros:
- Rapid Development: Database-First allows for quick application development since you start with an existing database schema.
- Utilizes Existing Databases: Ideal for projects where you need to work with an existing database schema without major modifications.
- Data Integrity: Data constraints and relationships in the database are preserved, ensuring data integrity.
- Simplified Maintenance: Changes to the database are reflected in the application automatically, reducing maintenance effort.
- Powerful Tooling: Entity Framework provides robust tooling and scaffolding features for generating models and controllers from the database schema.
- Code Reusability: Generated code can be reused and customized as needed, saving development time.
Cons:
- Limited Control: Developers might have limited control over the design of the data model, which could be a constraint in some scenarios.
- Inefficient Queries: Generated queries might not be as optimized as hand-written queries, leading to potential performance issues.
- Complexity in Large Databases: In large and complex databases, generating the entire model can result in unwieldy and complex code.
- Database Changes: If the database schema changes frequently, it can lead to challenges in keeping the application in sync.
- Extra Overhead: The additional layers generated by Entity Framework can introduce performance overhead in high-demand applications.
- Vendor Lock-in: The approach can make it harder to switch to a different data access technology in the future due to the tightly coupled data model.
In summary, the Database First Approach in .NET MVC using Entity Framework can be a powerful and efficient way to build applications, especially when working with existing databases. However, it might not be the best choice for all projects, particularly when fine-grained control over the data model or performance optimization is a priority. It’s essential to consider your project’s specific requirements and constraints before choosing this approach.
Before we proceed with the steps below, please make sure to have the latest version of the following installer:
- Visual Studio
- SQL Server
I. Setup ASP.NET Web Application Project
- Select File > New > Project.
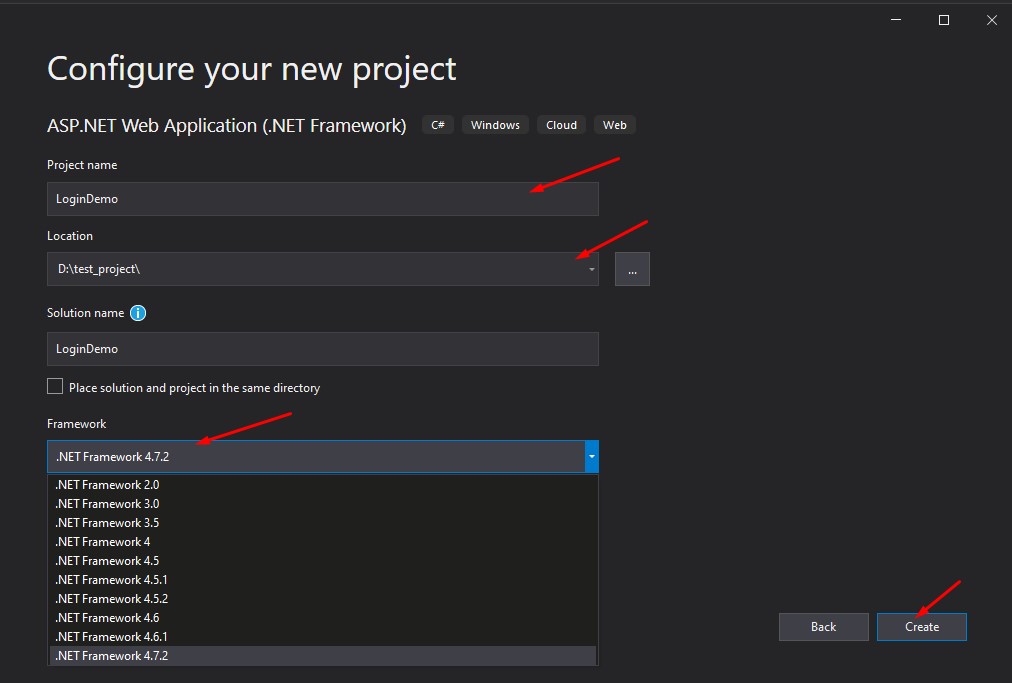
- Select ASP.NET Web Application(.NET Framework). Name the project DBFirstDemo to have the same namespace as my project. Click OK.
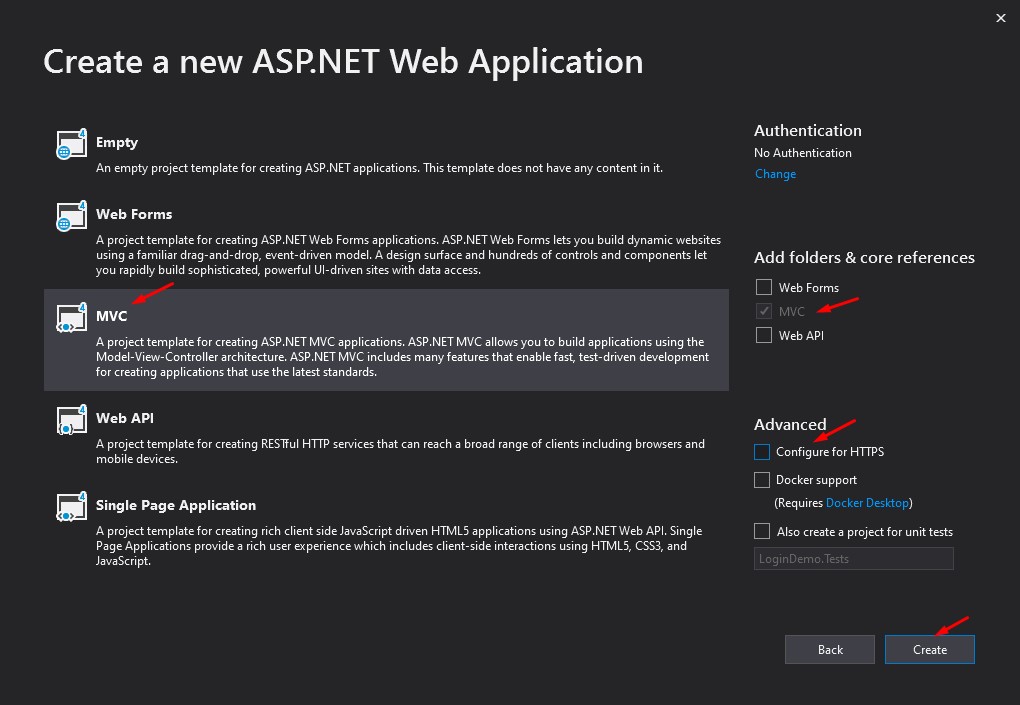
- Select the MVC template and then uncheck Configure for HTTPS.
- Lastly, Click on Create.

II. Create SQL Database and Table
Now that we have setup our new project. Let’s create the database that we will use for this tutorial.
- To create a database, open your SQL Server Application and create a database using the command below
CREATE DATABASE UserDB;2. Now, inside the UserDB database, create a table using the command below.
USE [UserDB]
GO
SET ANSI_NULLS ON
GO
SET QUOTED_IDENTIFIER ON
GO
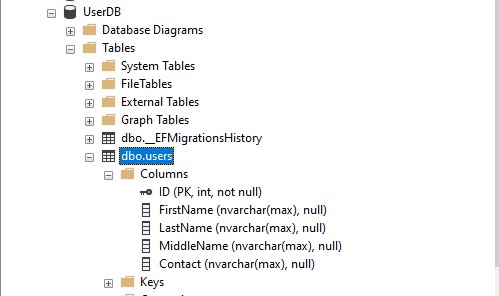
CREATE TABLE [dbo].[users](
[ID] [int] IDENTITY(1,1) NOT NULL,
[FirstName] nvarchar NULL,
[LastName] nvarchar NULL,
[MiddleName] nvarchar NULL,
[Contact] nvarchar NULL,
CONSTRAINT [PK_users] PRIMARY KEY CLUSTERED
(
[ID] ASC
)WITH (PAD_INDEX = OFF, STATISTICS_NORECOMPUTE = OFF, IGNORE_DUP_KEY = OFF, ALLOW_ROW_LOCKS = ON, ALLOW_PAGE_LOCKS = ON, OPTIMIZE_FOR_SEQUENTIAL_KEY = OFF) ON [PRIMARY]
) ON [PRIMARY] TEXTIMAGE_ON [PRIMARY]
GOBelow is the screenshot of my database structure.
III. Add ADO.NET Entity Data Model
To implement a database first approach in Entity Framework, we will use ADO.NET Entity Data Model. ADO.NET Entity Data Model will create our model properties and DBContext base on our database. Below are the steps to do that.
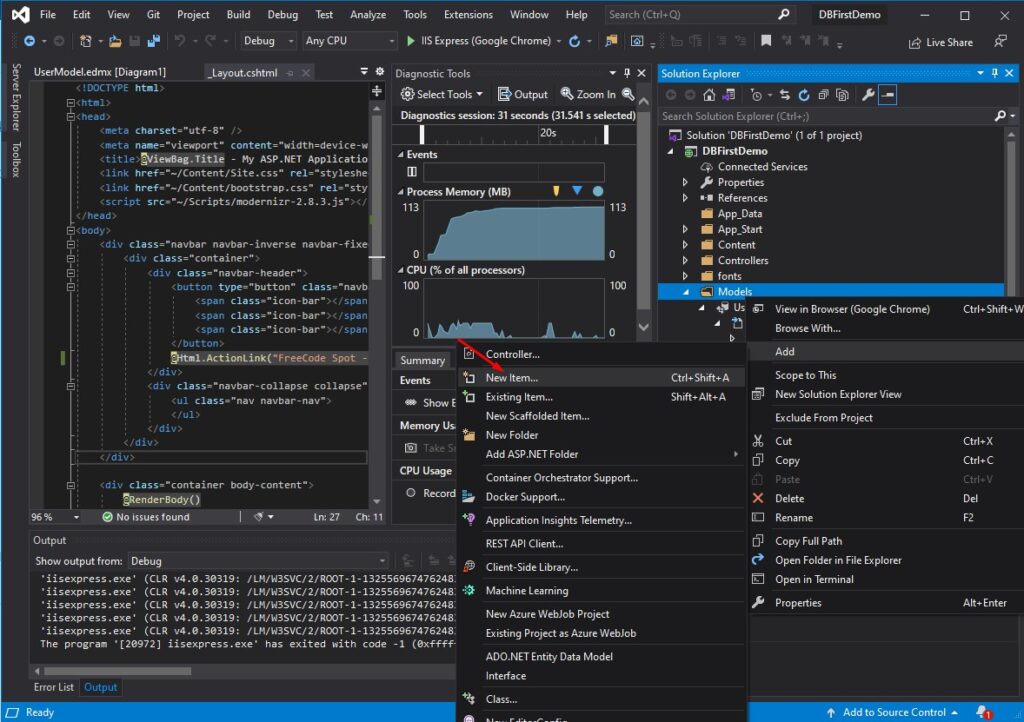
- Open your your project. Right-click on Models folder and Add New item. See the screenshot below.
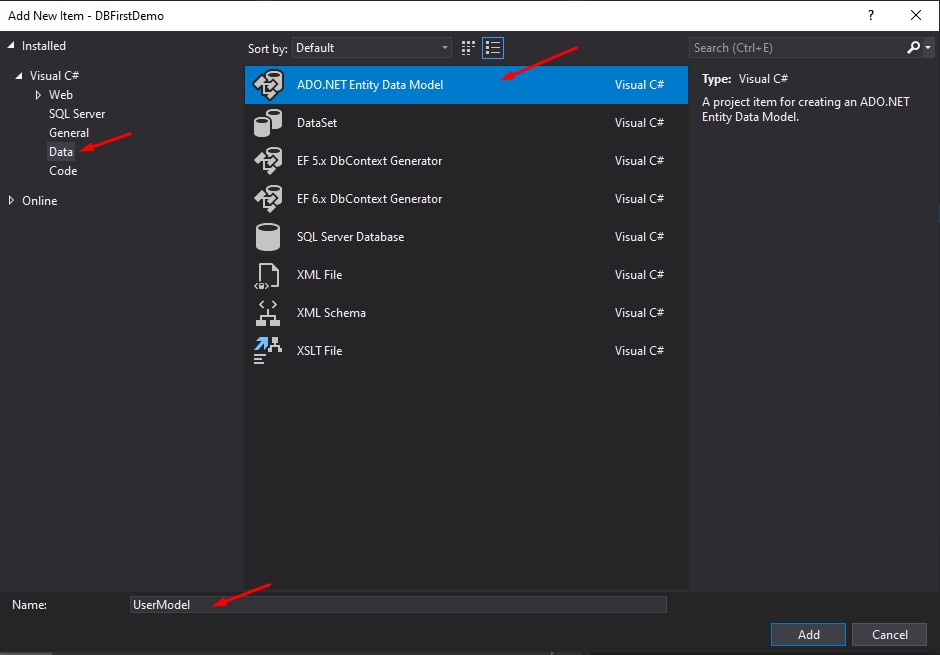
2. On the Add New Item Window, select Data from the sidebar and choose ADO.NET Entity Data Model. Name it UserModel then click on the Add button. See the screenshot provided below.
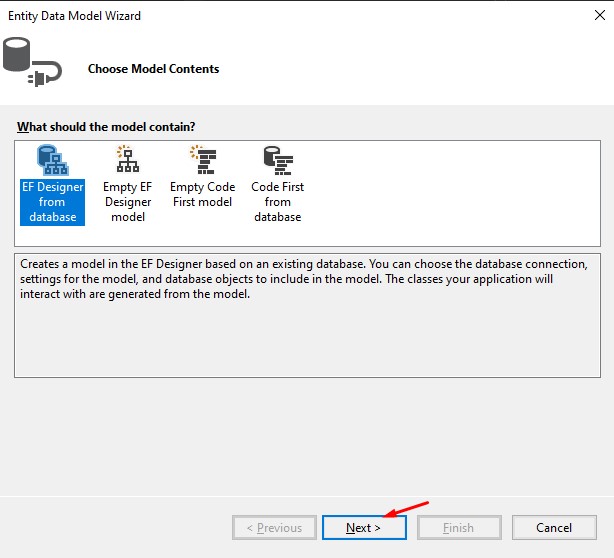
3. Once a configuration window prompts choose EF Designer from Database then click next.
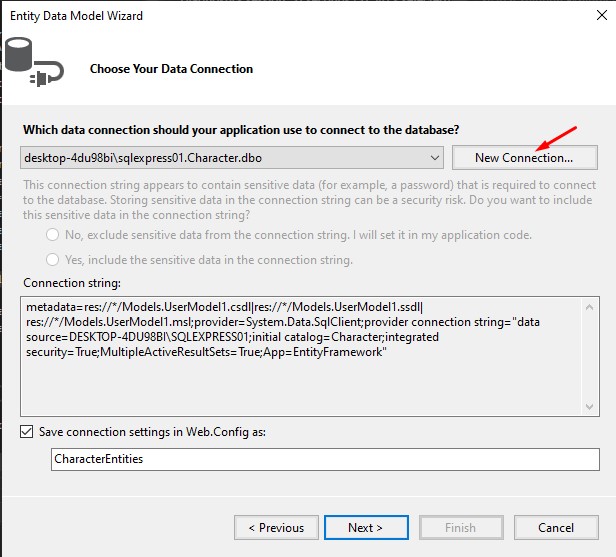
4. Select New Connection to add your database to the Entity Data Model.
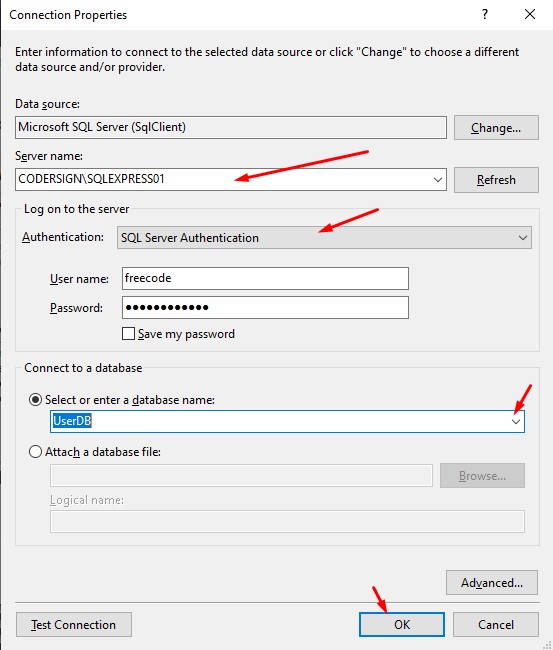
5. Fill in your SQL Server credential on the Connection Properties window and select the database you want to connect. See the screenshot below.
6. Going back to the Entity Data Model Wizard, your connection will be available from the dropdown selection. Choose your connection and click the next button.

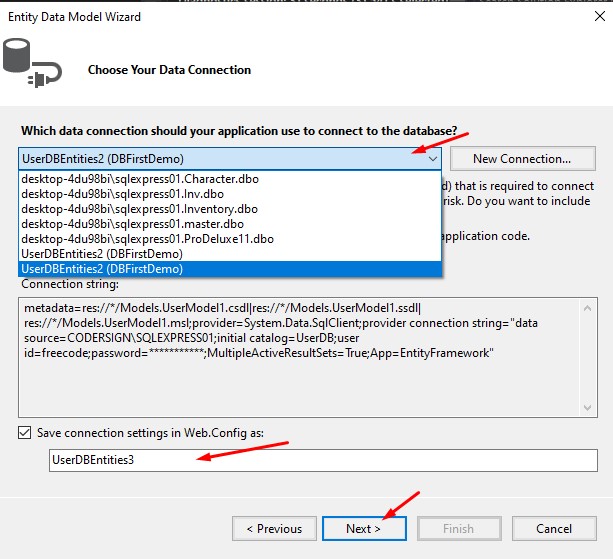
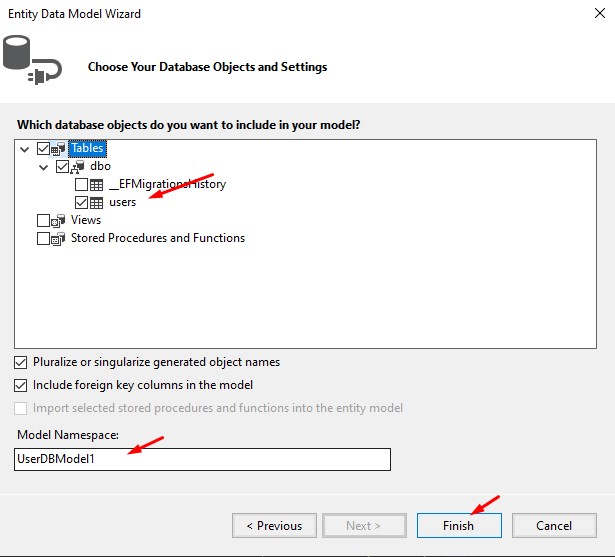
7. Select the table you want to add to the Entity Data Model then click the Finish button.
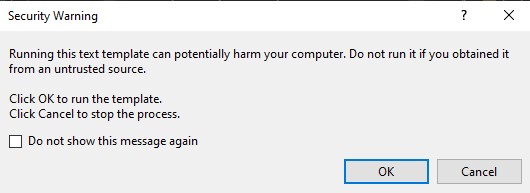
8. If you will be prompted with a Security warning just press the OK button.
9. After you click the Finish button, the Entity Data Model Wizard will generate a file for us. A model property class and a DBContext that will connect our web application to our database table. See the screenshot below.
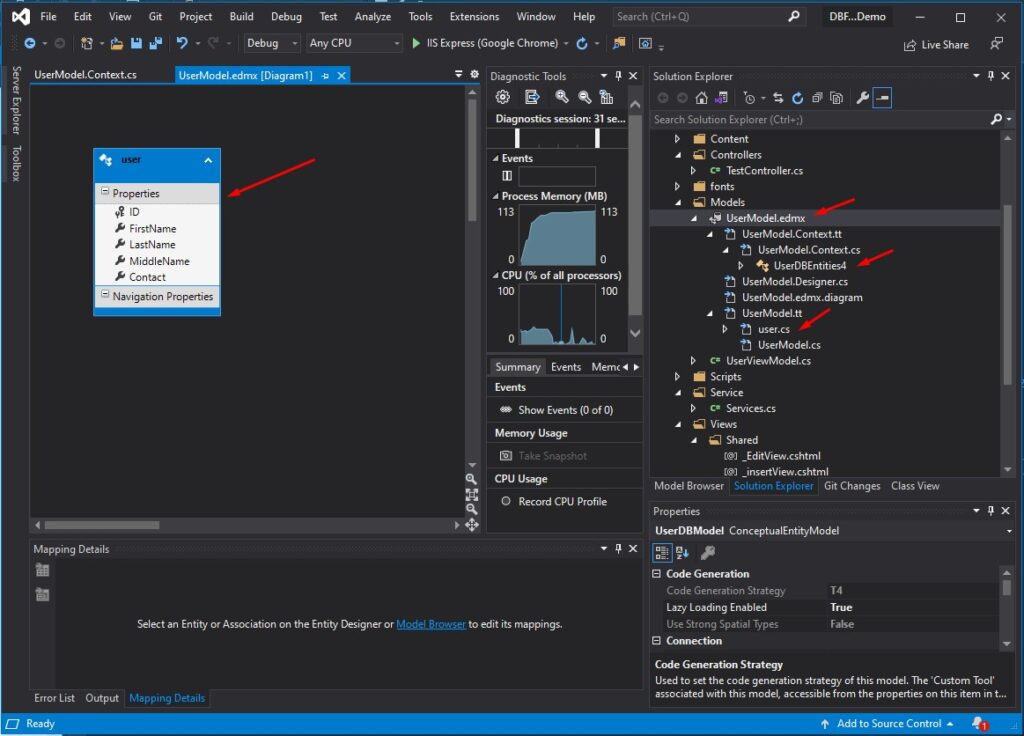
Below are the class and properties auto-generated by the Entity Data Model Wizard.
UserDBEntities.cs – DBContext Class
This is the DBContext class that connect our application to the database.
 //------------------------------------------------------------------------------
 // <auto-generated>
 //     This code was generated from a template.
 //
 //     Manual changes to this file may cause unexpected behavior in your application.
 //     Manual changes to this file will be overwritten if the code is regenerated.
 // </auto-generated>
 //------------------------------------------------------------------------------

 namespace DBFirstDemo.Models
 {
     using System;
     using System.Data.Entity;
     using System.Data.Entity.Infrastructure;

     public partial class UserDBEntities4 : DbContext
     {
         public UserDBEntities4()
             : base("name=UserDBEntities4")
         {
         }

         protected override void OnModelCreating(DbModelBuilder modelBuilder)
         {
             throw new UnintentionalCodeFirstException();
         }

         public virtual DbSet<user> users { get; set; }
     }
 }
user.cs
Table properties
 //------------------------------------------------------------------------------
 // <auto-generated>
 //     This code was generated from a template.
 //
 //     Manual changes to this file may cause unexpected behavior in your application.
 //     Manual changes to this file will be overwritten if the code is regenerated.
 // </auto-generated>
 //------------------------------------------------------------------------------

 namespace DBFirstDemo.Models
 {
     using System;
     using System.Collections.Generic;

     public partial class user
     {
         public int ID { get; set; }
         public string FirstName { get; set; }
         public string LastName { get; set; }
         public string MiddleName { get; set; }
         public string Contact { get; set; }
     }
 }
IV. Create Service Class
This class will serve as the repository class, where all the database CRUD interactions will be placed. Create a Service folder on the root directory of your project. Then create a class named Services.cs. Below are the methods we need for the CRUD operation.
CREATE – Insert_data
Register a new user to the system
   public string Insert_data(user _user)
         {
             string result = "";
             try
             {
                 using (UserDBEntities4 DBUser = new UserDBEntities4())
                 {
                     var user = DBUser.users.FirstOrDefault(d => d.FirstName == _user.FirstName && d.LastName == _user.LastName);
                     if (user != null) //if name exist update data
                     {
                         result = "User already Exists!";
                     }
                     else
                     {
                         DBUser.users.Add(_user);
                         var res = DBUser.SaveChanges();
                         if (res == 1)
                         {
                             result = "Success";
                         }
                         else
                         {
                             result = "Failed";
                         }
                     }
                 }
             }
             catch (Exception ex)
             {
                 result = ex.Message;
             }
             return result;
         }
READ – GetUserById, GetUsers
Retrieved user from the database
 public user GetUserById(int id)
         {
             user result = new user();

                 using (UserDBEntities4 DBUser = new UserDBEntities4())
                 {

                     result = DBUser.users.FirstOrDefault(c => c.ID == id);
                 }
             return result;
         }

         public List<user> GetUsers()
         {
             List<user> result = new List<user>();
             using (UserDBEntities4 DBUser = new UserDBEntities4())
             {
                 result = DBUser.users.Select(c => c).ToList();
             }
             return result;
         }
UPDATE – UpdateUser
Update user record
 public string UpdateUser(user user)
    {
             string result = "";
             try
             {
                 using (UserDBEntities4 DBUser = new UserDBEntities4())
                 {
                     user data = DBUser.users.FirstOrDefault(d => d.ID == user.ID);
                     data.FirstName = user.FirstName;
                     data.LastName = user.LastName;
                     data.MiddleName = user.MiddleName;
                     data.Contact = user.Contact;

                     var res = DBUser.SaveChanges();
                     if (res == 1)
                     {
                         result = "Success";
                     }
                     else
                     {
                         result = "Failed";
                     }
                 }
             }
             catch (Exception ex)
             {
                 result = ex.Message;
             }
             return result;
   }
DELETE
Delete User from the table
public string Delete(int id)
{
string result = "";
try
{
using (UserDBEntities4 DBUser = new UserDBEntities4())
{
user data = DBUser.users.FirstOrDefault(d => d.ID == id);
DBUser.users.Remove(data);
var res = DBUser.SaveChanges();
if (res == 1)
{
result = "Success";
}
else
{
result = "Failed";
}
}
}
catch (Exception ex)
{
result = ex.Message;
}
return result;
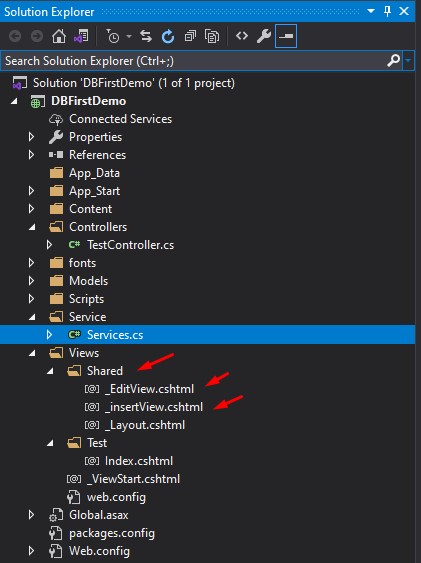
} IV. Create Partial Views
We will use partial views to display the register view and Edit view form dynamically. We will create a partial view inside the Shared folder. See the image below.
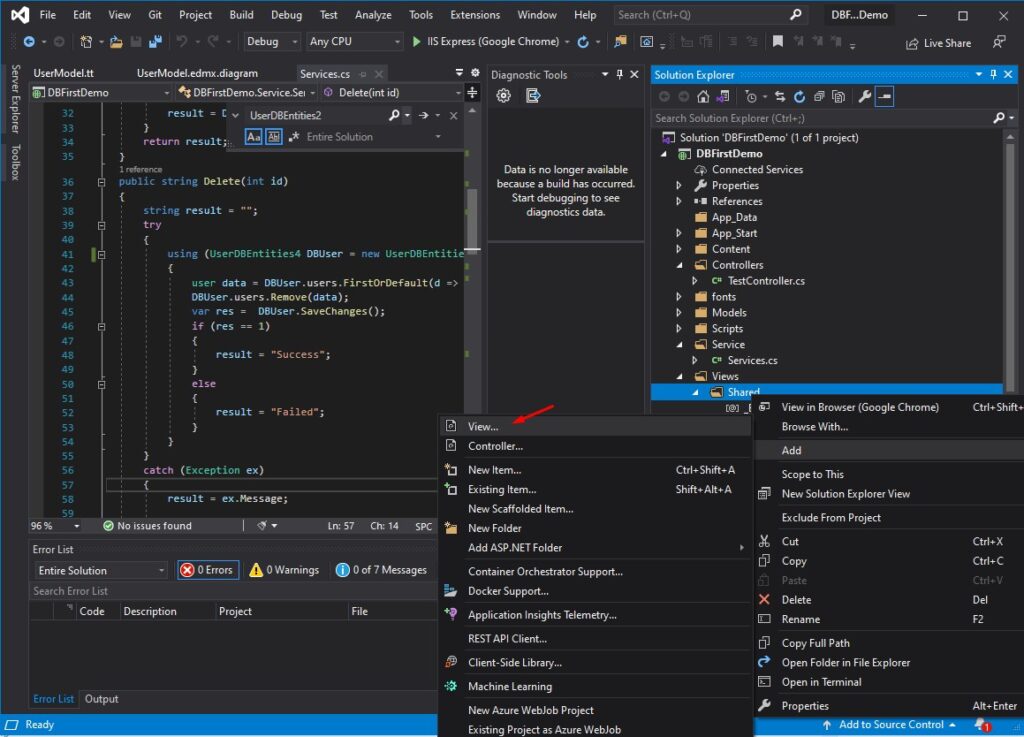
- To create a partial view right-click on the location where you want to place the partial view, which in this case its the shared folder. See the image below.
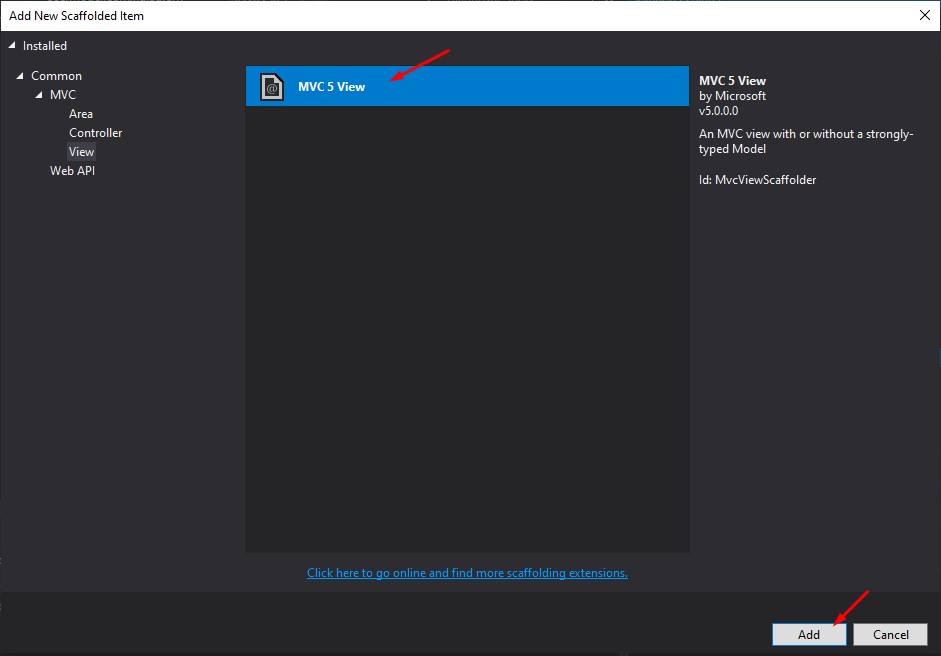
2. Choose MVC 5 View then click the Add button.
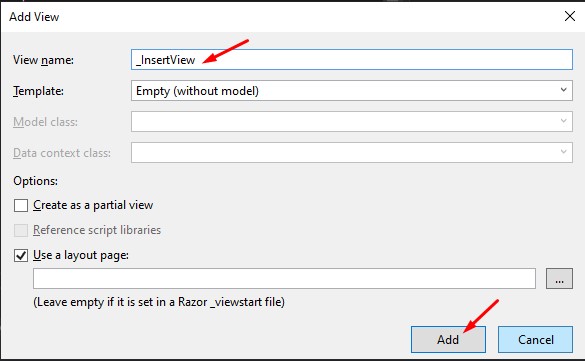
3. Name the partial view and click the Add button.
4. Below is the code snippet from the _insertView.cshtml.
 @model DBFirstDemo.Models.UserViewModel
 @{
     ViewBag.Title = "Register User";
 }

 <h2>Register User</h2>

 @using (Html.BeginForm("Index", "Test", FormMethod.Post, new { @class = "form-horizontal", role = "form" }))
 {
     <fieldset>

         @Html.ValidationSummary(true, "", new { @class = "text-danger" })
         @Html.HiddenFor(m => m.user_data.ID, new { @class = "form-control", })
         <div class="form-group">
             @Html.LabelFor(m => m.user_data.FirstName, new { @class = "col-lg-2 control-label" })
             <div class="col-lg-10">
                 @Html.TextBoxFor(m => m.user_data.FirstName, new { @class = "form-control" })
                 @Html.ValidationMessageFor(m => m.user_data.FirstName, "", new { @class = "text-danger" })
             </div>
         </div>
         <div class="form-group">
             @Html.LabelFor(m => m.user_data.LastName, new { @class = "col-lg-2 control-label" })
             <div class="col-lg-10">
                 @Html.TextBoxFor(m => m.user_data.LastName, new { @class = "form-control" })
                 @Html.ValidationMessageFor(m => m.user_data.LastName, "", new { @class = "text-danger" })
             </div>
         </div>

         <div class="form-group">
             @Html.LabelFor(m => m.user_data.MiddleName, new { @class = "col-lg-2 control-label" })
             <div class="col-lg-10">
                 @Html.TextBoxFor(m => m.user_data.MiddleName, new { @class = "form-control" })
                 @Html.ValidationMessageFor(m => m.user_data.MiddleName, "", new { @class = "text-danger" })
             </div>
         </div>

         <div class="form-group">
             @Html.LabelFor(m => m.user_data.Contact, new { @class = "col-lg-2 control-label" })
             <div class="col-lg-10">
                 @Html.TextBoxFor(m => m.user_data.Contact, new { @class = "form-control" })
                 @Html.ValidationMessageFor(m => m.user_data.Contact, "", new { @class = "text-danger" })
             </div>
         </div>

         <div class="form-group">
             <div class="col-lg-10 col-lg-offset-2">
                 <button type="submit" class="btn btn-primary">Register</button>
             </div>
         </div>

     </fieldset>
 }
5. Below is the code snippet from the _EditView.cshtml.
@model DBFirstDemo.Models.UserViewModel
@{
ViewBag.Title = "Edit User";
}
<h2>Edit User</h2>
@using (Html.BeginForm("EditUser", "Test", FormMethod.Post, new { @class = "form-horizontal", role = "form" }))
{
<fieldset>
@Html.ValidationSummary(true, "", new { @class = "text-danger" })
@Html.HiddenFor(m => m.user_data.ID, new { @class = "form-control", })
<div class="form-group">
@Html.LabelFor(m => m.user_data.FirstName, new { @class = "col-lg-2 control-label" })
<div class="col-lg-10">
@Html.TextBoxFor(m => m.user_data.FirstName, new { @class = "form-control" })
@Html.ValidationMessageFor(m => m.user_data.FirstName, "", new { @class = "text-danger" })
</div>
</div>
<div class="form-group">
@Html.LabelFor(m => m.user_data.LastName, new { @class = "col-lg-2 control-label" })
<div class="col-lg-10">
@Html.TextBoxFor(m => m.user_data.LastName, new { @class = "form-control" })
@Html.ValidationMessageFor(m => m.user_data.LastName, "", new { @class = "text-danger" })
</div>
</div>
<div class="form-group">
@Html.LabelFor(m => m.user_data.MiddleName, new { @class = "col-lg-2 control-label" })
<div class="col-lg-10">
@Html.TextBoxFor(m => m.user_data.MiddleName, new { @class = "form-control" })
@Html.ValidationMessageFor(m => m.user_data.MiddleName, "", new { @class = "text-danger" })
</div>
</div>
<div class="form-group">
@Html.LabelFor(m => m.user_data.Contact, new { @class = "col-lg-2 control-label" })
<div class="col-lg-10">
@Html.TextBoxFor(m => m.user_data.Contact, new { @class = "form-control" })
@Html.ValidationMessageFor(m => m.user_data.Contact, "", new { @class = "text-danger" })
</div>
</div>
<div class="form-group">
<div class="col-lg-10 col-lg-offset-2">
<button type="submit" class="btn btn-primary">Update</button>
<a class="btn btn-danger" href="@Url.Action("Index","Test")">Cancel</a>
</div>
</div>
</fieldset>
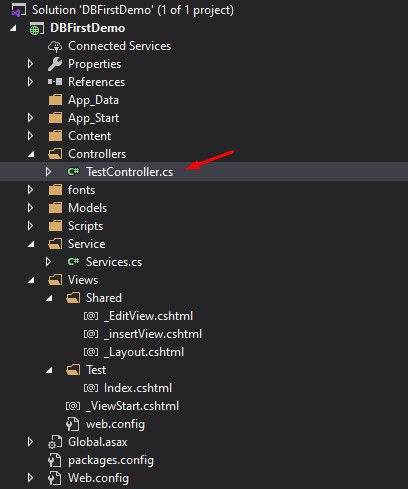
} V. Create TestController
Now, all we need to do is to create a controller. This controller will handle the connection between the view and Services.cs class that we created awhile ago. Below are the methods I used in my TestController.
| ActionResult | Method | Description |
| Index() | HTTPGET | Display the register form |
| Index(UserViewModel _user) | HTTPPOST | Process the new user for Registration |
| EditUser(int Id) | HTTPGET | Retrieve user info and display to the Edit View form |
| EditUser(UserViewModel _user) | HTTPPOST | Process the updating of the user information |
| DeleteUser(int Id) | HTTPGET | Delete the user |
using DBFirstDemo.Models;
using System;
using System.Collections.Generic;
using System.Linq;
using System.Web;
using System.Web.Mvc;
namespace DBFirstDemo.Controllers
{
public class TestController : Controller
{
Service.Services services = new Service.Services();
public ActionResult Index()
{
UserViewModel model = new UserViewModel();
model.user_list = services.GetUsers();
ViewBag.Method = "Register";
return View(model);
}
[HttpPost]
public ActionResult Index(UserViewModel _user)
{
if (_user.user_data != null)
{
user data = new user()
{
FirstName = _user.user_data.FirstName,
LastName = _user.user_data.LastName,
MiddleName = _user.user_data.MiddleName,
Contact = _user.user_data.Contact
};
var result = services.Insert_data(data);
return RedirectToAction("Index");
}
ModelState.AddModelError("","");
ViewBag.Method = "Register";
return View(_user);
}
[HttpGet]
public ActionResult EditUser(int Id)
{UserViewModel model = new UserViewModel();
model.user_list = services.GetUsers();
model.user_data = services.GetUserById(Id);
ViewBag.Method = "Edit";
return View("Index",model);
}
[HttpPost]
public ActionResult EditUser(UserViewModel _user)
{
if (_user.user_data != null)
{
user data = new user()
{
ID = _user.user_data.ID,
FirstName = _user.user_data.FirstName,
LastName = _user.user_data.LastName,
MiddleName = _user.user_data.MiddleName,
Contact = _user.user_data.Contact
};
var result = services.UpdateUser(data);
return RedirectToAction("Index");
}
ViewBag.Method = "Register";
return View("Index");
}
[HttpGet]
public ActionResult DeleteUser(int Id)
{
services.Delete(Id);
return RedirectToAction("Index");
}
}
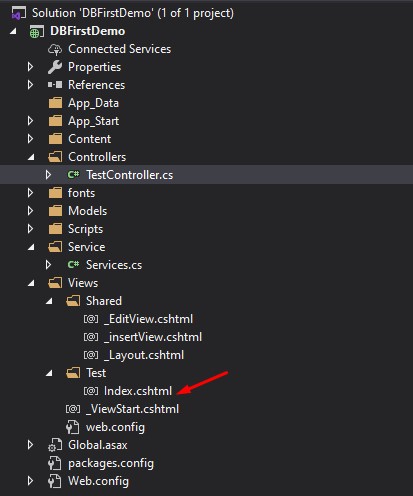
}VI. Create Index.cshtml
Lastly, all we need is the view. In this tutorial, it is the index.cshtml. This is how we call the partial view that I created awhile ago. Below are the code snippets on the index.cshtml.
@model DBFirstDemo.Models.UserViewModel
 @{
     ViewBag.Title = "Home Page"
 }

 <div class="">
     <div id="Form-container">

         @{
             if (ViewBag.Method == "Edit")
             {
                 @Html.Partial("_EditView")
             }
             else if (ViewBag.Method == "Register")
             {
                 @Html.Partial("_insertView")
             }
         }

     </div>
 <div class="">
     <table class="table">
         <thead>
             <tr>
                 <th>ID</th>
                 <th>First Name</th>
                 <th>Last Name</th>
                 <th>Middle Name</th>
                 <th>Contact Number</th>
                 <th colspan="2">Option</th>
             </tr>
         </thead>
         <tbody id="Table_data">
             @{
                 foreach (var row in Model.user_list)
                 {
                         <tr>
                             <td>@row.ID</td>
                             <td>@row.FirstName</td>
                             <td>@row.LastName</td>
                             <td>@row.MiddleName</td>
                             <td>@row.Contact</td>
                             <td><a class="btn btn-primary" href="@Url.Action("EditUser","Test",new { ID = row.ID})">Edit</a></td>
                             <td><a class="btn btn-danger" href="@Url.Action("DeleteUser","Test", new { ID = row.ID})">Delete</a></td>
                         </tr>
                 }
             }
         </tbody>
     </table>
 </div>
</div>
To download the source code of this tutorial you can visit my GitHub Account. coderbugzz
Summary
In our exploration, we’ve gained insights into the implementation of a Database-First Approach within ASP.NET MVC, leveraging Entity Framework. Additionally, we’ve developed a straightforward view to facilitate CRUD operations. This tutorial aims to familiarize you with this methodology and serve as a valuable reference for your upcoming projects, highlighting the importance of the “dotnet first approach in MVC.”
KEEP CODING!