
Clean Architecture in Flutter is like the magic wand that turns your app development journey into a breeze. It’s the secret recipe for building apps that work beautifully, stay organized, and grow without headaches.
- I. Create a Firebase project
- II. Create a new Flutter application
- III. Set up required folders and files
- IV. Implement the domain layer
- V. Connect Firebase Firestore to the application
- VI. Implement the Data Layer
- VII. Implement the presentation layer and integrate the domain and data layers
- VIII. Build the app
- Source Code:
- IX. Summary
In this blog post, we’ll simplify the complexities and shed light on Clean Architecture in Flutter and present it in the simplest way possible. Whether you’re a newbie or a seasoned developer, you’ll discover how Clean Architecture can make your Flutter app development a walk in the park. So, let’s get started and make Clean Architecture in Flutter as easy as pie!
The figure below is one of the forms of clean architecture.

Figure 1. The Clean Architecture as presented by Robert Martin
While there are several variations of the architecture present in the literature, the core principles remain the same, which is the creation of a central core of the application that is independent of external dependencies. The core includes the business logic and data models of the app.
The clean architecture has the following layers:
- Domain Layer – The domain layer serves as the core of the application which contains the business logic and data models;
- Application Layer – The application layer implements the use case of the app and bridges the infrastructure and presentation layers;
- Infrastructure Layer – The infrastructure layer deals with the interaction with the external world including the database, the web server, the user interface; and
- Presentation Layer – The presentation layer contains code that renders the user interface where the request is made and the response is returned.
Pros of Clean Architecture
While there are a lot of benefits cited in various literature to clean architecture, the top three that we can consider are:
- Flexibility – The core of the application is independent of any external dependencies (e.g., database, web server, or the user interface) making it easy to replace any of these in your app;
- Maintainability – New features and bug fixes can be implemented easily since the core is well-defined and is not affected by the external world; and
- Scalability – The core of your app can be reused in different environments.
Cons of Clean Architecture
- Initial complexity – Implementing clean architecture can be more time-consuming and complex because it requires careful planning and design;
- Over-engineering – For small apps (e.g., simple CRUD apps), implementing layers of abstraction can lead to unnecessary complexity and development overhead;
- Learning curve – Implementing clean architecture requires an understanding of the SOLID principle, which can lead to a steep learning curve.
Notwithstanding the above cons of the architecture, in this tutorial, you will implement the clean architecture in Flutter by creating a simple store management app with create, read, update, and delete (CRUD) features for store items. You will be using Firebase Firestore as your database. To complete this tutorial, you must have the following:
- A computer with Flutter and Node installed;
- A Firebase project with Firestore activated;
- A code editor of your choice (VS Code is recommended); and
- A basic knowledge of Flutter, particularly widgets, and Firebase.
At the end of this tutorial, your app should look like this:
Watch the video on Flutter Clean Architecture Demo here.
Before you start, you should note that the objective of this tutorial is to demonstrate how clean architecture can be implemented in a Flutter app. Therefore, building the UI and implementing the Firebase Firestore database will not be explored in detail in this tutorial.
The main entity of the app is the Product entity which represents a product in the real world, for example, a shoe or a t-shirt. Since this is an inventory app, the main purpose is to keep track of the stock per type of product. The data to be stored would mainly include details of the product and quantity on hand. The app should be able to create new products, display a single or all available product(s), update the details and quantity of products, and delete products.
Let’s get our hands dirty!
I. Create a Firebase project
Begin with setting up a Firebase project in your Google Firebase console (https://console.firebase.google.com/). Click on “Add Project” and follow the instructions on-screen.
1. Add Firestore and Firebase Storage from the Build menu. Find the instructions from the following URL.
- For adding Firestore use this firestore quickstart
- Then, for adding Storage use this Getting started with Cloud Storage .
You can find detailed instructions on the linked portions of the documentation. Once you’ve finished configuring a Firebase project, you may proceed with the next step.

Or you can use our step-by-step guide on setting up Firebase.
II. Create a new Flutter application
Create a Flutter application by running the following command:
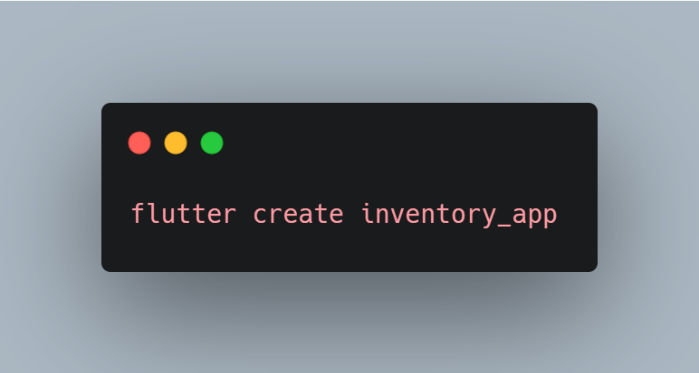
Make sure to move to a directory where you wish to create your project in.
This will create a new Flutter project in the inventory_app folder.
III. Set up required folders and files
In your project directory, create the following folders and files (except firebase_options.dart which will be generated when we set up Firebase).
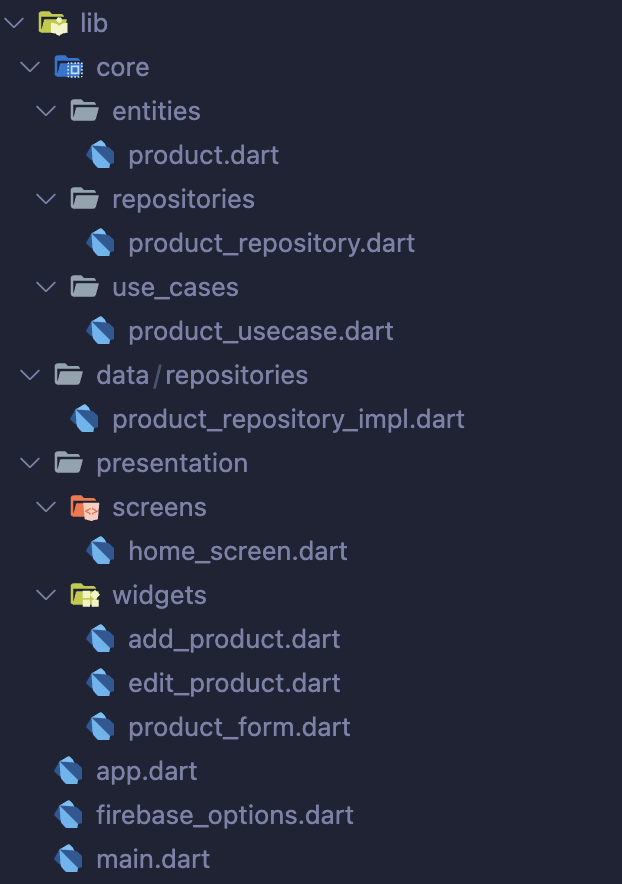
The above directory more or less captures what we want to achieve.
We have three main folders: core, data, and presentation. The core layer contains the entities, repositories, and use_cases which capture the business logic of our application. The data layer contains the repository implementation. Lastly, the presentation layer contains the screens and widgets of our application.
IV. Implement the domain layer
As mentioned earlier, the domain layer is the layer that serves as the core of the application which contains the data models and business logic. Let’s create the Product model first.
1. Creating the Product model
As you can see, we defined a class and defined the expected properties and their data types. You can add more types and properties here and this will be reflected throughout the app when the Product class is referenced.
/// product.dart
/// Defines the Product class, the main entity for this application
@immutable
class Product {
  final String? id;
  final String name;
  final String brandName;
  final String category;
  final int quantity;
  final double price;
  const Product({
    required this.name,
    required this.brandName,
    required this.category,
    required this.quantity,
    required this.price,
    this.id,
  });
}
Below are additional codes inside the Product class which handles serialization of the class. These serialization functions handle the translation of the Product into JSON or from JSON useful when interacting with external data sources.
  factory Product.fromJson(Map<String, dynamic> json) {
    return Product(
      id: json['id'],
      name: json['name'],
      brandName: json['brandName'],
      category: json['category'],
      quantity: json['quantity'],
      price: json['price'],
    );
  }
  Map<String, dynamic> toJson() {
    return {
      'id': id,
      'name': name,
      'brandName': brandName,
      'category': category,
      'quantity': quantity,
      'price': price,
    };
  }
Lastly, we create a copyWith function that returns a new instance of the class with some updated values without modifying the original object.
       Product copyWith({
    String? id,
    String? name,
    String? brandName,
    String? category,
    int? quantity,
    double? price,
  }) {
    return Product(
      id: id ?? this.id,
      name: name ?? this.name,
      brandName: brandName ?? this.brandName,
      category: category ?? this.category,
      quantity: quantity ?? this.quantity,
      price: price ?? this.price,
    );
  }
While adding copyWith returns a new instance of the Product class, there is still no mechanism to enforce that the object be mutable only using copyWith. To enforce immutability, we have added @immutable annotation to the class, declare the properties as final, and the constructor as constant.
2. Creating the Repository
The next step is to define the ProductRepository. The ProductRepository is an abstract class, an interface, that provides a clean API for data access to the rest of the application. It acts as a bridge between the domain (business logic) and the data sources (like databases, APIs, external services, etc.).
Define the ProductRepository as in the code below:
   /// product_repository.dart
/// Defines an interface for the ProductRepository
import 'package:inventory_app/core/entities/product.dart';
abstract class ProductRepository {
  // get all products
  Stream<List<Product>> getAll();
  // get a product by id
  Future<Product> getById(String id);
  // creates a new product
  Future<void> create(Product product);
  // updates product details
  Future<void> update(Product product);
  // delete the product
  Future<void> delete(String id);
}
The repository has five methods: getAll, getById, create, update, and delete. As you can see, the repository class only provides the return type, the method name, and the expected inputs. This means that the repository class does not depend on external services, only on the model.
3. Creating the Use Case
The use case holds the business logic of the application and is included in the domain layer. Let’s define the use cases.
   /// product_usecase.dart
/// the ProductUseCase encapsulates the business logic
/// It operates on entities and interacts with repositories
import 'package:inventory_app/core/entities/product.dart';
import 'package:inventory_app/core/repositories/product_repository.dart';
class GetAllProductUseCase {
  final ProductRepository repository;
  GetAllProductUseCase(this.repository);
  Stream<List<Product>> execute() {
    return repository.getAll();
  }
}
class GetByIdProductUseCase {
  final ProductRepository repository;
  GetByIdProductUseCase(this.repository);
  Future<Product> execute(String id) async {
    return await repository.getById(id);
  }
}
class CreateProductUseCase {
  final ProductRepository repository;
  CreateProductUseCase(this.repository);
  Future<void> execute(Product product) async {
    await repository.create(product);
  }
}
class UpdateProductUseCase {
  final ProductRepository repository;
  UpdateProductUseCase(this.repository);
  Future<void> execute(Product product) async {
    await repository.update(product);
  }
}
class DeleteProductUseCase {
  final ProductRepository repository;
  DeleteProductUseCase(this.repository);
  Future<void> execute(String id) async {
    await repository.delete(id);
  }
}
Each use case takes a ProductRepository as a dependency and defines an execute method that encapsulates the logic for that specific use case. These use cases serve as the bridge between the business logic and the repository, providing a clean and organized way to interact with the Product model.
This structure helps keep the code modular and allows for testing of the individual use cases. Further, it makes it clear what each use case is responsible for, improving the readability and maintainability of your code. We are also sure that a use case is responsible for one thing only.
With that, we’re done with the domain layer. We will be implementing the data layer next, i.e. connecting our application to external data sources, in this case, Firebase Firestore.
V. Connect Firebase Firestore to the application
Before we can proceed with this tutorial, we need to connect Firestore to our application. Make sure you are logged in to Firebase. You can use the following command to login:
Next, install flutterfire_cli globally and activate it using the following command:
Inside your project folder, run:
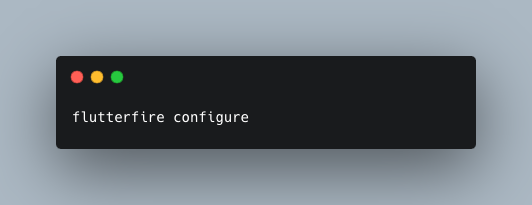
Follow the instructions in the console to configure your project.
After successfully carrying out the configuration, you should find a new file named lib/firebase_options.dart which contains the information of your firebase project.
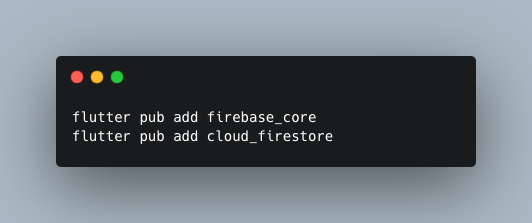
Add Firebase dependencies to your Flutter project:
Lastly, update the main.dart to initialize firebase on app startup.
   /// main.dart
import 'package:firebase_core/firebase_core.dart';
import 'package:flutter/material.dart';
import 'package:inventory_app/app.dart';
import 'package:inventory_app/firebase_options.dart';
void main() async {
  WidgetsFlutterBinding.ensureInitialized();
  // initialize Firebase based on generated firebase_options file
  await Firebase.initializeApp(
    options: DefaultFirebaseOptions.currentPlatform,
  );
  runApp(const MyApp());
}
This successfully integrates Firebase into our application. While this tutorial limits the use of Firebase Firestore, note that this configuration also activates other Firebase services.
VI. Implement the Data Layer
The main data source of our application will be Firebase Firestore. We will define the product repository implementer that lives inside the data layer. This class will now contain the actual implementation of the repository using Firestore as the data source. As you can see, because the ProductRepositoryImpl implements the ProductRepository, it implements all methods in the abstract class. Further, this class depends on the data source, i.e. the FirebaseFirestore. We have also used the serialization methods in the Product class to decode and encode response and payload to the Firestore, respectively.
This is where clean architecture shines. You can use other data sources by defining different implementers per data source, e.g. local data source like SQLite or Hive, or REST API. All you have to do is make sure the class implements the ProductRepository class. Only Firestore as the data source will be replaced. You can try that on your own as an assignment.
 /// product_repository_impl.dart
/// Holds the implementation of ProductRepository
/// Interacts with the data source
import 'package:cloud_firestore/cloud_firestore.dart';
import 'package:inventory_app/core/entities/product.dart';
import 'package:inventory_app/core/repositories/product_repository.dart';
class ProductRepositoryImpl implements ProductRepository {
  final FirebaseFirestore _firestore;
  ProductRepositoryImpl(this._firestore);
  @override
  Stream<List<Product>> getAll() {
    return _firestore.collection('products').snapshots().map((querySnapshot) {
      return querySnapshot.docs.map((doc) {
        return Product.fromJson(doc.data());
      }).toList();
    });
  }
  @override
  Future<Product> getById(String id) async {
    DocumentSnapshot<Map<String, dynamic>> doc =
        await _firestore.collection('products').doc(id).get();
    return Product.fromJson(doc.data()!);
  }
  @override
  Future<void> create(Product product) async {
    DocumentReference<Map<String, dynamic>> docRef =
        _firestore.collection('products').doc();
    final id = docRef.id;
    product = product.copyWith(id: id);
    await docRef.set(product.toJson());
  }
  @override
  Future<void> update(Product product) async {
    await _firestore
        .collection('products')
        .doc(product.id!)
        .update(product.toJson());
  }
  @override
  Future<void> delete(String id) async {
    await _firestore.collection('products').doc(id).delete();
  }
}
Note: The firebase syntax above is specific to Firebase Firestore, which is not covered in this tutorial. You can learn more about Firestore in the Firebase documentation (https://firebase.google.com/docs).
VII. Implement the presentation layer and integrate the domain and data layers
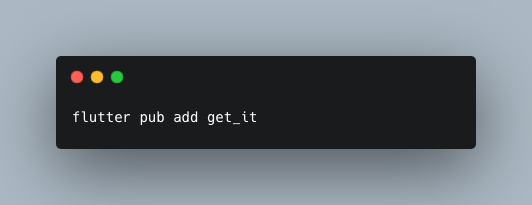
We will now use the domain and data layers in the presentation layer. However, before we can proceed, we need to add another package called get_it, a dependency injection package for Flutter and Dart. As you can see, the clean architecture pattern creates dependencies between classes and layers. It allows you to register dependencies (e.g., classes or instances of classes) and later retrieve them using a unique identifier. Using get_it, we can centralize the definition of dependency classes and only initialize them once in the app and refer to them as you need them.
To install the package, run:
After adding the package, create a new function inside main.dart file and type in the following code:
/// main.dart
import 'package:get_it/get_it.dart';
GetIt locator = GetIt.instance;
void loadDependencies() {
  //
  final firestore = FirebaseFirestore.instance;
  locator.registerLazySingleton<ProductRepository>(
      () => ProductRepositoryImpl(firestore));
  locator.registerLazySingleton<GetAllProductUseCase>(
      () => GetAllProductUseCase(locator<ProductRepository>()));
  locator.registerLazySingleton<GetByIdProductUseCase>(
      () => GetByIdProductUseCase(locator<ProductRepository>()));
  locator.registerLazySingleton<CreateProductUseCase>(
      () => CreateProductUseCase(locator<ProductRepository>()));
  locator.registerLazySingleton<UpdateProductUseCase>(
      () => UpdateProductUseCase(locator<ProductRepository>()));
  locator.registerLazySingleton<DeleteProductUseCase>(
      () => DeleteProductUseCase(locator<ProductRepository>()));
}
Then call the function loadDependencies() inside the main() function just before runApp();
     // initialize dependencies/instances
  loadDependencies();
  runApp(const MyApp());
This function will create an instance of the classes defined inside it and makes it available anywhere in your app as a singleton. To use it, you can do the following:
final GetAllProductUseCase getAllProductUseCase = locator<GetAllProductUseCase>(); You can call this anywhere in your app and when you do, you can always be sure that it’s the same instance of the class inside your app, thus, the term singleton.
1. Build the List Product
Let’s now integrate this into our presentation layer. Let’s build the HomeScreen.
class _HomeScreenState extends State<HomeScreen> {
  final GetAllProductUseCase getAllProductUseCase =
      locator<GetAllProductUseCase>();
Since this is a stream, we can create a StreamBuilder inside HomeScreen’s body property and load the products there:
        body: StreamBuilder(
        stream: getAllProductUseCase.execute(),
        builder: (context, snapshot) {
          // for implementation: display ui based on state of the stream
        },
      ),
The rest of the code is just for the user interface. What we are interested in is the second line which calls the getAllProductsUseCase.execute(). Since this is a stream, every time the stream receives data from the Firebase Firestore, the user interface will update and load the new item/s.
For a better user experience, when the ConnectionState is waiting, we will show a circular progress indicator.
              if (snapshot.connectionState == ConnectionState.waiting) {
            return const Center(
              child: CircularProgressIndicator(),
            );
          }
In case of error, we show the error message:
          if (snapshot.hasError) {
            return Center(
              child: Text(
                snapshot.error.toString(),
              ),
            );
          }
If the snapshot is empty, show a prompt to add a product:
   if (products.isEmpty) {
            return Center(
              child: Column(
                mainAxisAlignment: MainAxisAlignment.center,
                children: [
                  IconButton(
                    onPressed: () {
                      addProduct();
                    },
                    icon: const Icon(
                      Icons.add,
                      size: 48,
                    ),
                  ),
                  const SizedBox(
                    height: 20,
                  ),
                  const Text(
                    'Click the + icon to add a new product',
                    style: TextStyle(
                      color: Colors.black38,
                    ),
                  )
                ],
              ),
            );
          }
And lastly, if there is data, return a table of products:
   return Padding(
            padding: const EdgeInsets.all(8.0),
            child: SingleChildScrollView(
              child: Table(
                border:
                    TableBorder.all(borderRadius: BorderRadius.circular(8.0)),
                children: [
                  const TableRow(children: [
                    TableCell(
                        child: Padding(
                      padding: EdgeInsets.all(8.0),
                      child: Text(
                        'Product Name',
                        style: TextStyle(fontWeight: FontWeight.bold),
                      ),
                    )),
                    TableCell(
                        child: Padding(
                      padding: EdgeInsets.all(8.0),
                      child: Text(
                        'Brand Name',
                        style: TextStyle(fontWeight: FontWeight.bold),
                      ),
                    )),
                    TableCell(
                        child: Padding(
                      padding: EdgeInsets.all(8.0),
                      child: Text(
                        'Category',
                        style: TextStyle(fontWeight: FontWeight.bold),
                      ),
                    )),
                    TableCell(
                        child: Padding(
                      padding: EdgeInsets.all(8.0),
                      child: Text(
                        'Quantity',
                        style: TextStyle(fontWeight: FontWeight.bold),
                      ),
                    )),
                    TableCell(
                        child: Padding(
                      padding: EdgeInsets.all(8.0),
                      child: Text(
                        'Price (USD)',
                        style: TextStyle(fontWeight: FontWeight.bold),
                      ),
                    )),
                    TableCell(
                        child: Padding(
                      padding: EdgeInsets.all(8.0),
                      child: Text(
                        'Actions',
                        style: TextStyle(fontWeight: FontWeight.bold),
                      ),
                    )),
                  ]),
                  ...products.map(
                    (Product product) {
                      return TableRow(
                        children: [
                          TableCell(
                              child: Padding(
                            padding: const EdgeInsets.all(8.0),
                            child: Text(product.name),
                          )),
                          TableCell(
                              child: Padding(
                            padding: const EdgeInsets.all(8.0),
                            child: Text(product.brandName),
                          )),
                          TableCell(
                              child: Padding(
                            padding: const EdgeInsets.all(8.0),
                            child: Text(product.category),
                          )),
                          TableCell(
                              child: Padding(
                            padding: const EdgeInsets.all(8.0),
                            child: Text(product.quantity.toString()),
                          )),
                          TableCell(
                              child: Padding(
                            padding: const EdgeInsets.all(8.0),
                            child: Text(product.price.toString()),
                          )),
                          TableCell(
                            child: Padding(
                              padding: const EdgeInsets.all(8.0),
                              child: Wrap(
                                children: [
                                  IconButton(
                                    icon: const Icon(Icons.edit),
                                    onPressed: () => editProduct(product),
                                  ),
                                  IconButton(
                                    icon: const Icon(
                                      Icons.delete,
                                      color: Colors.red,
                                    ),
                                    onPressed: () => deleteProduct(product),
                                  ),
                                ],
                              ),
                            ),
                          ),
                        ],
                      );
                    },
                  ).toList(),
                ],
              ),
            ),
          );
        },
The above code snippet creates a table with a header row and list of products iterated to create table rows. At the end of each product row, edit and delete buttons are present.
2. Build the Add Product
For the add product feature, we will add a function inside the home screen that shows a dialog to add a product. But before that, since add product and edit product have the same data requirements, let’s extract the ProductForm into its own widget file.
Create lib/presentation/widgets/product_form.dart. Copy and paste the code below:
   /// product_form.dart
import 'package:flutter/material.dart';
import 'package:inventory_app/core/entities/product.dart';
class ProductForm extends StatefulWidget {
  const ProductForm({
    super.key,
    required this.product,
    required this.onSubmit,
  });
  final Product product;
  final Function(Product product) onSubmit;
  @override
  State<ProductForm> createState() => _ProductFormState();
}
class _ProductFormState extends State<ProductForm> {
  final TextEditingController _nameController = TextEditingController();
  final TextEditingController _brandNameController = TextEditingController();
  final TextEditingController _categoryController = TextEditingController();
  final TextEditingController _quantityController = TextEditingController();
  final TextEditingController _priceController = TextEditingController();
  void onSubmit() {
    widget.onSubmit(
      Product(
        // retain product id
        id: widget.product.id,
        name: _nameController.text,
        brandName: _brandNameController.text,
        category: _categoryController.text,
        quantity: int.tryParse(_quantityController.text) ?? 0,
        price: double.tryParse(_priceController.text) ?? 0,
      ),
    );
  }
  @override
  void initState() {
    _nameController.text = widget.product.name;
    _brandNameController.text = widget.product.brandName;
    _categoryController.text = widget.product.category;
    _quantityController.text = widget.product.quantity.toString();
    _priceController.text = widget.product.price.toString();
    super.initState();
  }
  @override
  void dispose() {
    _nameController.dispose();
    _brandNameController.dispose();
    _categoryController.dispose();
    _quantityController.dispose();
    _priceController.dispose();
    super.dispose();
  }
  @override
  Widget build(BuildContext context) {
    return Padding(
      padding: const EdgeInsets.all(8.0),
      child: Column(
        mainAxisSize: MainAxisSize.min,
        children: [
          //
          Row(
            children: [
              const Expanded(child: Text('Product Name')),
              Expanded(
                flex: 3,
                child: TextField(
                  controller: _nameController,
                  decoration: const InputDecoration(
                    hintText:
                        'Skechers Slip-ins: Glide-Step Swift - New Thrill',
                    hintStyle: TextStyle(
                      color: Colors.black38,
                    ),
                  ),
                ),
              ),
            ],
          ),
          Row(
            children: [
              const Expanded(child: Text('Brand Name')),
              Expanded(
                flex: 3,
                child: TextField(
                  controller: _brandNameController,
                  decoration: const InputDecoration(
                    hintText: 'Skechers',
                    hintStyle: TextStyle(
                      color: Colors.black38,
                    ),
                  ),
                ),
              ),
            ],
          ),
          Row(
            children: [
              const Expanded(child: Text('Category')),
              Expanded(
                flex: 3,
                child: TextField(
                  controller: _categoryController,
                  decoration: const InputDecoration(
                    hintText: 'Sneakers',
                    hintStyle: TextStyle(
                      color: Colors.black38,
                    ),
                  ),
                ),
              ),
            ],
          ),
          Row(
            children: [
              const Expanded(child: Text('Quantity')),
              Expanded(
                flex: 3,
                child: TextField(
                  controller: _quantityController,
                  decoration: const InputDecoration(
                      hintText: '1',
                      hintStyle: TextStyle(
                        color: Colors.black38,
                      )),
                  keyboardType: const TextInputType.numberWithOptions(
                    decimal: false,
                    signed: false,
                  ),
                ),
              ),
            ],
          ),
          Row(
            children: [
              const Expanded(child: Text('Price (USD)')),
              Expanded(
                flex: 3,
                child: TextField(
                  controller: _priceController,
                  decoration: const InputDecoration(
                    hintText: '1.00',
                    hintStyle: TextStyle(
                      color: Colors.black38,
                    ),
                  ),
                  keyboardType: const TextInputType.numberWithOptions(
                    decimal: true,
                    signed: false,
                  ),
                ),
              ),
            ],
          ),
          const SizedBox(
            height: 20,
          ),
          Padding(
            padding: const EdgeInsets.all(8.0),
            child: SizedBox(
                width: double.infinity,
                child: FilledButton(
                  onPressed: onSubmit,
                  child: const Text('SUBMIT'),
                )),
          ),
        ],
      ),
    );
  }
}
To summarize the content of the ProductForm widget, it has five TextFields that represent each of the properties of the product class. Excluded is id generated in the Firestore database upon creation of the document. We have created an assigned TextEditingController for each field. Lastly, we added an onSubmit callback which returns a Product object that the parent widget can use. We will add the parent widgets next.
Back in the home screen, add the addProduct function:
    void addProduct() {
    showDialog(
        context: context,
        builder: (context) {
          return const AlertDialog(
            title: Text('ADD PRODUCT'),
            content: AddProduct(),
          );
        });
  }
Then, create the lib/presentation/widgets/add_product.dart file and add the following code:
/// add_product.dart
import 'package:flutter/material.dart';
import 'package:inventory_app/core/entities/product.dart';
import 'package:inventory_app/core/use_cases/product_usecase.dart';
import 'package:inventory_app/main.dart';
import 'package:inventory_app/presentation/widgets/product_form.dart';
class AddProduct extends StatefulWidget {
  const AddProduct({
    super.key,
  });
  @override
  State<AddProduct> createState() => _AddProductState();
}
class _AddProductState extends State<AddProduct> {
  final CreateProductUseCase _createProductUseCase =
      locator<CreateProductUseCase>();
  Future<void> onSubmit(Product product) async {
    await _createProductUseCase.execute(product);
    if (mounted) {
      Navigator.of(context).pop();
      // .push(MaterialPageRoute(builder: (context) => const HomeScreen()));
    }
  }
  @override
  Widget build(BuildContext context) {
    return ProductForm(
      product: const Product(
        name: '',
        brandName: '',
        category: '',
        quantity: 0,
        price: 0,
      ),
      onSubmit: (Product product) {
        onSubmit(product);
      },
    );
  }
}
The AddProduct widget is a simple widget that returns the ProductForm with an empty instance of class Product. The onSubmit function calls the CreateProductUseCase and upon success, closes the dialog.
3. Build the Edit Product
To call the edit product, add the editProduct function to the home screen. Copy and paste the following code:
  void editProduct(Product product) {
    showDialog(
        context: context,
        builder: (context) {
          return AlertDialog(
            title: const Text('UPDATE PRODUCT'),
            content: EditProduct(
              product: product,
            ),
          );
        });
  }
The editProduct is very similar to the addProduct except that the product to be edited is passed on to it. For the lib/presentation/widgets/edit_product.dart, add the following code:
/// edit_product.dart
import 'package:flutter/material.dart';
import 'package:inventory_app/core/entities/product.dart';
import 'package:inventory_app/core/use_cases/product_usecase.dart';
import 'package:inventory_app/main.dart';
import 'package:inventory_app/presentation/widgets/product_form.dart';
class EditProduct extends StatefulWidget {
  const EditProduct({
    super.key,
    required this.product,
  });
  final Product product;
  @override
  State<EditProduct> createState() => _EditProductState();
}
class _EditProductState extends State<EditProduct> {
  final UpdateProductUseCase _updateProductUseCase =
      locator<UpdateProductUseCase>();
  Future<void> _onSubmit(Product product) async {
    await _updateProductUseCase.execute(product);
    if (context.mounted) {
      Navigator.of(context).pop();
    }
  }
  @override
  Widget build(BuildContext context) {
    return ProductForm(
        product: widget.product,
        onSubmit: (Product product) {
          _onSubmit(product);
        });
  }
}
For the EditProduct widget, we’re calling the UpdateProductUseCase instead.
4. Add the Delete Product
For the Delete Product feature, a simple function calling a confirmation dialog is implemented like this:
Future<void> deleteProduct(Product product) async {
    //
    showDialog(
      context: context,
      builder: (context) {
        return AlertDialog(
          title: const Text('DELETE PRODUCT'),
          content: const Text('Are you sure you want to delete this product?'),
          actions: [
            TextButton(
                onPressed: () {
                  Navigator.pop(context);
                },
                child: const Text('CANCEL')),
            FilledButton(
              onPressed: () async {
                await _deleteProductUseCase.execute(product.id!);
                if (context.mounted) {
                  Navigator.of(context).pop();
                }
              },
              child: const Text('CONFIRM'),
            )
          ],
        );
      },
    );
  }
Great! We’ve finished building our product inventory application! You can run this code on the web, MacOS, Android, and iOS. Unfortunately, as of this time, Windows and Linux do not support Firebase out of the box.
VIII. Build the app
To create builds for the app on different platforms:
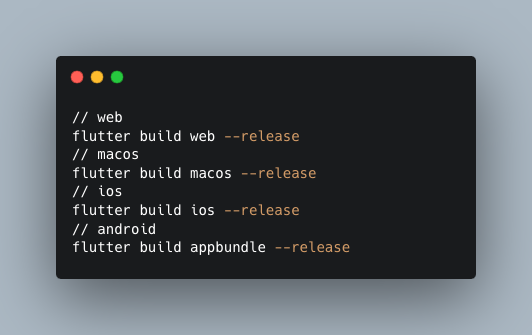
Upon successful build, you will find the respective build folders and files inside the build folder.
Note: You need an active Apple developer account to build ios apps.
Source Code:
You may also download the source code from GitHub.
IX. Summary
In this tutorial, we learned about How to Implement Clean Architecture in the Flutter application by building a simple product inventory app. The core of clean architecture is the domain layer which contains the models and business logic of your application. The clean architecture has the benefits of maintainability, flexibility, and scalability but can be complex, overengineered, and difficult to learn. This tutorial also showed us how to set up Firebase and use Firestore as a database. Lastly, we also learned how to build the app on various platforms.