
In this tutorial, we will learn how to Deploy and Share ASP.NET Core WebApp to a Local Network using IIS on Windows. Deploying ASP.NET Core Web APP on IIS is an easy task once you understand and follow the correct steps to prepare your development and deployment environment.
- What is IIS?
- I. Create a new ASP.NET Core Web Application
- II. Enable IIS on Windows?
- III. Install the ASP.NET Core Module/Hosting Bundle
- IV. Create Application Pool and Website Application
- IV. Deploy ASP.NET Core Web Application to IIS
- V. Configure IIS Website to be Accessible from within your Network
- Summary
What is IIS?
IIS stands for “Internet Information Services,” a web server provided by Microsoft to host the websites. Internet Information Services (IIS) is a flexible, general-purpose web server from Microsoft that runs on Windows systems to serve requested HTML pages or files.
The first and most important thing you need is to download and install the latest Visual Studio 2019. Visual Studio 2019 supports the newest version of Dot Net SDK, which is 5.0
Note that you cannot use Visual Studio 2017 to develop Dot Net Core 3 or Dot Net 5 apps.
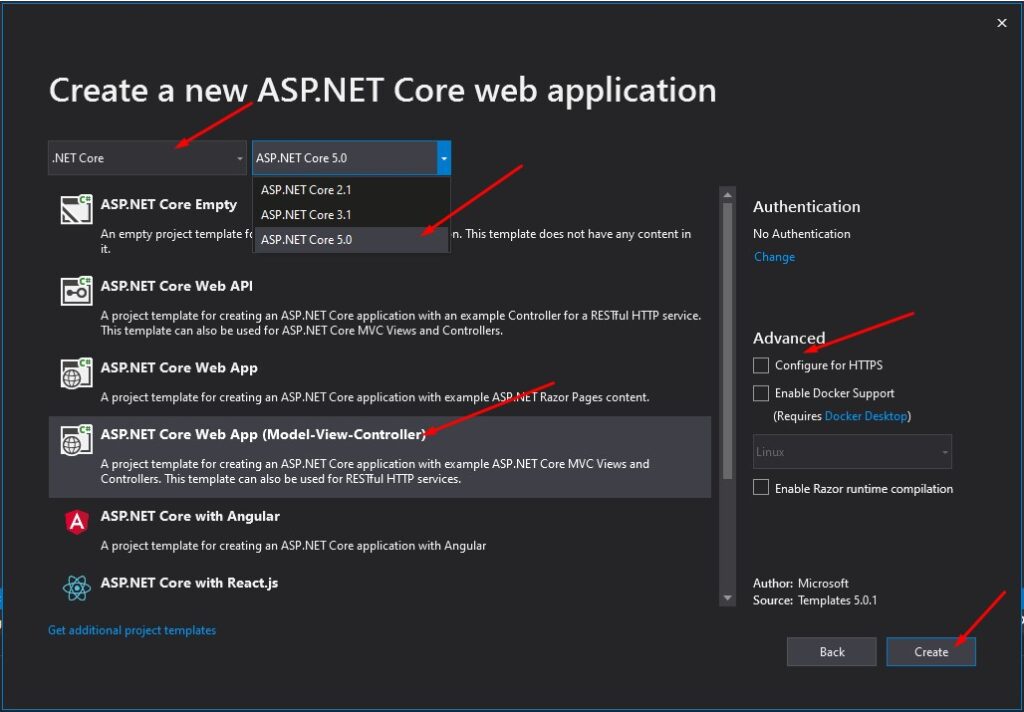
I. Create a new ASP.NET Core Web Application
Let’s create a new ASP.NET Core Web Application for the deployment demo. If you already have a project to deploy, skip this part and move to the next step. If not, follow the steps below.
- Select File > New > Project.
- Select ASP.NET Core Web Application. Name the project DeployDemo to have the same namespace as my project. Click OK.
- Select an ASP.NET Core Web Application. and then uncheck Configure for HTTPS.
- Lastly, Click on Create.
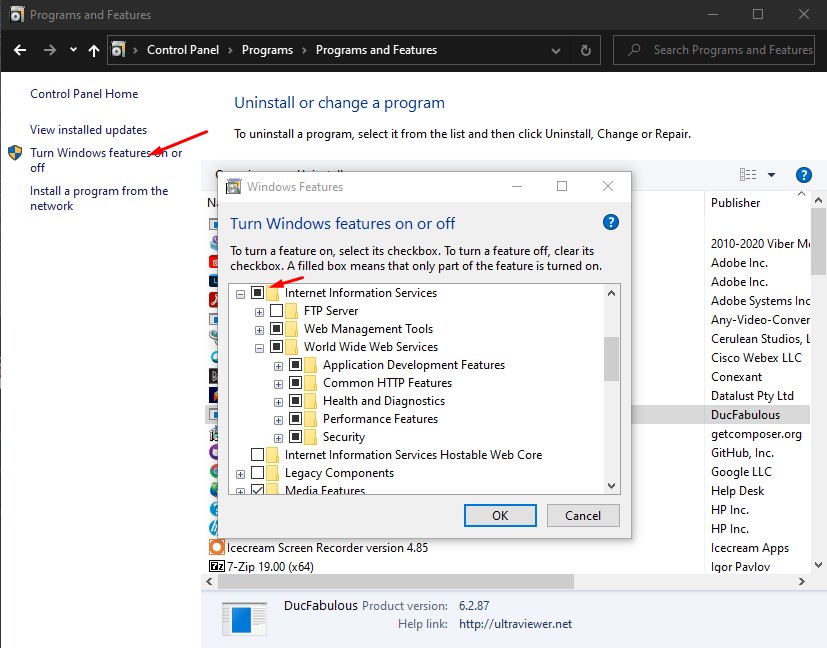
II. Enable IIS on Windows?
If you have already enabled IIS, then you can skip this step. But if not then enabled it by following the below steps:
You may also visit this article for detailed step to enable IIS on windows. link
- Open Control Panel and then click on the “Programs and Features.”
- Click on “Turn Windows features on or off.”
- Select Internet Information Services and click on the OK button.
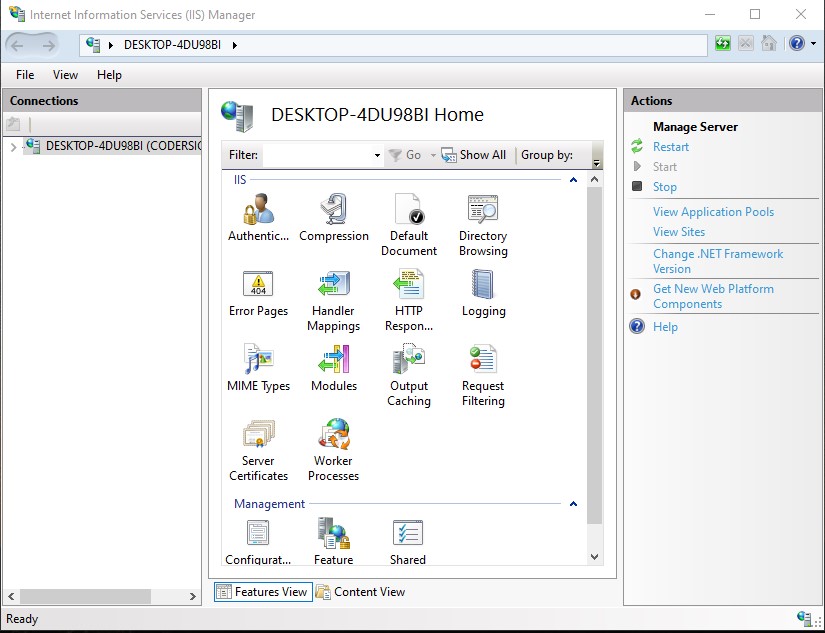
- To see whether IIS is enabled, press the Windows + R key and type inetmgr, and click on OK.
- IIS Manager is open.
III. Install the ASP.NET Core Module/Hosting Bundle
ASP.NET Core offer two Deployment Mode, Framework-Dependent and Self-Contained.
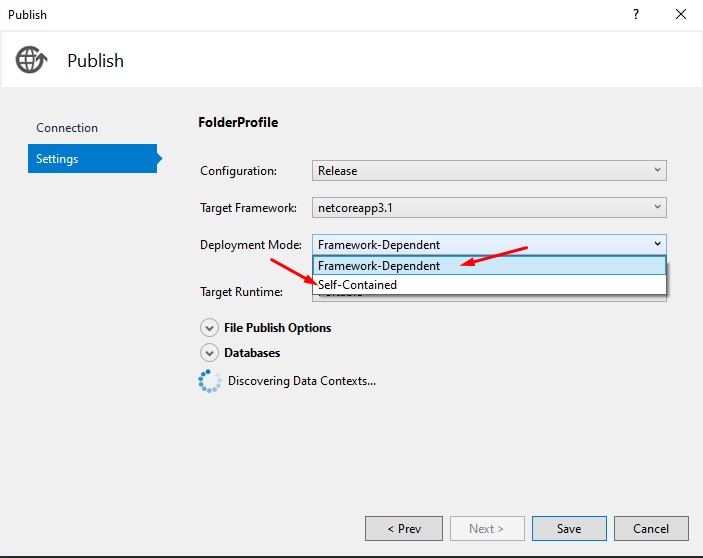
| Deployment Mode | Difinition |
| Framework-Dependent | Dependent on what framework is installed on the machine. (.net core 3.1 or .net core 5.0) |
| Self-Contained | This deployment mode will produce an application that includes the .NET Core runtime and libraries. |
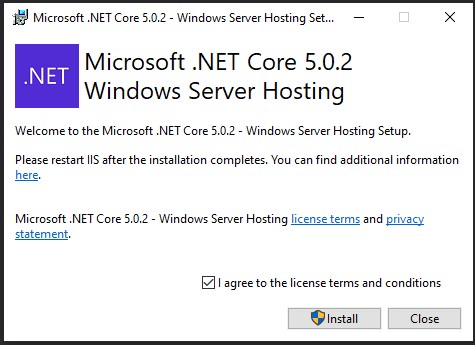
- To download the latest .Net Core hosting bundle, you may use this link.
- Once you finish the download, install the bundle into your machine.
- Now, we are ready to configure IIS to run a .Net core application.
IV. Create Application Pool and Website Application
To configure IIS for the deployment of ASP.NET Core Web Application. Just follow the steps below.
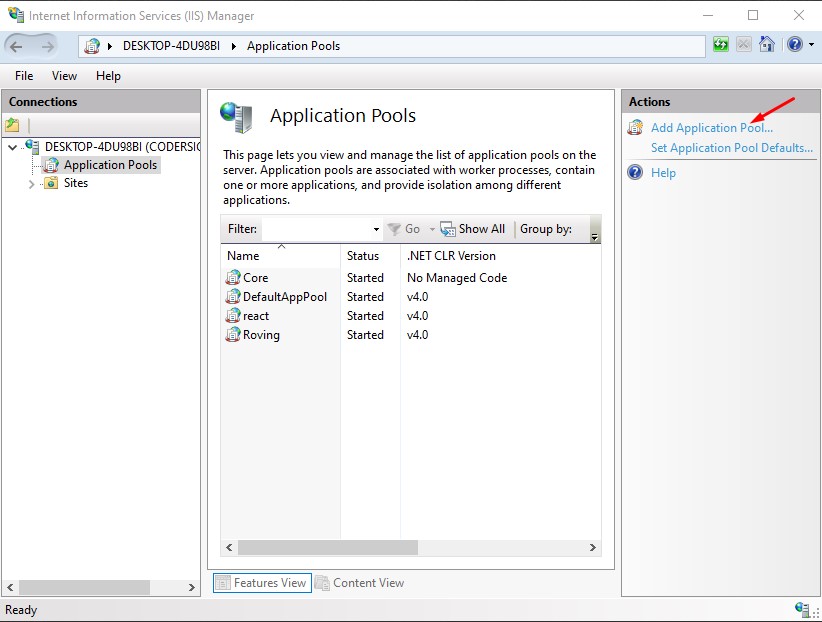
- Create a new Application Pool. Open IIS and select Application Pools.
2. Click on the Add Application Pool option from the Actions pane. See the screenshot below.
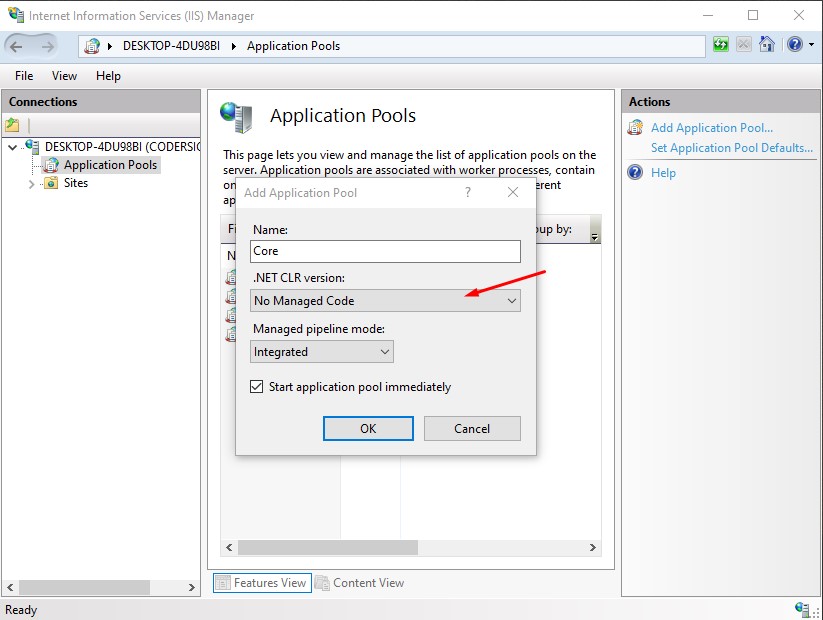
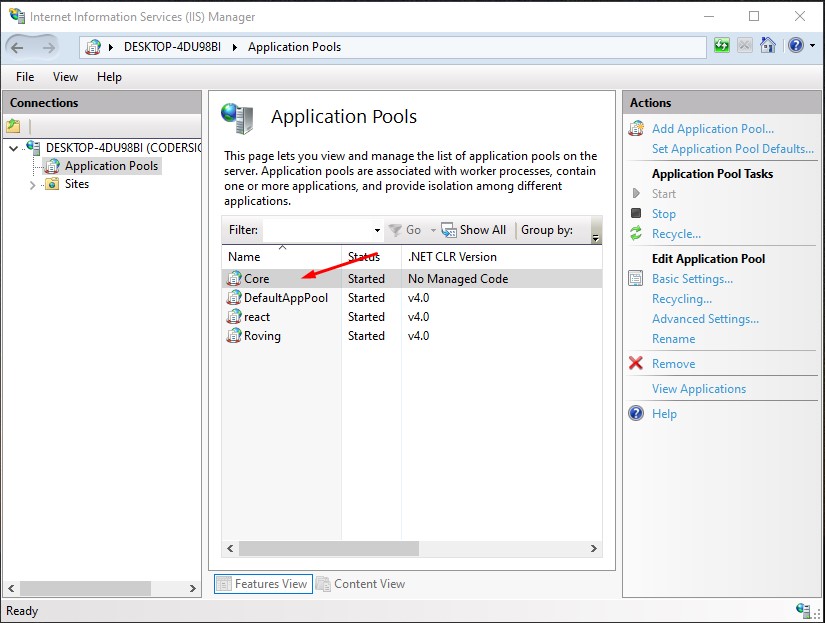
3. Input desired name to your new application pool, then select No Manage Code under the .NET CLR version. Click “OK” to create the application pool.
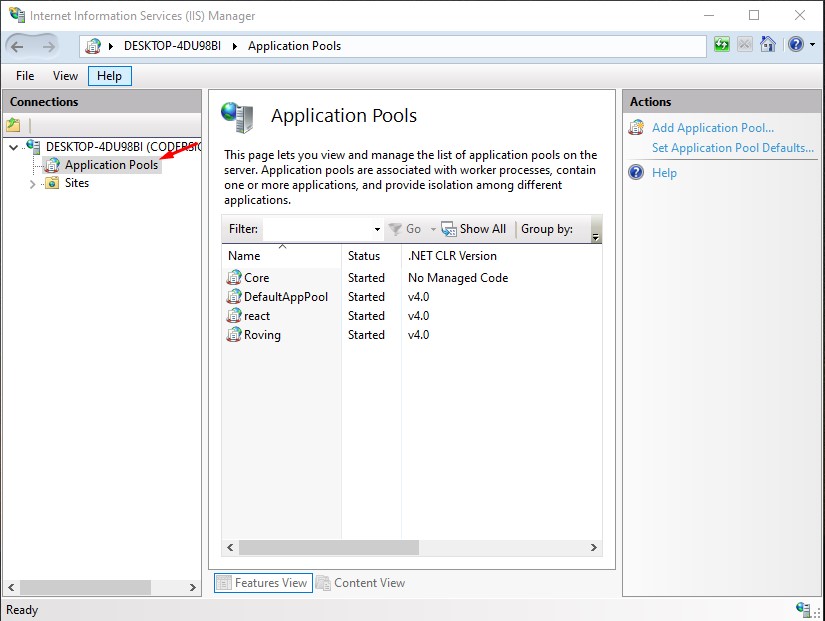
The newly created Application Pool will be added to the list of available pool. See the image below.
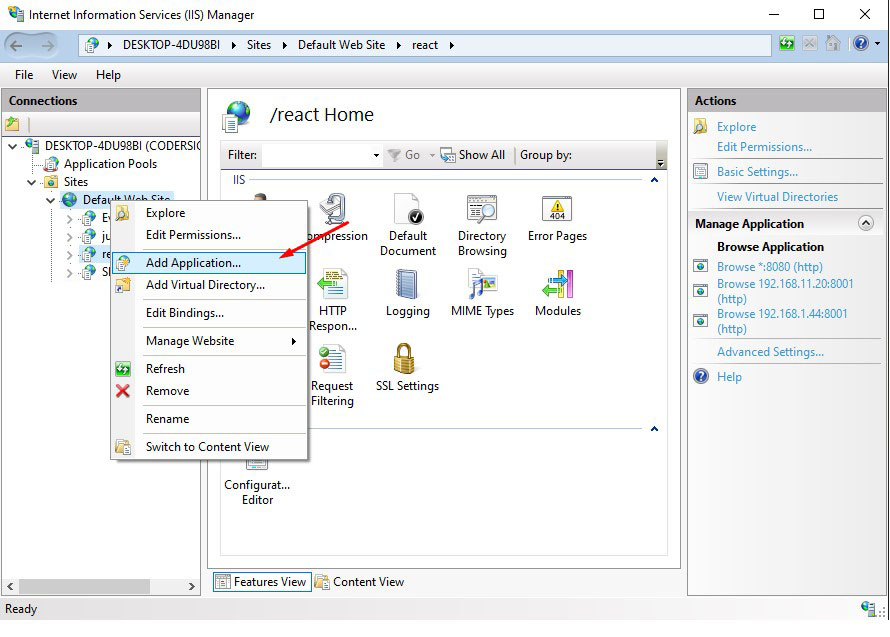
4. Now, we are ready to create a website in IIS. To create expand Sites option. Add a new application by right-clicking the default websites then choose Add Application
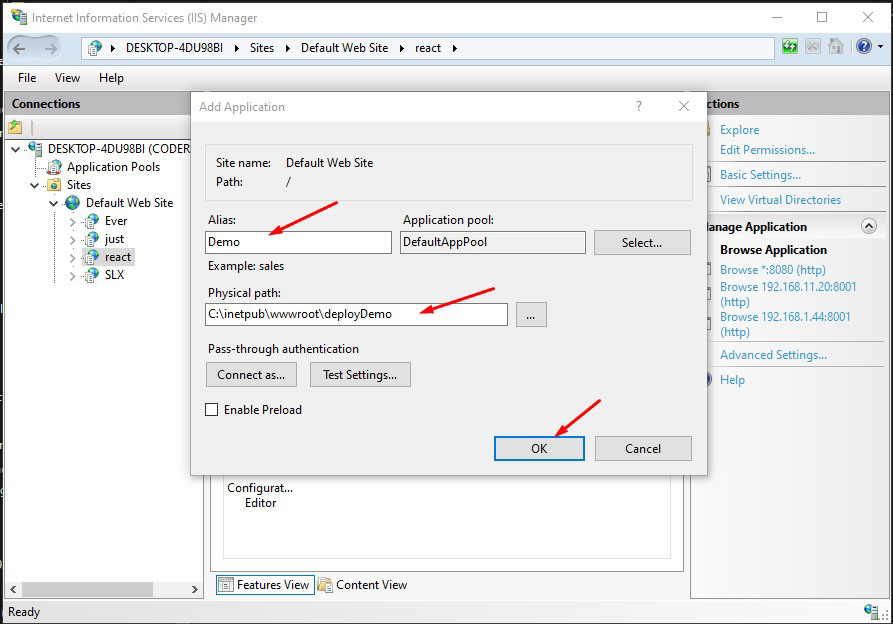
5. Provide a name and path for your web application. This website location is where you will place your website’s resources. In my case I use “C:\inetpub\wwwroot\deployDemo” . Click the “OK” button once done.
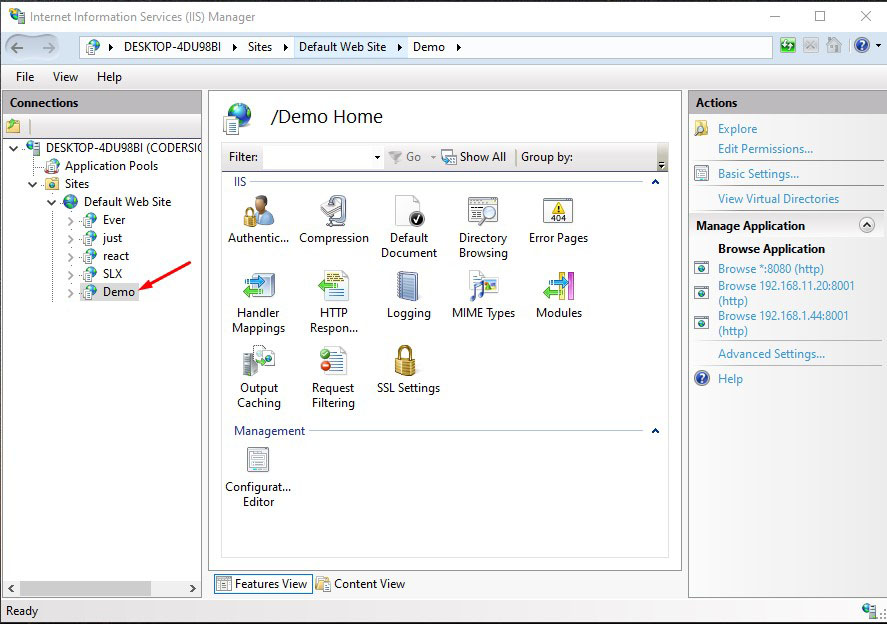
Now, you should be able to see the Demo application under the default website.
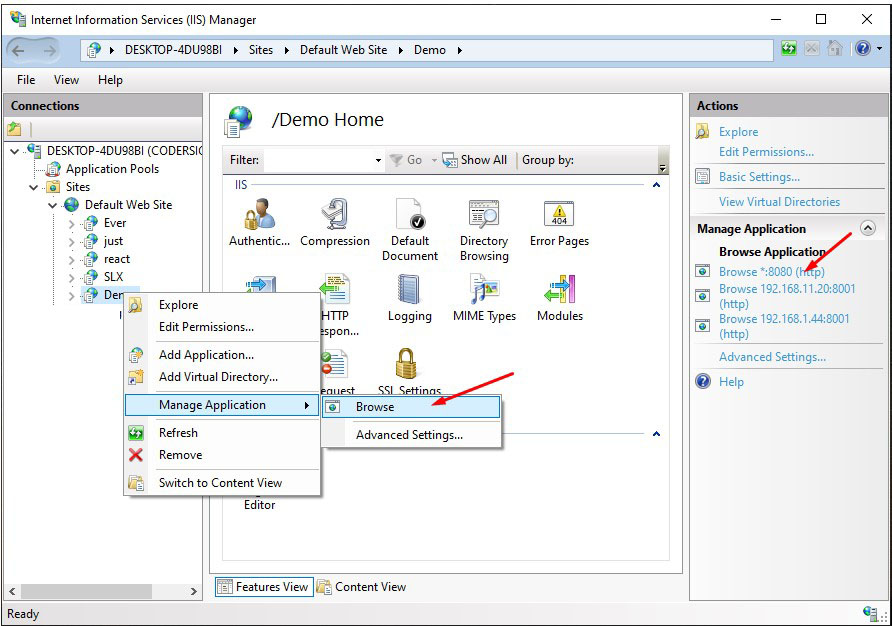
6. You can browse the website by right-clicking on the Demo Application then choose Manage Application » Browse. Obviously, this is still an empty website, so let’s deploy our ASP.NET Core on this Demo website’s path.
IV. Deploy ASP.NET Core Web Application to IIS
Let’s configure and deploy our ASP.NET Core Web Application that we created from the very start of this tutorial. This how my ASP.NET Core project looks like.
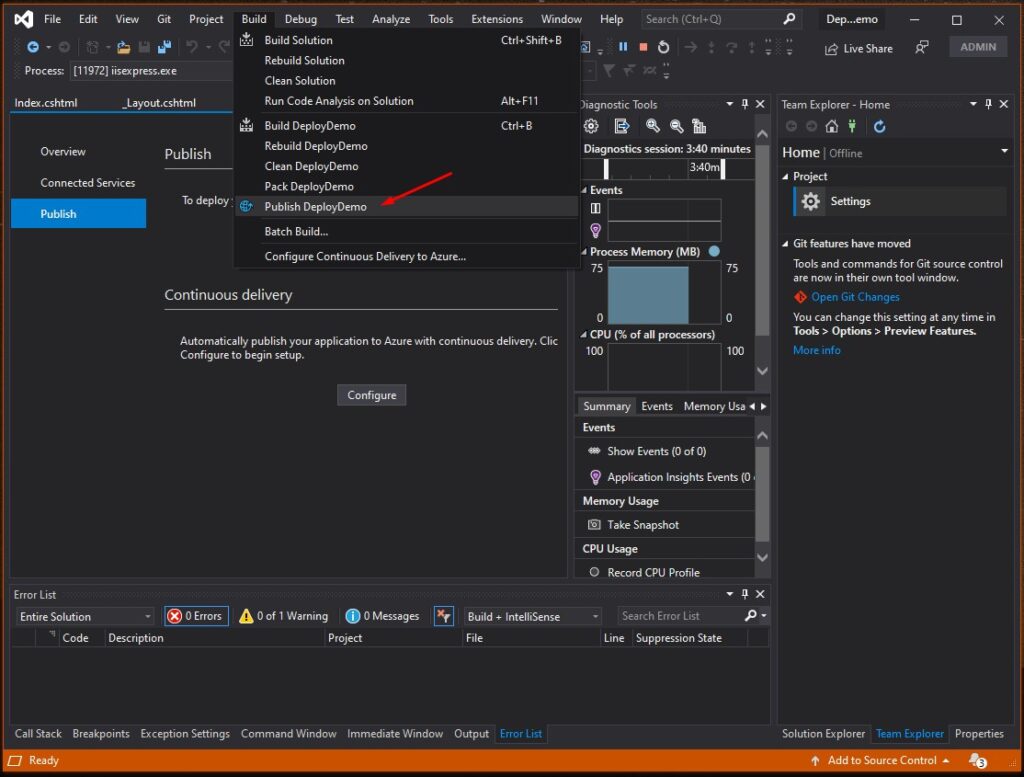
- To publish a website go to Build » Publish DeployDemo. This will open the Publish window.
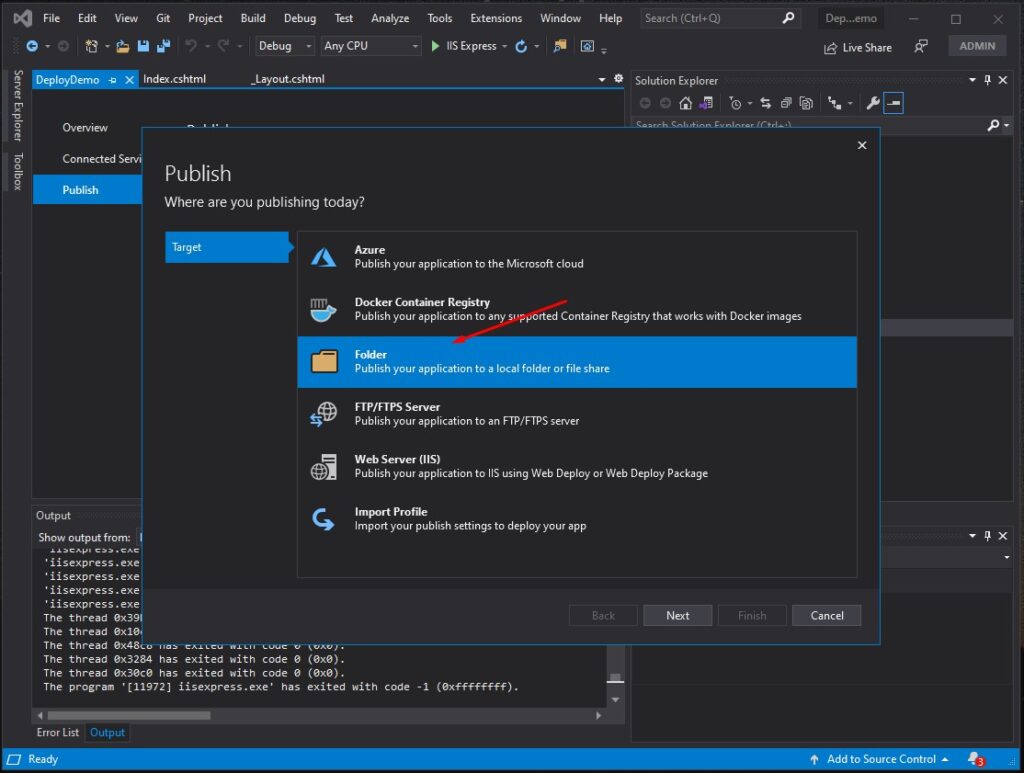
2. Choose Folder from the option. Click the Next button. See the screenshot below.
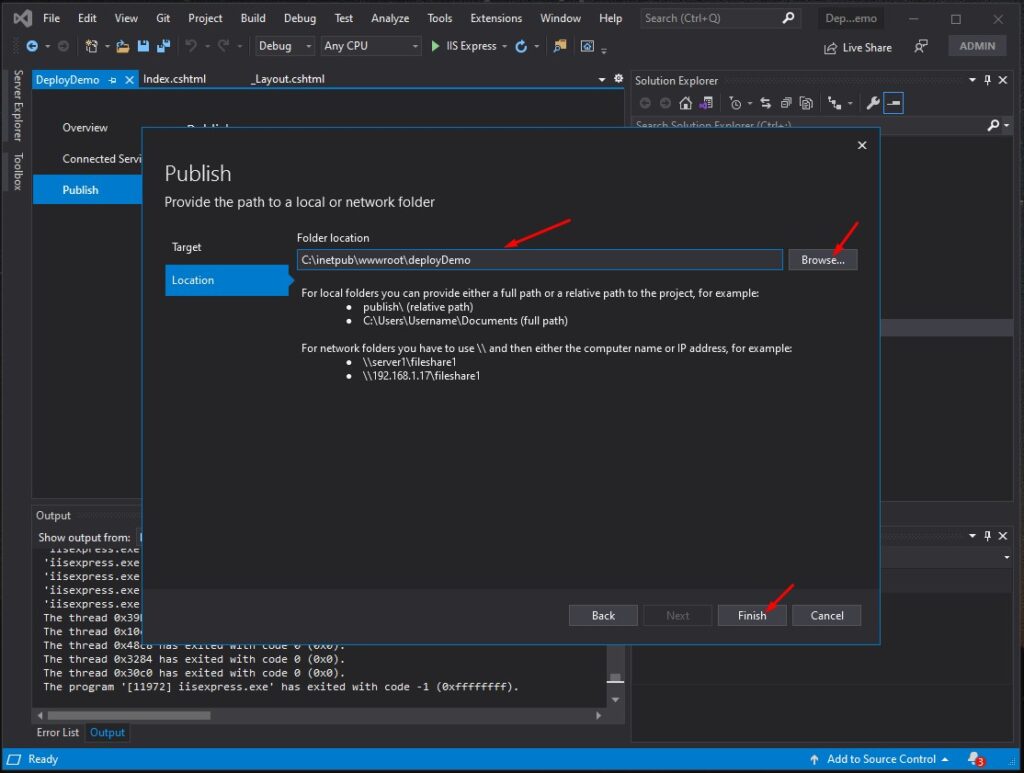
3. Then browse the path for your website location which in my case it’s “C:\inetpub\wwwroot\deployDemo“. Click on the Finish button to proceed. See the screenshot below.
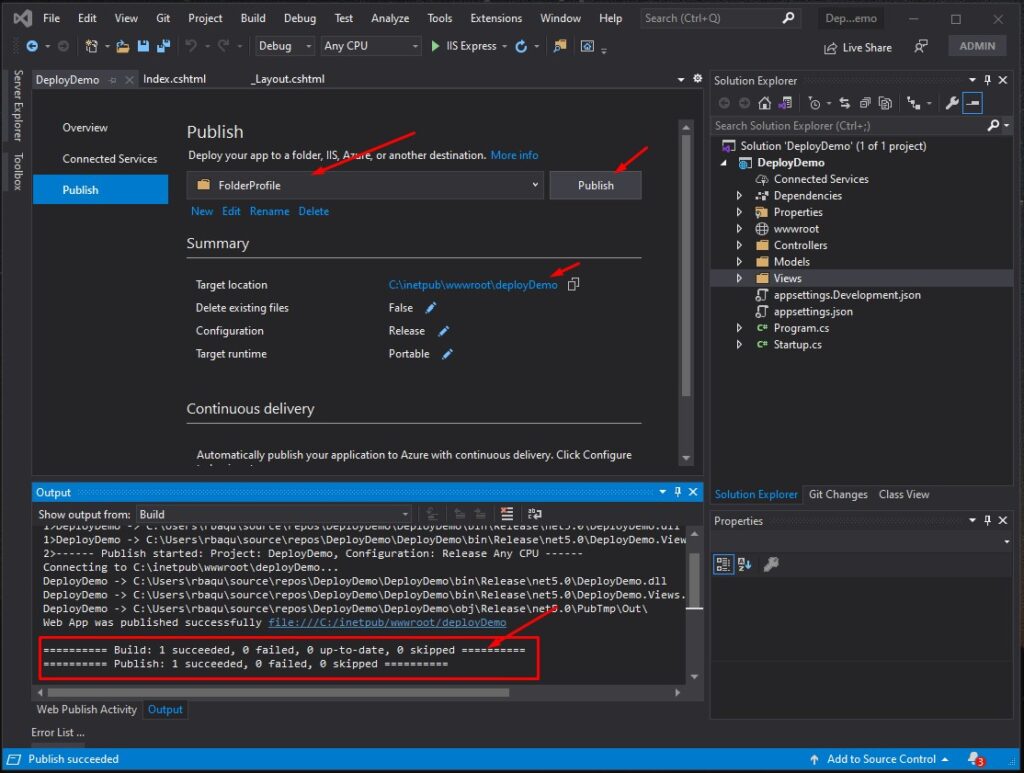
4. Now, Deploy your application by pressing the Publish button. Wait for Visual Studio to deploy your app. See the screenshot below.
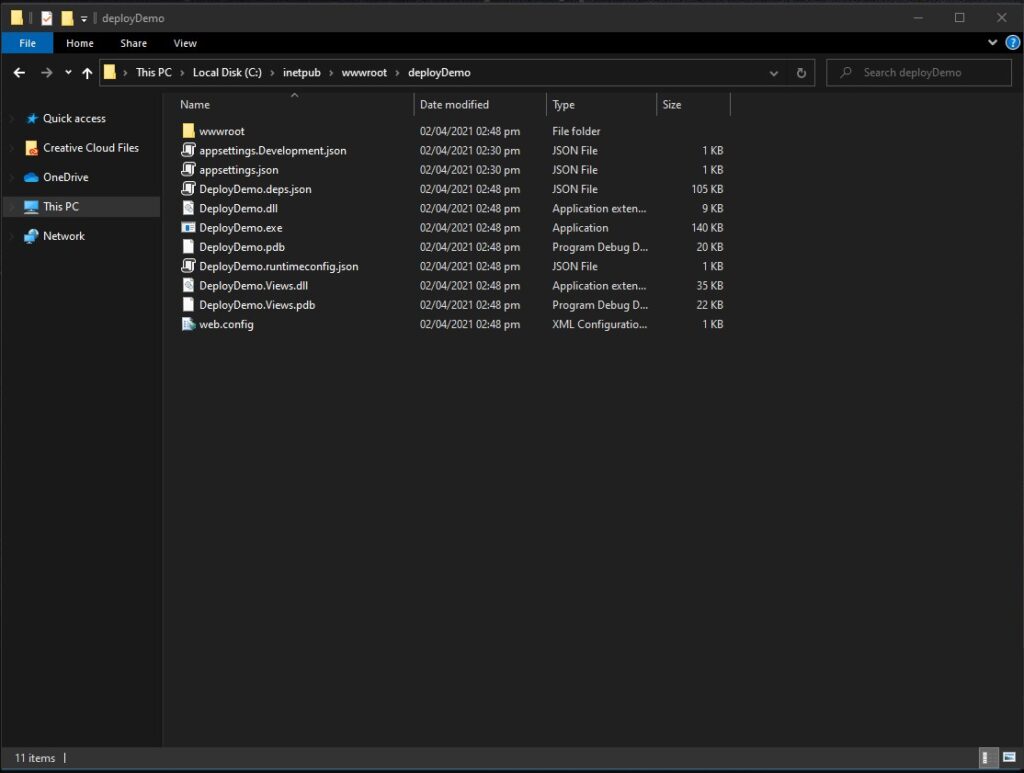
5. Now, open your website path you will find build files of your application. These are the files found in my website location.
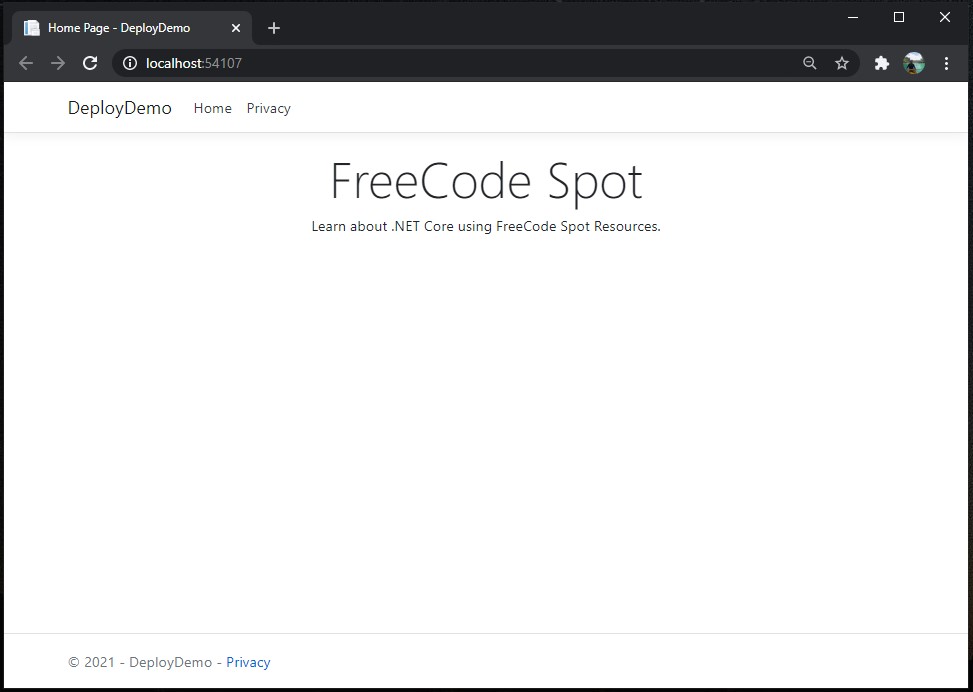
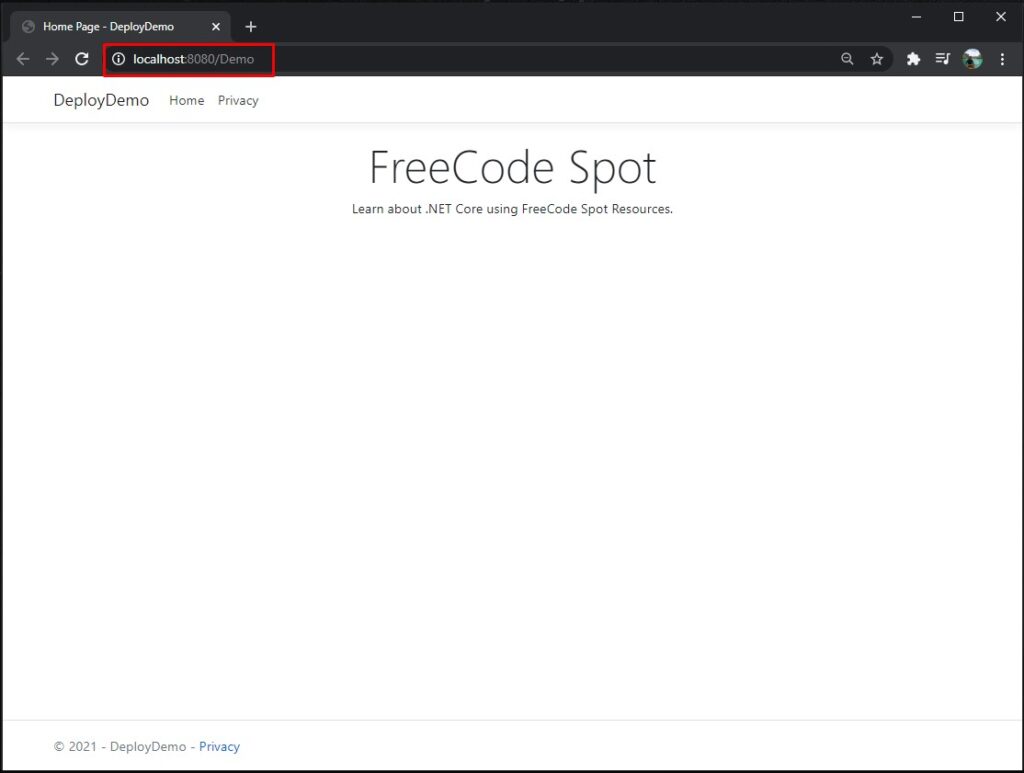
6. Let’s test if the deployment was successful. Open IIS Manager, then browse Demo Application. You should be able to open your application using any browser.
This the website using localhost:8080 port from my IIS.
V. Configure IIS Website to be Accessible from within your Network
To share your website with a network, we need to set IIS binding and use our local IP as an address(http://192.128.2.44:8080/Demo). To do that, follow the steps below.
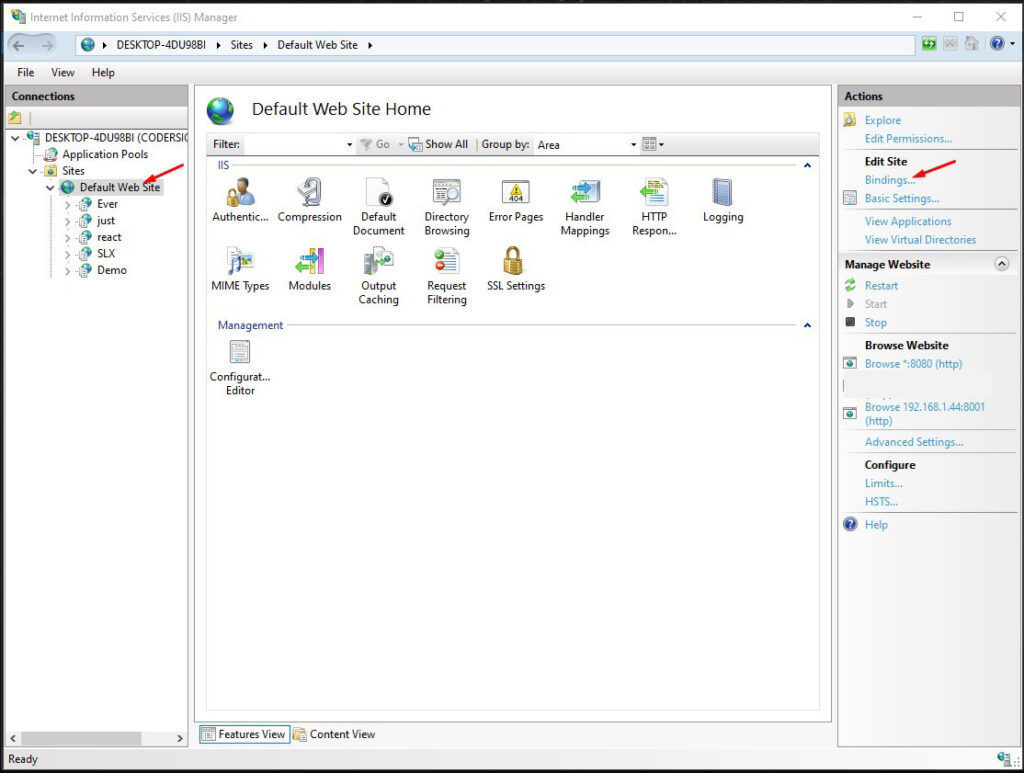
- Select the Default Website from IIS then choose Bindings.
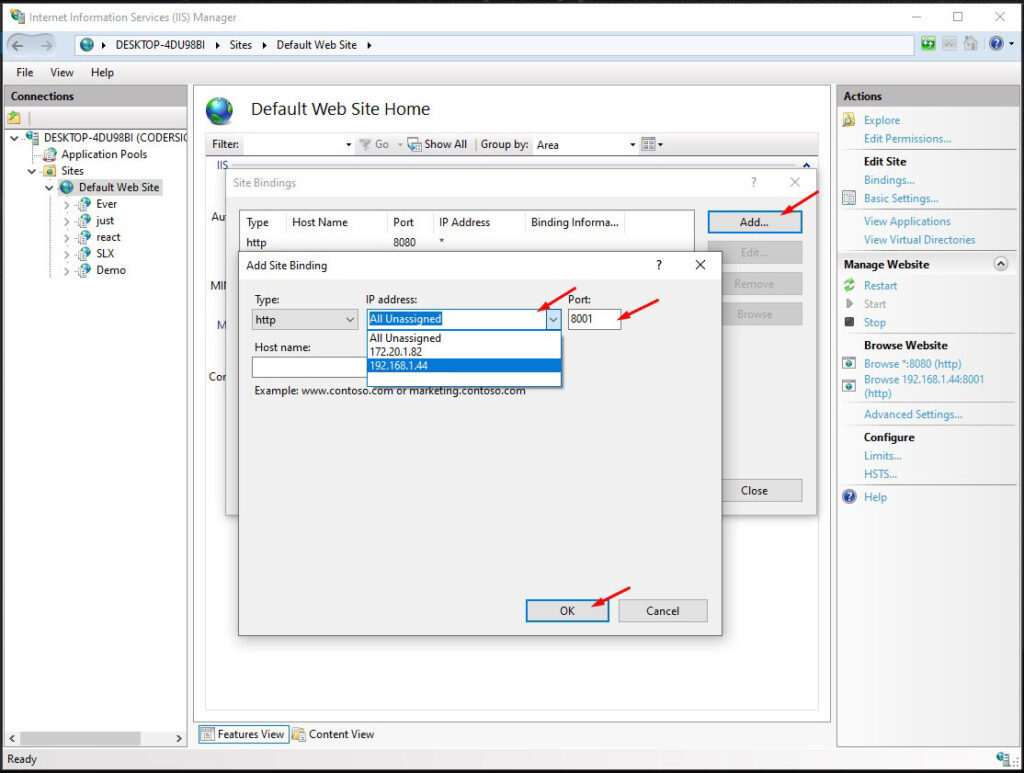
2. Add new Binding and select your local IP address from the drop-down menu. Assign port, which, in my case, I use 8001. Click the “OK” to add the site binding. See the image below.
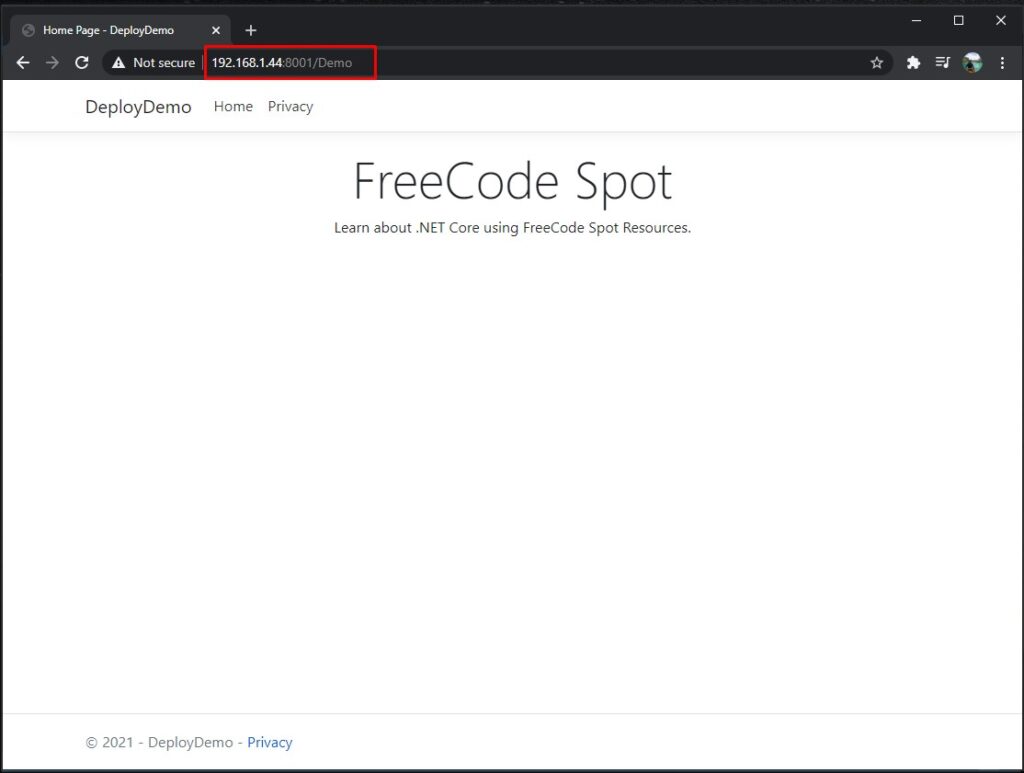
3. Now, you should be able to access your website using this address “http://192.168.1.44:8001/Demo”. It may defer on the local IP address you have on your local machine.
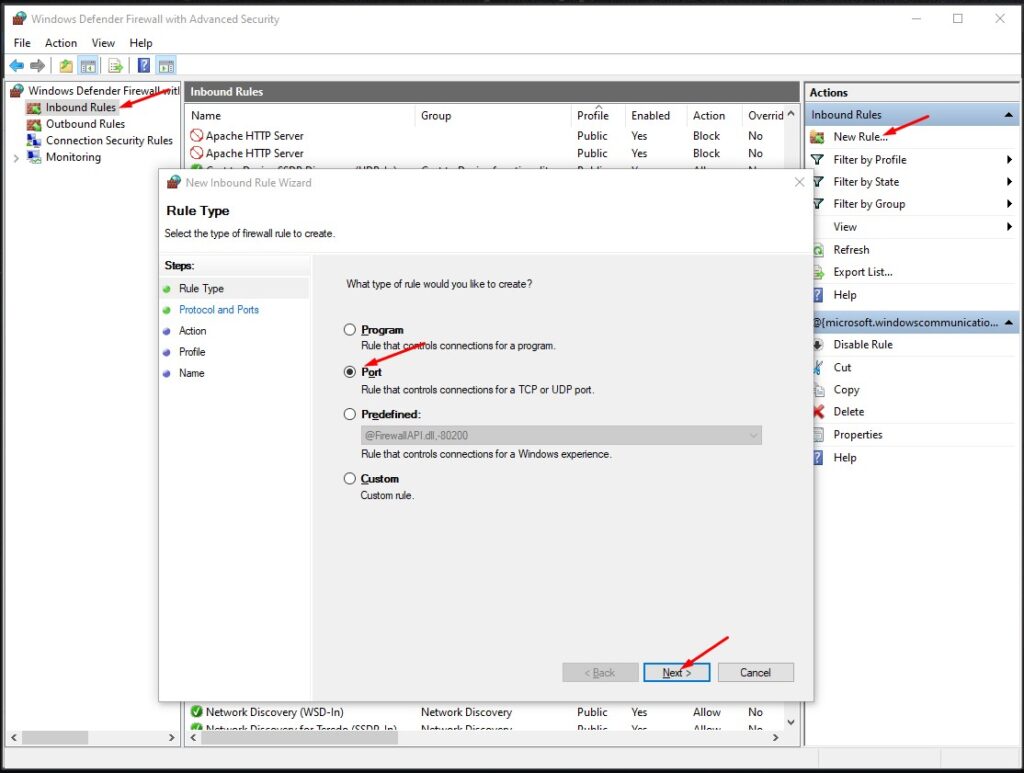
4. To access this address from a different machine on your local network. Open Windows Defender Firewall with Advanced Security. Let’s add inbound Rules for the port that we used on the Demo Application, port 8001. To do that, click New Rule, then choose the port. Click Next to proceed with the next step.
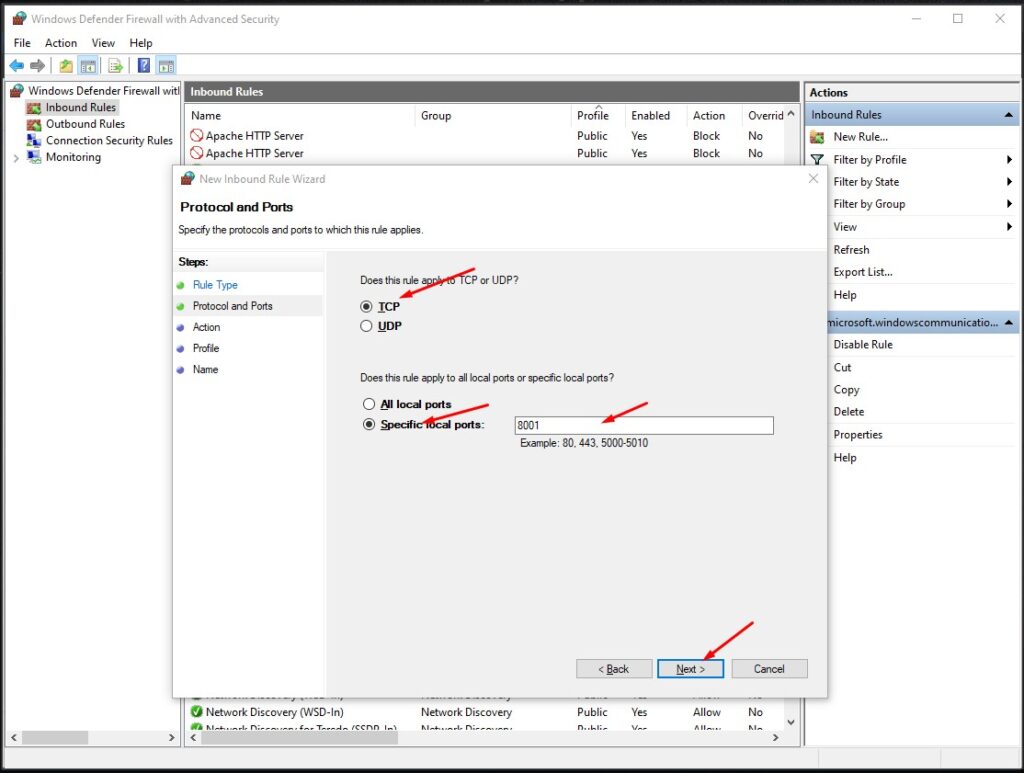
5. Input the port 8001 then click the Next button. The port may differ on what you use on your IIS web Application. See the screenshot below.
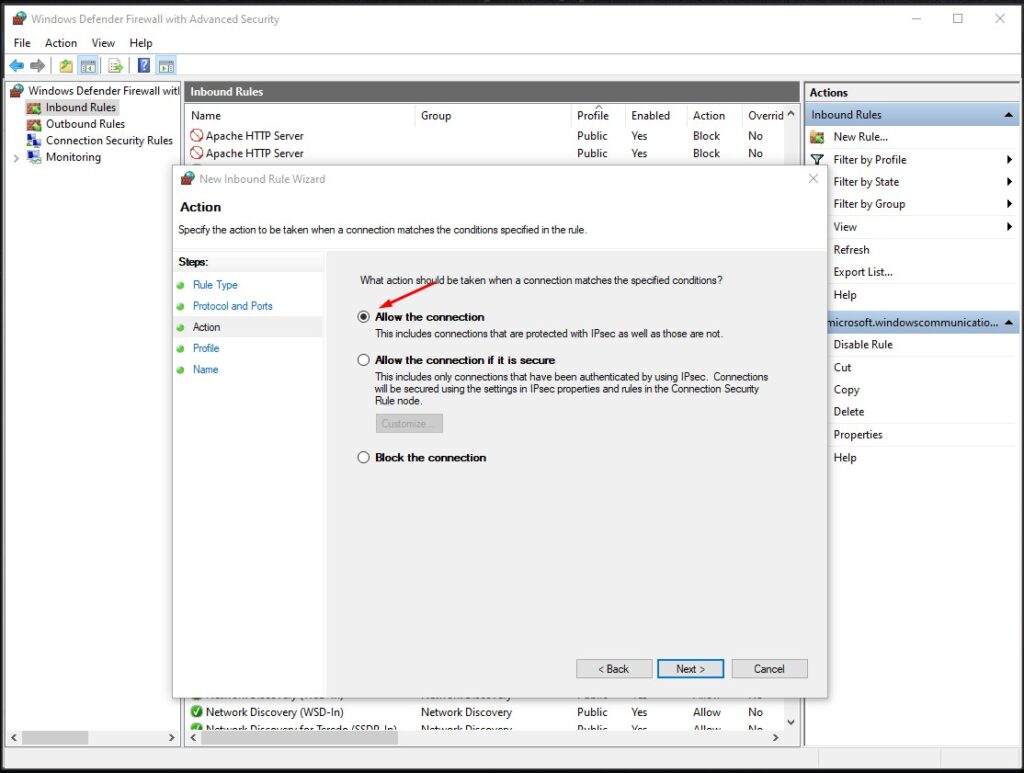
6. Select Allow the Connection then click Next to proceed. See the screenshot below.
7. Leave the default settings as shown below then click Next to proceed.

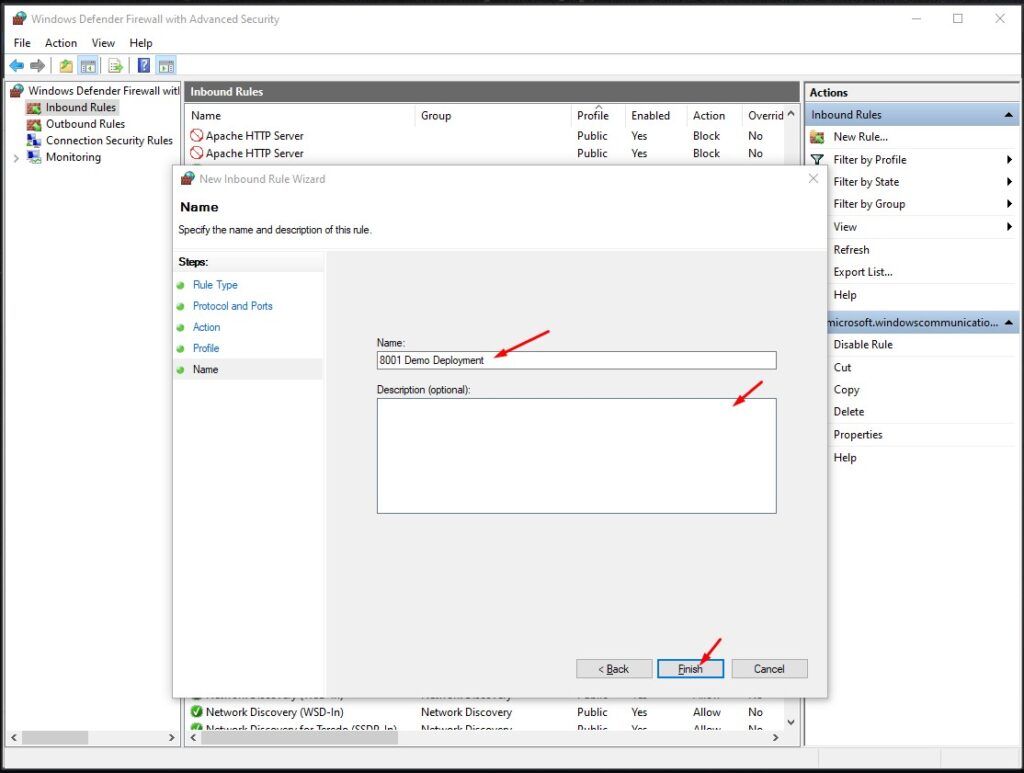
8. Name the new Inbound Rule, which in my case, I named it “8001 Demo Deployment,” then click the Finish button.
Now, you should be able to access your website from anywhere within your network.
Summary
This tutorial taught us how easy it is to Deploy and Share ASP.NET Core WebApp to a Local Network using IIS on a Windows machine. We also configure the IIS website to be accessible from anywhere within your local network, which can work in a group and share Web API. Hopefully, you can use this tutorial to reference your future projects.
KEEP CODING!
Visit me on my facebook page @freecodespot.