
This tutorial will learn how to minify CSHTML view in ASP.NET Core using WebMarkupMin.AspNetCore3. We will also include bundling and minification of static files like CSS and JS on our project. Using these techniques will allow us to improve our website performance in production.
What is Bundling and Minification?
Bundling and minification are techniques you can use in your ASP.NET Web Application to improve request load time. Bundling and minification improve load time by reducing the number of requests to the server and reducing the size of requested static assets like CSS and JS files.
MInification
Minification is the process of removing unnecessary elements and rewriting code to reduce file size. This process will remove white space and comments. It will also shorten variable names to one character.
Bundling
Bundling combines multiple files into a single file. Bundling reduces the number of server requests necessary to render a web asset, such as a web page.
We will create a new project to apply this functionality from scratch. Before we proceed, please make sure to have the following installed.
- The latest version of Visual Studio
- Alternatively, you can also use Visual Studio Code
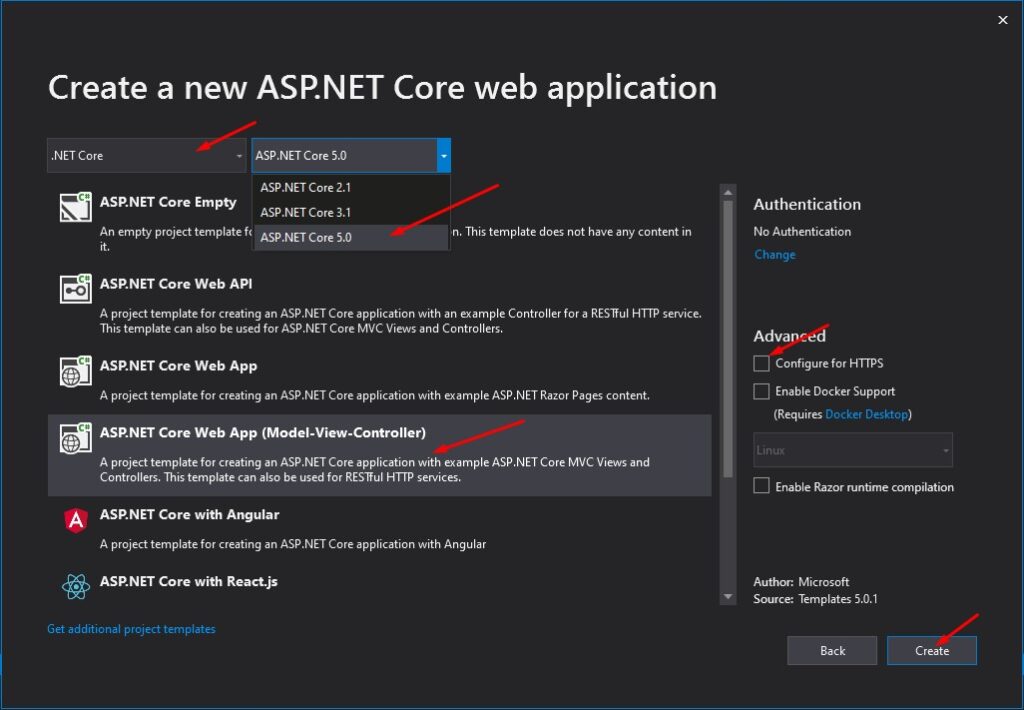
I. Create a new ASP.NET Core Web Application
- First, create your ASP.NET Core Web Application. To do that just follow the steps below.
- Select File > New > Project.
- Select ASP.NET Core Web Application. Name the project MinifyDemo to have the same namespace as my project. Click OK.
- Select an ASP.NET Core Web Application. and then uncheck Configure for HTTPS.
- Lastly, Click on Create.
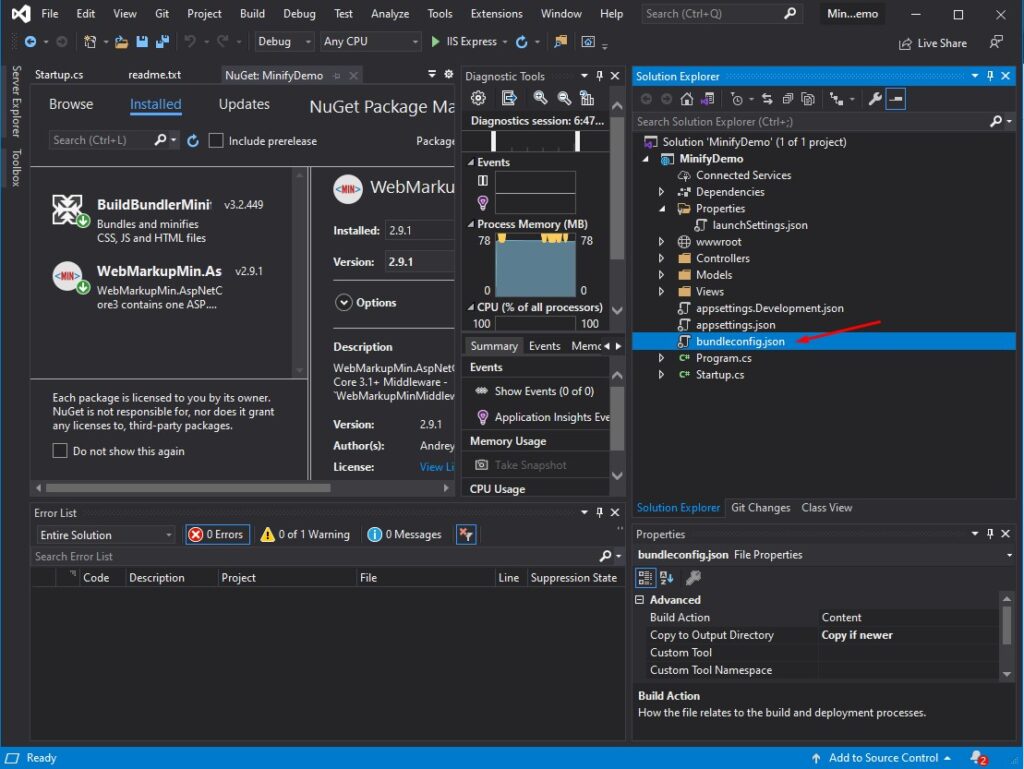
2. Now, we will install the packages that we need for this tutorial. Using NuGet Package Manager, you can browse the package I listed below. You may also refer to this article on installing a package using Package Manager.
| Package | Description |
| BuildBundlerMinifier | This will handle the minification and bundling of css and js asset |
| WebMarkupMin.AspNetCore3 | Minify cshtml file |
II. Configure BuildBundlerMinifier
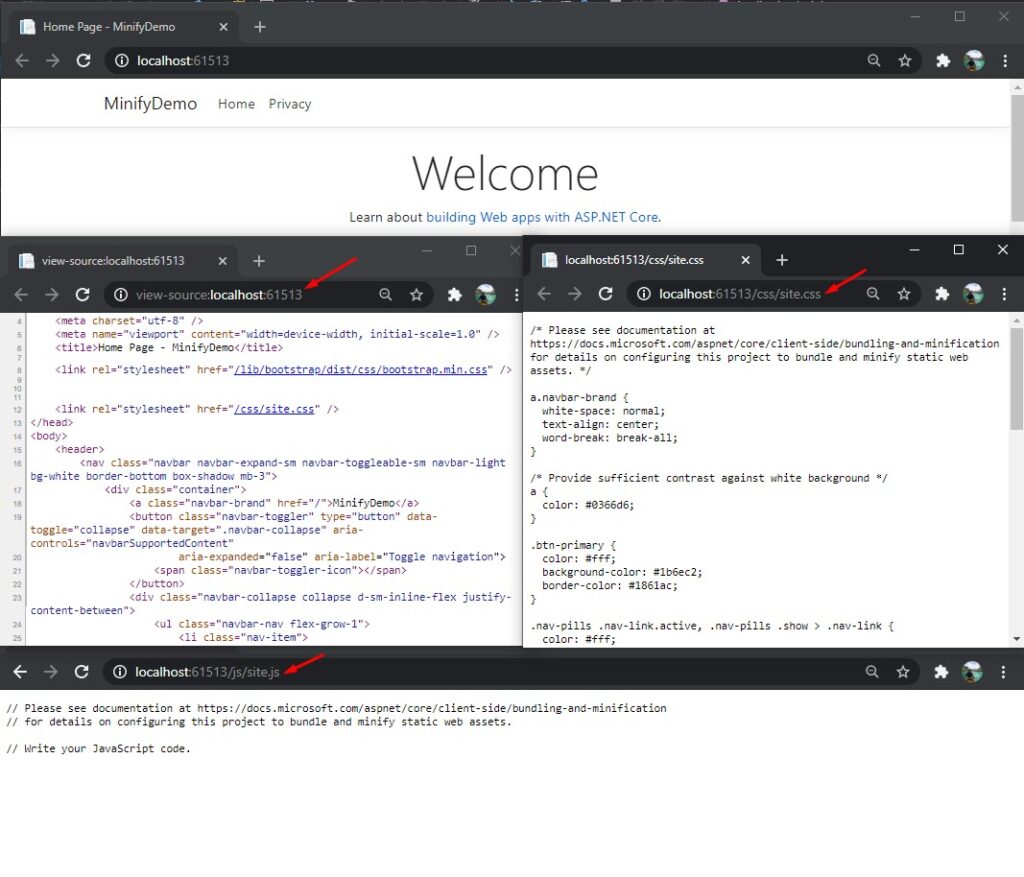
Now, run your project to see your website assets from the web browser. The screenshot below will show my static assets from a newly created ASP.NET Core Web Application.
- If you remember, we installed a package name BuildBundlerMinifier. To use this, we need to create bundleconfig.json from the root directory of your project.
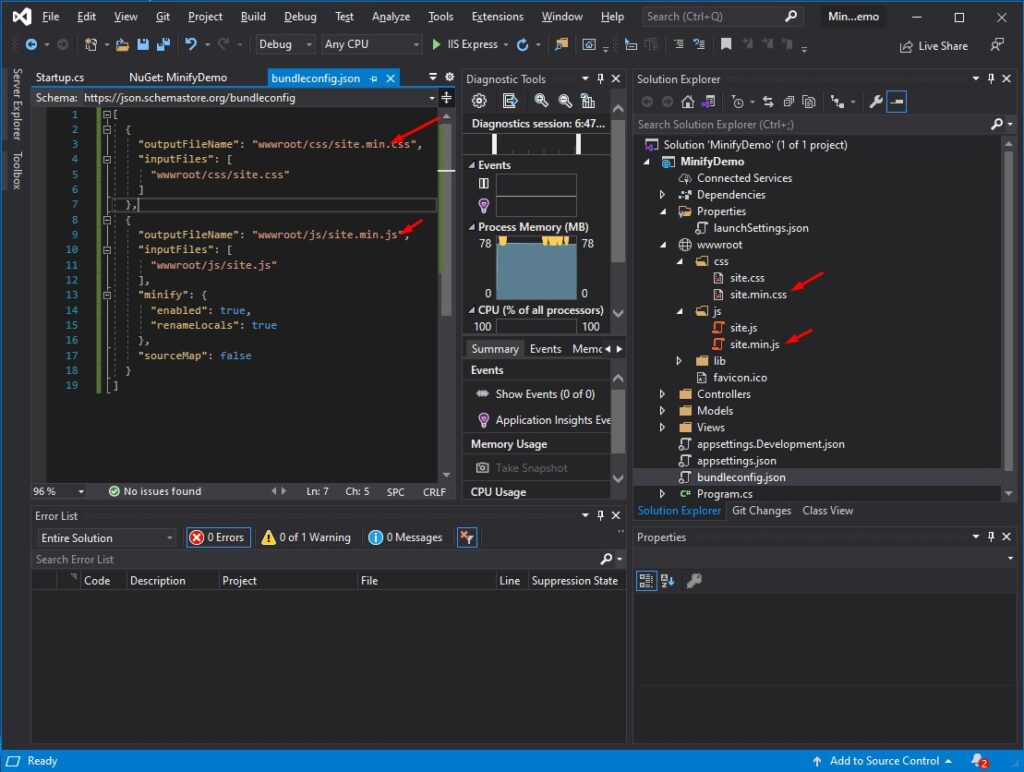
2. The code snippet below is the default configuration of bundle config. You can copy and paste the code below.
[
   {
     "outputFileName": "wwwroot/css/site.min.css",
     "inputFiles": [
       "wwwroot/css/site.css"
     ]
   },
   {
     "outputFileName": "wwwroot/js/site.min.js",
     "inputFiles": [
       "wwwroot/js/site.js"
     ],
     "minify": {
       "enabled": true,
       "renameLocals": true
     },
     "sourceMap": false
   }
 ]
The code above will generate a new bundled and minified file that is initialized using the outputFileName.
The line of code below handles the CSS bundling and minification. You can specify more than one CSS file to bundle into a single file.
{
     "outputFileName": "wwwroot/css/site.min.css",
     "inputFiles": [
       "wwwroot/css/site.css",
      "wwwroot/css/custom.css"
     ]
   }
While the line of code below will handle the script file. You can also add multiple JS file.
{
     "outputFileName": "wwwroot/js/site.min.js",
     "inputFiles": [
       "wwwroot/js/site.js",
       "wwwroot/js/custom.js"
     ],
     "minify": {
       "enabled": true,
       "renameLocals": true
  }
3. Now, build your application. You will see a new file with a name indicated on the outputFileName. See the screenshot below.
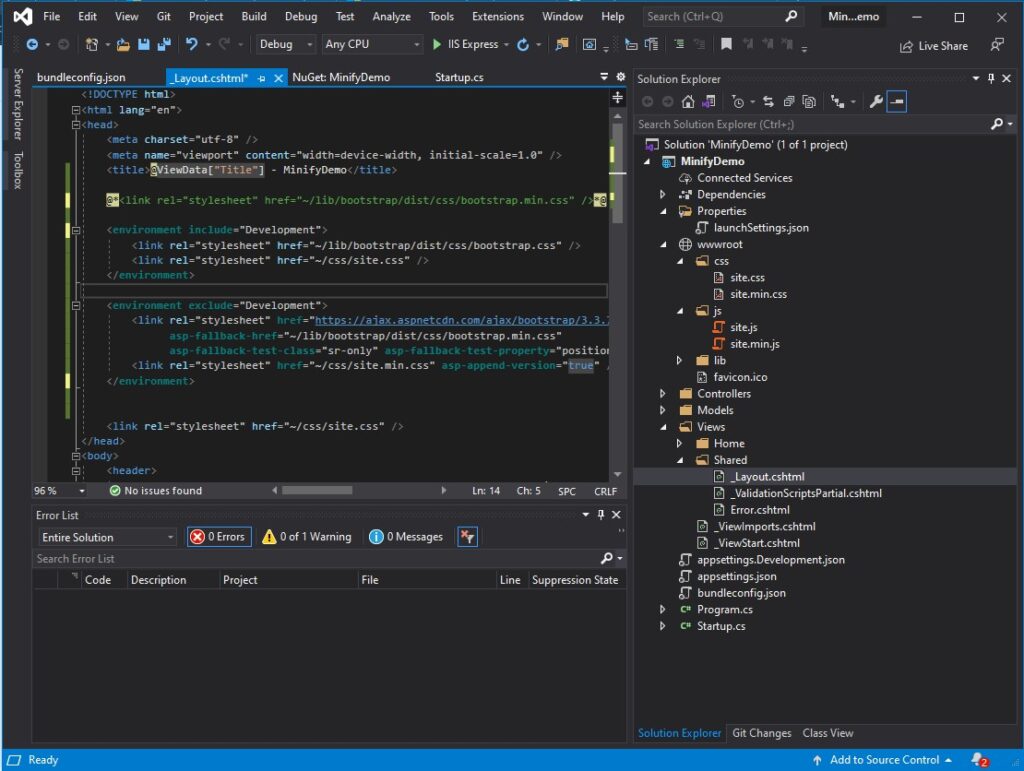
4. This minified and bundled file can only be useful in a production server, so let’s configure it only to be used when the application is in production. To do that, open _layout.cshtml and use the code snippet below. This code snippet will include and exclude the necessary script and CSS that we need in our development environment.
 <environment include="Development">
         <link rel="stylesheet" href="~/lib/bootstrap/dist/css/bootstrap.css" />
         <link rel="stylesheet" href="~/css/site.css" />
</environment>

<environment exclude="Development">
         <link rel="stylesheet" href="https://ajax.aspnetcdn.com/ajax/bootstrap/3.3.7/css/bootstrap.min.css"
               asp-fallback-href="~/lib/bootstrap/dist/css/bootstrap.min.css"
               asp-fallback-test-class="sr-only" asp-fallback-test-property="position" asp-fallback-test-value="absolute" />
         <link rel="stylesheet" href="~/css/site.min.css" asp-append-version="true" />
</environment>
See the screenshot below.
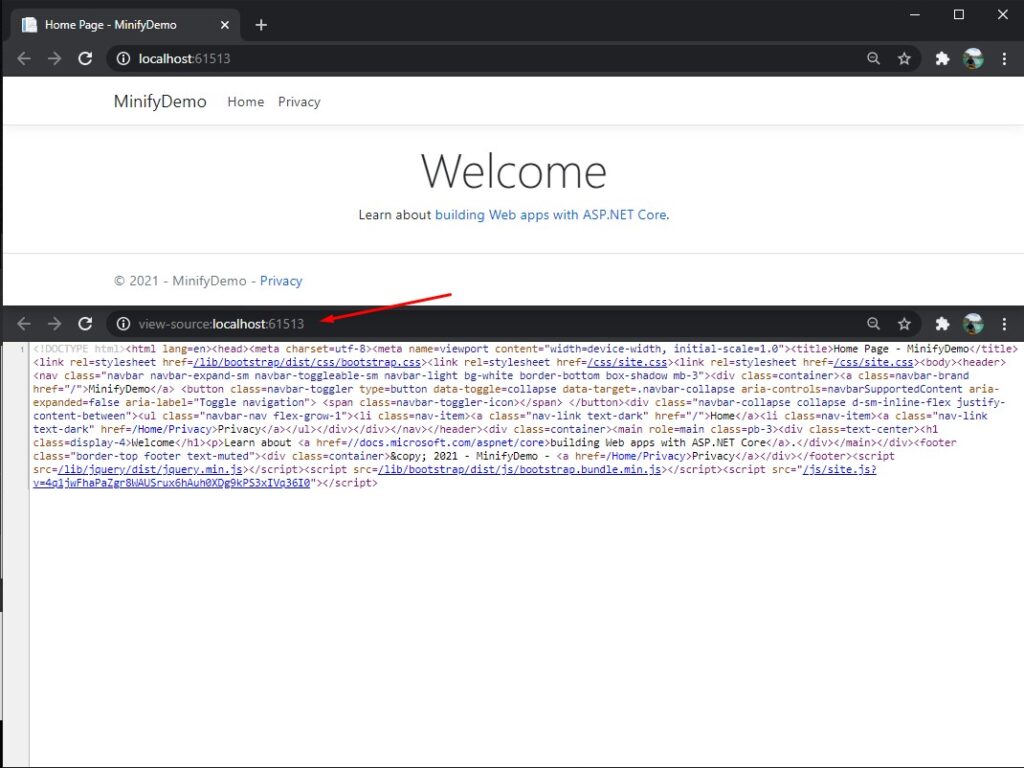
Now, when you use site.min.js and site.min.css, this is how it looks like in the browser. BuildBundlerMinifier does not include HTML files in modification, so we need another package to do the job for us.

III. Minify CSHTML File
To minify the CSHTML file, we will use WebMarkupMin.AspNetCore3. Just follow the steps below to configure webmarkupmin.
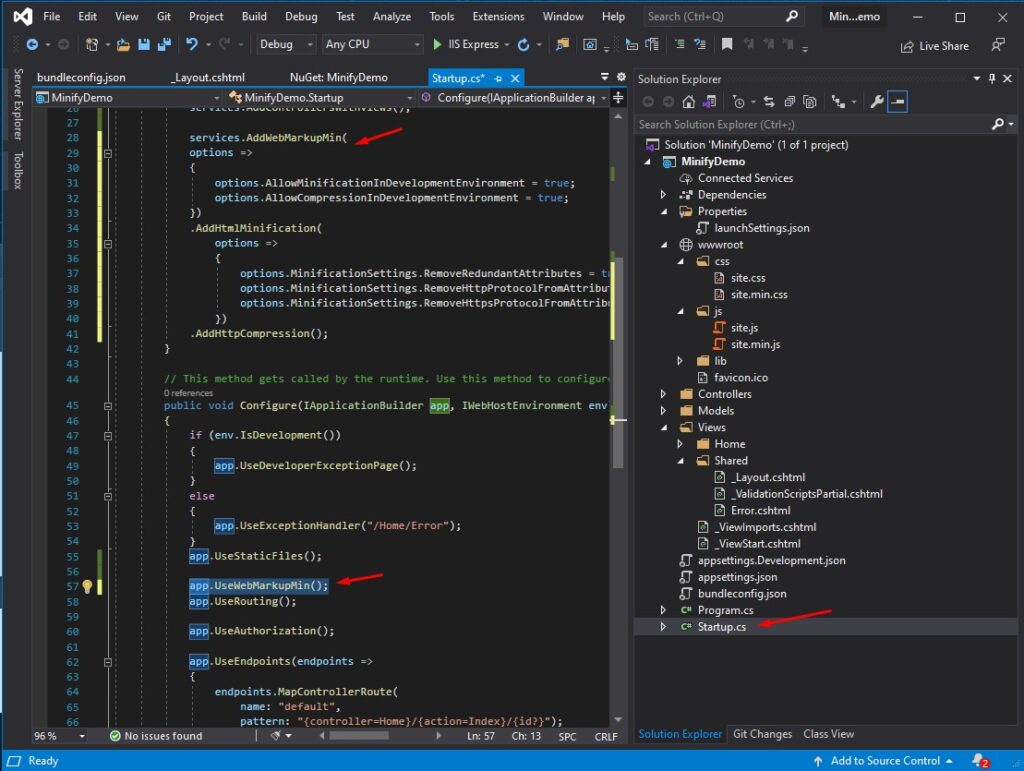
- Using WebMarkupMin.AspNetCore3 package that we installed awhile ago, we will minify our CSHTML from our project. Navigate to your Startup.cs and place the code below under ConfigureServices() method.
services.AddWebMarkupMin(
             options =>
             {
                 options.AllowMinificationInDevelopmentEnvironment = true;
                 options.AllowCompressionInDevelopmentEnvironment = true;
             })
             .AddHtmlMinification(
                 options =>
                 {
                     options.MinificationSettings.RemoveRedundantAttributes = true;
                     options.MinificationSettings.RemoveHttpProtocolFromAttributes = true;
                     options.MinificationSettings.RemoveHttpsProtocolFromAttributes = true;
                 })
             .AddHttpCompression();
2. Now, add the code snippet below inside Configure() method to initialize webmarkupmin.
app.UseWebMarkupMin();See the screenshot below.
If you run your project this time you will see a minified CSHTML file. See the screenshot below.
You may get the source code from this tutorial in my GitHub Account @coderbugzz
Summary
In this tutorial, we have learned how to Minify CSHTML view in ASP.NET Core using WebMarkupMin.AspNetCore3. We also learned to apply BuildBundlerMinifier to minify and bundle static files on our site. I hope you can use this as a reference to improve your existing Web Application’s performance.
KEEP CODING!