
Are you looking for a way to upload bigger size files to your webserver? We’ll this is the right place for you. This article will show you how to upload file to a web hosting server using FileZilla. Just follow the step below to configure FileZilla FTP Client to connect to your web hosting.
For Hosting ASP.NET WebSite on IIS visit this article. How to Host ASP.NET on Windows with IIS.
Disclaimer: All hostinger link here is an affiliate link. Using this link will help me to generate a commission that will help me fund this website. I will really appreciate it if you’ll use my link.
Configure FTP Client FileZilla – Steps
- Download FTP Client
- Collect FTP details from your Web Hosting.
- Add site to FileZilla.
- Connect to Web Server
Filezilla has a few options that make it quite easy to understand, but this cannot be very clear if you haven’t used FTP clients before. Don’t worry; we can do that using these four simple steps.
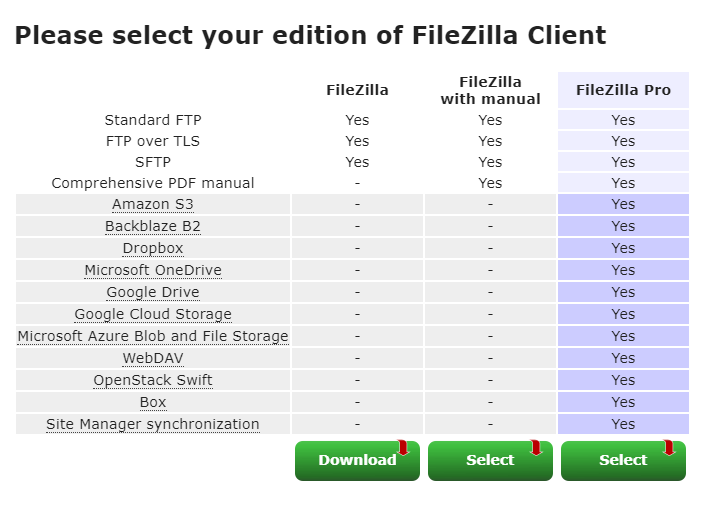
1. Download FTP Client FileZilla
First(of course), before we can configure FTP Client FileZilla we need to download FileZilla Client.You can visit this download link.
If you want to avail FileZilla Pro you can go ahead and select that option but for me
I downloaded the free version.
2. Collect FTP details from your Web Hosting
Second, log in to your web hosting account dashboard. In my case, I am with Hostinger, so this is what my dashboard looks like. This is called Hpanel.
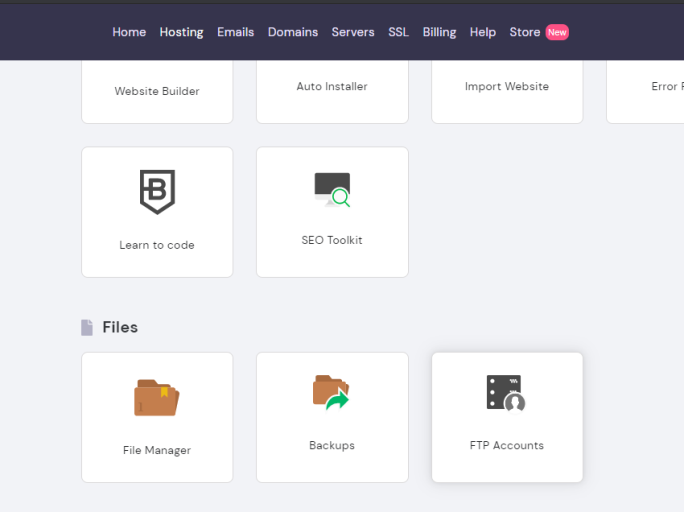
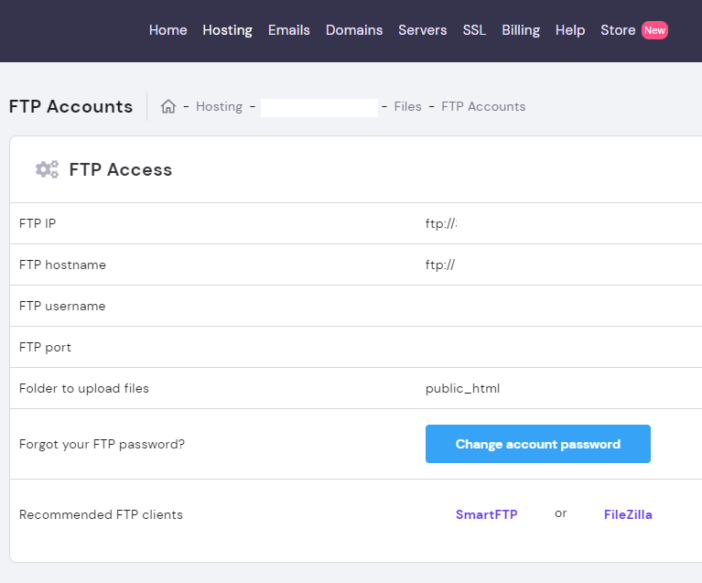
Go ahead and open FTP Accounts. That is the details we need for FileZilla.
Note: Don't be confuse, image below was modified. I cover all the personal information.
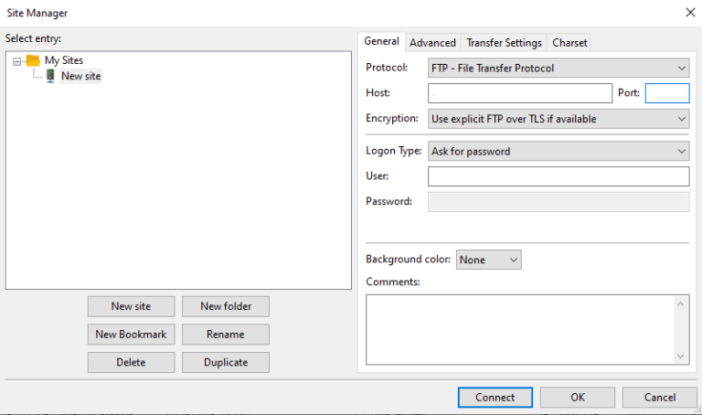
3. Add site to FileZilla
Third, all we need to do is fill up all the necessary inputs that FileZilla needs. Open FileZilla Client and navigate to File -> Site Manager to open this window.
Fill up field Host, Port, User and password which is found in your Hostinger FTP account.
4. Connect to Web Server
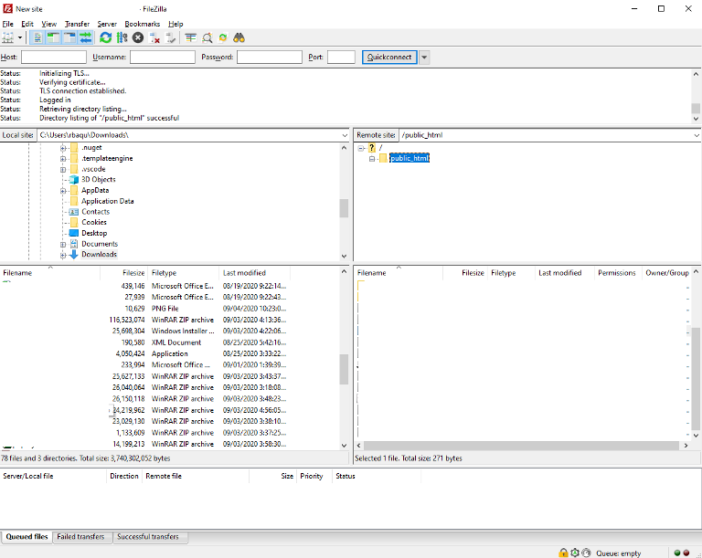
Lastly, try to connect to your server by ticking on the “Connect” button and wait for the successful response. This is how it looks like when you have successfully connected with your web server.
Unsuccessful Connection
Sometimes things may not go as expected. If you were unable to connect try resetting your password from your Web hosting dashboard. If still, no success try to contact your web hosting provider.
If FileZilla responds with Connection established, initializing TLS…
and it fails to open the connection, navigate to File -> Site Manager and try
changing your Encryption to Only use plain FTP (insecure).
To Sum it Up!!
Now, you can add, modify, and delete files from your web server using your local machine. This could be a big help especially if you are deploying websites like WordPress. Uploading from your Cpanel File manager has its limitation depending on your Hosting Plan.
This is how easy to upload file to a Web Hosting server using FileZilla on Windows machine. If you find this article helpful, please feel free to share this article.
If you want to make a blog and you are still figuring up, on what hosting should you choose I recommend hostinger.com. They offer the lowest hosting price and even offer free SSL and free domain.
Visit this link hostinger.com to view there latest discounts offers.
Hope this helps! Just comment what you had in mind to help me improved my content.
KEEP CODING!!