
In this article, we are going to set up continuous deployment using Jenkins. Jenkins provides automation in almost all the processes of a development lifecycle from code integration, testing, and up to deployment. But in this tutorial, I will just focus on how you can install and configure Jenkins to automate deployment from cloning a remote repository to building the solution and deployment of an ASP.NET web application.
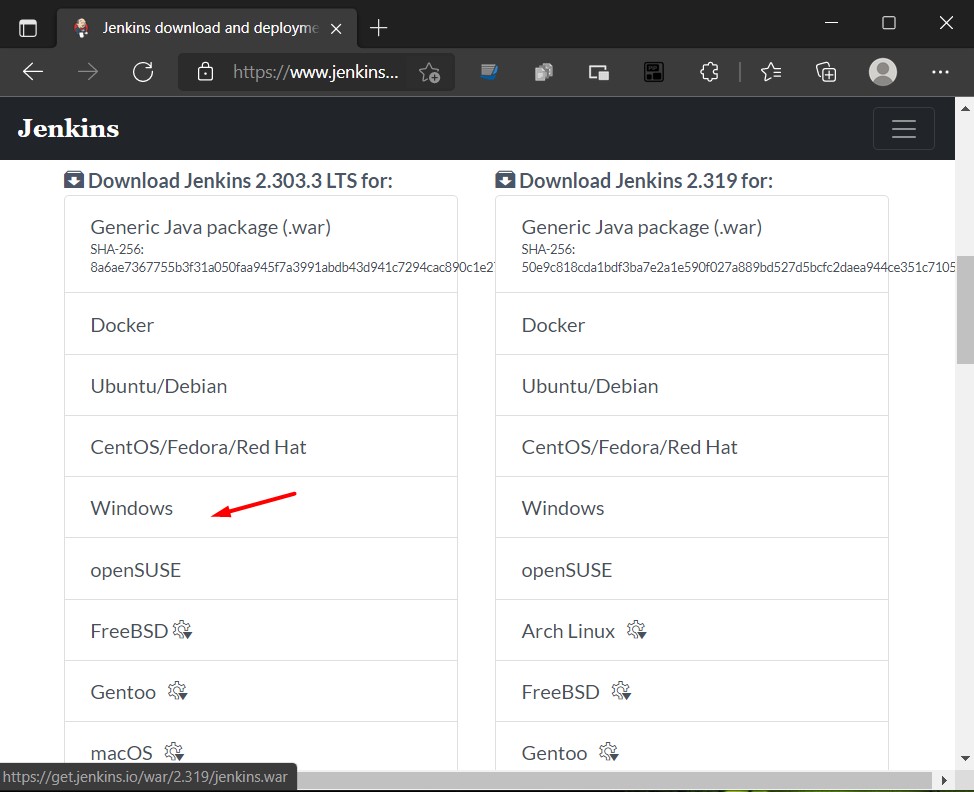
Let’s start by downloading Jenkins. Follow the steps below.
I. Download and Install Jenkins
To start using Jenkins we will install it on our windows machine.
2. Once, done downloading open the MSI(installer) file and then click the “Next” button to proceed with the installation.

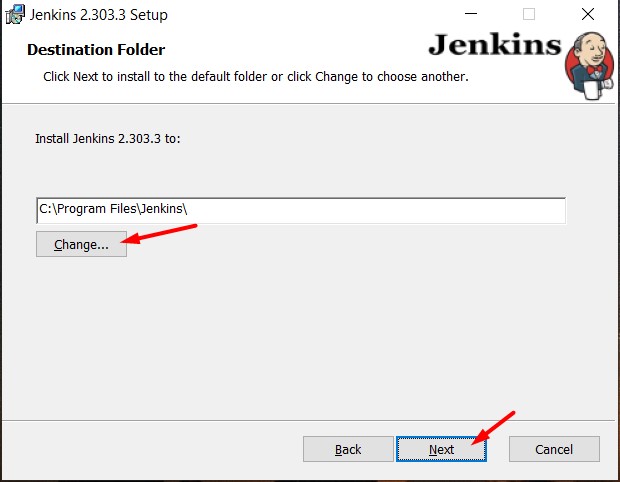
3. Choose the installation directory and click Next. See the image below.
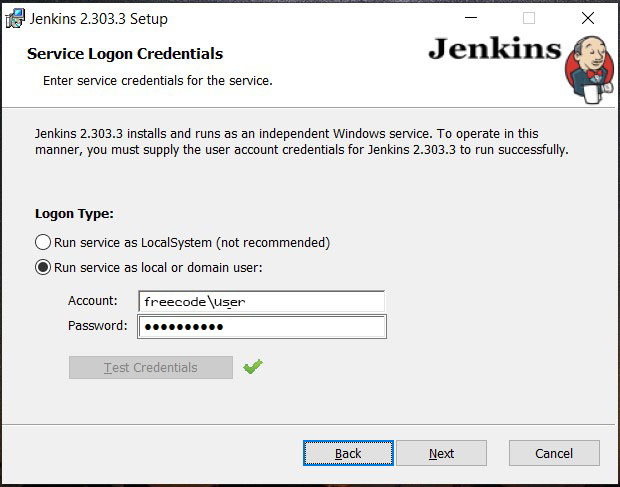
4. Input your login credential that has admin access to make sure the application has sufficient rights. Use the Test Credential button to test the login user. Then click the Next button to proceed.
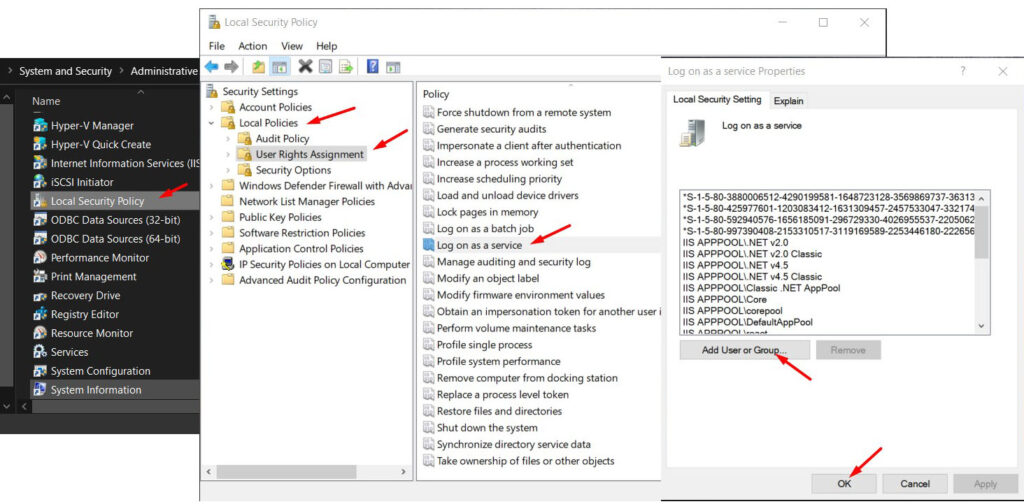
If you encounter an error like this. See the image below.
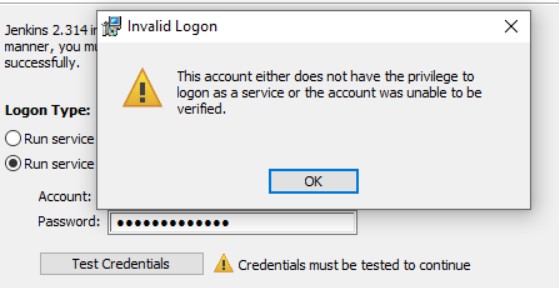
You may fix this by adding the user to the Administrative Tools. Navigate to the administrative tools » Local policies » User Right Assignment » login as a service » properties then add User or group. Then retest your logon credential to ensure it’s fixed.
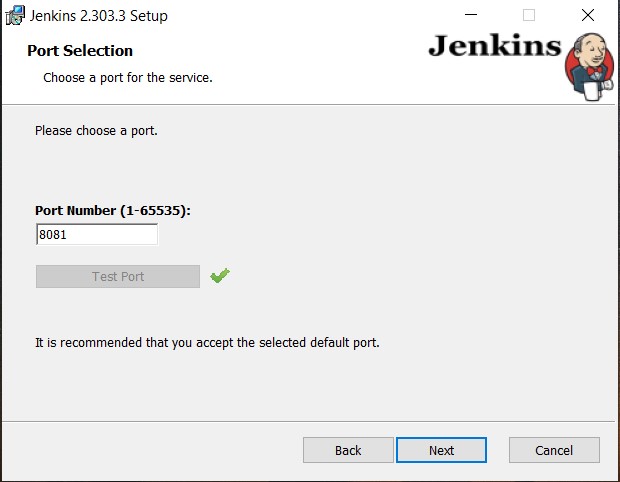
5. Now, choose the port you want Jenkins to use and click the Next button. In my case, port 8080 is not available so I choose 8081 instead. See the image below.
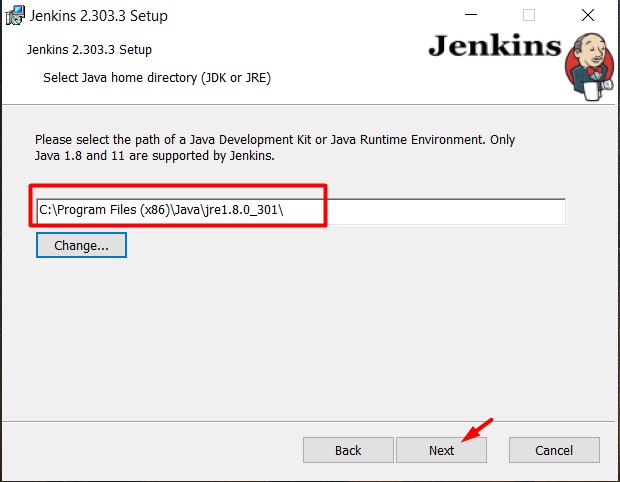
6. Locate your local Java installation. Jenkins is a Java programming-based application so we need to have Java installed on our local machine. You can download Java for windows here.
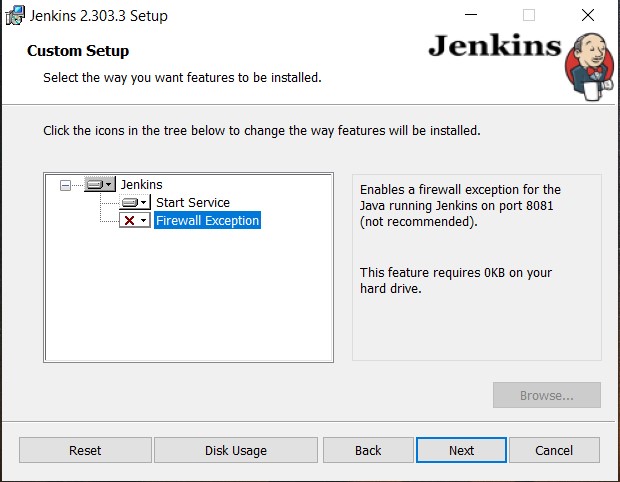
7. For this step you may leave it as is then just click Next to proceed.
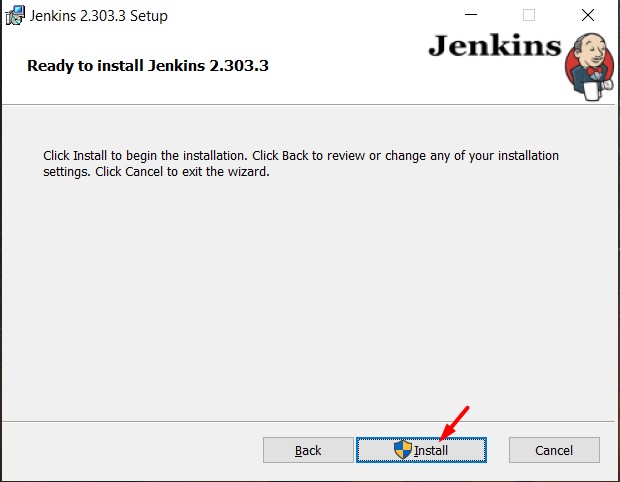
8. Lastly, Install Jenkins. This may take several minutes, just wait for it to finish installing.
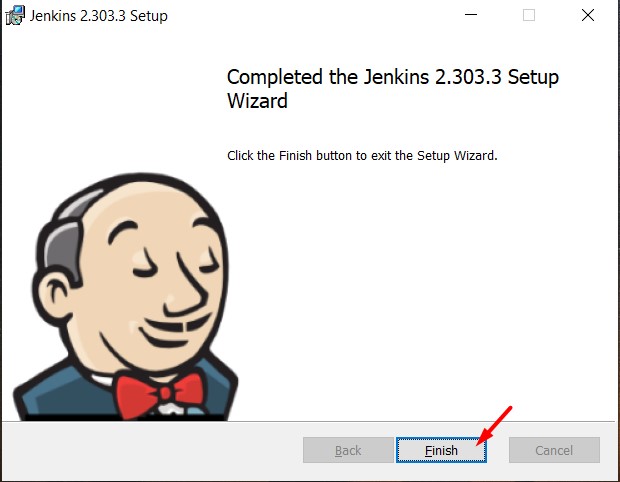
You will be able to reach this screen once the installation is done.
II. Configure Jenkins Installation
Once, you click the Finish button wait for the browser to open localhost: port. This process may take longer just wait for it until Jenkins started. If it did not start automatically you can also directly open Jenkins on your browser which in my case it’s on localhost:8081. Reload the page until you see this on your browser. See the image below.
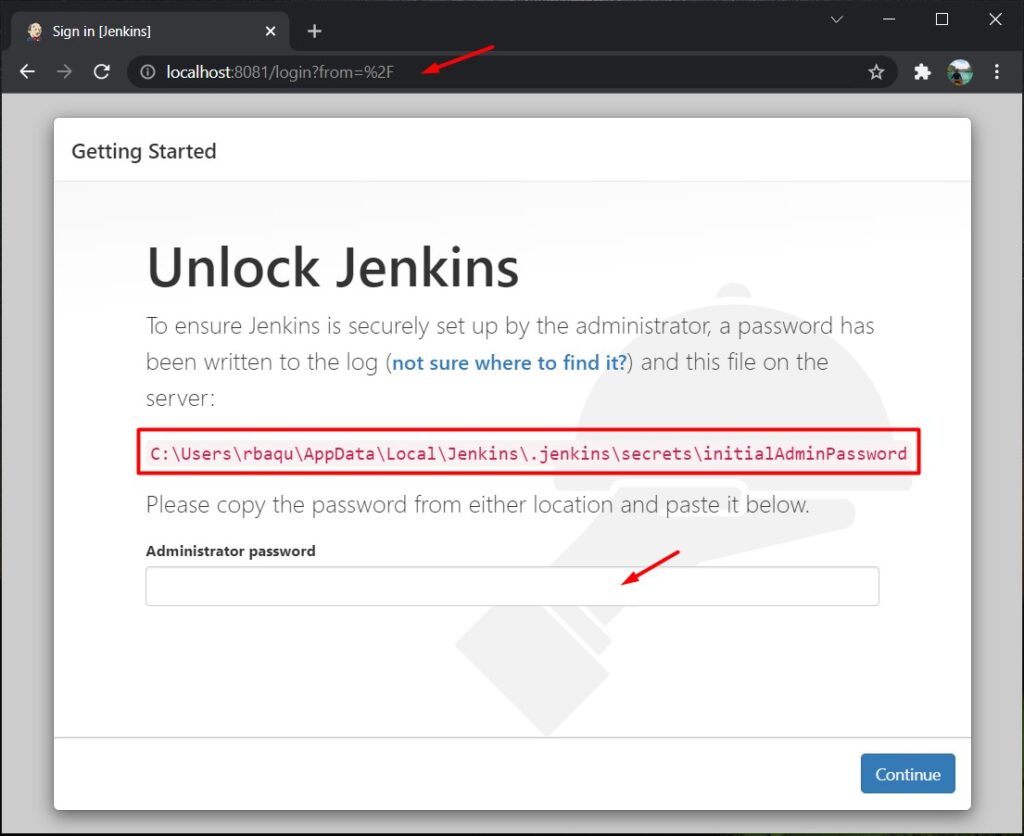
- You will be promted to input the admin password. Locate the address as shown on the image above.
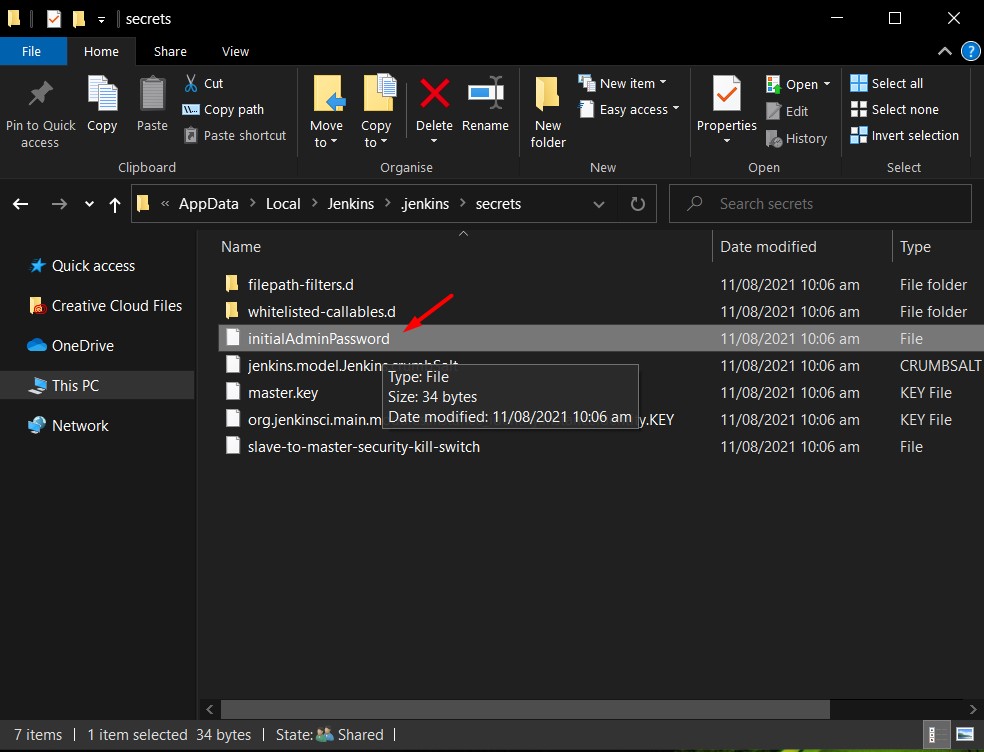
2. Copy the password inside initialAdminpassword file then click the Continue button to proceed.
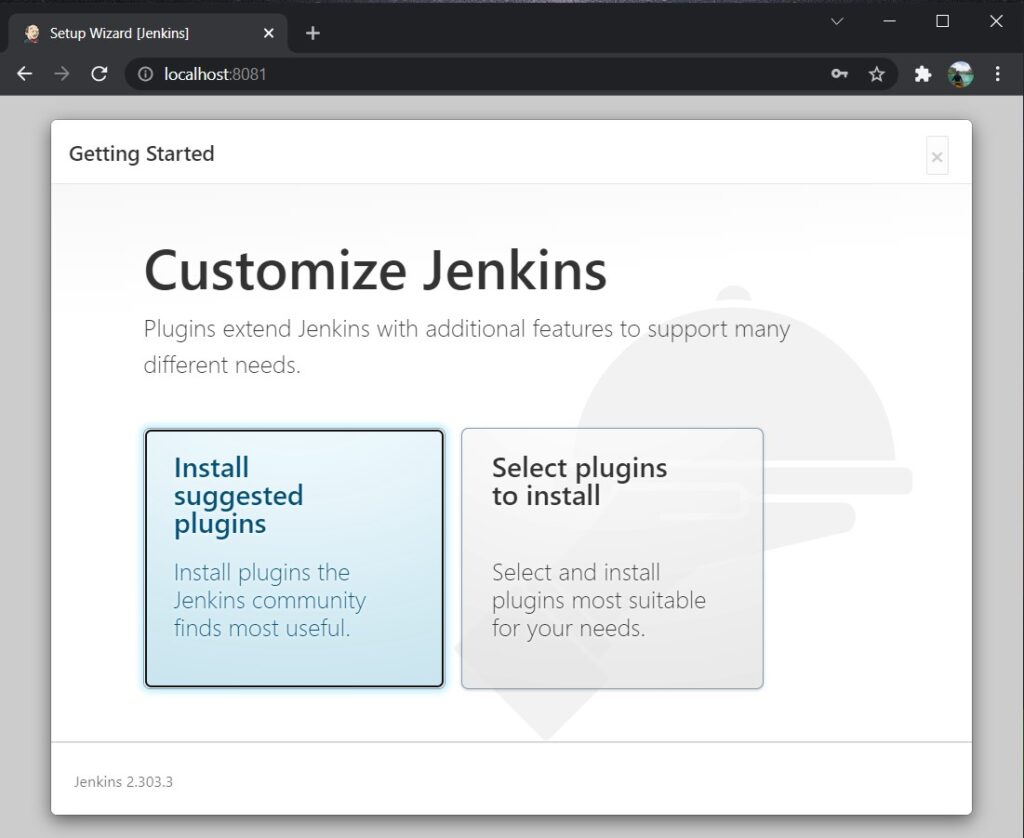
3. Next you will be asked to choose an option like the image shown below. Select install suggested plugins.
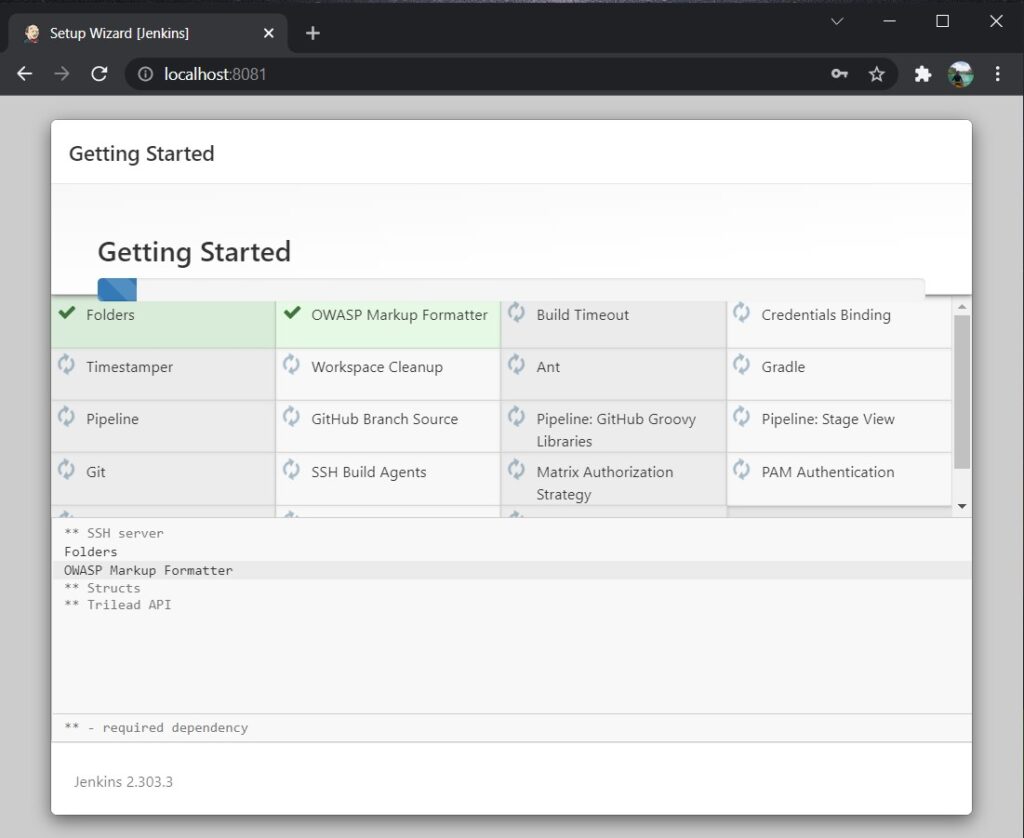
4. The installation will automatically download all the Jenkins suggested Plugins. Wait for the process to finish. See the image below.
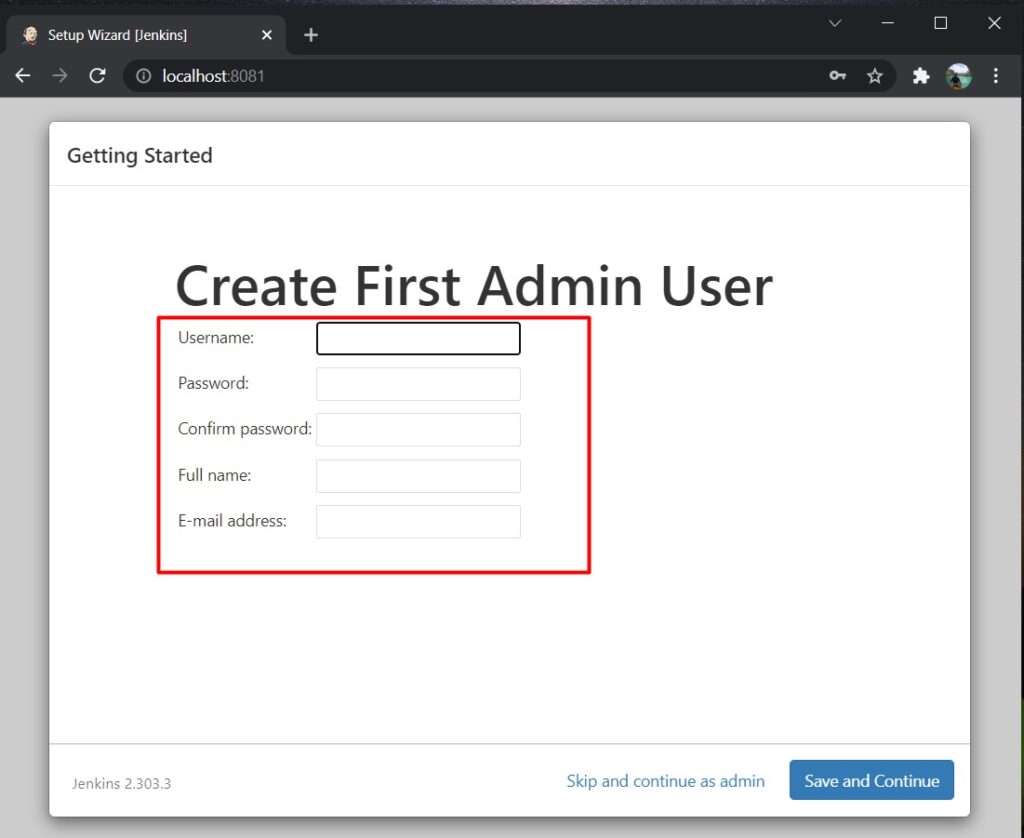
5. After the installation of plugins you will be asked to create a new user for Jenkins login. Create a user then click Save and Continue.
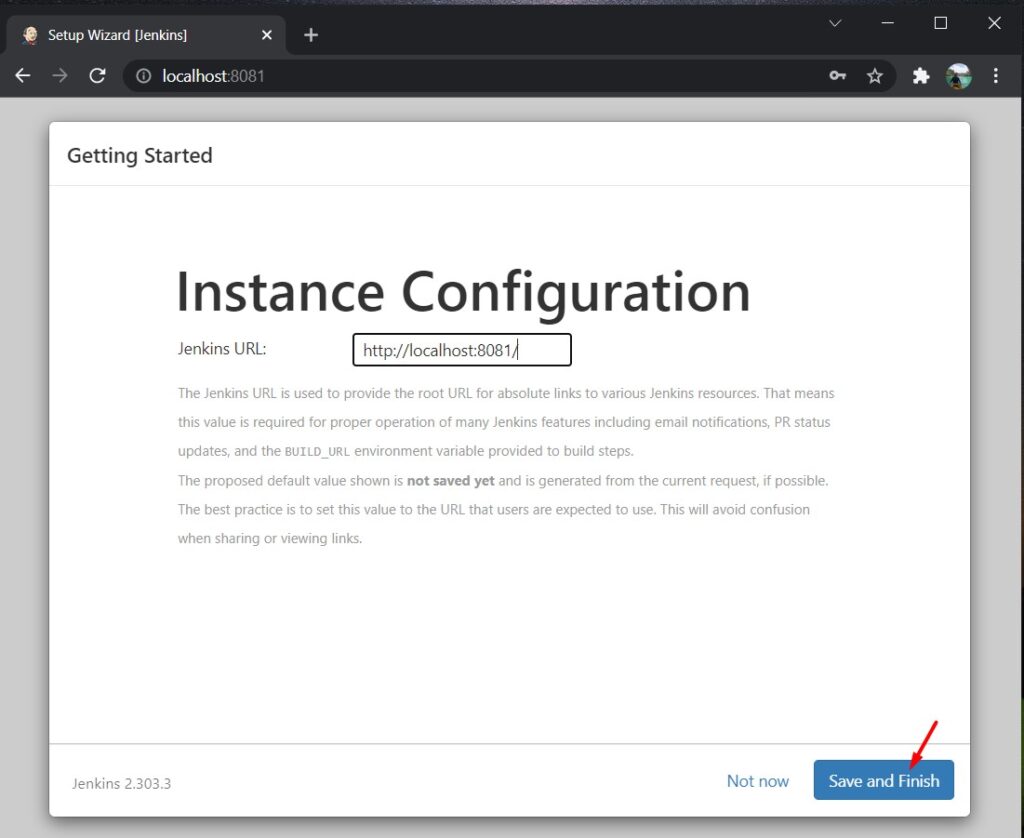
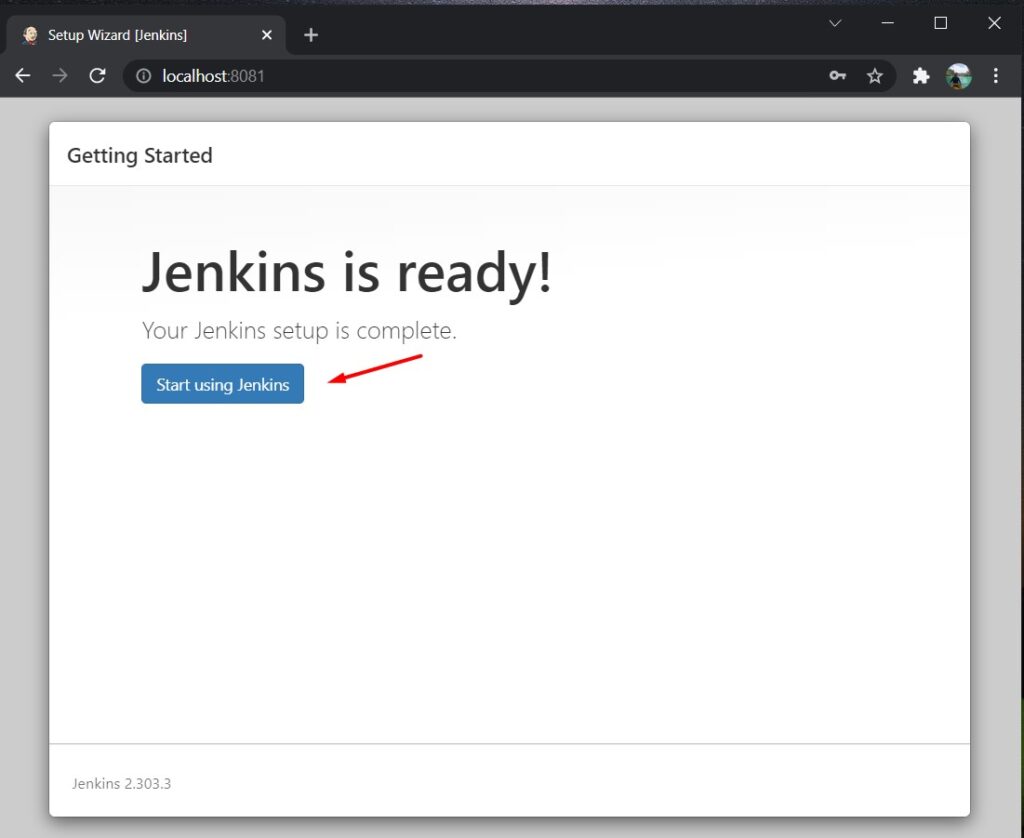
6. At last you have successfully configured Jenkins. This time, take note of the Jenkins URL and then click Save and Finish.
Now, you can start using Jenkins by accessing localhost:8081 which can be different on your end.
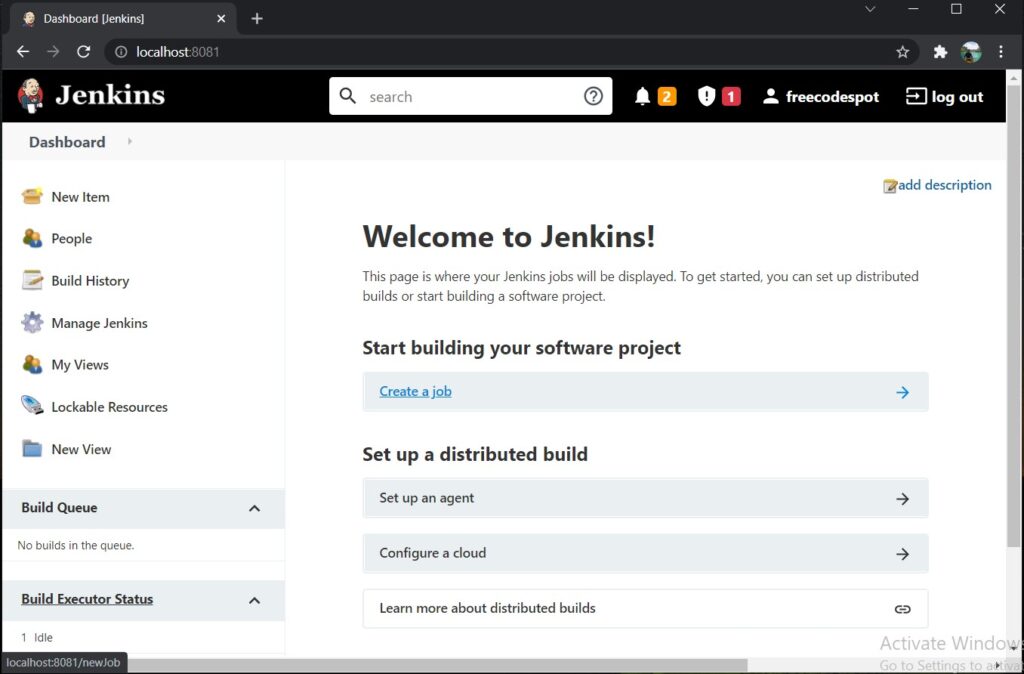
This is how the Jenkins Dashboard will look like.
III. Install Jenkins plugins needed
Now, since we are going to configure a continuous deployment using Jenkins, we will automate the build and deployment of an ASP.NET web application from a git repository. We need to install the following.
- Jenkins Git Plugin
- Jenkins MSBuild Plugins
- NuGet Application
Proceed by following the steps below.
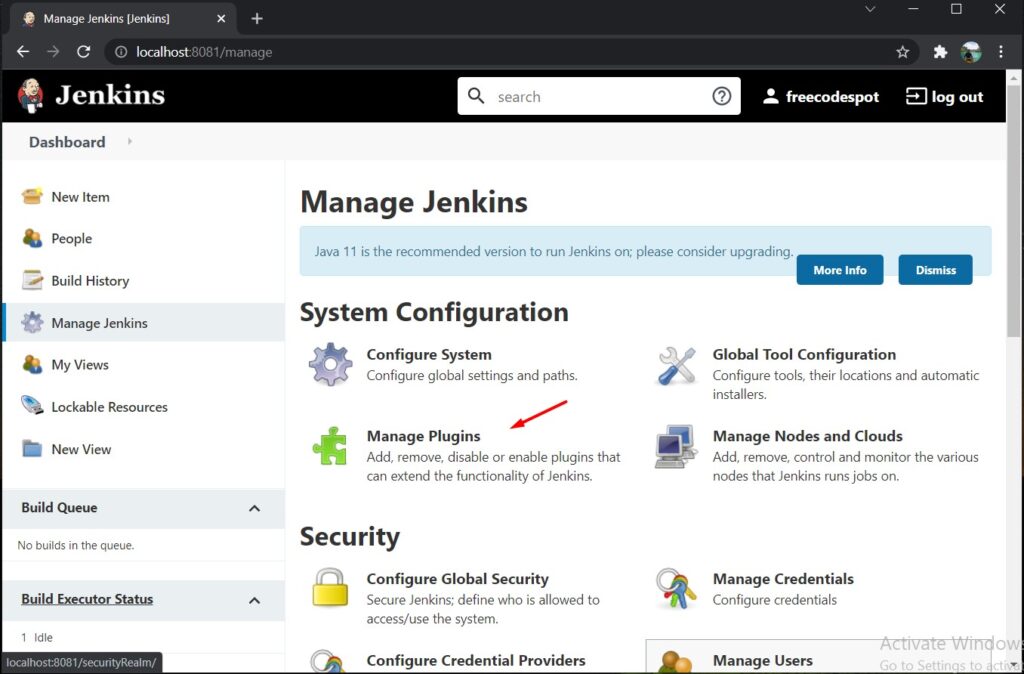
- Open Jenkins Manage Plugin options by navigating to Manage Jenkins page.
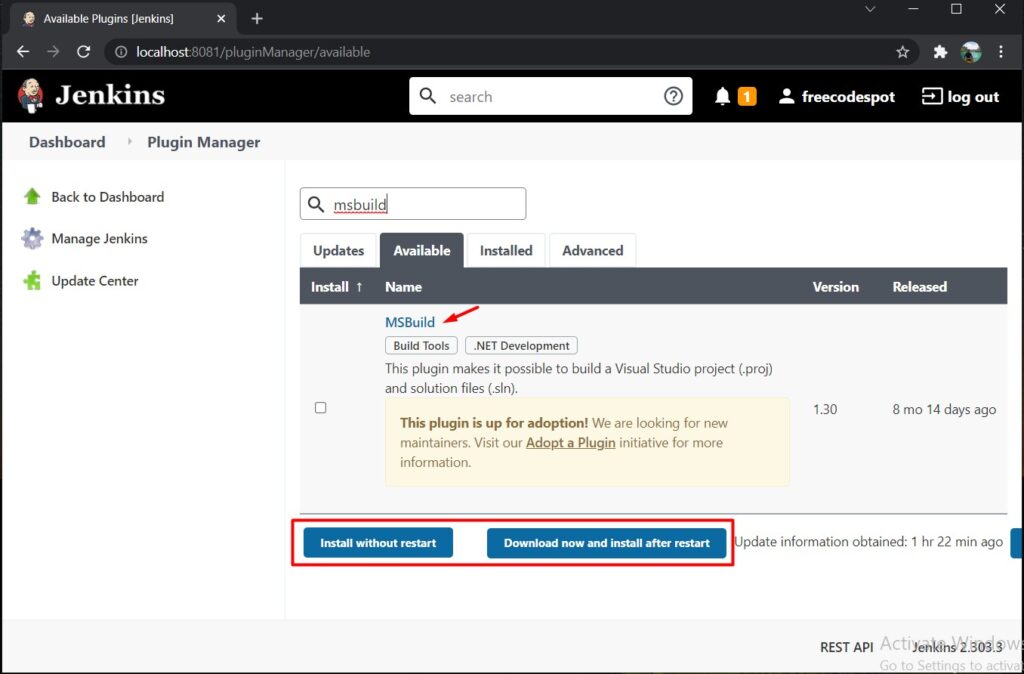
2. Search for MSBuild and install the plugin. To install the plugins tick the Plugin checkbox then select Install without restart. See the image below.
3. We also need to install Jenkins Git Plugin just follow the steps above but search for Git Plugin. If you install suggested plugins during the installation you already have the Git plugin installed.
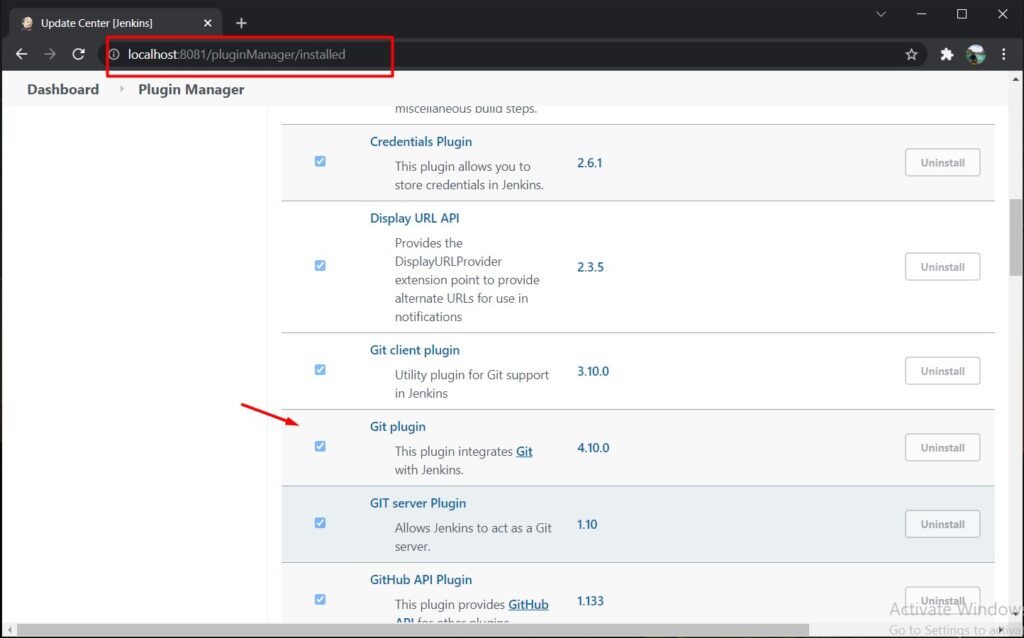
4. Verify the installation by navigating to the Installed tab. Use the filter to search for MSBuild Plugin . Do the same with the Git Plugin.

IV. MSBuild Configuration
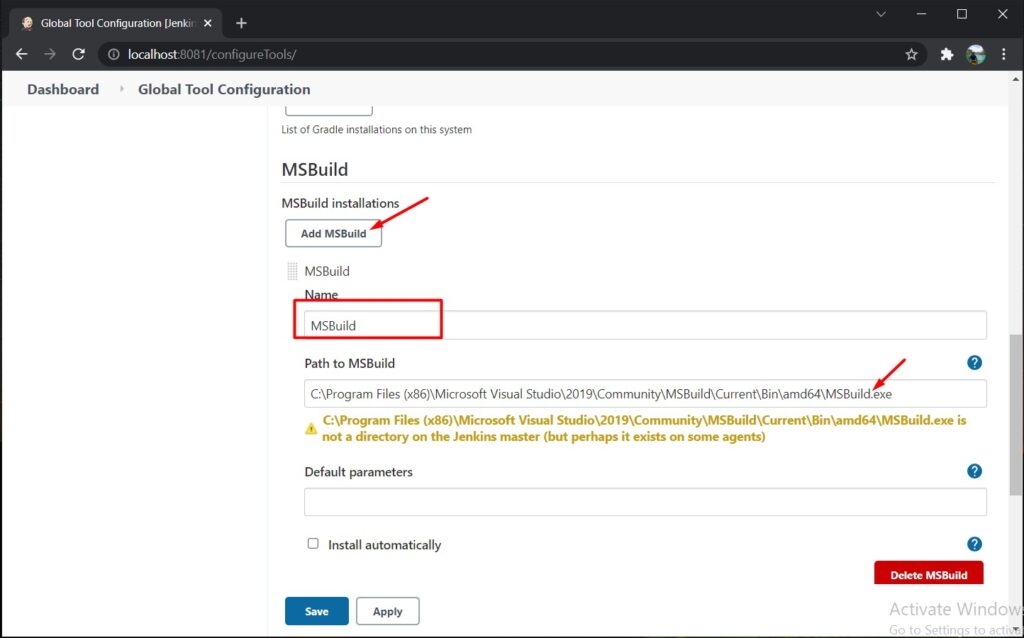
After installing MSBuild plugins it added its own configuration options to the Jenkins Global Tools Configuration. Navigate to Manage Jenkins » Global Tool Configuration then scroll down to the MSBuild Option.
Add MSBuild configuration then navigate to your MSBuild location. If you have Visual Studio installed on your machine you can locate your MSBuild inside the program file or you can use the location below but this can be different on your local system.
C:\Program Files (x86)\Microsoft Visual Studio\2019\Community\MSBuild\Current\Bin\amd64\MSBuild.exe
My msbuild location
MSBuild.exe is the application file that is executed once you build your project on your Visual Studio.
If you don’t have Visual Studio installed. You can directly download the Microsoft MSBuild from this link.
Now, add MSBuild installation name it MSBuild after that save the configuration. See the image below.
Now, it’s time to start the configuration for Continuous Deployment using Jenkins. Proceed to the next step.
V. Create a new Jenkins build project
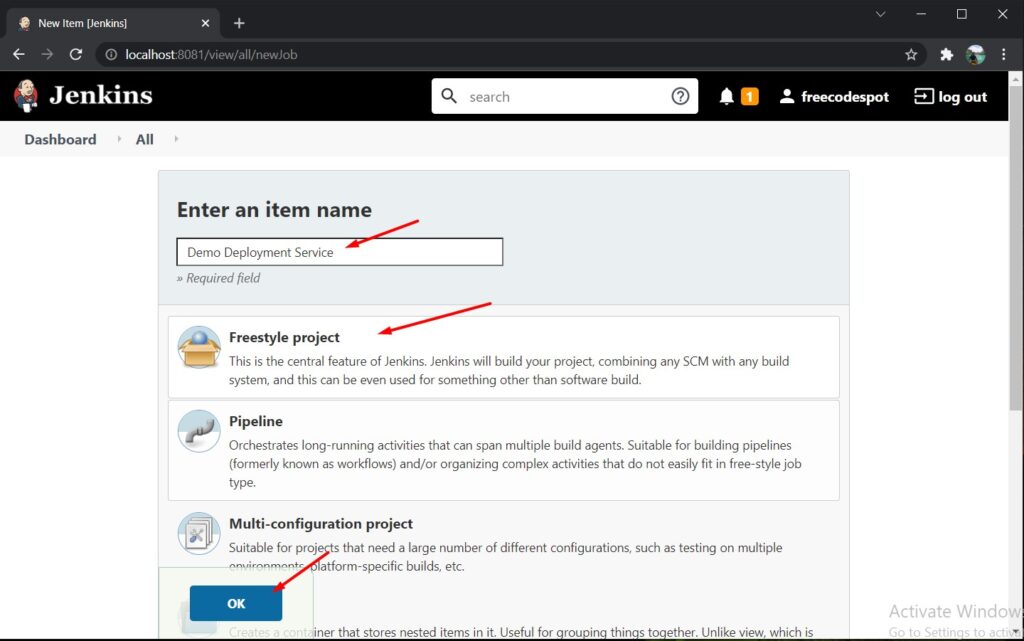
Let’s create a project Demo Deployment Service. This is the project name that I will use on my Jenkins new project. Follow the steps below.
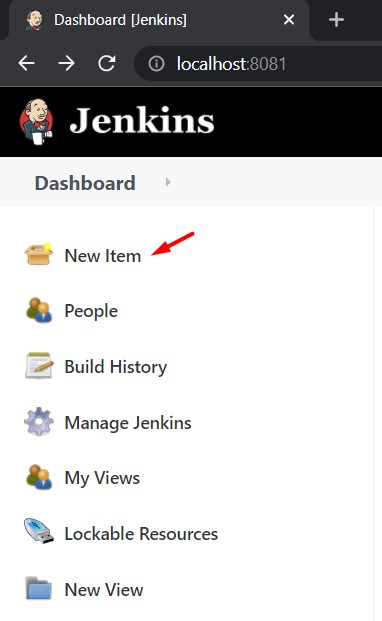
- From the Jenkins main Dashboard. Select New item to create a new Project.
2. Name the service as Demo Deployment Service then choose FreeStyle Project.
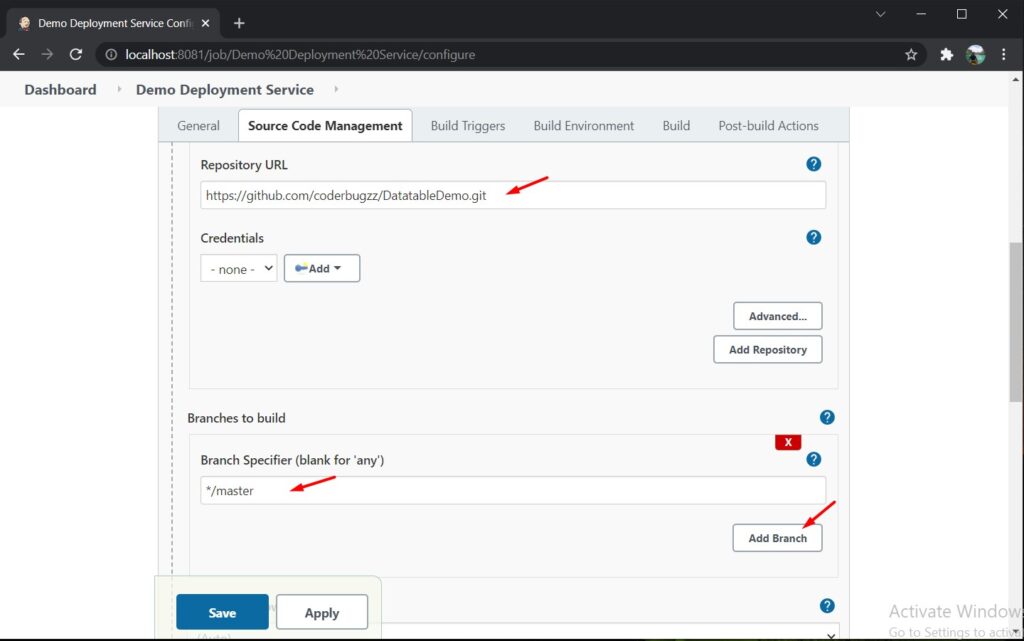
3. Navigate to the Source Code Management tab. Then select Git and input the Repository URL you want to deploy. Specify the branch from your Repository then click the Save button. In my case, I used the repository from this tutorial link. See the image below.
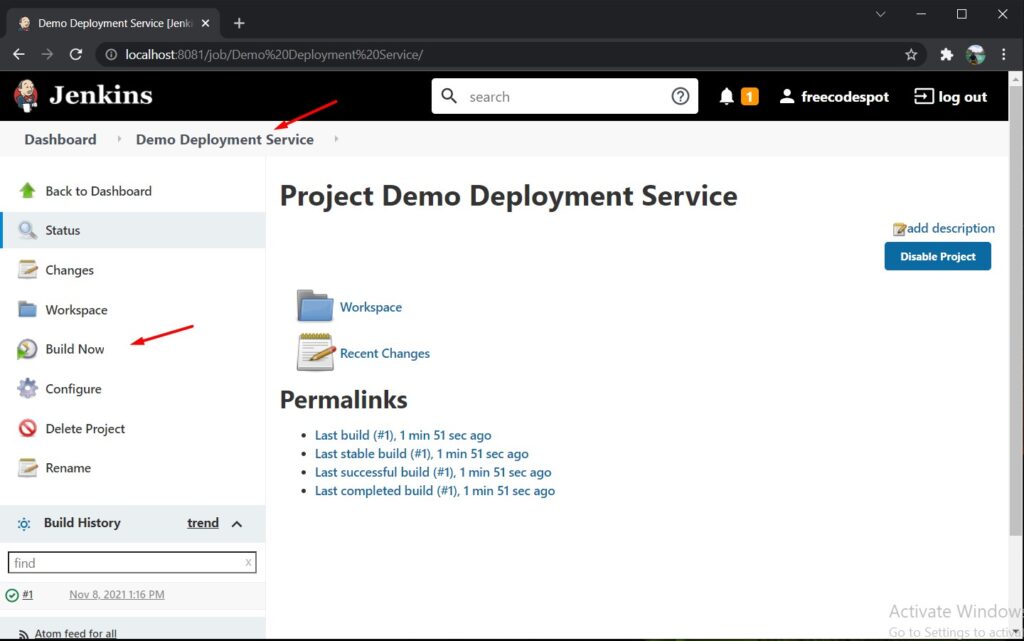
4. From your project dashboard, click the Build Now tab this will execute a clone command to clone the repository we added a while ago.
5. You can track the process by showing the console output under Build History. See the image below.

6. Just wait for the process to finish, Until you see a success message like this.
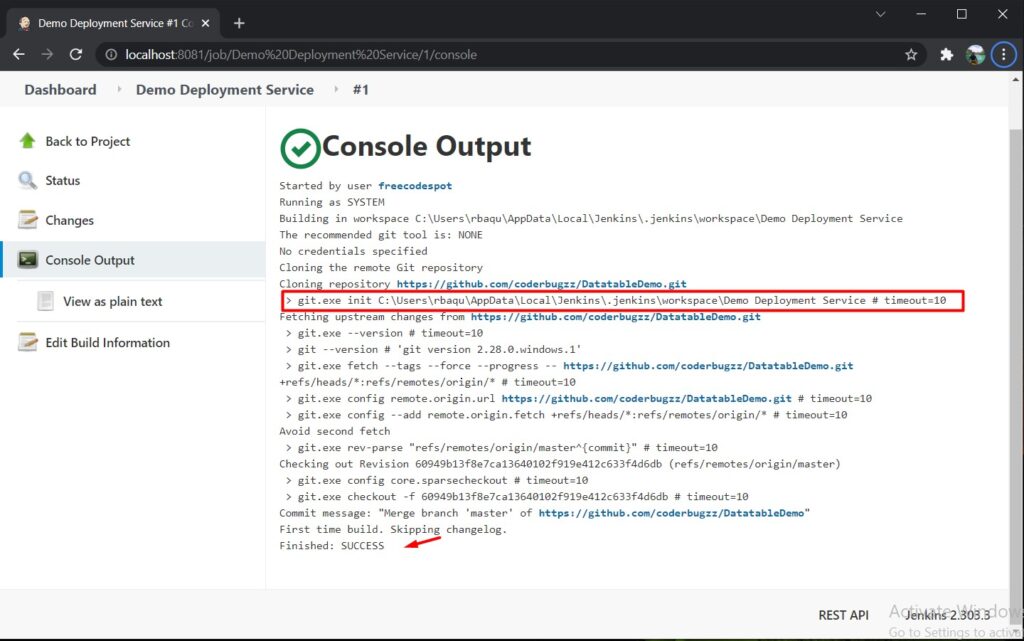
You can also find the output location of the cloned repository from the Console Output shown above.
VI. Configure Nuget Restore
Using a Git repository sometimes ignore the package you added to your projects. The solution would be to execute a NuGet restore command. NuGet restore will redownload all the packages needed for your project to run. In order for us to do that we need to make sure that NuGet.exe is accessible on our machine so that we can perform NuGet restore command from a Windows PowerShell.
- Download Nuget Application from this link.
- Copy the location where you put the Nuget.exe file.
- Register nuget to the Environment Variable.

VII. Adding Restore Command
Now, let’s add the NuGet Restore command to our Build configuration. To do that, follow the step below.
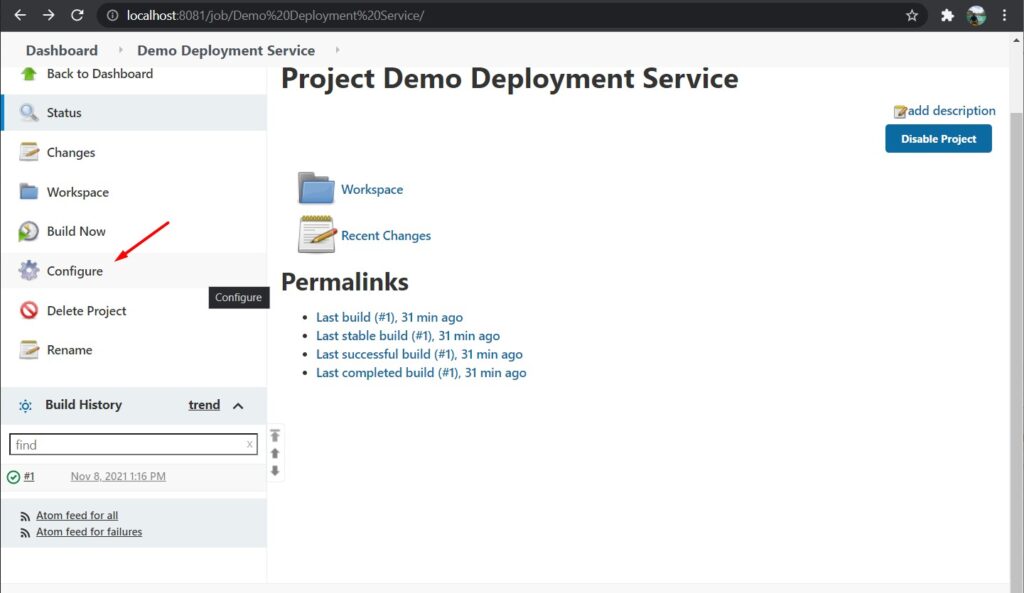
- Re.open your project Demo Deployment Service and select Configure. This will open your project settings where you can configure and add additional command execution during Building.
2. Open the Build tab then Add Build Step. Add Execute Windows batch command. See the image shown below.
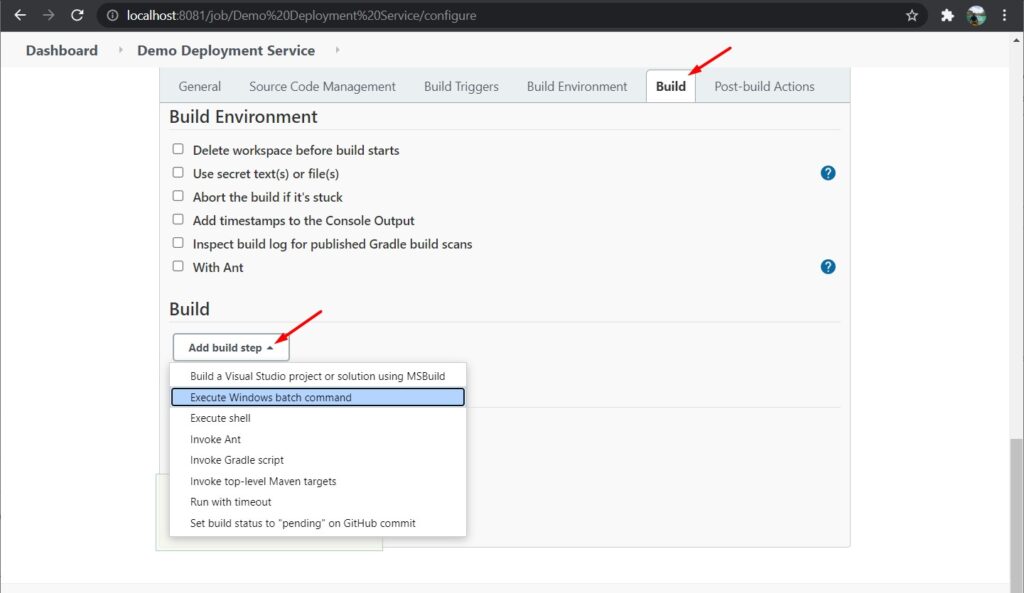
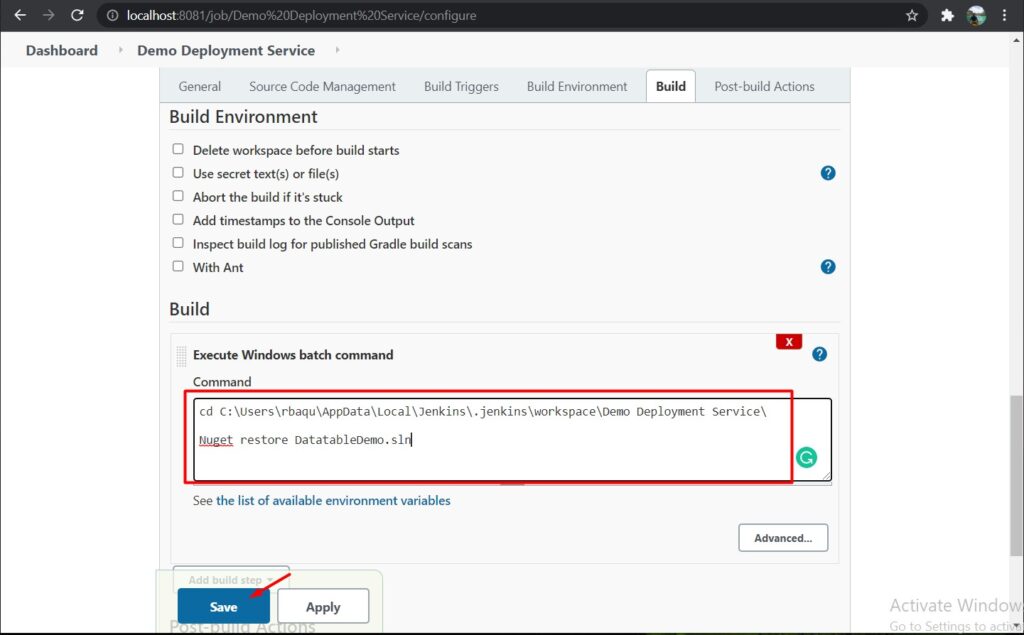
3. Add a basic cd command to change the directory to your cloned repository and execute a Nuget Restore command to redownload all the Nuget packages needed for your project. Save the configuration and test it using Build Now.
Note: Make sure that the location you use contains the solution file of your ASP.NET Web application.
Point to DatatableDemo.sln
cd C:\Users\rbaqu\AppData\Local\Jenkins.jenkins\workspace\Demo Deployment Service\
Nuget restore DatatableDemo.sln
Cd to the location of your cloned repository. In my case, it’s the DatatableDemo.sln
VIII. Build Project Command
If you remember we install and configure MSBuild Plugin a while ago. Now, let’s use the build configuration that we set. Navigate back to your Demo Deployment Service then open Configure page. Then follow the steps below.
1. Open your Build tab and add a build step. Select Build a Visual Studio project or solution using MSBuild.
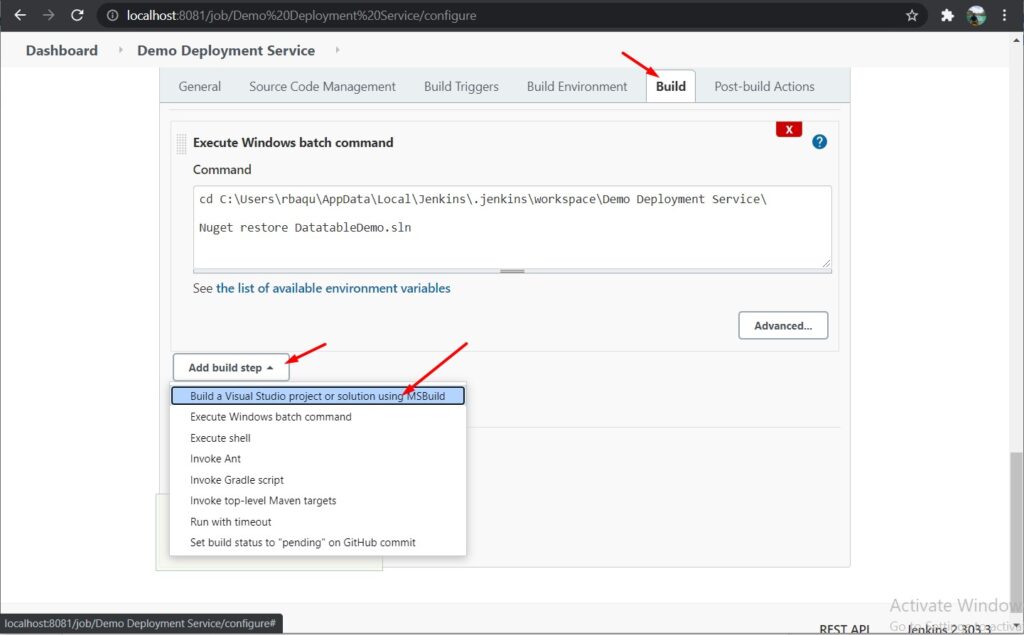
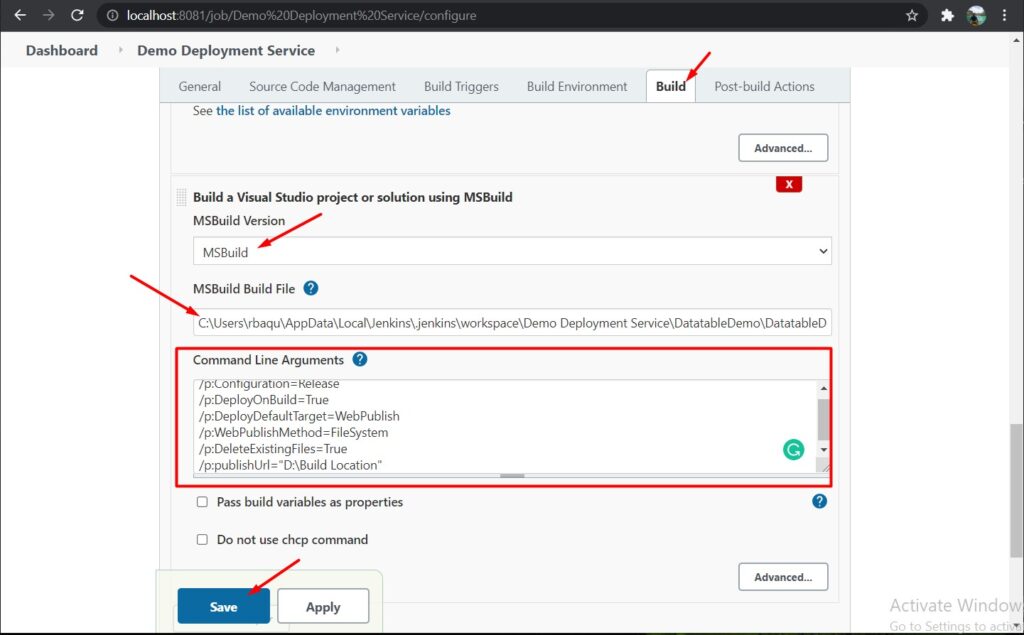
2. Select the MSBuild configuration that we created from the previous steps. In my case, I named it MSBuild.
3. From the MSBuild Build File input the location of your project solution which in my case, the file that I need is the DatatableDemo.csproj
MSBuild Build file : C:\Users\rbaqu\AppData\Local\Jenkins.jenkins\workspace\Demo Deployment Service\DatatableDemo\DatatableDemo.csproj
4. On the command-line argument add the command below for the deployment settings
/p:Configuration=Release
/p:DeployOnBuild=True
/p:DeployDefaultTarget=WebPublish
/p:WebPublishMethod=FileSystem
/p:DeleteExistingFiles=True
/p:publishUrl="D:\Build Location"
publishURL » Outout location for the Build file
See the image below for the full screenshot of my MSBuild configuration.
5. Save the configuration and retest using the BUILD NOW option.
For a successful build, you will see the build files on the publishURL location. You will also see a success message on the Console Output on the Build History.
Summary
In this article, we have set up an automated process for Continuous Deployment using Jenkins. I have listed below the processes that we automate in this tutorial.
- Clone a project from a Repository
- Check out the branch from a repository
- Restore the project Nuget packages
- Build project solution
- Generate project build release file for deployment
Instead of manually executing all the steps above we automate it into one process which is the Build Now option from the Jenkins dashboard. Now, if you have changes that you want to apply, all you need is to commit your changes and Jenkins will do the rest. Hopefully, with this article, you can get an idea of how you can automate your deployment process for your current and future ASP.NET web application projects.
KEEP CODING!!

Explore more articles start by reading this tutorial on how to create a login and registration using Identity.