In this tutorial, we’ll explore how to create a robust login web application using Cookie Authentication in ASP.NET Core. We’ll walk through the steps for implementing user registration and logout functionalities seamlessly. Additionally, we’ll leverage Dapper, a micro ORM, to handle database connectivity efficiently. By the end, you’ll have a solid understanding of how to integrate these components to build a secure and functional web application. Let’s get started and see how it all comes together!
- What is Cookie Authentication?
- Create a new ASP.NET Core Web Application
- Setup SQL Database Connection
- Add Model properties
- Create Interface and Implementation Class
- Map Interface and Implementation Class
- Configure Role Based Access
- Add Cookie Authentication on startup.cs
- Create and Configure AuthController
- Implement User Login Authentication
- Implement User Registration
- Implement SignOut Function
- Modify Web App Navigation Menu
- Summary
While this tutorial focuses on manual cookie-based authentication, ASP.NET Core also provides a built-in membership system called Identity. If you’d like to set up full login and registration using ASP.NET Core Identity, follow my ASP.NET Core Login and Registration using Identity guide.
What is Cookie Authentication?
Cookie authentication is one of the ways to implement login authentication. The cookie stored the identity of the user that is validated. Using Cookie authentication help us customise ASP.NET Core Identity. Since a cookie is designed to stored data for a long time, we can quickly check if someone is still log in our application.
Later on this tutorial, you will see how we can use a cookie-based authentication in our Web App. But before we proceed, please make sure to have the following installed on your machine.
- The latest version of Visual Studio
- (Alternative)Visual Studio Code
- SQL Server
- SQL Server Management Studio
If you already have this on your machine you can skip this part and move to the second steps.
Create a new ASP.NET Core Web Application
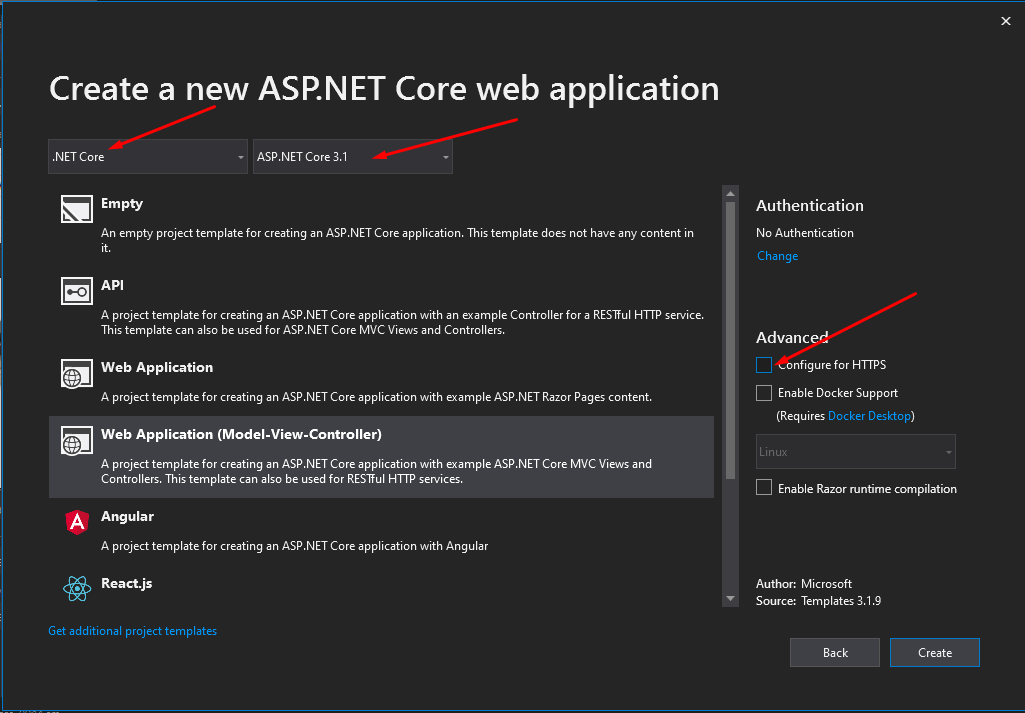
- First, create your ASP.NET Core Web Application. To do that just follow the steps below.
- Select File > New > Project.
- Select ASP.NET Core Web Application. Name the project IdentityDemo to have the same namespace as my project. Click OK.
- Select an ASP.NET Core Web Application. and then uncheck Configure for HTTPS.
- Lastly, Click on Create.
2. Now we need to install required packages for this project. I have listed it all below.
- Dapper
- System.Data.SqlClient
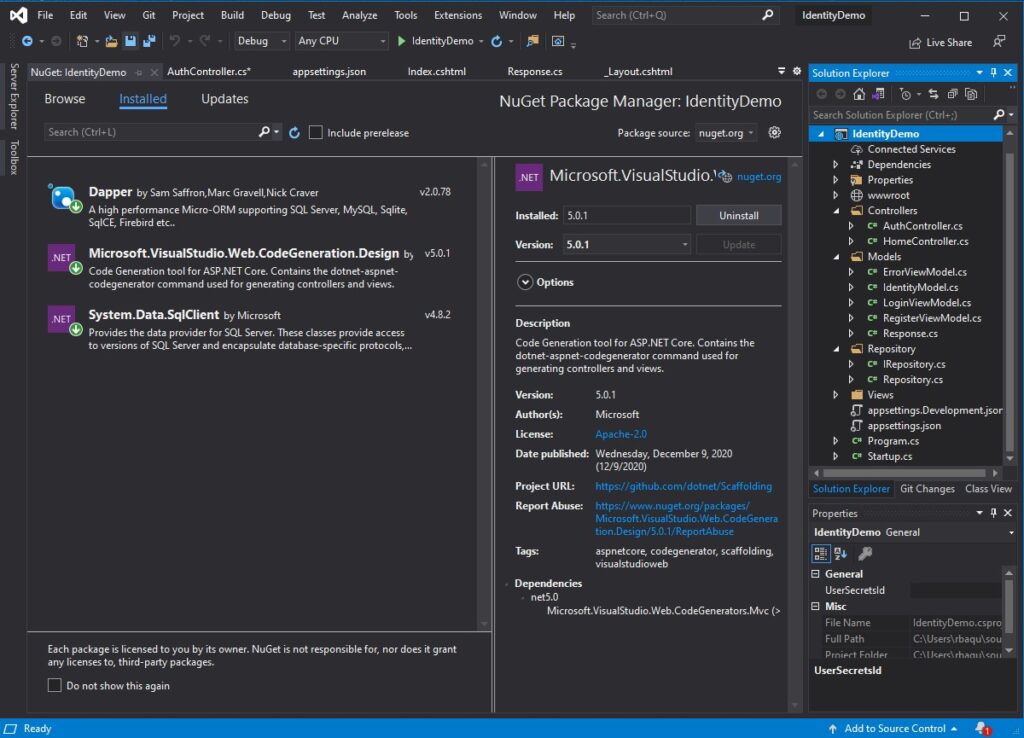
Use NuGet Package Manager to install this package. If this is your first time using this you can visit this article.
Setup SQL Database Connection
Now, let’s create Database tables that we need for this project. Below I will attach the script of the table and procedures that I made for this project.
- If you have an existing table, you can use it or create a new database and name it IdentityDemo. Below are the table and procedures that I made.
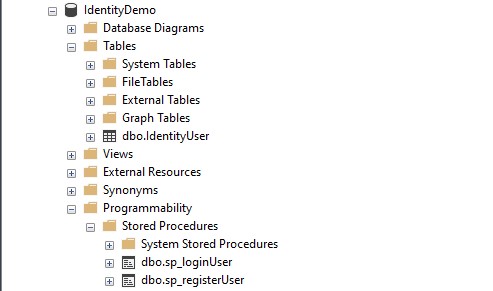
2. Create IdentityUser table.
USE [IdentityDemo]
 GO
 SET ANSI_NULLS ON
 GO
 SET QUOTED_IDENTIFIER ON
 GO
 CREATE TABLE [dbo].[IdentityUser](
     [ID] [int] IDENTITY(1,1) NOT NULL,
     [Email] nvarchar NULL,
     [Password] nvarchar NULL,
     [Role] nvarchar NULL,
     [Reg_Date] [datetime] NULL
 ) ON [PRIMARY]
 GO
3. Create sp_loginUser stored procedure. This procedure will handle the query for the validation of the user. We use MD5 hashing for the password to make it more secure. To create the stored procedure, you can execute the SQL query below.
USE [IdentityDemo]
 GO
 SET ANSI_NULLS ON
 GO
 SET QUOTED_IDENTIFIER ON
 GO
 -- =============================================
 -- Author:    FreeCode Spot
 -- Create date:
 -- Description:
 -- =============================================
 CREATE PROCEDURE [dbo].[sp_loginUser]
     @email Nvarchar(50),
     @password nvarchar(200)
     AS
 BEGIN
     SET NOCOUNT ON;
 Select * FROM IdentityUser where Email = @email and [Password] = CONVERT(VARCHAR(32), HashBytes('MD5', @password), 2)
 END
4. Create sp_registerUser Stored Procedure. This procedure will register a new user for our web application. See the code snippet below.
USE [IdentityDemo]
 GO
 SET ANSI_NULLS ON
 GO
 SET QUOTED_IDENTIFIER ON
 GO
 -- =============================================
 -- Author:        FeeCode Spot
 -- Create date:
 -- Description:
 -- =============================================
 CREATE PROCEDURE [dbo].[sp_registerUser]
     @email Nvarchar(50),
     @password nvarchar(200),
     @role nvarchar(50),
     @retval int OUTPUT
 AS
 BEGIN
     SET NOCOUNT ON;
       INSERT INTO IdentityUser(Email,[Password],[Role],Reg_Date) VALUES(@email,CONVERT(VARCHAR(32), HashBytes('MD5', @password), 2),@role,GETDATE())
       if(@@ROWCOUNT > 0)
       BEGIN
         SET @retval = 200
       END
       ELSE
       BEGIN
       SET @retval = 500
       END
 END
5. Now, we have set up all the necessary data layer that we need for this tutorial lets set up our web application to use this database. To do that, open your appsettings.json and add the connection string for this database. You can visit this link to know the default SQL connection strings.
"ConnectionStrings": {
     "default": "Server=CODERSIGN\SQLEXPRESS01;Database=IdentityDemo;User Id=freecode;Password=freecodespot;"
   }
Add Model properties
This model classes will be used later on the repository class and view models.
- IdentityModel.cs » This is the model that we are going to map with the dapper query in the login method on the Repository class.
public class IdentityModel
     {
         public int ID { get; set; }
         public string Email { get; set; }
         public string Password { get; set; }
         public string Role { get; set; }
         public string Reg_Date { get; set; }
     }
2. LoginViewModel.cs » Model that will be bind with our login view.
 public class LoginViewModel
     {
         [Required]
         [EmailAddress]
         public string Email { get; set; }
         [Required]
         [DataType(DataType.Password)]
         public string Password { get; set; }

         [Display(Name = "Remember Me")]
         public bool RememberMe { get; set; }

         public string Role { get; set; }

     }
3. RegisterViewModel.cs » Model that will be bind with our Register view
 public class RegisterViewModel
     {
         [Required]
         public string Email { get; set; }
         [Required]
         [DataType(DataType.Password)]
         public string Password { get; set; }
         [Required]
         public string Role { get; set; }
     }
4. Response.cs » we will use this as default response on Repository Methods.
public class Response<T>
{
public T Data { get; set; }
public string message { get; set; }
public int code { get; set; }
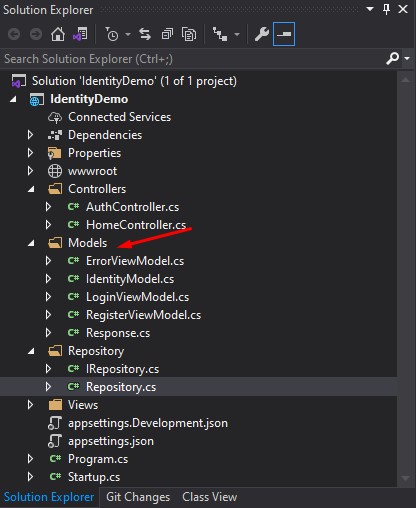
}Create Interface and Implementation Class
Repository class will handle the Query to the database. This repository is IN charge of the communication between our web application and the SQL Stored procedure we created awhile ago.
- Create a Repository folder. Under that folder, create an interface class and name it IRepository. Initialise implementation method for this class using the code below.
Task<Response<IdentityModel>> LoginAsync(LoginViewModel loginView);
Task<Response<string>> RegisterAsync(RegisterViewModel registerView);
This is the full code inside my IReposirtory Interface.
using IdentityDemo.Models;
 using System;
 using System.Collections.Generic;
 using System.Linq;
 using System.Threading.Tasks;
 namespace IdentityDemo.Repository
 {
    public interface IRepository
     {
          <Task> LoginAsync(LoginViewModel loginView);
          <Task> RegisterAsync(RegisterViewModel registerView);
 }
 }
2. Create the implementation for this interface. To do that, create a class file under the Repository folder with Repository as the filename and paste the codes below.
Get the connection string from appsettings.json
 private readonly IConfiguration _configuration;

  public Repository(IConfiguration configuration)
   {
             _configuration = configuration;
   }
LoginAsync Method
This will consume the sp_loginUser stored procedure using dapper
 public async Task<Response<IdentityModel>> LoginAsync(LoginViewModel loginView)
         {
             Response<IdentityModel> response = new Response<IdentityModel>();

             var sp_params = new DynamicParameters();
             sp_params.Add("email",loginView.Email,DbType.String);
             sp_params.Add("password", loginView.Password, DbType.String);

             try
             {
                 using IDbConnection dbConnection = new SqlConnection(_configuration.GetConnectionString("default"));

                 response.Data = await dbConnection.QueryFirstOrDefaultAsync<IdentityModel>("sp_loginUser", sp_params, commandType: CommandType.StoredProcedure);
                 response.message = (response.Data is null) ? "Login failed.Please check Username and / or password" : "data found";
                 response.code = (response.Data is null) ? 500 : 200;
             }
             catch (Exception ex)
             {
                 response.code = 500;
                 response.message = ex.Message;
             }

            return response;
         }
RegisterAsync Method
This will consume the sp_registerUser stored procedure using dapper
 public async Task<Response<string>> RegisterAsync(RegisterViewModel registerView)
         {
             Response<string> response = new Response<string>();
             var sp_params = new DynamicParameters();
             sp_params.Add("email", registerView.Email, DbType.String);
             sp_params.Add("password", registerView.Password, DbType.String);
             sp_params.Add("role", registerView.Role, DbType.String);
             sp_params.Add("retVal", DbType.String,direction:ParameterDirection.Output);


             using (IDbConnection dbConnection = new SqlConnection(_configuration.GetConnectionString("default")))
             {
                 if (dbConnection.State == ConnectionState.Closed) dbConnection.Open();
                 using var transaction = dbConnection.BeginTransaction();
                 try
                 {
                     await dbConnection.QueryAsync<string>("sp_registerUser", sp_params, commandType: CommandType.StoredProcedure, transaction: transaction);
                     response.code = sp_params.Get<int>("retVal"); //get output parameter value
                     transaction.Commit();
                     response.message = (response.code == 200) ? "Successfully Registered" : "Unable to register user";

                 }
                 catch (Exception ex)
                 {
                     transaction.Rollback();

                     response.Data = ex.Message;
                     response.message = "An error encountered during saving!";
                     response.code = 500;
                 }
             };
             return response;
         }
Map Interface and Implementation Class
To configure an Interface and a Repository Class, we need to let our application know that this two is connected. To do that open Startup.cs and add a scope under ConfigureServices method using the code snippet below.
services.AddScoped<IRepository, Repository.Repository>(); Configure Role Based Access
This steps will help us test the role of the user that we will create later. Open HomeController and setup authorise role using the code snippet below.
 [Authorize(Roles = "Admin")]
 public IActionResult Index()
      {
          return View();
     }

[Authorize(Roles = "User")]
   public IActionResult Privacy()
     {
             return View();
} | [Authorize(Roles = “Admin”)] | This means that only user with Admin role can access |
| [Authorize(Roles = “User”)] | This means that only user with User role can access |
Add Cookie Authentication on startup.cs
To add cookie authentication, copy the code below inside ConfigureServices method from your startup.cs.
services.AddAuthentication(CookieAuthenticationDefaults.AuthenticationScheme)
                     .AddCookie(option => {
                         option.LoginPath = new PathString("/Auth/index");
                         option.AccessDeniedPath = new PathString("/Auth/AccessDenied");
});| option.LoginPath | This option will redirect user to login page when user is not authenticated |
| option.AccessDeniedPath | This is the path if the user role is denied |
Now, add the app.UseAuthentication(); under Configure method. This is now how my code on my startup.cs will look like.
 using IdentityDemo.Repository;
 using Microsoft.AspNetCore.Authentication.Cookies;
 using Microsoft.AspNetCore.Builder;
 using Microsoft.AspNetCore.Hosting;
 using Microsoft.AspNetCore.Http;
 using Microsoft.Extensions.Configuration;
 using Microsoft.Extensions.DependencyInjection;
 using Microsoft.Extensions.Hosting;
 using System;
 using System.Collections.Generic;
 using System.Linq;
 using System.Threading.Tasks;

 namespace IdentityDemo
 {
     public class Startup
     {
         public Startup(IConfiguration configuration)
         {
             Configuration = configuration;
         }

         public IConfiguration Configuration { get; }

         // This method gets called by the runtime. Use this method to add services to the container.
         public void ConfigureServices(IServiceCollection services)
         {
             services.AddAuthentication(CookieAuthenticationDefaults.AuthenticationScheme)
                     .AddCookie(option => {
                         option.LoginPath = new PathString("/Auth/index");
                         option.AccessDeniedPath = new PathString("/Auth/AccessDenied");
                     });

             services.AddScoped<IRepository, Repository.Repository>();
             services.AddControllersWithViews();
         }

         // This method gets called by the runtime. Use this method to configure the HTTP request pipeline.
         public void Configure(IApplicationBuilder app, IWebHostEnvironment env)
         {
             if (env.IsDevelopment())
             {
                 app.UseDeveloperExceptionPage();
             }
             else
             {
                 app.UseExceptionHandler("/Home/Error");
             }
              app.UseStaticFiles();
             app.UseRouting();
             app.UseAuthentication();
             app.UseAuthorization();

             app.UseEndpoints(endpoints =>
             {
                 endpoints.MapControllerRoute(
                     name: "default",
                     pattern: "{controller=Home}/{action=Index}/{id?}");
             });
         }
     }
 }
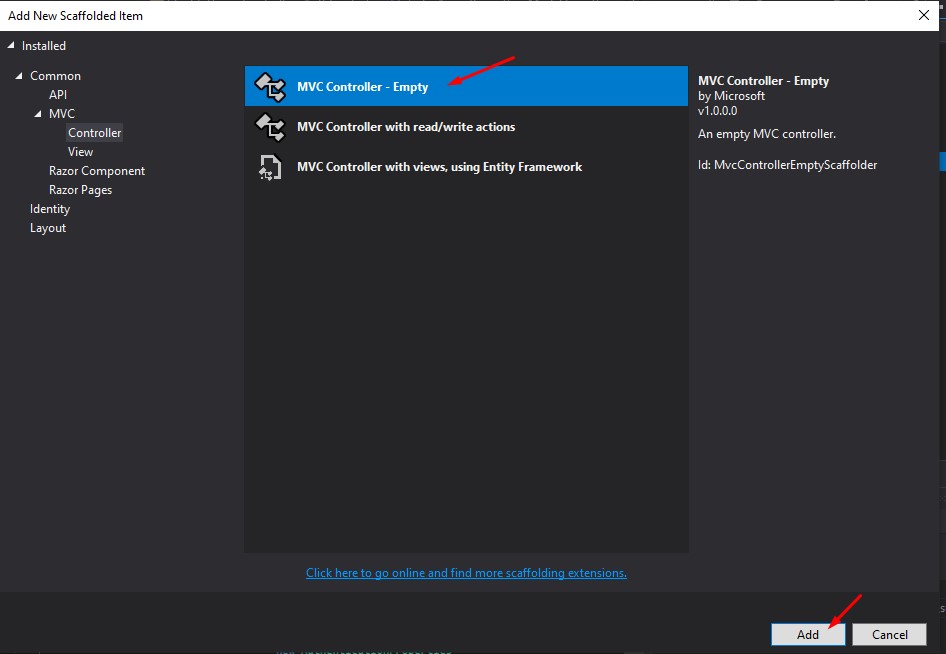
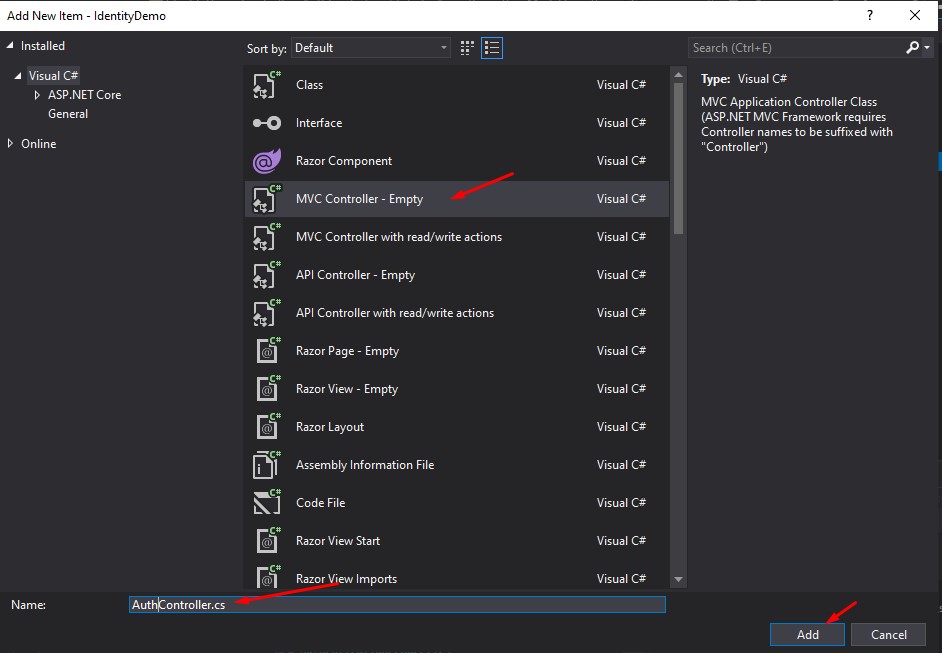
Create and Configure AuthController
This controller will handle the HTTP request for login, registration, logout, and access denied. This controller is the bridge from the view to the repository that we created just awhile ago.
- Right-click on the Controllers folder then choose Add » Controller
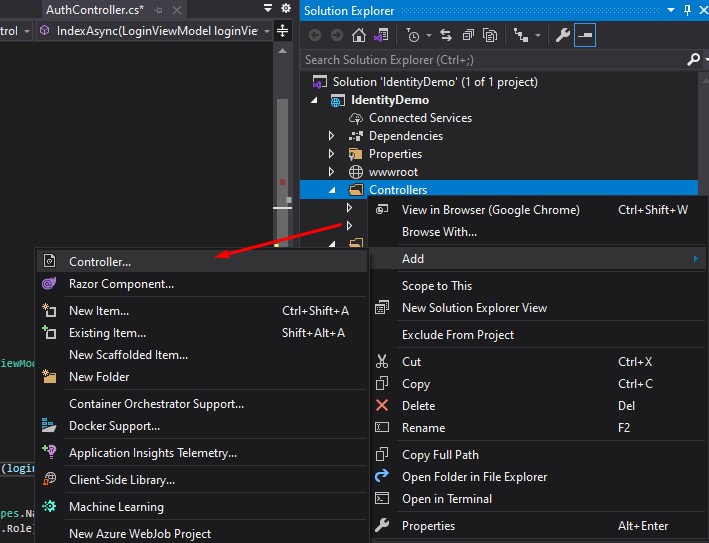
2. Choose MVC Controller – empty. See the image below.
3. Replace the name of the controller, which is AuthController.Then click the Add button. See the image below.
Implement User Login Authentication
We will use the index method for the login. This will handle the HTTP GET and POST request of login.
- To use the Repository that we created awhile ago, we need to inject the IRepository to the AuthController. To do that, copy the code snippet below.
 private readonly IRepository _repository;

public AuthController(IRepository repository)
   {
             _repository = repository;
    }
2. Create Index Method. We will create two index method, one for the get request and the other one is for the POST request.
| Index() | HTTPGET | Display the login view design |
| Index() | HTTPPOST | Perform validation of the user credential |
| HttpContext.SignInAsync | Sign in user using cookie authentication |
We use claims to store user information like role, username and email. This information will be stored on a cookie and can be used later in checking if the user is logged in or not. See the code snippet below.
public IActionResult Index() //display the login form
{
return View();
}
[HttpPost]
public async Task<IActionResult> IndexAsync(LoginViewModel loginViewModel) //perform validation for login authentication
{
if (ModelState.IsValid)
{
var username = loginViewModel.Email;
var password = loginViewModel.Password;
var result = await _repository.LoginAsync(loginViewModel);
if (result.code == 200)
{
var claims = new[] { new Claim(ClaimTypes.Name, username),
new Claim(ClaimTypes.Role, result.Data.Role),
new Claim(ClaimTypes.Email,username)};
var identity = new ClaimsIdentity(claims, CookieAuthenticationDefaults.AuthenticationScheme);
await HttpContext.SignInAsync(
CookieAuthenticationDefaults.AuthenticationScheme,
new ClaimsPrincipal(identity),
new AuthenticationProperties
{
IsPersistent = false //remember me
});
return Redirect("~/Home/Index");
}
else
{
ModelState.AddModelError("", result.message);
}
}
return View(loginViewModel);
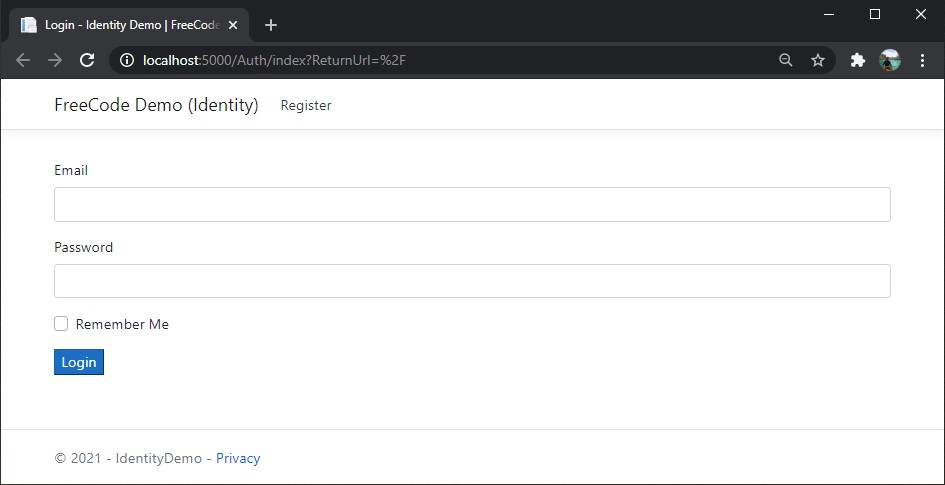
} 3. Create a simple form for our login and bind it with the LoginViewModel. To do that, see the code snippet below.
 @model IdentityDemo.Models.LoginViewModel
 @{
     ViewData["Title"] = "Login";
 }

 <div class="row">
     <div class="col-md-12">
         <form method="post">
             <div asp-validation-summary="All" class="text-danger"></div>
             <div class="form-group">
                 <label asp-for="Email"></label>
                 <input asp-for="Email" class="form-control" />
                 <span asp-validation-for="Email" class="text-danger"></span>
             </div>

             <div class="form-group">
                 <label asp-for="Password"></label>
                 <input asp-for="Password" class="form-control" />
                 <span asp-validation-for="Password" class="text-danger"></span>
             </div>

             <div class="form-group">
                 <div class="custom-control custom-checkbox">
                     <input asp-for="RememberMe" type="checkbox" class="custom-control-input">
                     <label class="custom-control-label" asp-for="RememberMe">@Html.DisplayNameFor(m => m.RememberMe)</label>
                 </div>

             </div>
             <button type="submit" class="btn-primary">Login</button>
         </form>

     </div>
 </div>
This is how this view will look like.
Implement User Registration
For register method we will just simply replicate the step the we do on the login method.
- Create two method a GET and a POST Register Method. See the code snippet below.
public IActionResult Register()
{
return View();
}
[HttpPost]
public async Task RegisterAsync(RegisterViewModel registerViewModel)
{
if (ModelState.IsValid)
{
var result = await _repository.RegisterAsync(registerViewModel);
if (result.code == 200)
{
return RedirectToAction("Index");
}
else
{
ModelState.AddModelError("", result.message);
}
}
return View(registerViewModel);
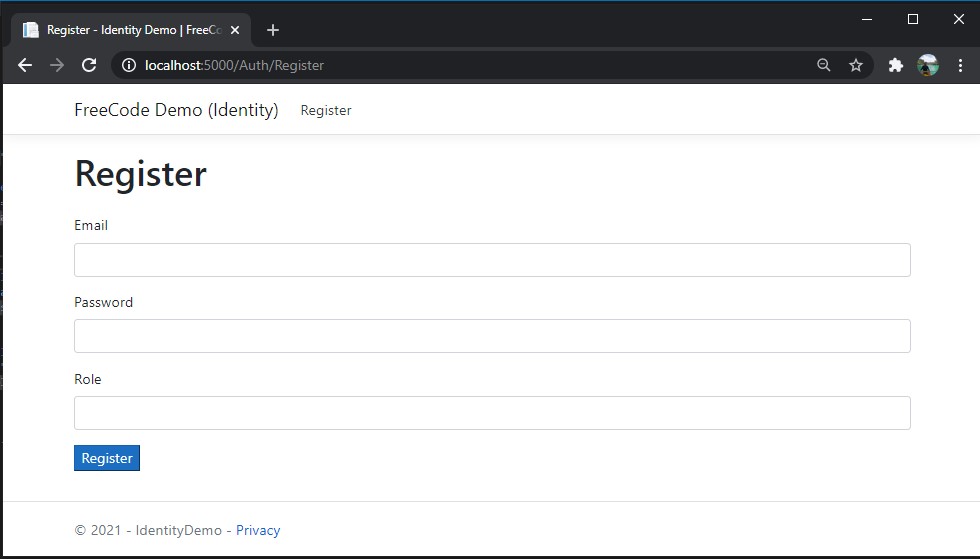
}2. Create a View for the Register and use the snippet below to create a simple register form.
 @model IdentityDemo.Models.RegisterViewModel
 @{
     ViewData["Title"] = "Register";
    }

 <h1>Register</h1>

 <div class="row">
     <div class="col-md-12">
         <form method="post">
             <div asp-validation-summary="All" class="text-danger"></div>
             <div class="form-group">
                 <label asp-for="Email"></label>
                 <input asp-for="Email" class="form-control" />
                 <span asp-validation-for="Email" class="text-danger"></span>
             </div>

             <div class="form-group">
                 <label asp-for="Password"></label>
                 <input asp-for="Password" class="form-control" />
                 <span asp-validation-for="Password" class="text-danger"></span>
             </div>
             <div class="form-group">
                 <label asp-for="Role"></label>
                 <input asp-for="Role" class="form-control" />
                 <span asp-validation-for="Role" class="text-danger"></span>
             </div>
             <button type="submit" class="btn-primary">Register</button>
         </form>

     </div>
 </div>
This is register view will look like.
Implement SignOut Function
Now, to sign out from cookie authentication you just need to use the code below.
public async Task<IActionResult> SignOutAsync()
         {
             await HttpContext.SignOutAsync(
                             CookieAuthenticationDefaults.AuthenticationScheme);

             return RedirectToAction("Index");

         }
To add the sign out menu, you need to add it to your _Layout.cshtml which is the next step. You can use the code snippet below for adding the signout. Please proceed with the next step to see my _Layout.cshtml.
<li class="nav-item">
      <a class="nav-link text-dark" asp-area="" asp-controller="Auth" asp-action="SignOut">Logout</a>
 </li>
Modify Web App Navigation Menu
_Layout.cshtml can be found under the Views » Shared. This layout is the master layout of an ASP.NET MVC template. You can customise the menu here if you want something to show if a user is authenticated. To do that you can use the code snippet below.
@if (User.Identity.IsAuthenticated)
                 {
                      //code here
                 }else
                {
                      //code here
                }
This is how my _layout codes look like.
<!DOCTYPE html>
<html>
<head>
<meta charset="utf-8" />
<meta name="viewport" content="width=device-width, initial-scale=1.0">
<title>@ViewBag.Title - My ASP.NET Application</title>
@Styles.Render("~/Content/css")
@Scripts.Render("~/bundles/modernizr")
</head>
<body>
<div class="navbar navbar-inverse navbar-fixed-top">
<div class="container">
<div class="navbar-header">
<button type="button" class="navbar-toggle" data-toggle="collapse" data-target=".navbar-collapse">
<span class="icon-bar"></span>
<span class="icon-bar"></span>
<span class="icon-bar"></span>
</button>
@Html.ActionLink("FreeCode LoginDemo", "Index", "Home", new { area = "" }, new { @class = "navbar-brand" })
</div>
<div class="navbar-collapse collapse">
@if (User.Identity.IsAuthenticated)
{
<ul class="nav navbar-nav">
<li>@Html.ActionLink("Home", "Index", "Home")</li>
</ul>
<ul class="nav navbar-nav pull-right">
<li>@Html.ActionLink("Logout", "Logout", "Account")</li>
<li>@Html.ActionLink(User.Identity.Name, "", "")</li>
</ul>
}
else
{
<ul class="nav navbar-nav pull-right">
<li>@Html.ActionLink("Register", "Register", "Account")</li>
</ul>
}
</div>
</div>
</div>
<div class="container body-content">
@RenderBody()
<hr />
<footer>
<p>© @DateTime.Now.Year - FreeCode Spot Website</p>
</footer>
</div>
@Scripts.Render("~/bundles/jquery")
@Scripts.Render("~/bundles/bootstrap")
@RenderSection("scripts", required: false)
</body>
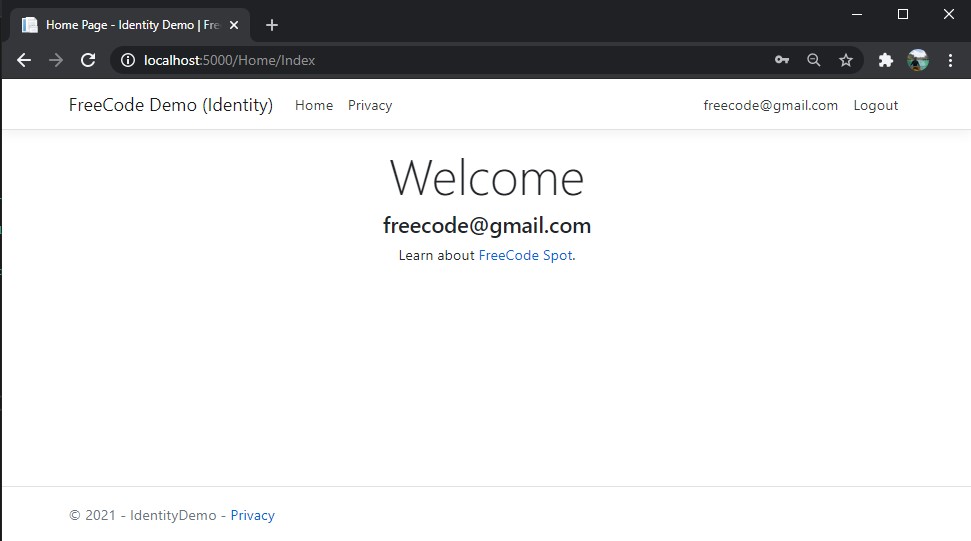
</html>This is the view if a user successfully log in.
If I miss-step, that might cause your application not running. You may download the source code at my GitHub Account. coderbugzz
Summary
We have learned how to set up a login Web Application using Cookie Authentication in ASP NET Core. We also use dapper on consuming the stored procedure that we use to register and log in. Hopefully, you find this tutorial helpful and gives you an idea on how you can secure your future .NET Web Application projects.
KEEP CODING!