When developing web applications using ASP.NET MVC and Entity Framework, one of the popular approaches is the Code First approach. Code First allows developers to define the application’s data model using simple C# or VB.NET classes, and Entity Framework takes care of creating the database schema based on these classes. In this article, we will explore the Code First approach and its benefits in ASP.NET MVC.
The Code-First approach offers several benefits:
- Rapid development: You can focus on writing code and defining relationships, allowing the database schema to be generated automatically.
- Improved maintainability: The code-first approach allows developers to easily modify the domain model without having to worry about altering the database schema manually.
- Version control: Code-first migrations enable tracking and managing database schema changes using version control systems.
- Testability: You can write unit tests against the domain model classes without relying on a database, as Entity Framework supports in-memory databases for testing purposes.
Before we start please make sure to have this following application installed on your machine.
- The latest version of Visual Studio
- SQL SERVER
If you already have the following tools installed on your machine you may proceed on the step below.
I. Setting up the ASP.NET MVC Project
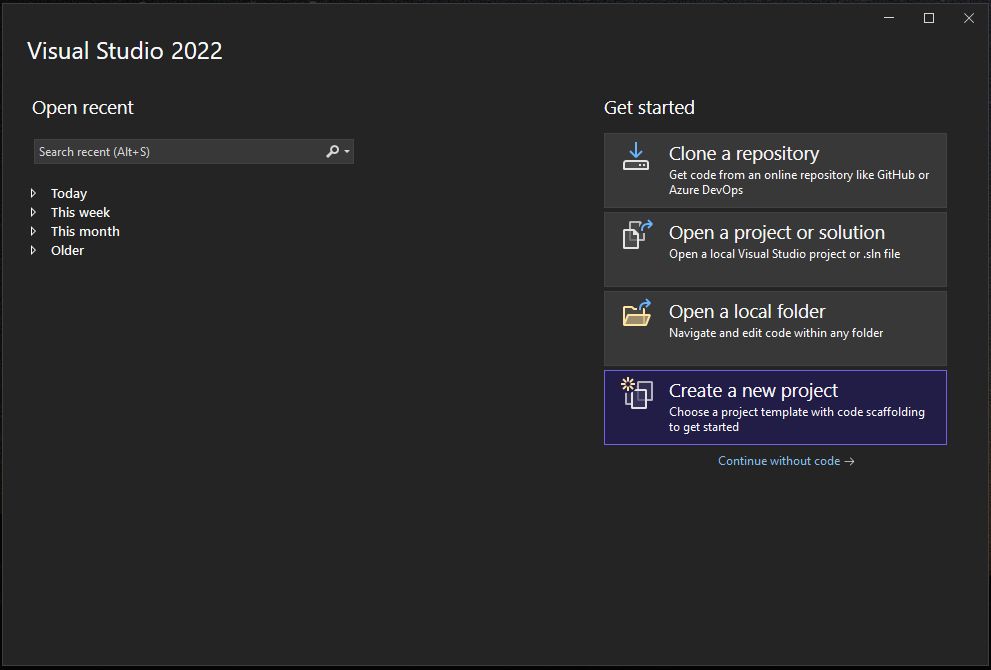
1. Open Visual Studio and Create New project or go to File->New->Project. A New Project dialog window will open. Select “Create a new project.”
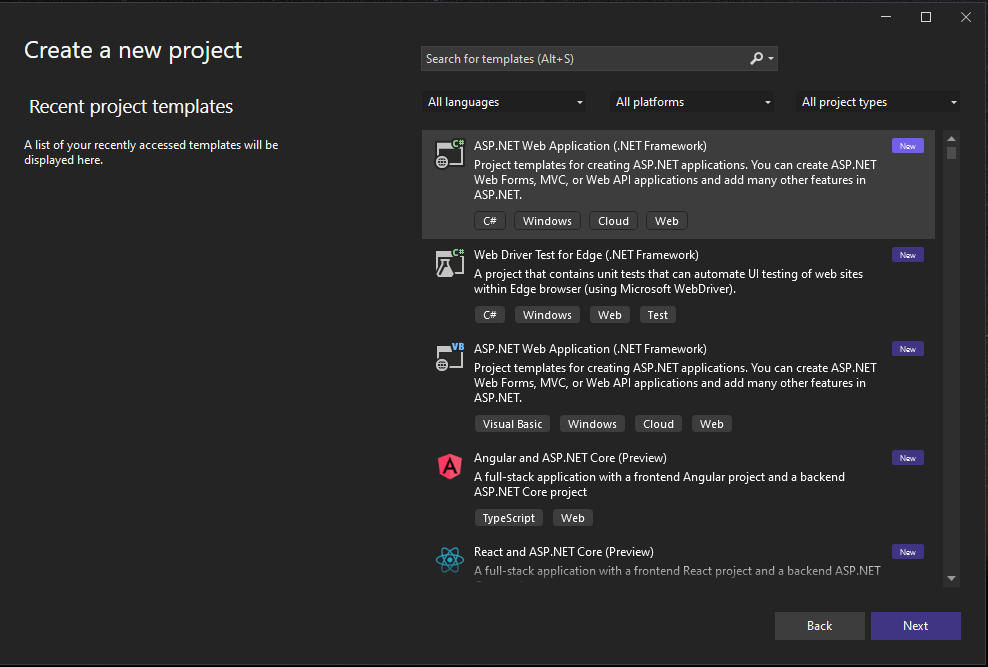
2. Choose “ASP.NET Web Application” and click “Next.”
3. Select “Web Application (Model-View-Controller)” template and click “Next.”
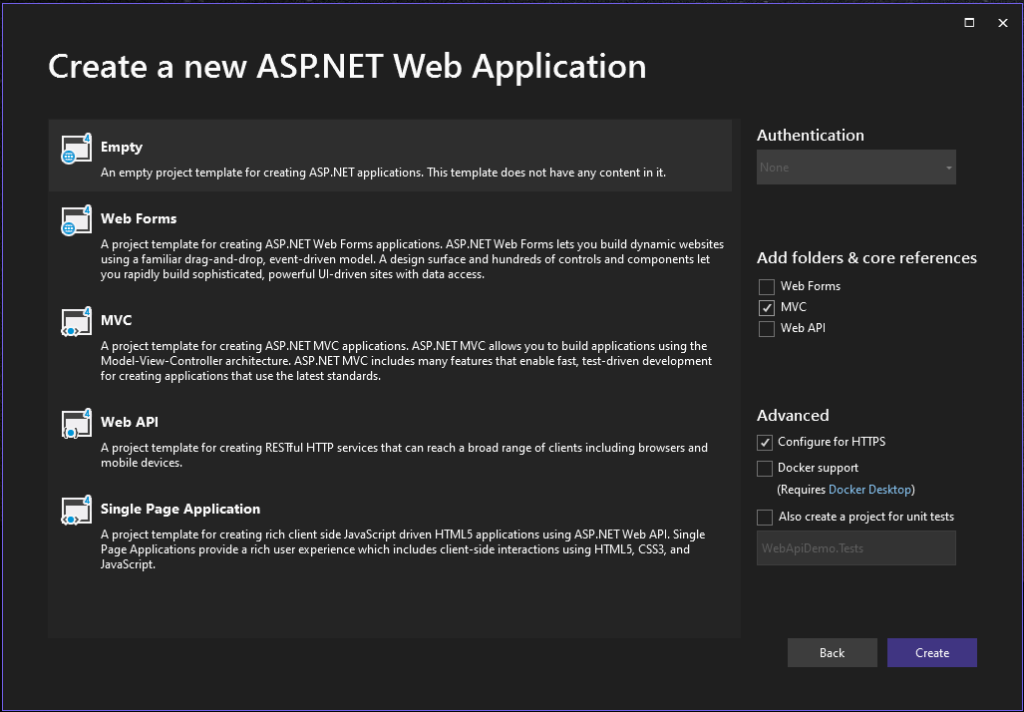
4. Enter a project name and choose a location to save the project.
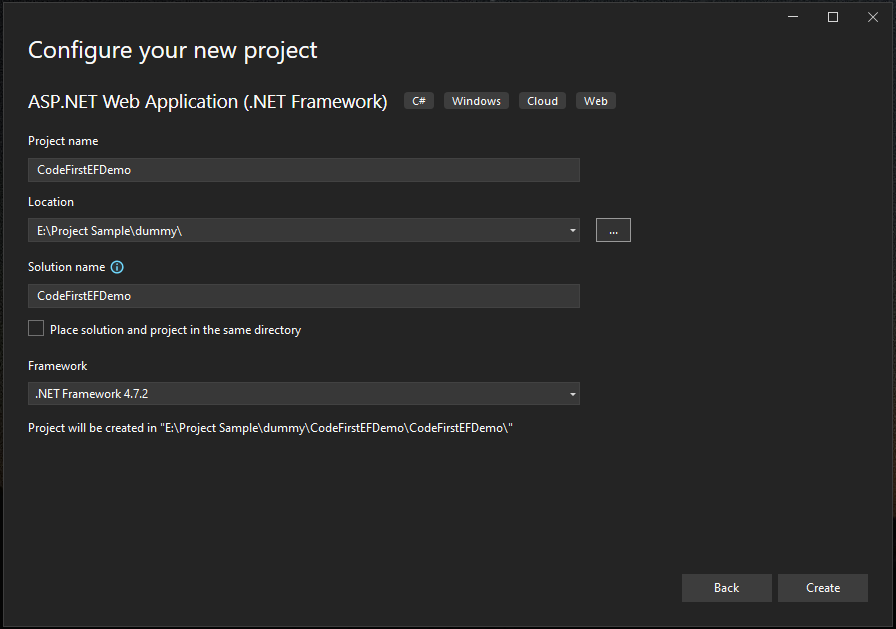
5. Click “Create” to create the project.
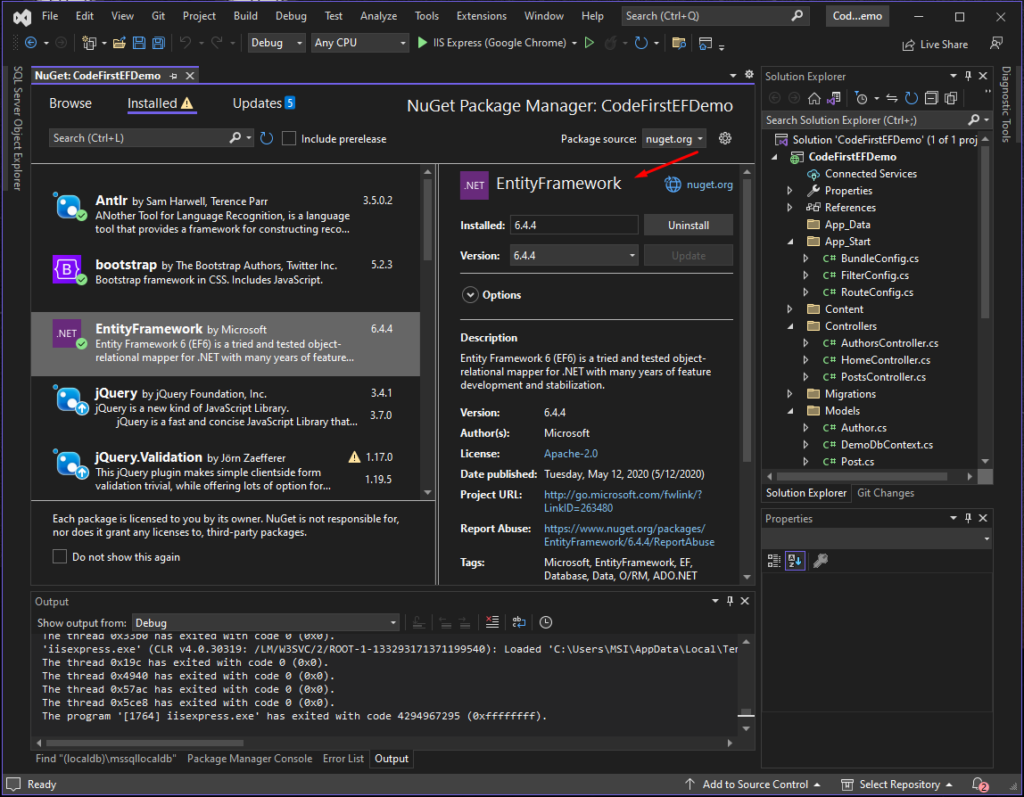
6. Add entity framework to your project. To do that, open NuGet Package Manager and search for Entity Framework and install.
II. Defining Model Classes
In Code First, the model classes represent the entities in your application’s domain. Each class typically corresponds to a table in the database. Let’s say we are building a simple blog application with two entities: Post and Author. Create the corresponding classes with the necessary properties and relationships.
1. Create Post class inside Models folder.
 public class Post
    {
        public int Id { get; set; }
        public string Title { get; set; }
        public string Content { get; set; }
        public DateTime CreatedAt { get; set; }

        public int AuthorId { get; set; }
        public Author Author { get; set; }
    }
2. Create Author class inside Models folder.
public class Author
    {
        public int Id { get; set; }
        public string Name { get; set; }

        public ICollection<Post> Posts { get; set; }
    }
III. Configure Database Connection String
To be able to use the Code first approach we need to configure our connection string by it in our project web.config. Open web.config and add the following code.
	<connectionStrings>
		<add name="DefaultConnection" connectionString="Server={SQL Server};Database={Database Name};Trusted_Connection=True;" providerName="System.Data.SqlClient" />
	</connectionStrings>
You can place the code above inside <configuration> tag in the config. Check this post to guide you on SQL Connection string format.
IV. Create the Database Context
The database context is responsible for managing the connection to the database and the corresponding tables. Create a new class that derives from DbContext and define a DbSet for each model class.
1. Inside Models folder create new class DemoDbContext and define DbSet using the Post and Author model that we created awhile ago.
 public class DemoDbContext : DbContext
    {
        public DemoDbContext() : base("DefaultConnection")
        {
        }
        public DbSet<Post> Posts { get; set; }
        public DbSet<Author> Authors { get; set; }
    }
If you observe the “DefaultConnection”, that is the name of the connection string that we added in the config. This means that entity framework will use this connection string in creating the database later.
V. Enable Code First Migrations:
Now, it’s time to create the migration. Open Package Manager Console from Tools » NuGet Package Manager » Package Manager Console. Execute the command below.
Enable-MigrationsThis will create a Configuration class that allows you to manage the migrations.
Add-migration Initial CreateVI. Run Migration
Update-DatabaseBy this time we are done setting the database schema, we can now perform CRUD (Create, Read, Update, Delete) operations on your entities using Entity Framework’s API. You can retrieve data using LINQ queries, update entities, or delete records as needed.
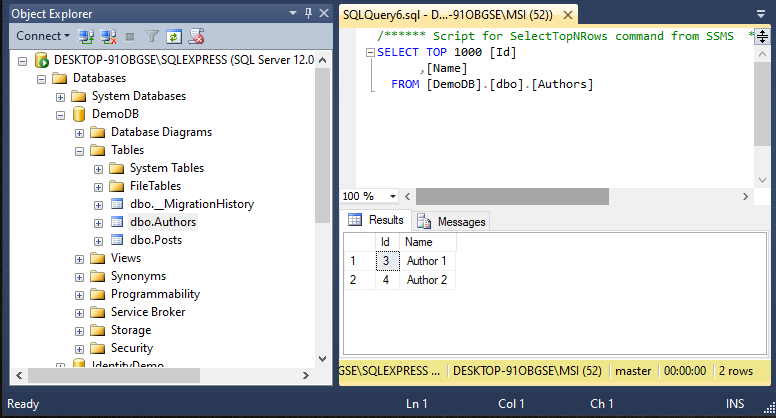
To check open your database and see if table were successfully created.
VII. Generate Controller Base using Entity Framework
For us to test the Entity Framework configuration that we setup above, we need to create a CRUD functionality. To do that, follow the steps below.
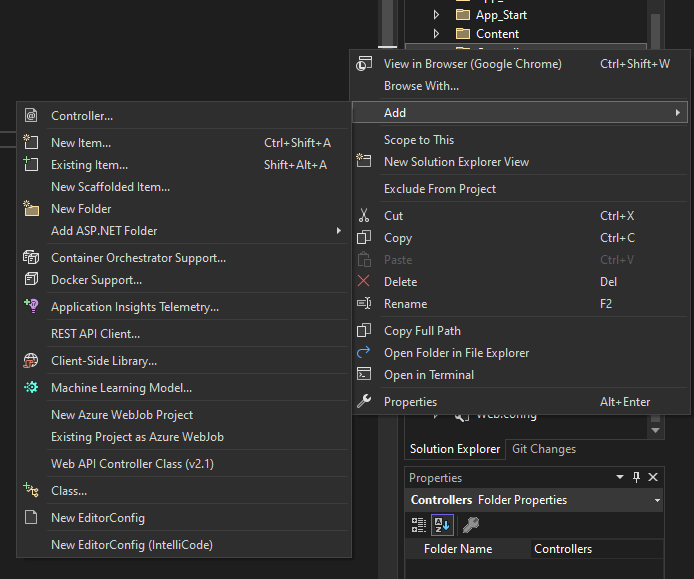
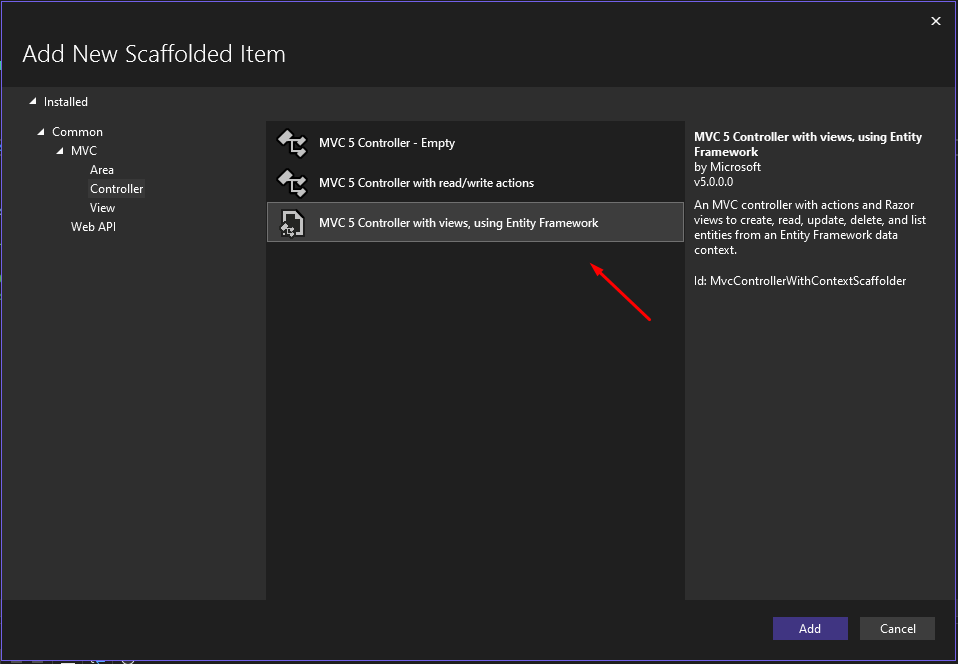
1. Right-click on Controllers folder, select add then choose Controller.
2. Select “MVC 5 Controller with views, using Entity Framework” and click Add button.
3. Select DemoDbContext for the Data context class and Author model for the Model class.
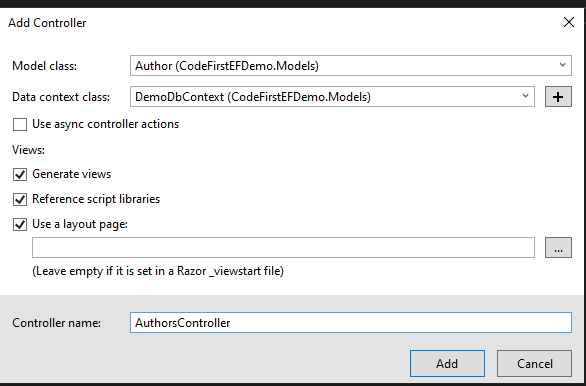
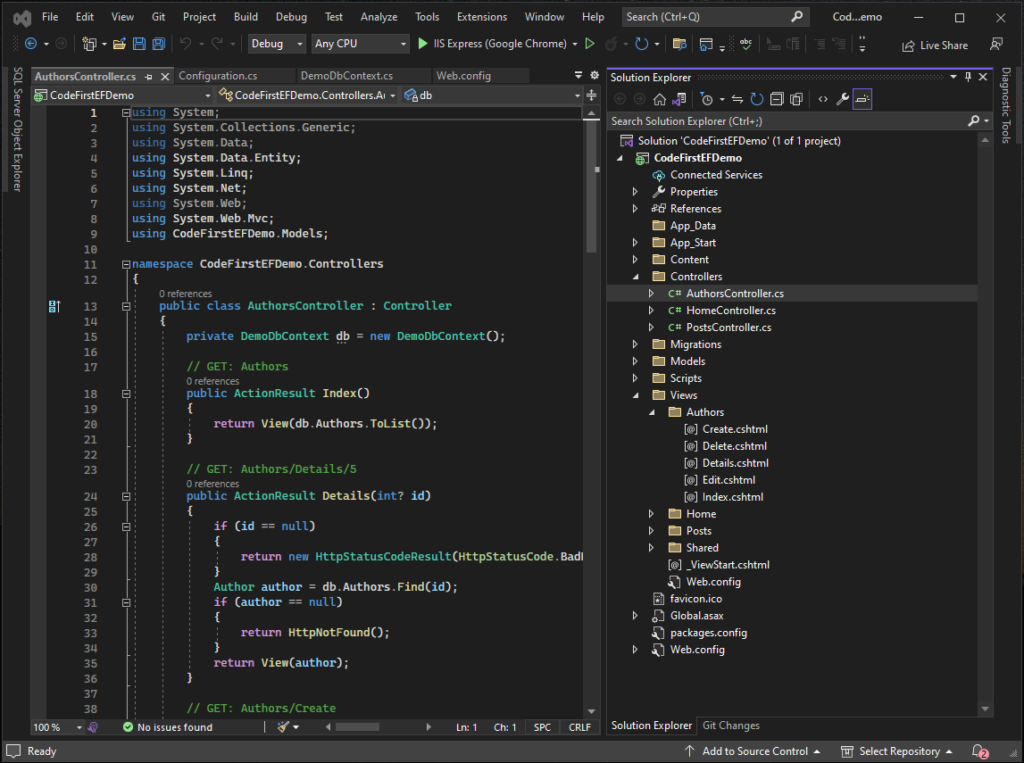
This will generate AuthorsController class and Views with CRUD function.
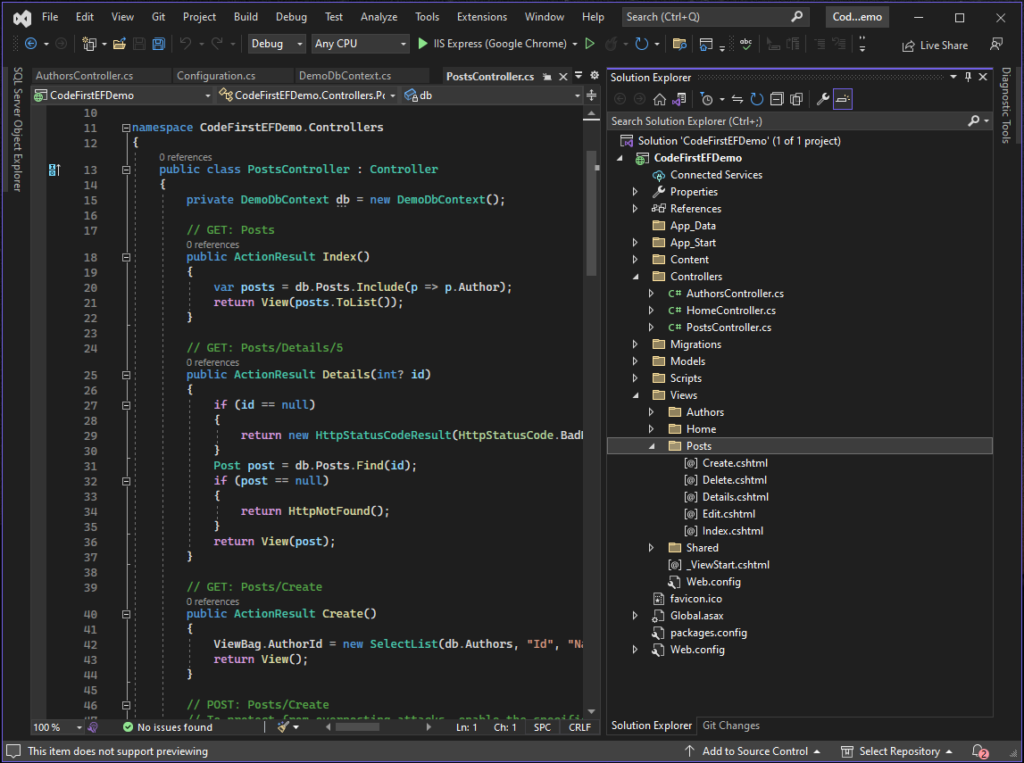
4. Do the same with Post model. See the image below.
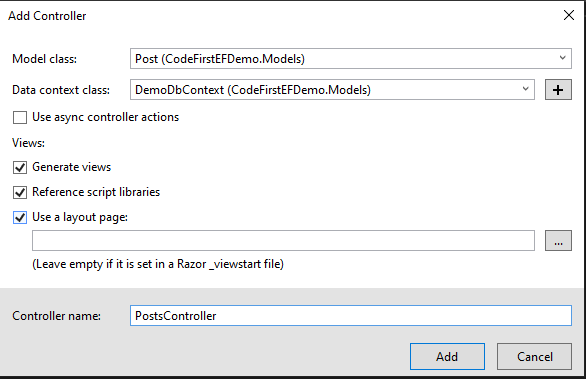
This will generate PostsController and Views with CRUD function.
VII. Test Function
If you want to change the default controller loaded on page load. Open RouteConfig class under App_Start folder. Then change the map route.
        public static void RegisterRoutes(RouteCollection routes)
        {
            routes.IgnoreRoute("{resource}.axd/{*pathInfo}");

            routes.MapRoute(
                name: "Default",
                url: "{controller}/{action}/{id}",
                defaults: new { controller = "Authors", action = "Index", id = UrlParameter.Optional }
            );
        }
Now, build and run your application. Test the Author CRUD first since this is required on creating a Post.
Source Code
You can download the source code from Github @coderbugzz for your reference.
Summary
The Code First approach in ASP.NET MVC using Entity Framework provides a convenient way to define your application’s data model using simple C# or VB.NET classes. It allows for rapid development by automating the creation of the database schema based on your model classes. By leveraging the power of Entity Framework, developers can focus on building the application’s business logic while leaving the database management to the framework.
Remember to regularly update your model classes and use Code First Migrations to keep your database schema in sync with your. Thank you for visiting my blog hopes this helps. Keep Coding!