In this tutorial, we will learn how to enable an identity framework to login using either Username and Email in ASP.NET Core login authentication. If you are familiar with Identity in ASP.NET Core, the default login is an email address and password. Although, you can update the username to accept different value aside from email, you still need to choose whether to use an email or username as an authentication method.
- I. Create a New ASP.NET Core Web MVC Application
- II. Install Nuget Package
- III. Create IdentityUser Class
- IV. Customize User Manager Class
- V. Searching for Users by Username or Email
- VI. Creating a DbSet for ApplicationUser
- VII. Configuring Identity Services
- VIII. Add SQL Connection String
- IX. Configuring application to use SQL Server
- X. Create and Run Migration
- XI. Create Account Controller
- XII. Create View Models
- XIII. Create Register Method
- XIV. Create a Registration Form
- XV. Create Login Method
- XVI. Create Login Form
- XVII. Modify Website Menu
- Run and Test Web Application
- Download Source Code
- Conclusion
So now, let’s go ahead and take a look at how we can achieve this process. Before we proceed to the next step, Please make sure to have installed the following
- The latest version of Visual Studio
- Visual Studio Code(Alternative)
- SQL Server
What is ASP.NET Core Identity?
Before we start with an actual project, to refresh our memory let’s talk about Identity. Identity is a membership system that adds login functionality to your application, allowing users to register, sign in, and manage their accounts. The default user entity in Identity is typically represented by the IdentityUser class.
Even though most of the processes were handled by the identity framework, we still have the option to customize classes used by the framework. Below are sample script where we create the ApplicationUser class and extend it with the IdentityUser.
public class ApplicationUser: IdentityUser
{
    // Custom properties can be added here
}
This way, we can add a custom property that we want to add to IdentityUser. That is a brief definition, but I hope you get the idea. Now, let’s start by creating a new ASP.NET Core project.
I. Create a New ASP.NET Core Web MVC Application
To start the tutorial, let’s create a new ASP.NET Core project. To do that, follow the steps below.
- Open Visual Studio: Launch Visual Studio 2022 on your machine.
- Create a New Project:
- Click on “Create a new project” on the start page or go to
File -> New -> Project....
- Click on “Create a new project” on the start page or go to
- Select Project Template:
- In the “Create a new project” dialog, search for “ASP.NET Core Web App (Model-View-Controller)” in the search bar.
- Select the template named “ASP.NET Core Web App (Model-View-Controller)”.
- Configure Project:
- Enter a name and location for your project. In my case, I named it LoginDemo
- Choose the desired framework version (e.g., .NET 6.0).
- Choose the authentication option if needed (Individual User Accounts, Windows Authentication, etc.).
- Click “Create” to generate the project.
II. Install Nuget Package
We need to install the required packages for this project. I have listed it all below.
- Microsoft.AspNetCore.Identity.EntityFrameworkCore
- Microsoft.EntityFrameworkCore
- Microsoft.EntityFrameworkCore.SqlServer
- Microsoft.EntityFrameworkCore.Tools
Use NuGet Package Manager to install this package. If this is your first time using this, you can visit this article.
III. Create IdentityUser Class
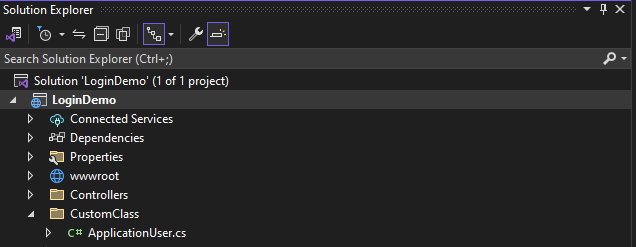
Create a custom class ApplicationUser and extend it with IdentityUser, this way we can add custom columns or properties for IdentityUser which can also be used for Identity Framework to validate user login authentication.
In my case, I create a CustomClass folder and inside it, I create an ApplicationUser class with the following code.

public class ApplicationUser: IdentityUser
    {
        public string Contact { get; set; }
    }
In the above code, we added a Contact property just to test how this custom class works. Later on in this tutorial when we run migration this column will be added to the ASPNetUser table which is defined by the Identity model.
IV. Customize User Manager Class
We also need to customize the UserManager class. This class is responsible for managing users. This way we can add a custom function that we can use later on our login logic, to accept both username and email. Let’s create a custom class ApplicationUserManager class that inherits from UserManager<ApplicationUser>.
Now, add another class ApplicationUserManager inside the CustomClass folder.
public class ApplicationUserManager: UserManager<ApplicationUser>
{
  public ApplicationUserManager(
  IUserStore<ApplicationUser> store,
  IOptions<IdentityOptions> optionsAccessor,
  IPasswordHasher<ApplicationUser> passwordHasher,
  IEnumerable<IUserValidator<ApplicationUser>> userValidators,
  IEnumerable<IPasswordValidator<ApplicationUser>> passwordValidators,
  ILookupNormalizer keyNormalizer,
  IdentityErrorDescriber errors,
  IServiceProvider services,
  ILogger<UserManager<ApplicationUser>> logger)
  : base(store, optionsAccessor, passwordHasher, userValidators, passwordValidators, keyNormalizer, errors, services, logger)
  {
  }
    // Custom implementation goes here
}
In the above code, I also added the required constructor for extending the UserManager class.
V. Searching for Users by Username or Email
Now, to allow users to login using either username and email in ASP.NET Core we need to override the FindByNameAsync and FindByEmailAsync methods in the ApplicationUserManager class.
public class ApplicationUserManager : UserManager<ApplicationUser>
{
    // add required constructor here..
    public override Task<ApplicationUser> FindByNameAsync(string userName)
    {
        return base.FindByNameAsync(userName);
    }
    public override Task<ApplicationUser> FindByEmailAsync(string email)
    {
        return base.FindByEmailAsync(email);
    }
}
VI. Creating a DbSet for ApplicationUser
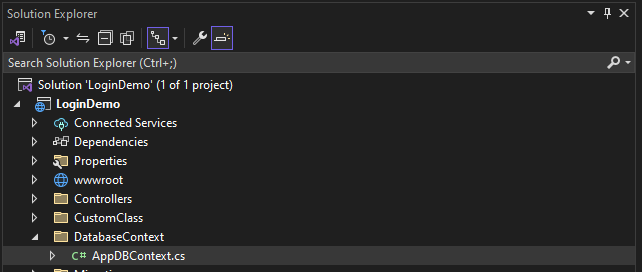
In this article, we will use a code-first approach and to do that, we need an IdentityDBContext class to handle all the database structure and queries that we need for this tutorial. Create a new file named AppDBContext and copy the script below.
public class AppDBContext : IdentityDbContext<ApplicationUser>
{
    private readonly DbContextOptions _options;
    public AppDBContext(DbContextOptions options) : base(options)
    {
        _options = options;
    }
    protected override void OnModelCreating(ModelBuilder modelBuilder)
    {
        base.OnModelCreating(modelBuilder);
    }
    public DbSet<ApplicationUser> Users { get; set; }
}
VII. Configuring Identity Services
In the Program.cs file, configure the application to use the custom ApplicationUserManager for managing users. Place the following code after the builder initialization.
builder.Services.AddIdentity<ApplicationUser, IdentityRole>()
    .AddEntityFrameworkStores<AppDBContext>()
    .AddDefaultTokenProviders()
    .AddUserManager<ApplicationUserManager>();
This way we can make sure that the custom UserManager class, we created in the previous step will be used throughout the application.
VIII. Add SQL Connection String
Now, let’s configure our database by adding the following line to your projects appsettings.json. Open your appsettings.json and add the script below.
"ConnectionStrings": {
    "default": "Data Source=Server_Name;Initial Catalog=Database_Name;Integrated Security=True;Connect Timeout=30;Encrypt=False;TrustServerCertificate=False;ApplicationIntent=ReadWrite;MultiSubnetFailover=False"
  }
Replace Server_Name and Database_Name with your local SQL server name details.
IX. Configuring application to use SQL Server
We need to let our application know to use SQL server database, and by that, we need to configure it by adding this configuration script on Program.cs.
builder.Services.AddDbContext<AppDBContext>(c => c.UseSqlServer(builder.Configuration.GetConnectionString("default")));X. Create and Run Migration
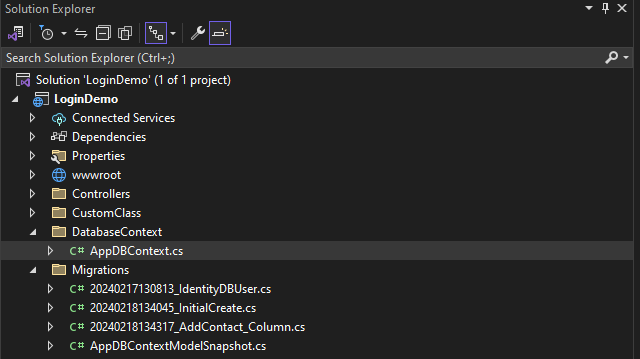
Now, we are done with all the configurations needed to make Identity frameworks work. This time we will need to create a migration file to generate an SQL query to add all the tables required by Identity. Open Tools » Nuget Package Manager » Package Manager Console and run the command below.
Add-Migration InitialCreateThis will generate a file inside the Migrations folder that contains SQL queries. That means every time you want to add additional property you simply add the property in the ApplicationUser class and create a migration and it will generate SQL queries for you.
Then we can run the command below to run the migration file and create an actual table. Make sure that the connection string is pointing to the right database on your local to make this work.
Update-DatabaseAfter this command, the migration will be applied to the database schema. Open the SQL server and verify if the following table was created.
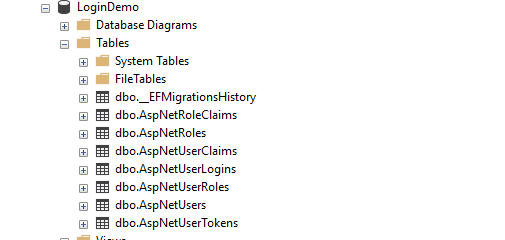
Each table above has its usage in Identity Framework, but for now, let’s focus on the AspNetUsers table. This table contains all users that registered to our app.
XI. Create Account Controller
If you observe we had a default controller named HomeController when we first created this project. So before we create a new controller let’s configure HomeController to only be accessible to authenticated users. To do that, open HomeController and place the authorize attribute. See the code snippet below.
 [Authorize]
 public class HomeController : Controller
 {
 }
Now, let’s create an AccountController. This is where we will add our Login and Register process.
- In the Solution Explorer, right-click on the
Controllersfolder. - Select “Add” -> “Controller…”
- In the “Add Scaffold” dialog, choose “MVC Controller-Empty”
- Name it AccountController
- Click “Add.”
This will create AccountController with the following code
public class AccountController : Controller
{
}
In this controller, we need to add SigninManager and UserManager, to do that, create a constructor and the following line.
   public class AccountController : Controller
   {
       private readonly UserManager<ApplicationUser> _userManager;
       private readonly SignInManager<ApplicationUser> _signInManager;

       public AccountController(UserManager<ApplicationUser> userManager,
                                     SignInManager<ApplicationUser> signInManager)
       {
           _userManager = userManager;
           _signInManager = signInManager;
       }
XII. Create View Models
A view model is a property that we will bind on our Register HTML form and Login form. This will help us to generate an instant UI using the Razor view in Visual Studio. In this tutorial, we need two view models, which are as follows:
- LoginViewModel
public class LoginViewModel
 {
     [Required]
     [Display(Name = "Email or Username")]
     public string UserName { get; set; }

     [Required]
     [DataType(DataType.Password)]
     public string Password { get; set; }

     [Display(Name = "Remember Me")]
     public bool RememberMe { get; set; }

}- RegisterViewModel
public class RegisterViewModel
{
    [Required]
    public string UserName { get; set; }

    [Required]
    [EmailAddress]
    public string Email { get; set; }

    [Required]
    [DataType(DataType.Password)]
    public string Password { get; set; }

    [DataType(DataType.Password)]
    [Display(Name = "Confirm Password")]
    [Compare("Password", ErrorMessage = "Password and confirmation password not match.")]
    public string ConfirmPassword { get; set; }
XIII. Create Register Method
We need two methods to implement the Register function. A GET method and a POST method. The get method will be used to display the Registration form and the POST method handle the form submission process.
public IActionResult Register()
{
    return View();
}
[HttpPost]
public async Task<IActionResult> Register(RegisterViewModel model)
{
    if (ModelState.IsValid)
    {
        var user = new ApplicationUser
        {
            UserName = model.UserName,
            Email = model.Email,
        };
        var result = await _userManager.CreateAsync(user, model.Password);
        if (result.Succeeded)
        {
            await _signInManager.SignInAsync(user, isPersistent: false);
            return RedirectToAction("index", "Home");
        }
        foreach (var error in result.Errors)
        {
            ModelState.AddModelError("", error.Description);
        }
        ModelState.AddModelError(string.Empty, "Invalid Login Attempt");
    }
    return View(model);
}
XIV. Create a Registration Form
After creating the necessary register method on the controller we need to add a View. To do that:
- Right-click anywhere inside the Register method then select Add View
- Choose Razor View
- Select Create as a template
- Then Choose RegisterViewModel in the Model class drop-down
- Lastly, click Add
This process will generate an HTML form using the RegisterViewmodel properties. You can locate the cshtml file inside Views » Account » Register.cshtml. Then modify the form to your preference, in my case, this is my register form HTML.
@model LoginDemo.Models.RegisterViewModel
@{
    ViewData["Title"] = "Register";
}
<h1>Register</h1>
<h4>RegisterViewModel</h4>
<hr />
<div class="row">
    <div class="col-md-4">
        <form asp-action="Register">
            <div asp-validation-summary="ModelOnly" class="text-danger"></div>
            <div class="form-group">
                <label asp-for="UserName" class="control-label"></label>
                <input asp-for="UserName" class="form-control" />
                <span asp-validation-for="UserName" class="text-danger"></span>
            </div>
            <div class="form-group">
                <label asp-for="Email" class="control-label"></label>
                <input asp-for="Email" class="form-control" />
                <span asp-validation-for="Email" class="text-danger"></span>
            </div>
            <div class="form-group">
                <label asp-for="Password" class="control-label"></label>
                <input asp-for="Password" class="form-control" />
                <span asp-validation-for="Password" class="text-danger"></span>
            </div>
            <div class="form-group">
                <label asp-for="ConfirmPassword" class="control-label"></label>
                <input asp-for="ConfirmPassword" class="form-control" />
                <span asp-validation-for="ConfirmPassword" class="text-danger"></span>
            </div>
            <div class="form-group">
                <input type="submit" value="Register" class="btn btn-primary" />
            </div>
        </form>
    </div>
</div>
@section Scripts {
    @{await Html.RenderPartialAsync("_ValidationScriptsPartial");}
}
XV. Create Login Method
Now, that we have a register function we can proceed with Login. Let’s create a Login action method that will allow our web app user to Login using either username and email in ASP.NET Core. To do that, move back to the account controller and add the following action method.
[HttpGet]
[AllowAnonymous]
public IActionResult Login()
{
    return View();
}
[HttpPost]
[AllowAnonymous]
public async Task<IActionResult> Login(LoginViewModel input)
{
    if (ModelState.IsValid)
    {
        var user = await _userManager.FindByNameAsync(input.UserName);
        if (user == null)
        {
            user = await _userManager.FindByEmailAsync(input.UserName);
        }
        if (user != null && await _userManager.CheckPasswordAsync(user, input.Password))
        {
            var result = await _signInManager.PasswordSignInAsync(user.UserName, input.Password, input.RememberMe, false);
            if (result.Succeeded)
            {
                return RedirectToAction("Index", "Home");
            }
        }
        else
        {
            ModelState.AddModelError(string.Empty, "Invalid Login Attempt");
        }
    }
    return View(input);
}
XVI. Create Login Form
Then we can add the HTML form using Razor to instantly generate the HTML form based on LoginViewmodel.
- Right-click anywhere inside the Login method then select Add View
- Choose Razor View
- Select Create as the template
- Then Choose LoginViewModel in the Model class drop-down
- Lastly, click Add
This step will create a new file inside View » Account » Login.cshtml
@model LoginDemo.Models.LoginViewModel
@{
    ViewData["Title"] = "Login";
}
<h1>Login</h1>
<h4>LoginViewModel</h4>
<hr />
<div class="row">
    <div class="col-md-4">
        <form asp-action="Login">
            <div asp-validation-summary="ModelOnly" class="text-danger"></div>
            <div class="form-group">
                <label asp-for="UserName" class="control-label"></label>
                <input asp-for="UserName" class="form-control" />
                <span asp-validation-for="UserName" class="text-danger"></span>
            </div>
            <div class="form-group">
                <label asp-for="Password" class="control-label"></label>
                <input asp-for="Password" class="form-control" />
                <span asp-validation-for="Password" class="text-danger"></span>
            </div>
            <div class="form-group form-check">
                <label class="form-check-label">
                    <input class="form-check-input" asp-for="RememberMe" /> @Html.DisplayNameFor(model => model.RememberMe)
                </label>
            </div>
            <div class="form-group">
                <input type="submit" value="Login" class="btn btn-primary" />
            </div>
        </form>
    </div>
</div>
@section Scripts {
    @{await Html.RenderPartialAsync("_ValidationScriptsPartial");}
}
XVII. Modify Website Menu
We also need to modify the menu to display the register and login menu. To do that, open _Layout.cshtml under the Shared folder. Then add the script below.
@if (User.Identity.IsAuthenticated)
  {
      <ul class="navbar-nav flex-grow-1">
          <li class="nav-item">
              <a class="nav-link text-dark" asp-area="" asp-controller="Home" asp-action="Index">Home</a>
          </li>
          <li class="nav-item">
              <a class="nav-link text-dark" asp-area="" asp-controller="Home" asp-action="Privacy">Privacy</a>
          </li>
          <li class="nav-item">
              <a class="nav-link text-dark" asp-area="" asp-controller="Account" asp-action="Logout">LogOut</a>
          </li>
      </ul>
  }
  else
  {
      <ul class="navbar-nav flex-grow-1">
          <li class="nav-item">
              <a class="nav-link text-dark" asp-area="" asp-controller="Account" asp-action="Login">Login</a>
          </li>
          <li class="nav-item">
              <a class="nav-link text-dark" asp-area="" asp-controller="Account" asp-action="register">Register</a>
          </li>
      </ul>
  }
The HTML form above will display the Register and Login menu if no user is logged in and display Home for an authenticated user.
Run and Test Web Application
Now, it’s time to run our web app. Press f5 to run the application and register a new user account
Download Source Code
You may download the source from GitHub. Don’t forget to follow us on GitHub.
Conclusion
To sum it up, we have created .net core 6 web application that enables Login using either username and Email in ASP.NET Core identity framework. The process require us to customize UserManager class, configure Identity services, add new logic to the login process, and ensure that the ApplicationUser is included in model for the context. This is one of the way we can make a flexible and user-friendly application. Hopefully, you gain some insight from this article that can be use on your future projects. Keep Coding!
Keep Coding!