The traditional Asp.Net Core API is good for backend applications. However, if you want to develop microservices and cloud-native applications, that type of technique can be a little too much hence the need for Minimal APIs.
- I. CREATING SQL DATABASE
- II. Create a Web API project
- III. Modify JSON configuration
- IV. Model Class
- V. Data Context Class
- VI. Modifying Program.cs class
- VII. CREATE/POST operation
- VIII. READ Operation
- IX. GetById
- X. UPDATE/PUT Operation
- XI. DELETE Operation
- XII. Testing the API
- Source Code:
- Summary
Minimal APIs are architected to create HTTP APIs with minimal dependencies. They are ideal for microservices and apps that want to include only the minimum files, features, and dependencies in ASP.NET Core.
In this tutorial, we are going to learn how to create a minimal web API with ASP.NET Core.
- Visual Studio 2022
- SQL Server
I. CREATING SQL DATABASE
We require a database to store our data. Follow the below steps to create a database.
- Launch SQL server management studio and create a new database called ToDoDb
- In the database run the following script
CREATE TABLE [dbo].[ToDo](
	[id] [int] IDENTITY(1,1) NOT NULL,
	[itemName] [nvarchar](max) NULL,
	[Description] [nvarchar](max) NULL)
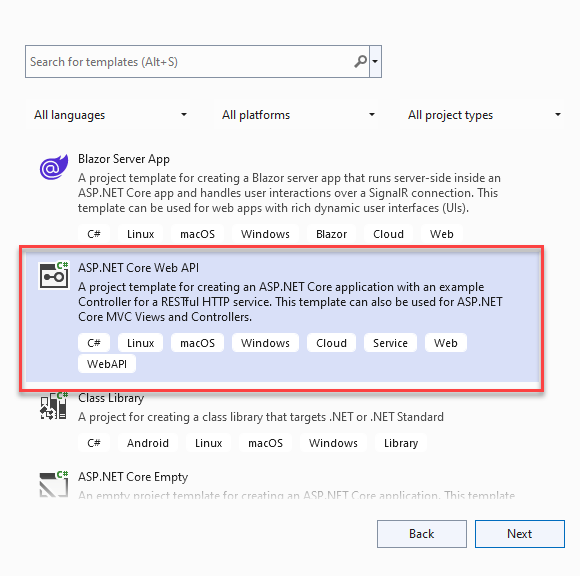
II. Create a Web API project
- Launch Visual Studio 2022 and select Create a new project

2. Select ASP.NET Core Web API and click Next
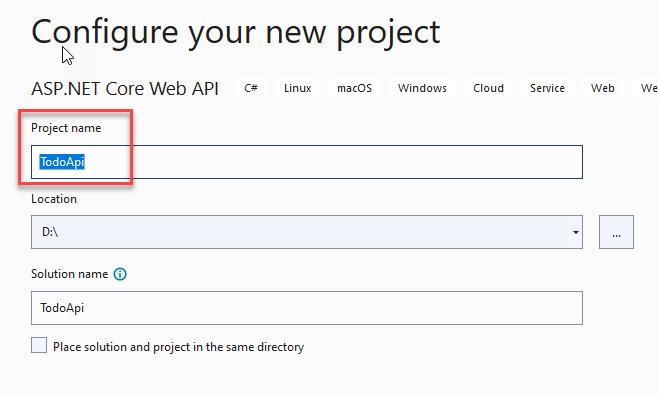
3. Give your project the name TodoApi or any other name you desire
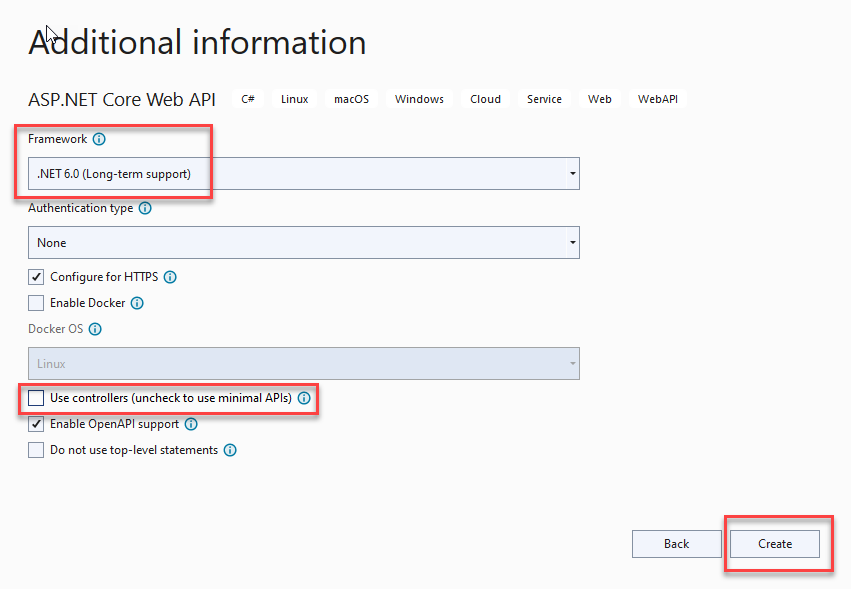
4. For the framework select .NET 6.0(Long-term support) and uncheck Use Controllers (uncheck to use minimal APIs) then click Create to finish setting up the project.
III. Modify JSON configuration
Once the project has successfully been created add the following code to appsettings.json file
"ConnectionStrings": {
" DefaultConnection": "server=YOUR SERVER NAME;Initial Catalog= ToDoDb;MultipleActiveResultSets=True;integrated security=true"
}
The above code creates a connection to the ToDoDb SQL database. Ensure you specify the name of the SQL server you are connecting to.
IV. Model Class
After successfully setting up the project Let’s add a model class that will hold the properties.
- To do this right-click on the project and click Add->Class
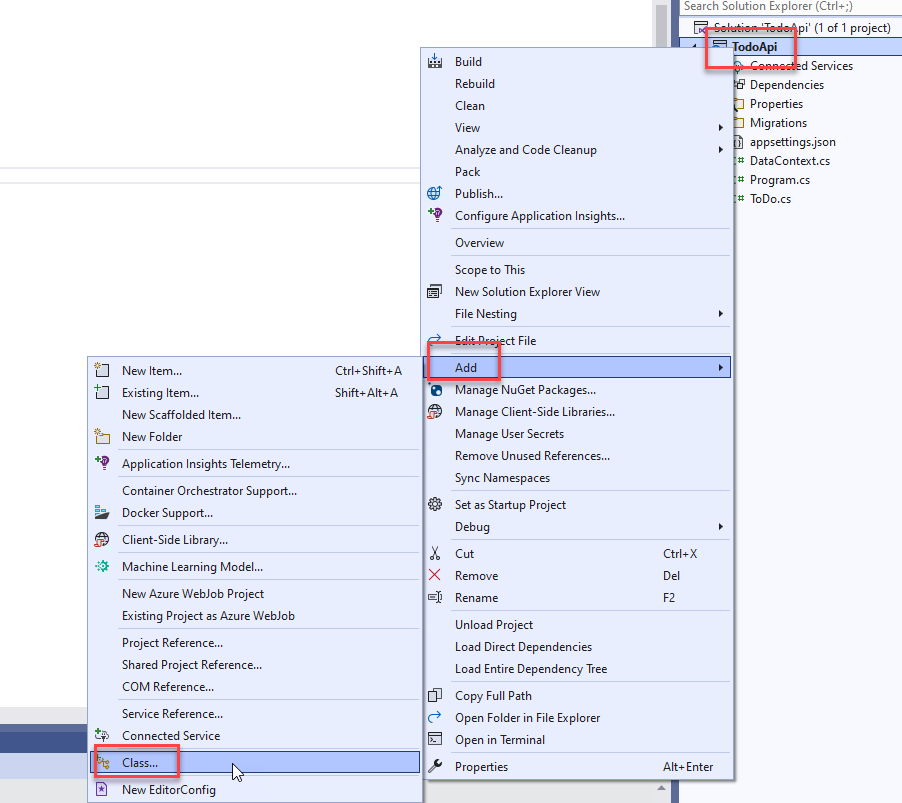
2. Give the class the name ToDo.cs and add the following properties to it.
public class ToDo
{
    public int id { get; set; }
    public string? itemName { get; set; }
    public string? Description { get; set; }
}
V. Data Context Class
Next, we are going to add a data context class to connect our model class to the SQL database.
To do this add a new class to the project and name it DataContext.cs.Inside the class paste the following code.
public class DataContext :DbContext
{
    public DataContext(DbContextOptions<DataContext> options) : base(options)
     {
     }
   public DbSet<ToDo> ToDo =>Set <ToDo> ();
}
VI. Modifying Program.cs class
After creating the database context class it’s important to register it in Program.cs to be able to use it in the API. To do this open Program.cs and add the following code
builder.Services.AddDbContext<DataContext>(options => options.UseSqlServer(builder.Configuration.GetConnectionString("DefaultConnection")));One of the most unique features of Minimal API is the ability to write all code logic in one place, in this case, all our code is going to be in Program.cs class.
VII. CREATE/POST operation
In program.cs add the following code
async Task<List<ToDo>>GetAllToDo(DataContext context) => await context.ToDo.ToListAsync();
app.MapPost("Add/ToDo", async (DataContext context, ToDo Item) =>
{
    context.ToDo.Add(Item);
    await context.SaveChangesAsync();
    return Results.Ok(await GetAllToDo(context));
});
The above method GetAllToDo will return all ToDo items in the database. Next, we used the MapPost method to first define a Post endpoint. Thereafter we bind values from the ToDo Item to the context class and then save the changes to the database using SaveChangesAsync() method. Finally, after saving we return the GetAllToDo method to confirm our value was added to the database.
VIII. READ Operation
Next, we are going to write code to fetch data from the database to our API.
In program.cs add the following code
app.MapGet("/ToDo", async (DataContext context) => await context.ToDo.ToListAsync());The above code returns all the values in the API
IX. GetById
Next, we are going to return a single ToDo item in the API.
To do this add the following code
app.MapGet("/ToDo/{id}", async (DataContext context,int id) => await context.ToDo.FindAsync(id) is ToDo Item ? Results.Ok(Item) : Results.NotFound("Item not found"));In the above code we used the MapGet method to first define a get endpoint then we called FindAsync to find an id value from the context class. if id is found, it is attached to the context and returned, if id does not exist Results.NotFound message is called.
X. UPDATE/PUT Operation
app.MapPut("/ToDo/{id}", async (DataContext context, ToDo Item,int id) =>
{
     var toDoItem = await context.ToDo.FindAsync(id);
     if (toDoItem == null) return Results.NotFound("Item not found");
     toDoItem.Description = Item.Description;
     toDoItem.itemName = Item.itemName;
     await context.SaveChangesAsync();
     return Results.Ok(await GetAllToDo(context));
});
The above code will update TODO data in the database based on the Id of the ToDo item.
We use the MapPut method to define a put endpoint, FindAsync(id) will search for the id to update then if (toDoItem == null) return Results will check in the database if the id exists if it does not exist a Results.NotFound(“Item not found”) message is thrown.
If the id exists the rest of the fields in the model class are mapped to the database values using the Datacontext context class we created. Finally, any changes made to the data are saved to the database by the code await context.SaveChangesAsync()
XI. DELETE Operation
Finally, we implement a delete endpoint using the MapDelete method. Add the following code.
app.MapDelete("/ToDo/{id}", async (DataContext context,int id) =>
{
      var toDoItem = await context.ToDo.FindAsync(id);
      if (toDoItem == null) return Results.NotFound("Item not found");
      context.Remove(toDoItem);
      await context.SaveChangesAsync();
      return Results.Ok(await GetAllToDo(context));
});
The above code will delete TODO data in the database based on the Id of the ToDo item.
XII. Testing the API
After successfully following the above steps and creating the API it’s important we test the code.
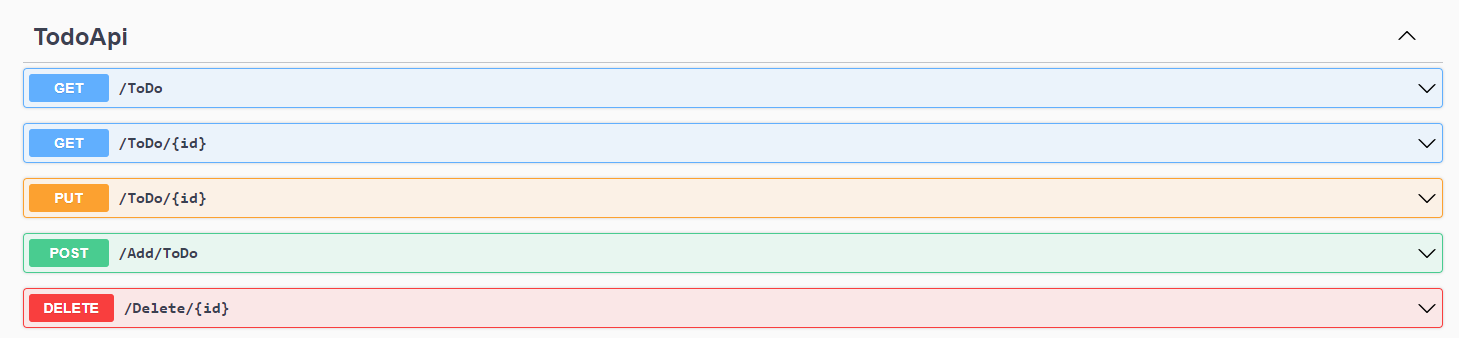
To do this run the application, a default page like the one shown below launches
Testing the post-method:
1. Open the POST menu tab and click Try it out
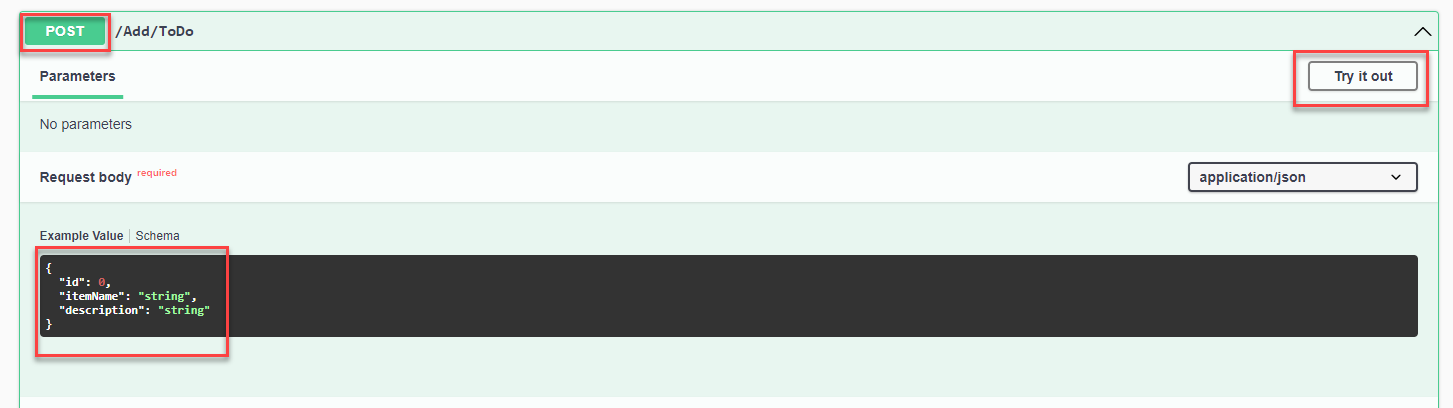
2. In the body section modify the itemName and description, an example is shown below
{
"itemName": "Evening Run",
"description": "Todays goal is to cover 10kms in 25mins "
}
3. After modifying the fields click Execute button to post into the database
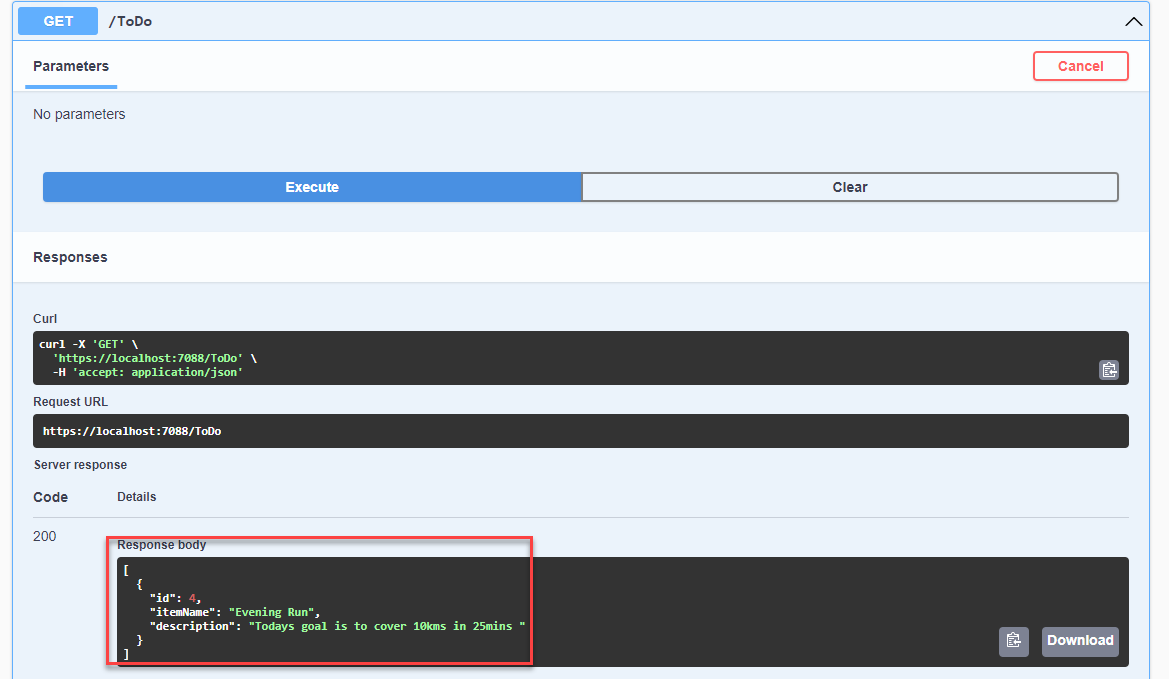
1. After successfully posting into the database click on the GET tab->Try it out

2. Click on Execute button

3. The posted item will be shown in the results as shown
- Open the DELETE menu tab and click Try it out
- Type in the id of the item you wish to delete then click Execute
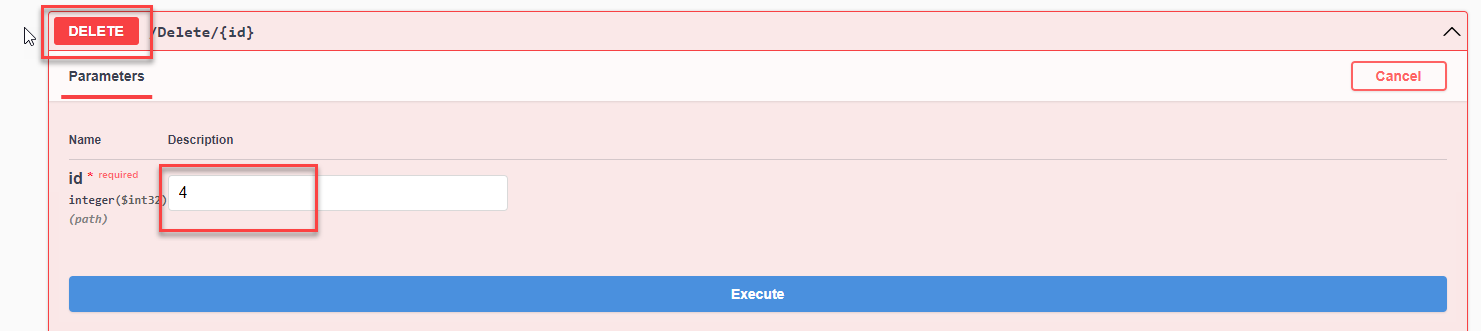
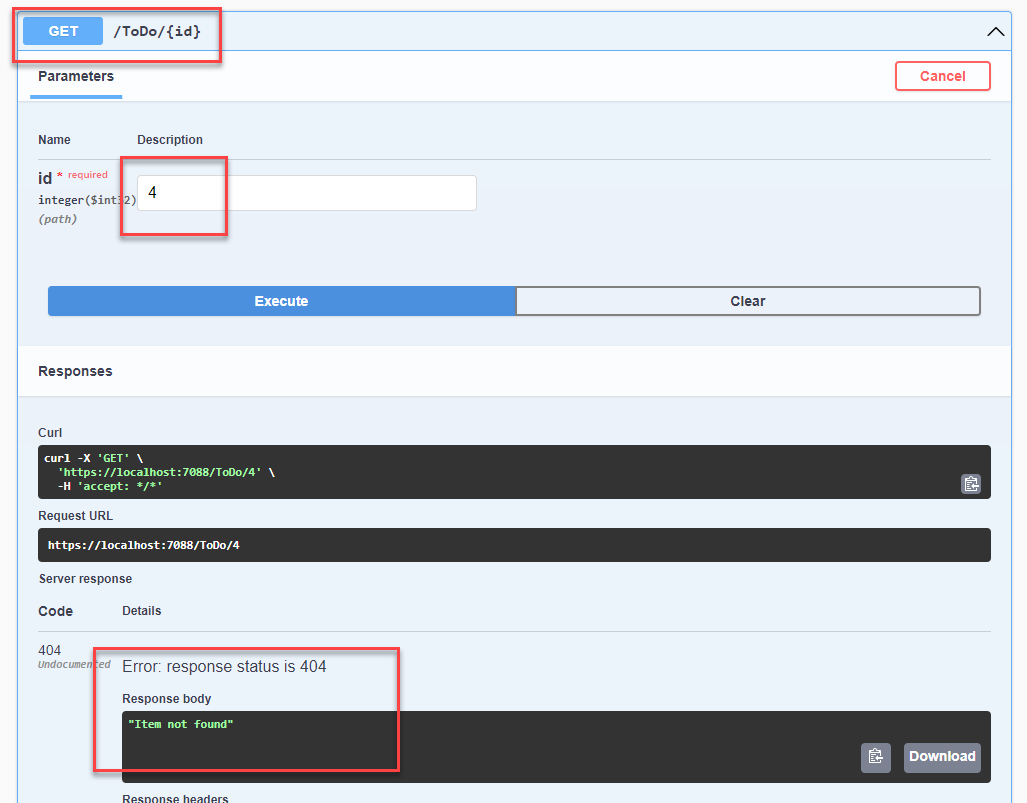
The item will be successfully deleted, to confirm if it has been deleted follow the steps, we used in the GetById Tab. You will notice the id does not exist.
Source Code:
You can download the source code from this Git Repository account:
Summary
In this tutorial, we have learned how to create CRUD operations with a minimal web API in ASP.NET Core. We have written and tested several scenarios. Hopefully, this project will help you with your future projects.
KEEP CODING!
For more tutorials like this, you may visit the blog page.