In this tutorial, we will create a sample unit test scenario to understand how we can automate unit Testing in ASP NET Core Web API.
- I. What is unit testing
- II. Importance of Unit tests
- III. Create a SQL database
- IV. Create an ASP.NET Core Web API Application
- V. Add Dependencies (NuGet packages)
- VI. Models
- VII. Controller
- VIII. Services
- IX. Appsettings.json
- X. Modifying Program.cs
- XI. Create a xUnit test Project
- XII. Adding Project References
- XIII. MockData
- XIV. Add TestController
- XV. Testing Services
- XVI. Running the Test application
- Summary
I. What is unit testing
Unit testing is a type of software testing process that involves testing small parts of an application (Units) in isolation from its infrastructure and dependencies.
II. Importance of Unit tests
Our applications can fail in unexpected ways in response to changes. Hence, automatic testing is required after making changes for all applications.
Manual testing is the slowest, least reliable, and most expensive way to test an application. But if applications aren’t designed to be testable, manual testing might be the only way available to us.
III. Create a SQL database
For this tutorial, we require a database to store our data. To do this Launch SQL Server and create a new database with the name ToDoDB.
In the database run the following query to create the table and columns that will hold our data.
      CREATE TABLE [dbo].[ToDo](
	[Id] [int] IDENTITY(1,1) NOT NULL,
	[ItemName] [nvarchar](max) NOT NULL,
        [IsCompleted] [bit] NOT NULL,
IV. Create an ASP.NET Core Web API Application
In order for us to perform Unit Testing in ASP NET Core Web API, we will first create .NET Core Web API projects. Follow the steps below.
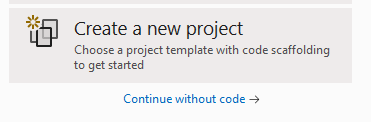
1. Create a new project
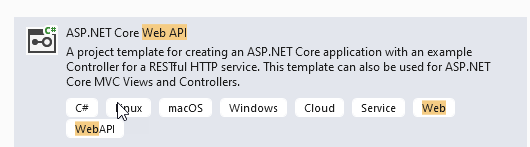
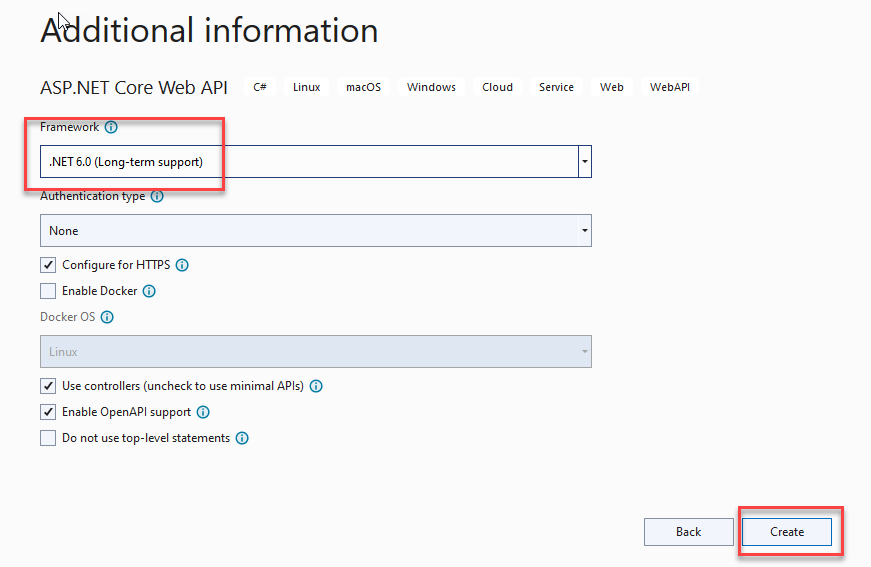
2. For project type choose ASP.NET Core Web Api
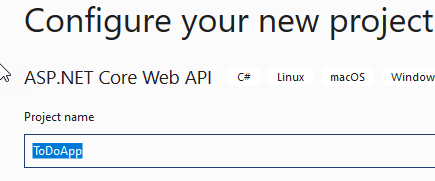
3. Give the project the name ToDoApp
4. Select .NET 6.0 (Long-term support) as the framework then click Create to finish setting up the project
V. Add Dependencies (NuGet packages)
After the successful creation of our application, We need to install the following packages
Microsoft.EntityFrameworkCore
Microsoft.EntityFrameworkCore.SqlServer
VI. Models
Let’s create some properties for our ToDo application. To do this:
1. Create a folder called Models,
2. Inside Models add a class called ToDo.cs
3. Paste the following code in ToDo.cs
        public int Id { get; set; }
        public string ItemName { get; set; }
        public bool IsCompleted { get; set; }
VII. Controller
Add a new controller called TodoController and paste the following code
private readonly ITodoService _todoService;
    public TodoController(ITodoService todoService)
    {
        _todoService = todoService;
    }
    [Route("get-all")]
    [HttpGet]
    public async Task<IActionResult> GetAllAsync()
    {
        var result = await _todoService.GetAllAsync();

        if (result.Count == 0)
        {
            return NoContent();
        }
        return Ok(result);
    }
    [HttpPost]
    [Route("save")]
    public async Task<IActionResult> SaveAsync(ToDo newTodo)
    {
        await _todoService.SaveAsync(newTodo);
        return Ok();
    }
VIII. Services
Create a folder called Services, inside the folder add a class called ITodoService.cs and paste the following code
public interface ITodoService
        {
            Task<List<ToDo>> GetAllAsync();
            Task SaveAsync(ToDo newTodo);
        }
On the same folder add another class called TodoService.cs and add the below code.
public class TodoService : ITodoService
    {
        private readonly ToDoDbContext _context;
        public TodoService(ToDoDbContext context)
        {
            _context = context;
        }

        public async Task<List<ToDo>> GetAllAsync()
        {
            return await _context.ToDo.ToListAsync();
        }

        public async Task SaveAsync(ToDo newToDo)
        {
            _context.ToDo.Add(newToDo);
            await _context.SaveChangesAsync();
        }
    }
Create another folder called Data. Inside the folder add a new class called ToDoDbContext and paste the following code.
public class ToDoDbContext : DbContext
{
         public  ToDoDbContext(DbContextOptions<ToDoDbContext> options) : base(options)
         {

         }
    public DbSet<ToDo> ToDo { get; set; }
}
The above code helps us in connecting the ToDo Model class to the SQL database
IX. Appsettings.json
Open Appsettings.json and add the following connection to the database
"ConnectionStrings": {
    "ToDoDbConnection": "server=YOUR_SERVER_NAME;Initial Catalog=ToDoDB;Integrated Security=True;Connect Timeout=30;Encrypt=False;TrustServerCertificate=False;ApplicationIntent=ReadWrite;MultiSubnetFailover=False"

  }
X. Modifying Program.cs
Modify program.cs by adding the following code before the builder.Buid() method
builder.Services.AddDbContext<ToDoDbContext>(options =>
{
    options.UseSqlServer(builder.Configuration.GetConnectionString("ToDoDbConnection"));
});
builder.Services.AddScoped<ITodoService, TodoService>();
XI. Create a xUnit test Project
In this section, we are going to create a new project for testing the ToDoApp we created
To do this
- Open your package manager console
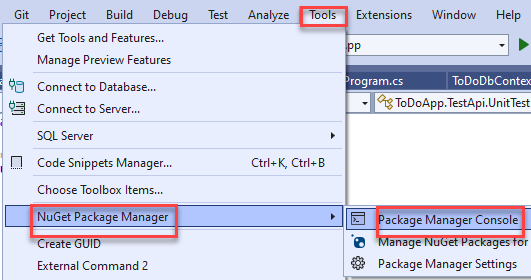
2. Run the following commands
dotnet new xunit -o ToDoApp.TestApiThe command above creates a new xunit project called ToDoApp.TestApi
dotnet sln ToDoApp.sln add ToDoApp.TestApi/ToDoApp.TestApi.csprojThe command above adds the xunit project we created to the ToDoApp solution folder.
XII. Adding Project References
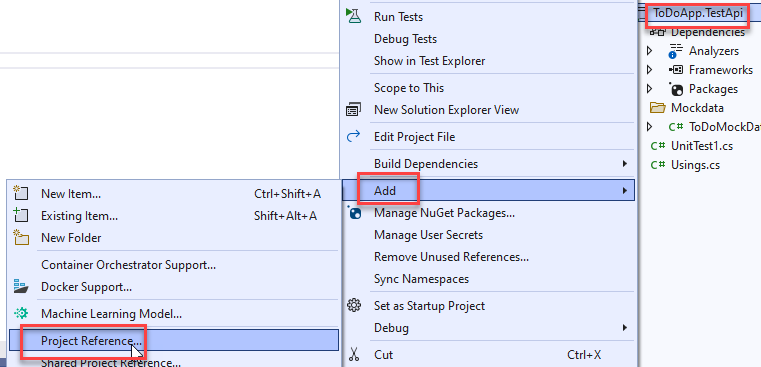
To do this right click on the ToDoApp.TestApi project folder->Add->Project Reference.
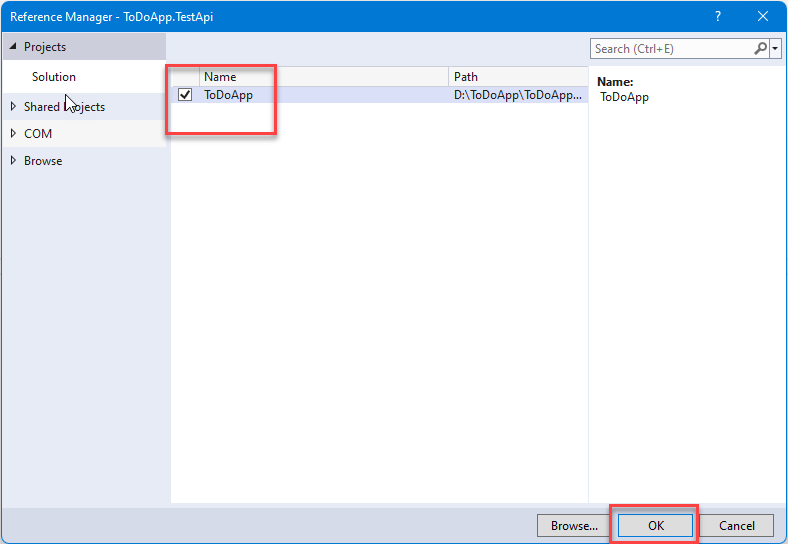
In the reference manager pop-up window checks ToDoApp and click the Ok button to complete the process
XIII. MockData
Create a new folder and name it Mockdata. Inside the folder create a new called ToDoMockData.cs and add the following code to create some mock data for the ‘Todo’ items.
public class ToDoMockData
{
    public static List<ToDo> GetTodos()
    {
        return new List<ToDo>{
             new ToDo{
                 Id = 1,
                 ItemName = "Need To Go Shopping",
                 IsCompleted = true
             },
             new ToDo{
                 Id = 2,
                 ItemName = "Cook Food",
                 IsCompleted = true
             },
             new ToDo{
                 Id = 3,
                 ItemName = "Play Games",
                 IsCompleted = false
             }
         };
    }
    public static List<ToDo> GetEmptyTodos()
    {
        return new List<ToDo>();
    }
    public static ToDo NewTodo()
    {
        return new ToDo
        {
            Id = 0,
            ItemName = "wash cloths",
            IsCompleted = false
        };
    }
}
XIV. Add TestController
When writing unit tests, it is usually good practice to follow the following rules (Arrange, Act, and Assert):
Arrange – this is where you prepare everything for the test, in other words, prepare the scene for testing (creating the objects and setting them up as necessary)
Act – this is where the method we are testing is executed
Assert – this is the final part of the test where we compare what we expect to happen with the actual result of the test method execution
1. UNIT Test status 200
Let’s begin by adding a test controller class. To do this:
Add a new folder named Controllers. Inside the folder add a new class TestToDoController.cs and add the below code.
[Fact]
    public async Task GetAllAsync_ShouldReturn200Status()
    {
        /// Arrange
        var todoService = new Mock<ITodoService>();
        todoService.Setup(_ => _.GetAllAsync()).ReturnsAsync(ToDoMockData.GetTodos());
        var sut = new TodoController(todoService.Object);

        /// Act
        var result = (OkObjectResult)await sut.GetAllAsync();


        // /// Assert
        result.StatusCode.Should().Be(200);
    }
The method above is decorated with an attribute [Fact]. This attribute says that the method is a unit test.
We want to test the controller GetAllAsync() method and we know that our controller’s action method depends on the TodoService.GetAllAsync(), therefore we create a mock instance of ITodoService and then mock the result of ITodoService.GetAllAsync() method. Finally, we create the instance of TodoController, invoke our controller’s action method GetAllAsync() then Check our expected result which is 200 as the status code.
2. UNIT Test status 204
Next, we add another test method that returns status 204 when it has no data. To do this add the following code below the GetAllAsync_ShouldReturn200Status () we created above.
[Fact]
    public async Task GetAllAsync_ShouldReturn204NoContentStatus()
    {
        /// Arrange
        var todoService = new Mock<ITodoService>();
        todoService.Setup(_ => _.GetAllAsync()).ReturnsAsync(ToDoMockData.GetEmptyTodos());
        var sut = new TodoController(todoService.Object);

        /// Act
        var result = (NoContentResult)await sut.GetAllAsync();


        /// Assert
        result.StatusCode.Should().Be(204);
        todoService.Verify(_ => _.GetAllAsync(), Times.Exactly(1));
    }
In the above code the object var todoService mocks ITodoSerivice.GetAllAsync() method and returns an empty collection of data. Next, var result calls TodoController.GetAllAsync() method which then checks status code 204 is returned using the code result.StatusCode.Should().Be(204)
3. UNIT Test controller save method
Next, add the below method to write a test case for the TodoController.SaveAsync method.
[Fact]
    public async Task SaveAsync_ShouldCall_ITodoService_SaveAsync_AtleastOnce()
    {
        /// Arrange
        var todoService = new Mock<ITodoService>();
        var newTodo = ToDoMockData.NewTodo();
        var sut = new TodoController(todoService.Object);

        /// Act
        var result = await sut.SaveAsync(newTodo);

        /// Assert
        todoService.Verify(_ => _.SaveAsync(newTodo), Times.Exactly(1));
    }
The method above will mock and test the TodoController.SaveAsync() method in the API controller class, also please note that Since TodoController.SaveAsync() method returns nothing the method is executed once.
XV. Testing Services
Add a new folder Services. Inside the folder add a class TestToDoService.cs.
4. Unit Test service Get Method
Let’s create a unit test case for the Get Method in our services class in the ToDo app.
To do this open TestToDoService.cs and add the below code.
public class TestToDoService : IDisposable
{
    protected readonly ToDoDbContext _context;
    public TestToDoService()
    {
        var options = new DbContextOptionsBuilder<ToDoDbContext>().UseInMemoryDatabase(databaseName: Guid.NewGuid().ToString())
        .Options;

        _context = new ToDoDbContext(options);

        _context.Database.EnsureCreated();
    }
In the above code, we inherited IDisposable to automatically release the memory when no object is no longer using it.
Next, we created a separate in-memory database for each test unit test method and defined a database name using Guid.
After that, we called EnsureCreated() method to check whether the database context exists.
5. Unit Test service returned collections
Let’s add another test method for testing all returned to do collections. To do this paste the below code into the controller class.
[Fact]
    public async Task GetAllAsync_ReturnTodoCollection()
    {
        /// Arrange
        _context.ToDo.AddRange(Mockdata.ToDoMockData.GetTodos());
        _context.SaveChanges();

        var sut = new TodoService(_context);

        /// Act
        var result = await sut.GetAllAsync();

        /// Assert
        result.Should().HaveCount(ToDoMockData.GetTodos().Count);
    }
In the above code, we first called the mocked data from the model ToDoMockData, an object var sut was created that mocked to the TodoService then we inserted some test data in our in-memory database, which invoked the ‘TodoService.GetAllAsync()’ method.
Finally, we called the result.Should().HaveCount to verify if the total records count in the database is the same as the expected count.
6. Unit Test Service POST Method
Let’s write a unit test case for the ‘Save’ method in our services. So our ‘TodoService.cs'(in API Project) save method looks as follows:
[Fact]
    public async Task SaveAsync_AddNewTodo()
    {
        /// Arrange
        var newTodo = ToDoMockData.NewTodo();
        _context.ToDo.AddRange(Mockdata.ToDoMockData.GetTodos());
        _context.SaveChanges();

        var sut = new TodoService(_context);

        /// Act
        await sut.SaveAsync(newTodo);

        ///Assert
        int expectedRecordCount = (ToDoMockData.GetTodos().Count() + 1);
        _context.ToDo.Count().Should().Be(expectedRecordCount);
    }
var newTodo stores the mock data that we want to insert as a new record, this is then passed into the in-memory database which thereafter invokes the method ITodoService.SaveAsync().After that, we create an object int expectedRecordCount which verifies the total records in the database as our expected count after inserting a new record.
Add another method called Dispose and paste the below code into it
public void Dispose()
    {
        _context.Database.EnsureDeleted();
        _context.Dispose();
    }
The ‘Dispose‘ method above gets executed on completion of the test case method execution. It destroys the in-memory database so that every test case will have its own in-memory database.
XVI. Running the Test application
Let’s build our solution and test it.
In the menus in your Visual studio click on Test and select Test Explorer.
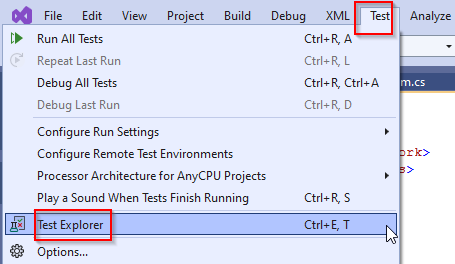
A pop-up window similar to the one below appears
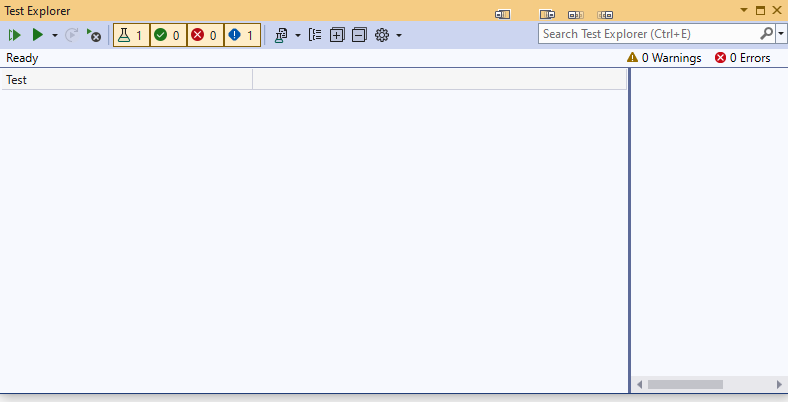
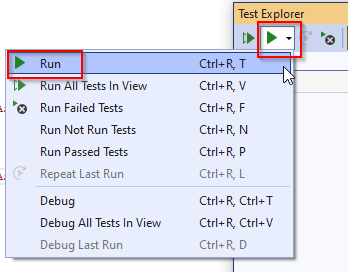
Ensure you have Built your solution then click Run to begin the tests
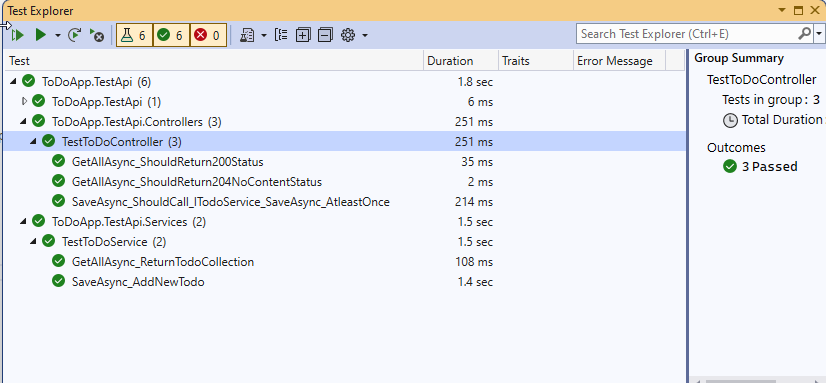
On a successful run, your Test results will be similar to the ones shown below
You may also download the source code for this tutorial from Github Repository.
Summary
In this tutorial, we learnt how to carry out Unit Testing in ASP NET Core Web API application. We have written and tested several test case scenarios. Hopefully, this tutorial will help you with your future projects.
KEEP CODING!
For more content like this, you may visit my blog page @freecodespot.com/blog