
Building your first NestJS application is like deep diving into an exciting and challenging universe. This tutorial is designed for all experience levels in backend programming, from novices exploring new frameworks to seasoned developers testing new features.
- I. Setting Up NestJs:
- II. Creating a New Nest.js Project
- III. Running Your Development Server
- IV. Controllers:
- V. Defining Routes within Controllers
- VI. Handling HTTP Requests and Responses within Controllers
- VII. ROUTERS
- VIII. Services and Dependency Injection:
- IX. Exploring Dependency Injection in NestJS
- X. Practical implementation
- Source Code
We live in a world where everything is possible. That’s the power of Nest.js, where building web applications becomes an exhilarating journey.
What is Nest.js?
Nest.js is a React framework that merges the dynamism of front-end development and the robustness of server-side rendering. This feature offers a versatile platform for crafting modern web applications in an easier, faster, and cheaper manner.
Year in and year out, we experience new technologies and tools in the development space. However, Next.js stands out as it seamlessly blends the familiarity of React (a frontend tool) with server-side capabilities using Node.js. Its intuitive design and emphasis on convention over configuration make it an ideal companion for developers seeking an efficient and structured approach.
Without much talk, let’s roll up our sleeves, get our hands dirty, and start building your first NestJS application project and how things work behind the scenes.
I. Setting Up NestJs:
To start Building Your First NestJS Application, we must set up a development environment to run nest.js locally. To do that, follow the steps below.
Prerequisite:
First and foremost, ensure you have the following prerequisites installed on your machine:
Node.js and npm: Nest.js relies on Node.js, so install it. You can download it from node.js download page.
Nest CLI: Install the Nest CLI globally using npm with the following command:
npm i -g @nestjs/cli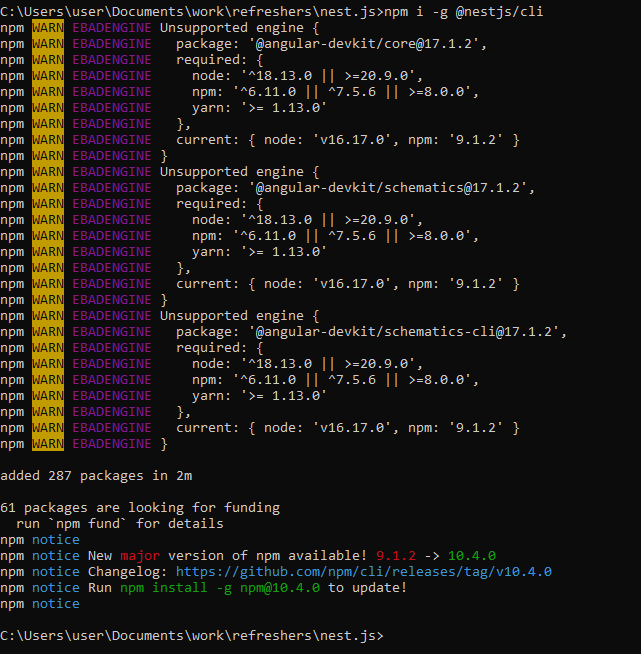
II. Creating a New Nest.js Project
We can start building your first NestJS application by creating a new nest.js project this time.
Let’s initiate a new Nest.js project using the Nest CLI. This command sets up a new Nest.js project with a default structure, ensuring you have everything you need to get started.
nest new test-project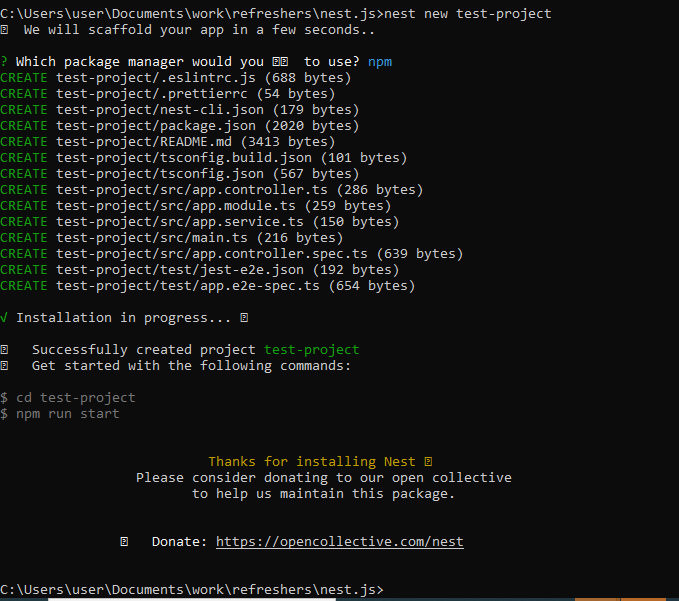
III. Running Your Development Server
Now, let’s fire up our Nest.js application in development mode by running the command:
npm run startBy default, your app will be available at http://localhost:3000/. Open this URL in your browser, and you should see your Nest.js application up and running.
Congratulations! You’ve successfully set up your Nest.js project and started your development server. Feel free to explore the generated code, and in the upcoming sections, we’ll delve into creating controllers, defining routes, and exploring services to build a scalable backend.

IV. Controllers:
In this section, we’ll delve into the fundamental aspects of controllers, unraveling their pivotal role in the NestJS framework. From understanding their core purpose to crafting your inaugural controller and defining routes, we’ll navigate through the intricacies of handling HTTP requests and responses within these vital components.
At the heart of NestJS lies the concept of controllers, serving as the orchestrators of your application’s functionality. Think of controllers as the conductors of an orchestra, directing the flow of requests and coordinating the actions of various components within your application. Their primary responsibility is to receive incoming requests, process them, and send back an appropriate response.
Creating Your First Controller
Let’s embark on a hands-on journey by creating your maiden NestJS controller. Using the Nest CLI, executing the following command will generate a new controller file:
nest generate controller your-controller-name
This command generates the controller file and takes care of the necessary boilerplate code. You’ll find your new controller in the src directory under the designated module.
V. Defining Routes within Controllers
Routes act as the pathways through which requests navigate your application, and controllers are the architects who design these routes. Each controller is associated with a set of routes, and defining them is a breeze in NestJS.
Open your newly created controller file, and you’ll notice the @Controller decorator. This decorator denotes the base route for all the endpoints within the controller. You can customize it with a path:
import { Controller } from '@nestjs/common';


@Controller('your-controller-name')
export class YourControllerNameController {
    //controller logic goes here
}
Now, within your controller class, you can define specific routes using various HTTP methods:
import { Controller, Get } from '@nestjs/common';


@Controller('your-controller-name')
export class YourControllerNameController {
    //controller logic goes here
    @Get()
getHello(): string {
  return 'Hello, World!';
}
}
Note: Make sure you import the Get method in this file.
In this example, the @Get() decorator signifies that this method will handle GET requests. You can use similar decorators like @Post(), @Put(), @Delete(), etc., and other HTTP methods.
VI. Handling HTTP Requests and Responses within Controllers
Once routes are defined, handling incoming requests and formulating responses is the next step. NestJS controllers streamline this process by providing decorators for request objects @Req() and response objects @Res(). These decorators allow you to access and manipulate the request and response objects within your controller methods.
import { Controller, Get, Req, Res } from '@nestjs/common';
@Controller('your-controller-name')
export class YourControllerNameController {
    //controller logic goes here
    @Get()
getHello(@Req() request: Request, @Res() response: Response): string {
  // Access and manipulate request and response objects
  return 'Hello, World!';
}
}
By using these decorators, you gain granular control over the request-response lifecycle, making it seamless to tailor your application’s behavior.
By understanding their role, creating your first controller, and defining routes, you have laid a robust foundation for building scalable and maintainable server-side applications. In the next steps, we’ll explore routing in NestJS, taking your knowledge to the next level.
VII. ROUTERS
Building on the understanding of controllers, let’s take a look at the essence of routing. In NestJS, routing serves as the compass that guides incoming requests to their designated controllers and handlers. These routes define the navigation pathways within your application, orchestrating a seamless flow from request initiation to response generation.
Defining Routes
Routes in NestJS act as the blueprints for defining the structure of your API. As we discussed in the previous section, routes are encapsulated within controllers. So, let’s see how this concept works with a hands-on example.
// Example of a basic route in a NestJS controller
import { Controller, Get } from '@nestjs/common';


@Controller('your-path')
export class YourControllerNameController {
  @Get()
  getHello(): string {
    return 'Hello, World!';
  }
}
In this example, the @Controller decorator sets the base path for all routes within the controller, and the @Get() decorator signifies a route handling GET requests. This clear and organized approach ensures that your API is intuitive and easy to navigate.
Implementing RESTful Endpoints
The RESTful principles we touched upon in the previous section come into play when implementing endpoints within NestJS controllers. Let’s reinforce this with an example:
// Example of implementing RESTful endpoints in a NestJS controller
import { Controller, Get, Post, Put, Delete } from '@nestjs/common';


@Controller('api/users')
export class UsersController {
  @Get()
  getAllUsers(): string {
    // Logic to retrieve all users
  }


  @Get(':id')
  getUserById(): string {
    // Logic to retrieve a user by ID
  }


  @Post()
  createUser(): string {
    // Logic to create a new user
  }


  @Put(':id')
  updateUser(): string {
    // Logic to update a user by ID
  }


  @Delete(':id')
  deleteUser(): string {
    // Logic to delete a user by ID
  }
}
By aligning with RESTful conventions, your NestJS application not only adheres to industry best practices but also ensures a standardized and predictable API structure.
VIII. Services and Dependency Injection:
Services act as workhorses, handling tasks ranging from data retrieval to complex computations. Their significance lies in promoting modularity, reusability, and maintainability, which are essential aspects of crafting scalable applications.
Creating and Utilizing Services
Let’s begin on the journey of creating and utilizing services in NestJS. To create a service, you can use the Nest CLI:
nest generate service your-service-name
This command generates a service file in the src directory, providing you with a clean slate to encapsulate your business logic. Once your service is created, you can inject it into controllers, allowing seamless integration of your business logic.
// Example of injecting a service into a NestJS controller
import { Controller, Get } from '@nestjs/common';
import { YourServiceNameService } from './your-service-name.service';


@Controller('your-path')
export class YourControllerNameController {
  constructor(private readonly yourServiceNameService: YourServiceNameService) {}


  @Get()
  getHello(): string {
    return this.yourServiceNameService.getHello();
  }
}
By injecting services into controllers, you foster a modular and organized codebase, where each service encapsulates specific functionality, making your application more maintainable and scalable.
IX. Exploring Dependency Injection in NestJS
NestJS’s dependency injection system is the secret sauce that makes services truly powerful. Through dependency injection, NestJS takes care of creating instances of services and injecting them where needed, automating the process and reducing boilerplate code.
// Example of using dependency injection in a NestJS module
import { Module } from '@nestjs/common';
import { YourServiceNameService } from './your-service-name.service';


@Module({
  providers: [YourServiceNameService],
  controllers: [YourControllerNameController],
})
export class YourModuleNameModule {}
In this example, the YourServiceNameService is added to the providers array within the module, making it available for injection into controllers within the same module.
X. Practical implementation
In our journey through NestJS controllers, routes, and services, theoretical understanding only takes us so far. The true mastery of these concepts comes through practical implementation. In this section, we’ll delve into building a simple application that seamlessly integrates controllers, routes, and services. Witness firsthand the harmonious interaction between these components as we connect routes to controllers and leverage services for efficient data processing.
First things first, let’s start by setting up our project. Use the Nest CLI to generate a new controller, service, and module:
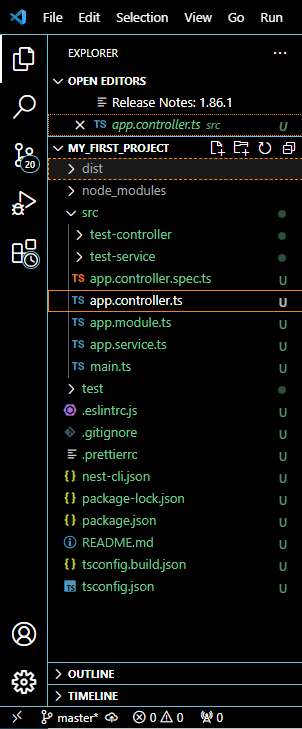
1. Create a new folder with the name practical using your terminal:
`mkdir practical` and change the directory into the folder using `cd practical`
2. Use the Nest CLI to generate a new controller, service, and module:
nest generate controller test-controllernest generate service test-service
This command structures your project and provides the scaffolding for clean implementation.
3. Defining Routes and Controllers: Open your controller file (e.g., your-controller.controller.ts) and define a simple route.
import { Controller, Get} from '@nestjs/common';
import { TestServiceService } from '../test-service/test-service.service';


@Controller('test-controller')
export class TestControllerController {


    constructor(private readonly testService: TestServiceService) {}


  @Get()
  getHello(): string {
    return this.testService.getHello();
  }
}
4. Implementing Services for Data Processing: Now, let’s implement the corresponding service (e.g., your-service.service.ts):
import { Injectable } from '@nestjs/common';


@Injectable()
export class TestServiceService {
    getHello(): string {
        // Your data processing logic goes here
        return 'Hello, World!';
      }
}
Injecting this service into our controller allows for the seamless interaction between the two.
5. Connecting Routes, Controllers, and Services: Lastly, connect your routes, controllers, and services within a NestJS module (e.g., your-module.module.ts)
import { Module } from '@nestjs/common';
import { AppController } from './app.controller';
import { AppService } from './app.service';
import { TestControllerController } from './test-controller/test-controller.controller';
import { TestServiceService } from './test-service/test-service.service';


@Module({
  imports: [],
  controllers: [AppController, TestControllerController],
  providers: [AppService, TestServiceService],
})
export class AppModule {}
Now, run your NestJS application using: `npm run start`
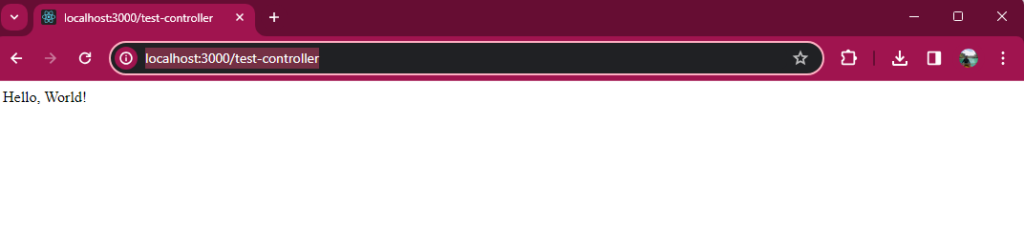
Visit http://localhost:3000/your-path in your browser and witness the result of your labor. The route defined in your controller seamlessly interacts with the service, showcasing the power of NestJS in action.
To test it, you can access http://localhost:3000/test-controller.
Source Code
Congratulations! We have finished building your first NestJS application from scratch and internalized the real-world application of controllers, routes, and services in Nest.js. You have seen how routes connect to controllers and services handle data processing, creating a synergy within the application.
With this hands-on experience, you have gotten from this article, you are well-equipped to embark on more complex Nest.js tasks.
Visit the Freecodespot archive for more.
Keep Coding!