
If you’ve been wondering if you can create a Local GIT Server on Windows like GitHub, Bitbucket, or even DevOps Azure, well I was too. This is the hard part of being a developer that is learning through the help of online resources. You need to devote a lot of time to research just to get what you are looking for.
This time I will give you a break and share a way to create a git server repository on your local Windows machine.
Before we start we need to install git bash for windows. You can download it here.
I. Initialize a Bare repository using CLI
A bare repository is a Git repository that does not have a working tree. A working tree is a directory in which all the project files reside. A Bare repository is used as a Remote repository that contains logs or history of all the changes on the repository branch that is pushed to this bare repository.
Let’s say I have two folders here, a Repository folder and a Clone folder. The Repository folder would act as our Remote Git Repository while the Clone folder would be our local machine or the client. Follow the steps below to create a Bare Repository.

- Add a Bare repository inside Repository folder. Open the Repository folder then run git bash. Use the git command below.
git init --bare test.gitThis will initialize a bare repository. See the image below.

This time you have created your local Remote Repository. Let’s clone and commit to this test.git repository.
II. Clone and push to the Remote repository
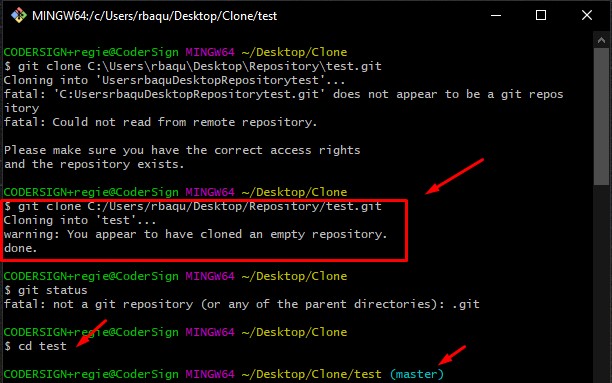
From the previous step, we created a remote repository inside the Repository folder which in my case my repository URL would be “C:\Users\user\Desktop\Repository\test.git”. For this location to work you need to replace the backslash to forward slash like this ” C:/Users/user/Desktop/Repository\test.git“.
- Open the clone folder which represent our client machine. Change your directory to the clone folder. Then execute the git command below.
git clone C:/Users/user/Desktop/Repository/test.git2. This creates a test folder inside the Clone folder. Change directory to the test folder.
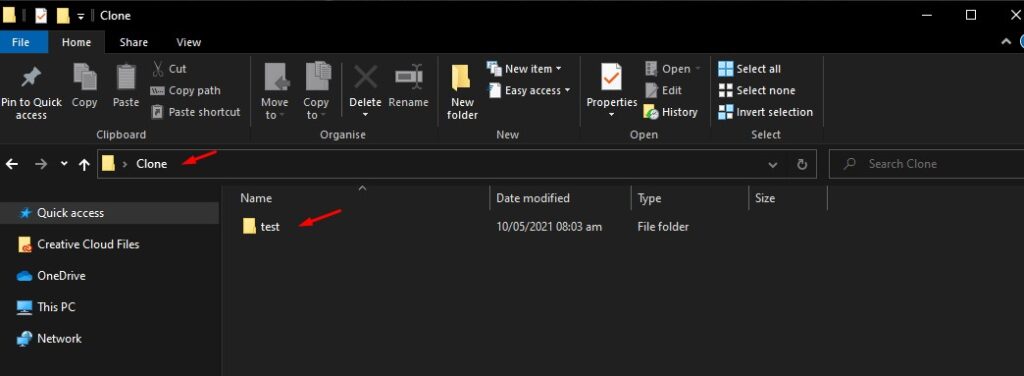
This is what my Clone folder looks like.
3. Now, let’s try to push some files. I created a readme.txt inside the test folder then open the git bash again and execute the command below. Make sure that you are inside the test folder.
3.1 Check any changes from a local repository.
git status3.2 Add all changes or stage all files for commit
git add .3.3 Commit all changes
git commit -m "initial commit"3.4 Push file to the remote repository which in this case is the Bare repository inside the Repository folder.
git push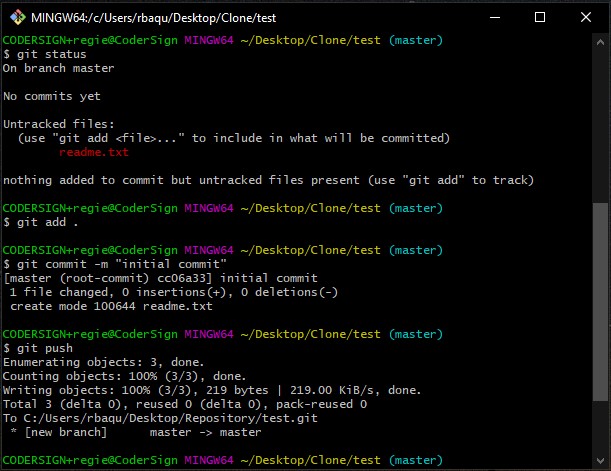
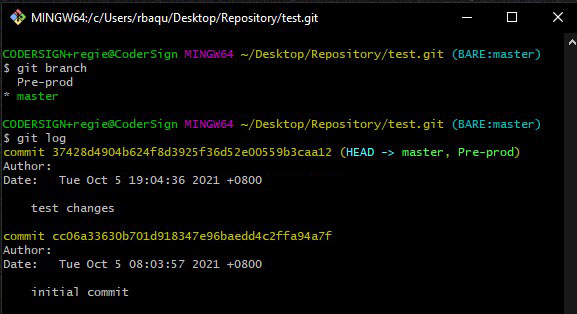
5. On your remote repository which is the test.git inside the Repository folder, you can check the last commit using this command.
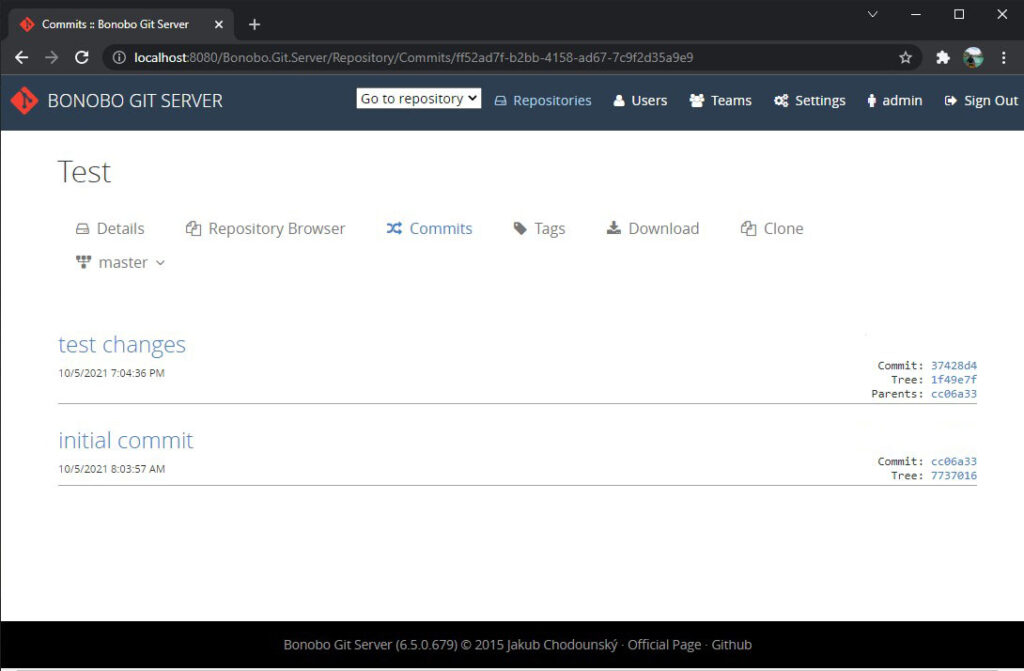
git logThis command will output the history of the commit that you push on this repository branch. See the image below.
Now, to share this local remote repository you can share this folder and use your local network IP address. In my case, my remote repository URL would be like this \\192.16.1.10\Repository\test.git
III. Configure a Local Git Server using Bonobo
We have set up a local git repository using CLI on the steps above, This time let’s use a Web Application called bonobo git server. Bonobo git server provides an easy management tool and access to your git repositories that are self-hosted on your server using IIS.
- Download Bonobo git server here.
- Extract the file inside your IIS root directory. “C:\inetpub\wwwroot”

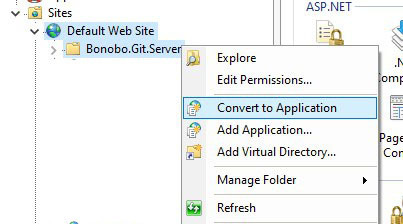
3. Open IIS then Convert the folder to Application
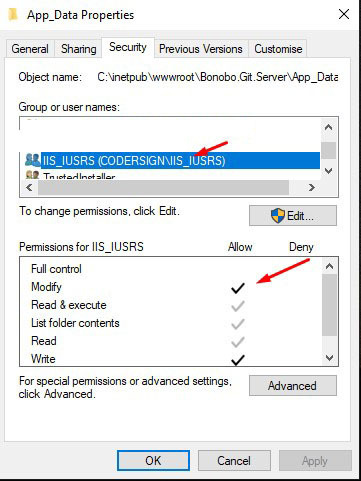
4. Make sure that you have given IIS users a sufficient right to modify files under the App_Data folder. See the image below.
5. Browse the newly created application and log in using the default user account.
Username: admin
Password: Admin
You have now your windows base Git Server that you can share with your team.
IV. Migrate a Remote Git Repository to a new Git Server
Now, if you want to migrate your existing Remote repository to a new Git server. Do the steps below. For this tutorial I’m going to transfer test.git under the Repository folder to our newly installed Bonobo Git Server.
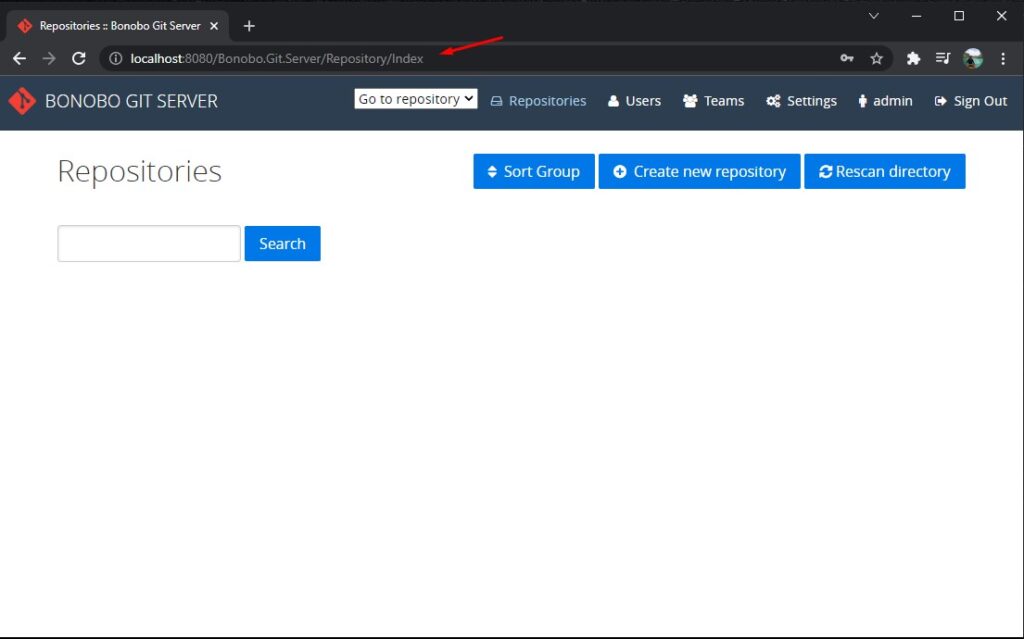
- Open your local Bonobo Git server(http://localhost:8080/Bonobo.Git.Server/Repository/Index).
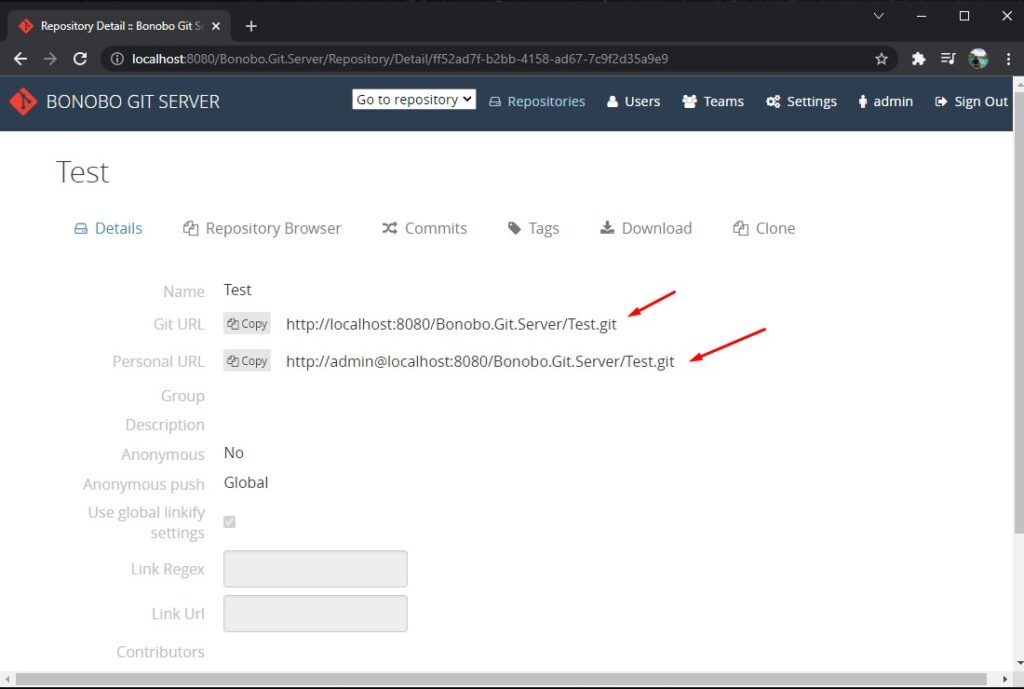
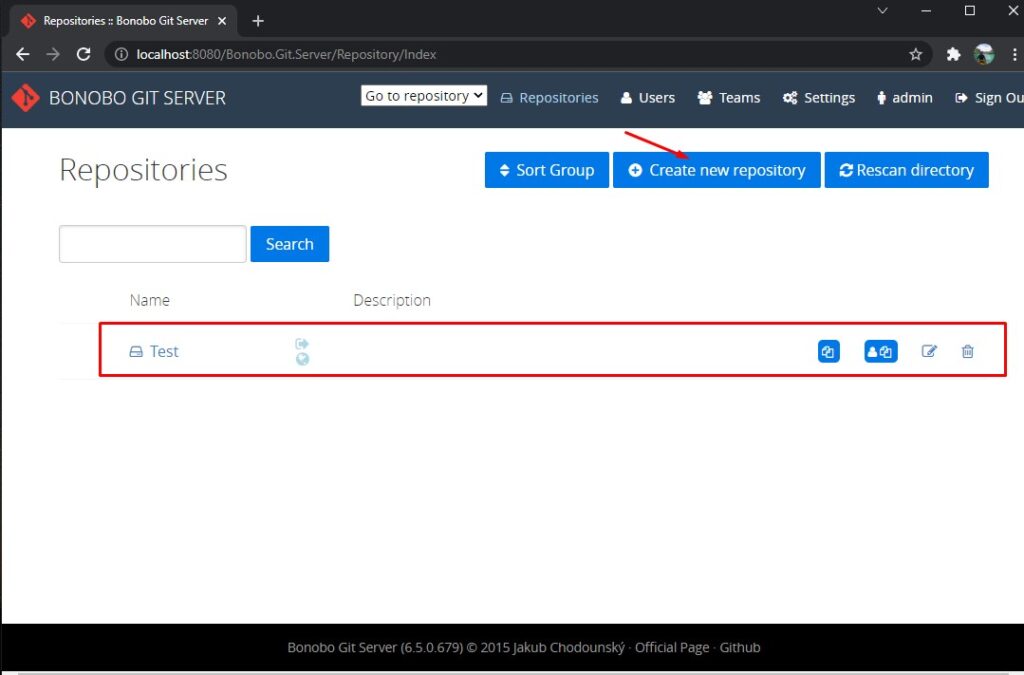
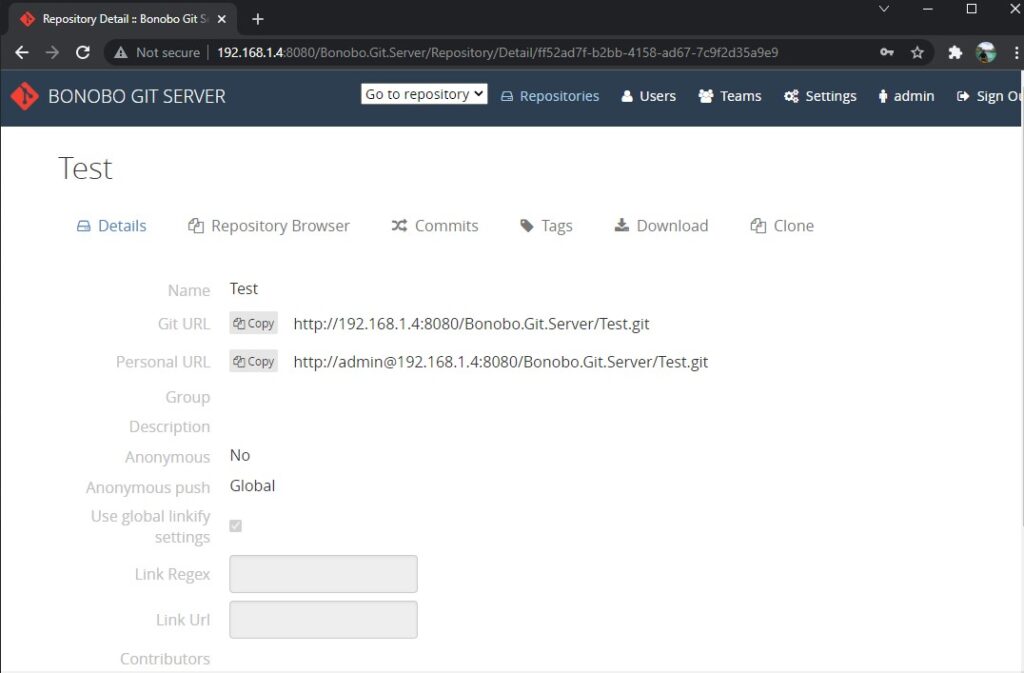
- Create a new repository. I named it Test. See the image below.
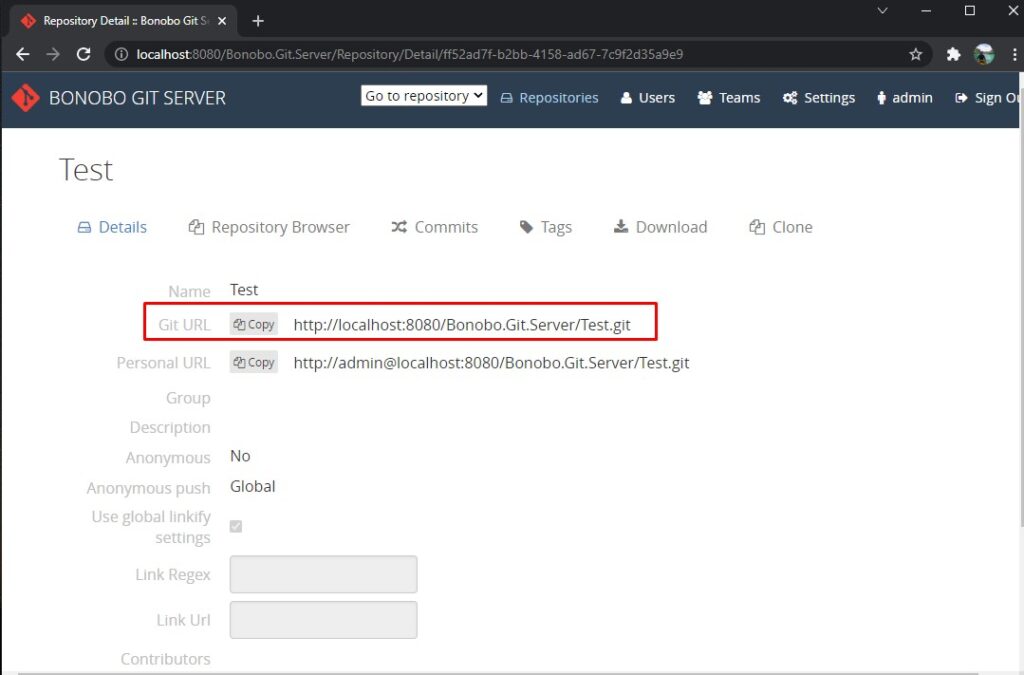
3. Open the newly created repository and copy the URL. This is where we will transfer the test.git Repository. See the image below.
4. If your Remote repository is in your local windows you can directly push the repository using a “git clone –mirror <new URL>”. But if not, here’s a way you can do that. Use the Git CLI command below to clone your remote repository.
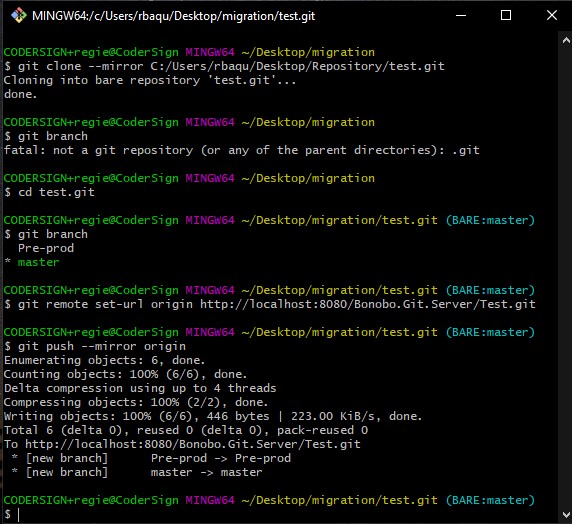
git clone --mirror C:/Users/user/Desktop/Repository/test.gitThis will mirror your remote repository locally.
5. Cd to the Clone Repository.
cd test.git6. Set your origin URL to the new Bonobo Repository that you created.
git remote set-url origin http://localhost:8080/Bonobo.Git.Server/Test.git7. Then you can simply push the mirror Repository like this.
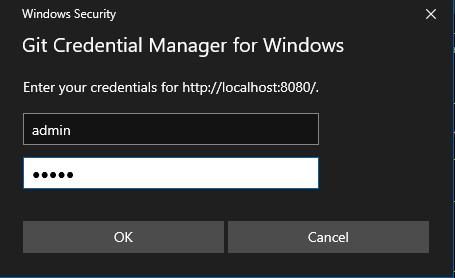
git push --mirror origin8. You will be prompted to input your git credential. Just use the default bonobo server password(uname:admin, pass:admin).
See the image below for the actual command that I used on this example.
Now, if you move back to your bonobo Test Repository. You will see the branch and committed changes from your old remote repository.
To share this Bonobo Git Repository inside your local network you can configure IIS to user IP address. Like this.
Visit this link to configure your IIS to be accessible inside your local network.
Summary
We have learned from this article two ways to Create a Local GIT Server that can be hosted on a Windows machine. We can initialize a bare repository and you can share the folder and give it to someone inside your network for code collaboration. Or we can also use a bonobo git server to easily host and create a git repository. We have also presented a way to migrate or transfer your existing remote repository to another Git server.
Hopefully, this tutorial will be able to give you an idea of how you can collaborate with your teammates inside your local network.
KEEP CODING!!