
In this beginner’s guide, we’ll explore React fundamentals, with a focus on understanding React components, comprehending state and props, and grasping event handling. Whether you’re new to coding or looking to boost your web development skills, join us on this enlightening journey. By the end, you’ll be well-prepared to craft dynamic web applications. Let’s dive into React basics and enjoy building awesome user interfaces!
- I. What are React components?
- II. Importance of component-based architecture in React
- III. Creating Functional and Class Components
- IV. State and Props in React
- V. Handling Events in React:
- VI. Conditional Rendering in React
- VII. UserLogin App
- UserLogin Source Code
- VIII. Hands-on exercises to reinforce the concepts learned
I. What are React components?
- React components are the basic building blocks of a React application, consisting of modular and reusable elements. These components consist of the logic and user interface (UI) for particular parts of the application. Think of these reusable parts as JavaScript functions that, given any type of input, can return a React element. They serve the same purpose as JavaScript functions, but they also return HTML and operate independently. The component name for a React component must begin with an uppercase letter when generating it.
- React components enable you to create code that is modular, reusable, and maintainable by breaking up your user interface (UI) into smaller, easier-to-manage sections.
II. Importance of component-based architecture in React
Component-based architecture offers various benefits and is considered necessary for developing React applications that are scalable and maintainable. The key reasons why React’s architecture is based on components are outlined below:
- It reduces code duplication and permits component reuse.
- It makes the framework as a whole more flexible and scalable.
- It facilitates easier code-based maintenance or updating.
- It expedites project schedules and encourages developers working on the same code base to divide tasks.
- Breaking down functionalities into individual components facilitates problem identification and resolution.
React’s component-based architecture makes it easier to maintain, repurpose, test, scale, encapsulate, rewrite, modularize, and debug. When these benefits are considered, especially in complex, large-scale projects, React apps perform better and are more effective.
III. Creating Functional and Class Components
1. Comprehending the distinction between functional and class components is integral to understanding React components.
Components come in two types, Class components and Functional components. In older React code bases, you may find Class components primarily used. It is now suggested to use Functional components along with Hooks, which were added in React 16.8.
Functional Components: These are simple, stateless components that are defined as JavaScript functions. They receive props (properties) as input and return React elements as output. Here is a basic example of a functional component called a Car (without props).
function Car(){
               return <h2> Hi, I am a Car! </h2>;
}
Class Components: These are more feature-rich components that can hold and manage local state. They are defined as ES6 classes and can have lifecycle methods. A class component must include the extends React.Component statement. This statement creates an inheritance to React.Component, and gives your component access to React.Component’s functions. Class component also requires a render() method, this method returns HTML. Here is the same example as above but using a class component instead.
class Car extends React.Component {
 render() {
       return <h2>Hi, I am a Car!</h2>;
   }
}
2. When to use each type of component
Functional components have a simple syntax and are light in weight. They are excellent options when:
- You require basic user interface elements or components that do not require self-managing state or lifecycle functions.
- You desire easier testing and simpler code.
- Optimizing performance is essential.
Class components are considered more feature-rich because they can hold and manage local state, making them suitable when:
- You need to manage complex state interactions or use lifecycle methods extensively.
- Creating error boundaries.
- Collaborating with outdated code that uses class components.
Functional components and hooks are becoming more and more important to the React team. Functional components may be the focus of future features and optimizations, which makes them a wise choice for long-term maintainability. For most React development, give priority to functional components with hooks. Think of class components only when you have certain needs that demand their features
IV. State and Props in React
1. Managing component state in React
State represents information that is subject to change and has an impact on the user interface, such as dynamic content, user input, and interactive elements. When a state object changes, React components update their own rendering. State can be managed in both functional components with hooks and class components.
a.) Managing State in Functional Components (with Hooks)
useState Hook: The useState hook is used in functional components to add state to them. It returns an array with two elements: the current state value and a function to update it
Example:
const [count, setCount] = useState(0);useReducer Hook: It takes a reducer function (similar to Redux) to manage state updates.
Example:
const [state, dispatch] = useReducer(reducer, initialState);b.) Managing State in Class Components:
React Class components have a built-in state object. Component properties are kept in state, managed using “this.state” and updated using “this.setState”. The setState function is asynchronous and takes an object representing the updated state or a function that returns the updated state. The state object is initialized in the constructor
this.state: It is used as an object to store state within a class component.
Example:
class Counter extends React.Component {
  constructor(props) {
	super(props);
	this.state = { count: 0 };
  }
  // ...
}
this.setState(): This is used to update state and trigger a re-render.
Example:
handleClick() {
  this.setState({ count: this.state.count + 1 });
}
2. Passing data between components using props
Props, which stands for “properties,” are a key component of React that allows data to be transferred between components. They act as arguments passed from a parent component to its child components, allowing you to tailor and customize the child’s behavior and appearance based on the received information.
How props are passed in react:·
JSX attributes: Props are passed like HTML attributes to the child component element in JSX. In the example below, props are 30
<MyComponent name="John" age={30} />Object spread: You can spread an object containing all props you want to pass.
const props = { name: "Jane", color: "blue" };
<MyComponent {...props} />
How to access props in react:
Destructuring: In function components receiving props, destructuring allows accessing props directly.
function Car(props){
  	  	return <h2>I am a {props.color} Car!</h2>;
	  }
In this example, the `Car` component takes a `color` prop as input and renders a message using that prop.·
this.props: In class components, props are accessible as a property called this.props.
class MyComponent extends React.Component {
  render() {
	return (
  	<>
    	<h1>Hello, {this.props.name}!</h1>
    	<p>You are {this.props.age} years old.</p>
  	</>
	);
  }
}
If your component has a constructor function(The constructor function is where you initiate the component’s properties), the props should always be passed to the constructor and also to the React.Component via the super() method. The constructor() method is called with the props, as arguments, and you should always start by calling the super(props) before anything else, this will initiate the parent’s constructor method and allow the component to inherit methods from its parent (React.Component). The constructor method is called, by React, every time you make a component.
class Car extends React.Component {

   constructor(props) {

   super(props);
    }
render() {

return <h2>I am a {this.props.model} </h2>;
     }
 }
 const root = ReactDOM.createRoot(document.getElementById(‘root’));
root.render(<Car model=”Mustang”/>);
V. Handling Events in React:
1. Overview of event handling in React
Event handling in React involves capturing and responding to user interactions within your components. Whether it’s a button click, mouseover, or form submission. React provides a consistent way to handle events. Event handling is essential for creating interactive and dynamic user interfaces.
useEffect is used to perform side effects in response to events, such as fetching data or modifying the DOM. Custom events can be created for component communication using the dispatchEvent method. For Best Practices, use clear and descriptive event handler names and avoid nesting event handlers too deeply. Event handling is crucial for building interactive React applications. By understanding these concepts, you can create dynamic and responsive user experiences.
Samples of typical event handlers include:
- onClick: Handles mouse clicks.
- onChange: Handles changes in input fields.
- onSubmit: Handles form submissions.
- onMouseOver: Handles mouse hover events.
- onKeyDown: Handles key presses.
2. Using event handlers to respond to user interactions
There are certain user interactions that require special event handlers like clicking a button or moving the mouse. Here are ways of using event handlers to respond to various user interactions:
Attaching Event Handlers:
- Add JSX Attributes: Add event handlers directly to JSX elements using camelCase syntax (e.g., onClick, onChange, onMouseOver).
- Pass a function: Pass the function you want to execute when the event occurs as the value of the event handler attribute.
Example:
<button onClick={handleClick}>Click Me</button>
<input type="text" onChange={handleChange} />
3. Creating Event Handlers in functional and class components:
Functional Components: Define event handler functions directly within the component.
function MyComponent() {
  const handleClick = () => {
	// Handle the click event
  };

  return (
	<button onClick={handleClick}>Click Me</button>
  );
}
Class Components: Define event handler methods inside the component class, often using this.handleClick = this.handleClick.bind(this) in the constructor to ensure proper this binding.
class MyComponent extends React.Component {
  constructor(props) {
	super(props);
	this.handleClick = this.handleClick.bind(this);
  }

  handleClick() {
    // Handle the click event
  }

  render() {
	return (
  	<button onClick={this.handleClick}>Click Me</button>
	);
  }
}
These examples cover a range of user interactions and demonstrate how event handlers can be used to respond to these events. Depending on your application’s requirements, you can customize event handlers to perform specific actions or trigger updates in your React components.
VI. Conditional Rendering in React
1. Rendering components conditionally based on state
In this section, we will go through different ways that components can be rendered conditionally based on state. Rendering components conditionally based on state is a common practice in React applications. You can use conditional statements within the render method (for class components) or directly within the functional component to determine which components should be rendered based on the current state.
2. Implementing conditional logic in JSX for dynamic UIs
In React, you can implement conditional logic in JSX to create dynamic user interfaces. You can use JavaScript expressions, ternary operators, and logical operators to conditionally render different parts of your UI based on certain conditions. Here are examples demonstrating conditional logic in JSX:
a.) Conditional Logic Within JSX:
Ternary Operator: Use the ternary operator for simple conditions:
{isLoggedIn ? <WelcomeMessage /> : <LoginForm />}Here, the ternary operator (condition ? trueValue : falseValue) is used for conditional rendering. If isLoggedIn is true, <WelcomeMessage /> is rendered; otherwise, <LoginForm /> is rendered.
Logical AND Operator: Render a component only if a condition is true:
{isLoggedIn && <WelcomeMessage />}
 {!isLoggedIn && <LoginForm />}
In this example, the && (logical AND) operator is used for conditional rendering. If isLoggedIn is true, the <WelcomeMessage /> component is rendered; otherwise, the <LoginForm /> component is rendered.
b.) Loops and Conditional Blocks:
Arrays: Iterate over arrays and conditionally render elements based on their properties:
{items.map((item) => (
  <Item key={item.id} isFeatured={item.isFeatured} />
))}
if/else blocks: Use if blocks within JSX for more complex logic:
{isLoading ? (
  <p>Loading...</p>
) : (
  <div>
	<Content />
	{hasError && <ErrorAlert />}
  </div>
)}
c.) Using State to Control Rendering:
useState Hook: Manage state variables that control conditional rendering:
const [showDetails, setShowDetails] = useState(false);

<button onClick={() => setShowDetails(true)}>Show Details</button>
{showDetails && <DetailsModal />}
Rendering components conditionally based on state is a common practice in React applications. You can use conditional statements within the render method (for class components) or directly within the functional component to determine which components should be rendered based on the current state. Here are examples using both class components and functional components with hooks:
Class Components:
import React, { Component } from 'react';

class ConditionalRendering extends Component {
  constructor(props) {
	super(props);
	this.state = {
  	isLoggedIn: false,
	};
  }
  toggleLogin = () => {
	this.setState((prevState) => ({ isLoggedIn: !prevState.isLoggedIn }));
  };

  render() {
	return (
  	<div>
    	<button onClick={this.toggleLogin}>
      	{this.state.isLoggedIn ? 'Logout' : 'Login'}
    	</button>
    	{this.state.isLoggedIn ? <WelcomeMessage /> : <LoginForm />}
  	</div>
	);
  }
}
class WelcomeMessage extends Component {
  render() {
	return <h1>Welcome! You are logged in.</h1>;
  }
}

class LoginForm extends Component {
  render() {
	return <h1>Please log in to continue.</h1>;
  }
}
export default ConditionalRendering;
In this example, the ConditionalRendering component has a state variable isLoggedIn. Depending on the value of this state, either the WelcomeMessage or the LoginForm component will be rendered.
Functional Components with Hooks:
import React, { useState } from 'react';

const ConditionalRendering = () => {
  const [isLoggedIn, setLoggedIn] = useState(false);

  const toggleLogin = () => {
	setLoggedIn((prevLoggedIn) => !prevLoggedIn);
  };

  return (
	<div>
  	<button onClick={toggleLogin}>
    	{isLoggedIn ? 'Logout' : 'Login'}
  	</button>
  	{isLoggedIn ? <WelcomeMessage /> : <LoginForm />}
	</div>
  );
};

const WelcomeMessage = () => {
  return <h1>Welcome! You are logged in.</h1>;
};

const LoginForm = () => {
  return <h1>Please log in to continue.</h1>;
};

export default ConditionalRendering;
In this functional component example, the useState hook is used to manage the isLoggedIn state. The toggleLogin function updates the state, and the components (WelcomeMessage or LoginForm) are conditionally rendered based on the state.
These examples demonstrate how to conditionally render components based on the state in both class components and functional components with hooks. You can apply similar patterns for more complex conditions or multiple states.
VII. UserLogin App
Here’s a step-by-step guide to creating a user login system using React
1. Create a new React project using Create React App:
npx create-react-app my-login-app2. Then navigate to the project directory and start the server:
cd my-login-app

npm start
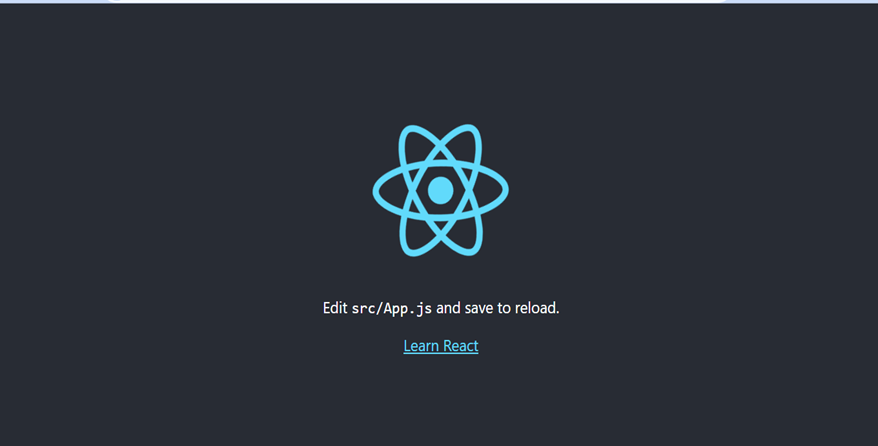
This is the default React page. To close the server, run Ctrl+c.
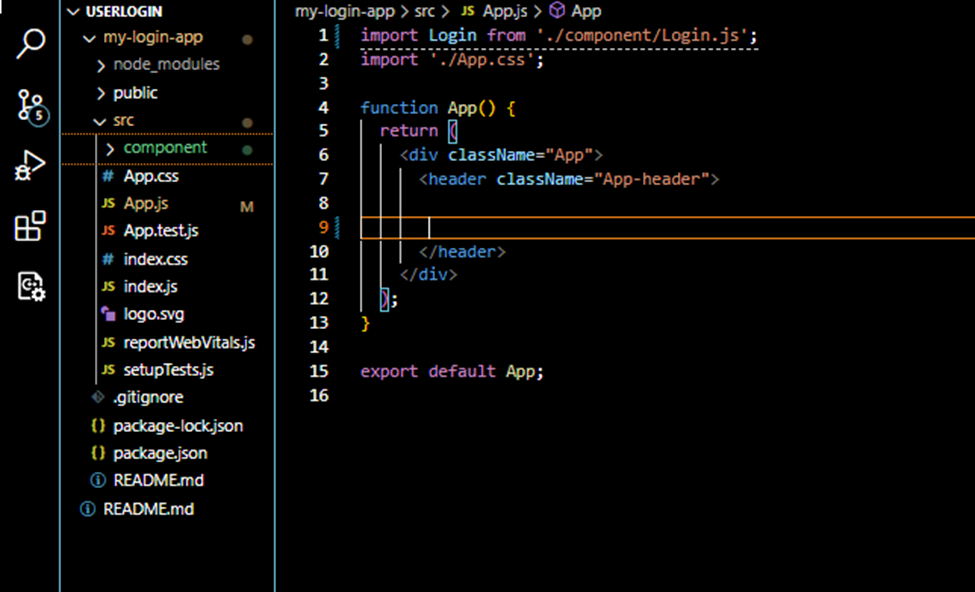
3. Clear the content of the App.js file and leave it looking like the code below.
4. Under src folder create a new folder named component, then create a file named Login.js inside it:
5. Paste the code below inside the login.js file you recently created
import React, { useState } from "react";
import "./Login.css";

const Login = () => {
  // State for username, password, and error message
  const [username, setUsername] = useState("");
  const [password, setPassword] = useState("");
  const [error, setError] = useState("");
  const [success, setSuccess] = useState("");

  // Handle form submission
  const handleSubmit = (e) => {
    e.preventDefault();

    if (username === "user" && password === "password") {
      setError("");
       setSuccess("Login successful!");
      // Navigate to a protected route or display a success message
    } else {
      setSuccess("");
      setError("Invalid username or password");
    }
  };

  return (
    <div className="container">
    <div className="card">
      <h2>Login</h2>
      <form onSubmit={handleSubmit}>
      {error && <div className="error">{error}</div>}
      {success && <div className="success">{success}</div>}
        <input
          type="text"
          id="username"
          name="username"
          value={username}
          onChange={(e) => setUsername(e.target.value)}
          placeholder="Username"
          required=""
        />
        <input
          type="password"
          id="password"
          name="password"
          value={password}
          onChange={(e) => setPassword(e.target.value)}
          placeholder="Password"
          required=""
        />
        <button type="submit">Login</button>
      </form>
    </div>
  </div>
  );
};

export default Login;
6. Create a login.css file inside the component folder and paste the following code in it:
/* Login.css */

.container {
  width: 100%;
  max-width: 400px;
}

.card {
  width: 100%;
  background-color: #f8f8f8; /* Warna card */
  padding: 20px;
  border-radius: 12px; /* Border radius card */
  box-shadow: 0 4px 8px rgba(0, 0, 0, 0.1);
}

h2 {
  text-align: center;
  color: #333;
}

form {
  display: flex;
  flex-direction: column;
}

input {
  padding: 10px;
  margin-bottom: 12px;
  border: 2px solid #ddd; /* Border color input */
  border-radius: 8px; /* Border radius input */
  transition: border-color 0.3s ease-in-out;
  outline: none;
  color: #333;
  background-color: #f4f4f4; /* Warna input */
}

input:focus {
  border-color: #ff9900; /* Warna input saat focus */
}

button {
  background-color: #6164c1; /* Warna button */
  color: #fff;
  padding: 10px;
  border: none;
  border-radius: 8px; /* Border radius button */
  cursor: pointer;
  transition: background-color 0.3s ease-in-out;
}

button:hover {
  background-color: #9c9ed7; /* Warna button saat hover */
}


  .error{
    border-left-color: #d9534f !important;
    background-color: rgba(217, 83, 79, 0.1) !important;
    width:80%;
    background-color: #ffffff;
    padding:20px;
    border:1px solid #eee;
    border-left-width:5px;
    border-radius: 3px;
    margin:10px auto;
    font-family: 'Open Sans', sans-serif;
    font-size: 14px;
    color:#d9534f;
  }

  .success{
    border-left-color: #299122  !important;
    background-color: rgba(217, 83, 79, 0.1) !important;
    width:80%;
    background-color: #d4f1cb !important;
    padding:20px;
    border:1px solid #eee;
    border-left-width:5px;
    border-radius: 3px;
    margin:10px auto;
    font-family: 'Open Sans', sans-serif;
    font-size: 14px;
    color:#8b8080;
  }
7. Now, all we need is to call your component inside App.js to render your UI. To do that, import your login.js component using the syntax below.
import Login from './component/Login.js';8. Then add your component on the return.
<Login/>This is the final code inside our App.js.
import Login from './component/Login.js';
import './App.css';

function App() {
  return (
    <div className="App">
      <header className="App-header">

        <Login/>
      </header>
    </div>
  );
}

export default App;
9. Now run your app by using the command below.
npm startYour app will be open on the browser with this login UI.

If you observe we have added a static dummy username and password inside login.js, To test it, try logging in with the following credentials:
- user as Username
- password as Password
It should look like this. See the video below.
Congratulations!! You have now created a log-in form that implements state and event handling in React. The React component, Login, employs state, event handling, and local state management. It uses the useState hook to maintain a state for username, password, and an error message. Event handlers are attached to the input fields to update the corresponding states as the user types. The handleSubmit function simulates login logic, preventing the default form submission and logging success or setting an error message based on the entered credentials.
UserLogin Source Code
You can check out the source code from Github Repository and don’t forget to follow us.
VIII. Hands-on exercises to reinforce the concepts learned
a. Name the following React component “Person”. Replace XXXX with the correct component name
function xxxx (props) {
  return <h2>Hi, I'm {props.name}</h2>;
}
b. Complete this component which uses properties. Replace XXXX with the correct name
function Person(xxxx) {
  return <h1>Hi, I'm {xxxx.name}!</h1>;
}
const root = ReactDOM.createRoot(document.getElementById('root'));
root.render(<Person name="Jesse"/>);
c. Create a variable named name and pass it to the Person component. Replace “x”
function Person(props) {
  return <h2>I'm { props.name }!</h2>;
}

function Greeting() {
  const name = "Jesse"
  return (
	<>
  	<h1>Hello!</h1>
  	<Person name=XnameX />
	</>
  );
}

const root = ReactDOM.createRoot(document.getElementById('root'));
root.render(<Greeting />);
d. Complete this statement to include a click event handler. Replace XXXXX with the correct event name.
<button xxxxx={clicked}>Click Me!</button>e. Complete this statement to keep track of a “count” variable using the useState Hook. Replace xxxx and xxxxxx
import { useState } from "react";

function KeepCount() {
  const [xxxx, xxxxxx] = useState(0);
}
With the examples above, you can further practice what you have learned so far. This topic provides a comprehensive introduction to key React concepts for beginners, including how to create components, manage state and props, handle events, and implement conditional rendering.
Keep Coding!
Check this out Learn ReactJs from Scratch