In this tutorial, we are going to Display Database change notifications using SignalR in the ASP.NET CORE Web application. Our application will be able to load up new data without a user refreshing the page.
- What is SignalR Core
- What can it be used for?
- I. CREATING SQL DATABASE
- II. USING SQL TABLE DEPENDENCY
- III. CREATE AN ASP.NET CORE WEB API APPLICATION
- VI. CREATE AN ASP.NET CORE MVC WEB API APPLICATION
- V. ADDING SIGNALR CLIENT LIBRARY
- VI. CONFIGURING THE WEB APP TO USE SIGNALR
- VII. Testing the application
- Summary
What is SignalR Core
SignalR Core is a library for .NET developers that simplifies the process of adding real-time web functionality to your applications. What is “real-time web” functionality? It’s the ability to have server-side code push content to the connected clients as it happens, in real-time rather than waiting for a client to request data.
What can it be used for?
Pushing data from the server to the client (not just browser clients) has always been a tough problem. SignalR makes it dead easy and handles all the heavy lifting for you.
An example of SignalR in action is anytime time a user refreshes a web page to see new data. Examples include dashboards and monitoring applications, collaborative applications (such as simultaneous editing of documents), job progress updates, and real-time forms.
Requirements
- Visual Studio 2022 » Link
- SQL Server
I. CREATING SQL DATABASE
We require a database to store our data. Launch SQL server management studio and create a new database called ProductsDB. You can use the provided code snipper below.
GO
SET ANSI_NULLS ON
GO
SET QUOTED_IDENTIFIER ON
GO
CREATE TABLE [dbo].[Product](
	[Id] [int] IDENTITY(1,1) NOT NULL,
	[Name] [varchar](50) NOT NULL,
	[Category] [varchar](50) NOT NULL,
	[Price] [decimal](10, 2) NOT NULL,
 CONSTRAINT [PK_Product] PRIMARY KEY CLUSTERED
(
	[Id] ASC
)WITH (PAD_INDEX = OFF, STATISTICS_NORECOMPUTE = OFF, IGNORE_DUP_KEY = OFF, ALLOW_ROW_LOCKS = ON, ALLOW_PAGE_LOCKS = ON, OPTIMIZE_FOR_SEQUENTIAL_KEY = OFF) ON [PRIMARY]
) ON [PRIMARY]
GO
GO
SET IDENTITY_INSERT [dbo].[Product] ON
GO
INSERT [dbo].[Product] ([Id], [Name], [Category], [Price]) VALUES (1, N'Potato', N'Groceries', CAST(100.00 AS Decimal(10, 2)))
GO
INSERT [dbo].[Product] ([Id], [Name], [Category], [Price]) VALUES (2, N'Tomato', N'Groceries', CAST(150.00 AS Decimal(10, 2)))
GO
INSERT [dbo].[Product] ([Id], [Name], [Category], [Price]) VALUES (3, N'Onion', N'Groceries', CAST(70.00 AS Decimal(10, 2)))
GO
INSERT [dbo].[Product] ([Id], [Name], [Category], [Price]) VALUES (4, N'The Magic of Thinking Big', N'Books', CAST(250.00 AS Decimal(10, 2)))
GO
INSERT [dbo].[Product] ([Id], [Name], [Category], [Price]) VALUES (5, N'Rich Dad Poor Dad', N'Books', CAST(230.00 AS Decimal(10, 2)))
GO
INSERT [dbo].[Product] ([Id], [Name], [Category], [Price]) VALUES (6, N'The Secret', N'Books', CAST(270.00 AS Decimal(10, 2)))
GO
INSERT [dbo].[Product] ([Id], [Name], [Category], [Price]) VALUES (13, N'Mobile', N'Electronics', CAST(45000.00 AS Decimal(10, 2)))
GO
INSERT [dbo].[Product] ([Id], [Name], [Category], [Price]) VALUES (14, N'Chair', N'Furniture', CAST(500.00 AS Decimal(10, 2)))
GO
INSERT [dbo].[Product] ([Id], [Name], [Category], [Price]) VALUES (15, N'Flowers', N'Decoration', CAST(200.00 AS Decimal(10, 2)))
GO
INSERT [dbo].[Product] ([Id], [Name], [Category], [Price]) VALUES (16, N'Table', N'Furniture', CAST(500.00 AS Decimal(10, 2)))
GO
SET IDENTITY_INSERT [dbo].[Product] OFF
In the above query, we have created a SQL table called Product and inserted dummy records into it.
II. USING SQL TABLE DEPENDENCY
SqlTableDependency is a high-level C# service used to audit, monitor, and receive notifications on the SQL server’s record once the table has changed. Any changes such as insert, update or delete operation, a notification containing the record values are sent to SqlTableDependency.
In Order to use SQL Dependency, we need to enable Service Broker and Get data from the database. To do this, run the following query in the productsDB database that we created.
alter database productsDB set enable_broker with rollback immediateCheck whether the service broker is enabled by running the following script.
select is_broker_enabled from sys.databases where name ='productsDB'If the above script returns a value of 1 it means the service broker is enabled, if it returns 0 service broker is disabled.
III. CREATE AN ASP.NET CORE WEB API APPLICATION
Let’s create an API for pushing and making changes to the data in our database. This will be used on the testing end and see if the web application that Display Database change notification using SignalR works.
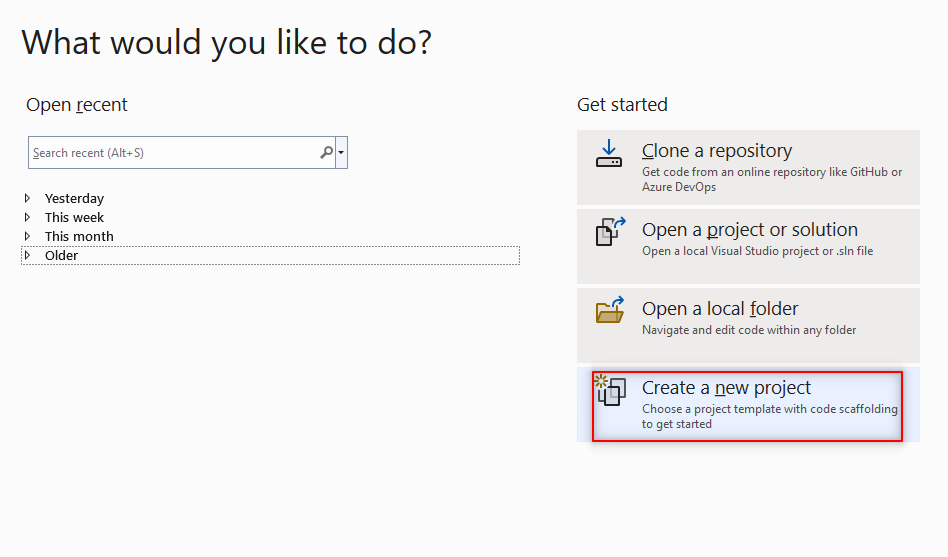
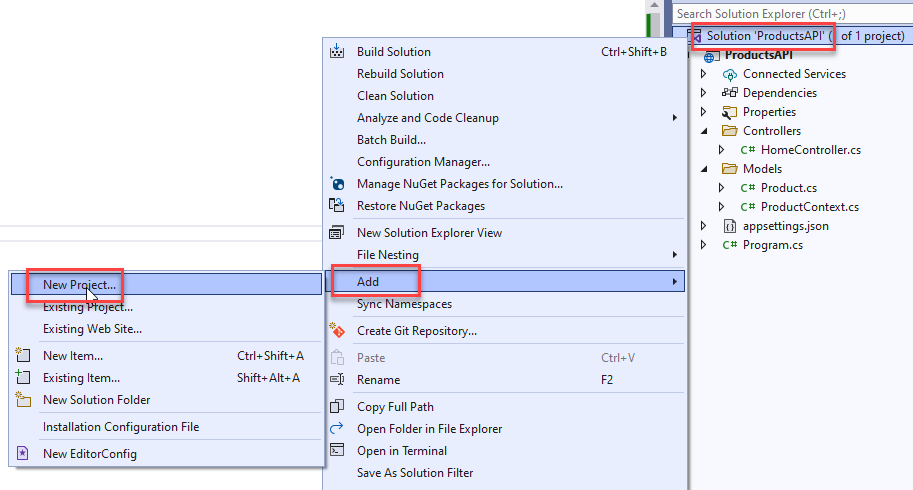
- Launch Visual Studio and click Create a new project.
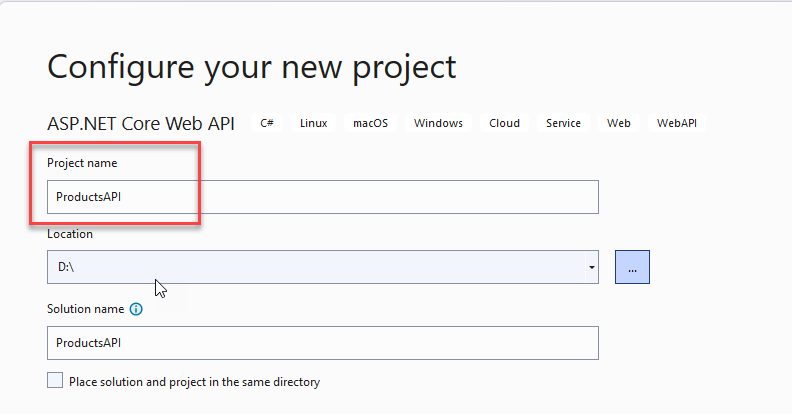
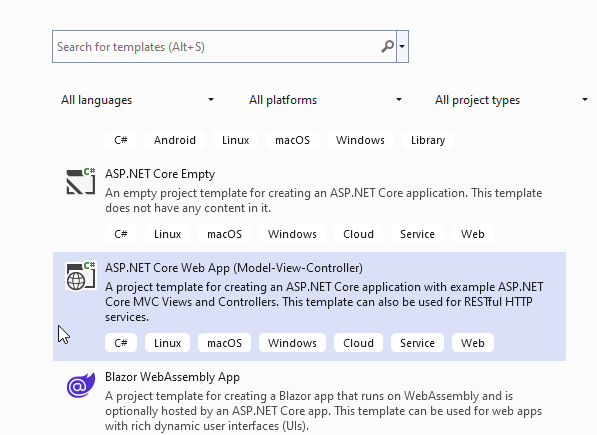
2. Select ASP.NET Core Web API

3. Give your project the name ProductsAPI.
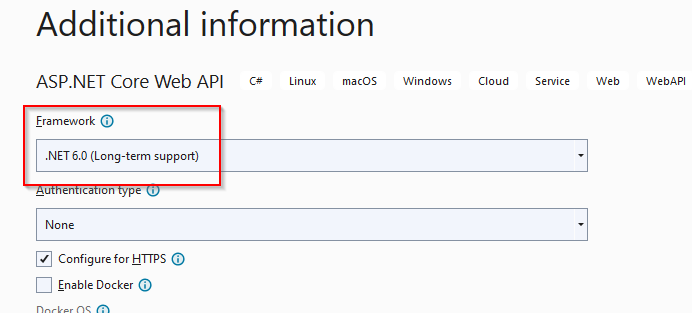
4. Select .Net 6.0(Long-term support) and click Create to finish setting up the project.
a) Modify JSON configuration
Once the project has successfully been created add the following code to appsettings.json file.
"ConnectionStrings": {
    "EmployeeDbContext": "server=YOUR SERVER NAME;Initial Catalog= ProductsDB;MultipleActiveResultSets=True;integrated security=true"
  }
To know more about connection strings you may visit this tutorial. Database Connection Strings
b) Create Model Class
Right-click on your Project then add a new folder called Models.
Inside the Models, folder add a class called Product. Paste the following code.
public class Product
    {
        [Key]
        public int Id { get; set; }

        [Required]
        public string? Name { get; set; }

        [Required]
        public string? Category { get; set; }
        [Required]
        public decimal? Price { get; set; }
    }
The above code defined the properties of the data to be stored in the database. Always ensure the model class name matches the name of the SQL table you are using.
Let’s add another class in the Models folders called ProductContext then paste the below code.
public class ProductContext : DbContext
    {
        private readonly IConfiguration _context;
        public ProductContext(IConfiguration connectionString)
        {
            _context = connectionString;
        }
        public DbSet<Product> Product { get; set; }
        protected override void OnConfiguring(DbContextOptionsBuilder optionsBuilder)
        {
            optionsBuilder.UseSqlServer(_context.GetConnectionString("ProductDbContext"));
        }
    }
In the above example, the ProductContext class is derived from DbContext class which makes it a context class. It also includes an entity set for Product. The context class is used to query or save data to the database. It is also used to configure domain classes, database-related mappings, change tracking settings, caching, transactions, etc.
c) CRUD API METHODS
CRUD refers to create, read, update and delete. In our API we are going to allow users to create a new record (CREATE), retrieve records (READ), modify existing records (UPDATE) and remove records from the database (Delete)
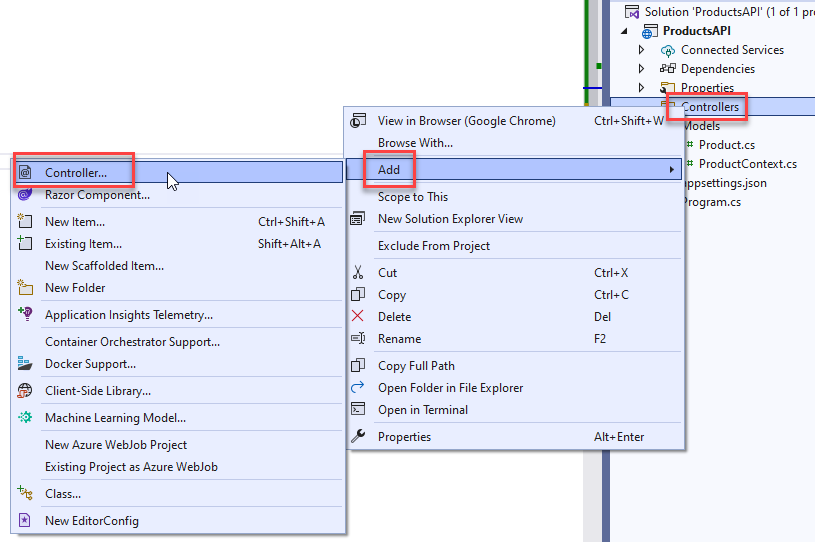
- Right-click on the Controllers folder, click Add->Controller
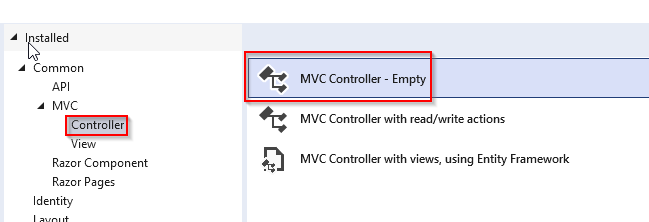
2. Select MVC Controller-Empty
3. Add the following code in your HomeController class.
public class HomeController : Controller
    {
[Route("api/Controller")]
      [ApiController]
        private readonly ProductContext _context;

        public HomeController(ProductContext context)
        {
            _context = context;


        }
        [HttpGet]
        public async Task<IEnumerable<Product>> Get()
        {
            return await _context.Product.ToListAsync();

        }
        [HttpGet("id")]
        [ProducesResponseType(typeof(Product), StatusCodes.Status200OK)]
        [ProducesResponseType(StatusCodes.Status404NotFound)]
        public async Task<IActionResult> GetProductById(int id)
        {
            var products = await _context.Product.FindAsync(id);
            return products == null ? NotFound() : Ok(products);
        }
        [HttpPost]
        [ProducesResponseType(StatusCodes.Status201Created)]
        public async Task<IActionResult> Create(Product prod)
        {
            await _context.Product.AddAsync(prod);
            await _context.SaveChangesAsync();
            return CreatedAtAction(nameof(GetProductById), new { id = prod.Id }, prod);
        }
        [HttpPut("{id}")]
        [ProducesResponseType(StatusCodes.Status204NoContent)]
        [ProducesResponseType(StatusCodes.Status400BadRequest)]
        public async Task<IActionResult> Update(int id, Product prod)
        {
            if (id != prod.Id) return BadRequest();
            _context.Entry(prod).State = EntityState.Modified;
            await _context.SaveChangesAsync();
            return NoContent();
        }
        [HttpDelete("{id}")]
        [ProducesResponseType(StatusCodes.Status204NoContent)]
        [ProducesResponseType(StatusCodes.Status404NotFound)]
        public async Task<IActionResult> Delete(int id)
        {
            var prodToDelete = await _context.Product.FindAsync(id);
            if (prodToDelete == null) return NotFound();
            _context.Product.Remove(prodToDelete);
            await _context.SaveChangesAsync();
            return NoContent();
        }
    }
The above code creates the four API crud operations.
d) Program.cs
Go to program.cs and add the following code.
var connectionString = builder.Configuration.GetConnectionString("ProductDbContext");
builder.Services.AddDbContext<ProductContext>(x => x.UseSqlServer(connectionString));
VI. CREATE AN ASP.NET CORE MVC WEB API APPLICATION
Next, we are going to another application that will contain the user interface(UI) for displaying data fetched from the database.
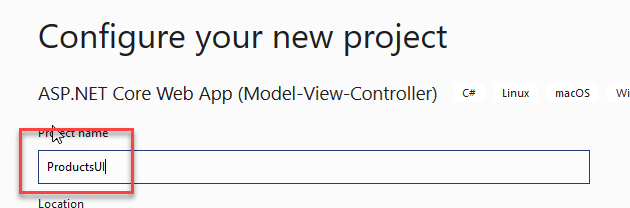
- Follow the previous steps we used in creating the API project and create a new ASP.NET MVC project called ProductsUI.
2. Select ASP.NET Core Web App
3. Give your project the name ProductsUI then click Next to finish setting up the project.
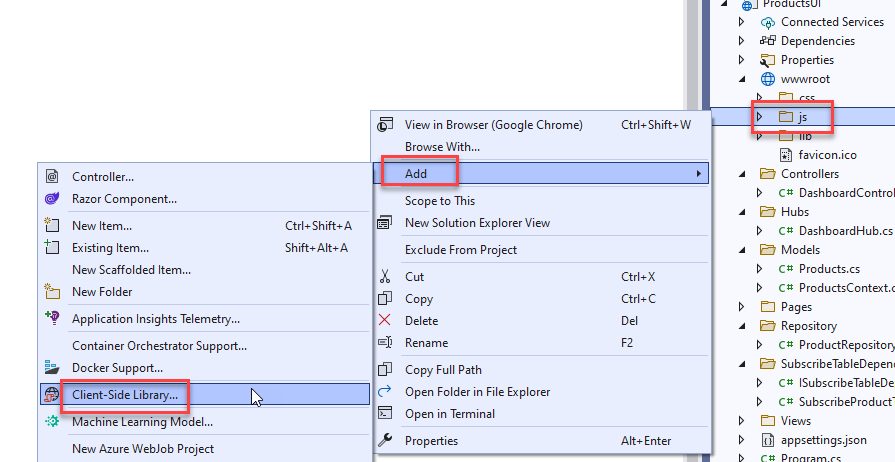
V. ADDING SIGNALR CLIENT LIBRARY
In order for us to display Database change notification using SignalR, we need to add SignalR dependency. Follow the steps below.
- Open wwwroot folder,right click on js folder->Add->Client-Side Library.
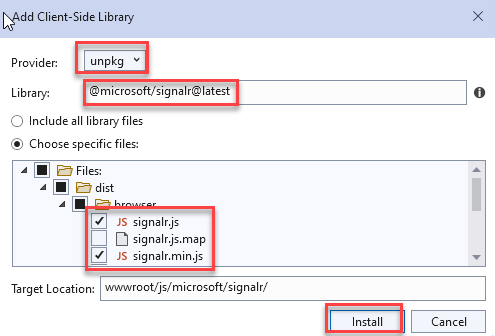
2. In the Add Client-Side Library dialog box:
- Select unpkg for Provider
- Enter @microsoft/signalr@latest for Library
- Select Choose specific files, expand the dist/browser folder, and select signalr.js and signalr.min.js.
- Select Install
VI. CONFIGURING THE WEB APP TO USE SIGNALR
On the same js folder right-click and add a javascript file, call it dashboard.js then paste the following code.
"use strict";

var connection = new signalR.HubConnectionBuilder().withUrl("/dashboardHub").build();

$(function () {
    connection.start().then(function () {
		/*alert('Connected to dashboardHub');*/

		InvokeProducts();


    }).catch(function (err) {
        return console.error(err.toString());
    });
});

// Product
function InvokeProducts() {
	connection.invoke("SendProducts").catch(function (err) {
		return console.error(err.toString());
	});
}

connection.on("ReceivedProducts", function (products) {
	BindProductsToGrid(products);
});

function BindProductsToGrid(products) {
	$('#tblProduct tbody').empty();

	var tr;
	$.each(products, function (index, product) {
		tr = $('<tr/>');
		tr.append(`<td>${(index + 1)}</td>`);
		tr.append(`<td>${product.name}</td>`);
		tr.append(`<td>${product.category}</td>`);
		tr.append(`<td>${product.price}</td>`);
		$('#tblProduct').append(tr);
	});
}
a) Models
Add a new folder called Models. Inside the folder add a new class called Product then paste the following code.
public class Product
    {
            [Key]
            public int Id { get; set; }

            [Required]
            public string? Name { get; set; }

            [Required]
            public string? Category { get; set; }
            [Required]
            public decimal? Price { get; set; }
      }
b) Database context
On the Models, folder add another class called ProductsContext and paste the below code.
public class ProductsContext : DbContext
    {
        private readonly IConfiguration _context;
        public ProductsContext(IConfiguration connectionString)
        {
            _context = connectionString;
        }
        public DbSet<ProductsContext> Employees { get; set; }
        protected override void OnConfiguring(DbContextOptionsBuilder optionsBuilder)
        {
            optionsBuilder.UseSqlServer(_context.GetConnectionString("ProductDbContext"));
        }
c) Configure app settings
Go to appsettings.json and add the following code to create a connection string to the database.
"ConnectionStrings": {
    "DefaultConnection": "Data Source=YOUR SERVER NAME;Initial Catalog=ProductsDB;MultipleActiveResultSets=True;integrated security=true"

  }
d) Controllers
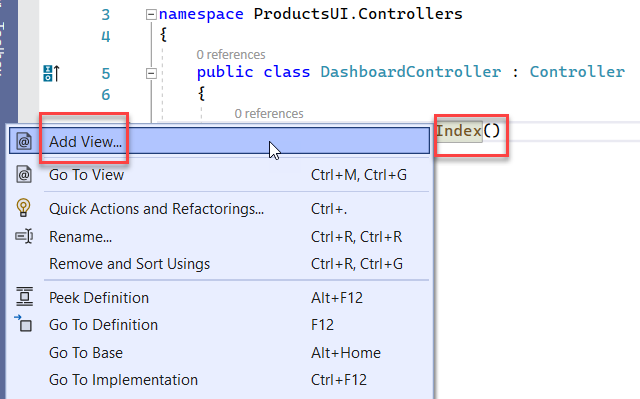
Right-click on the Controllers folder and add a new controller DashboardController.cs
In the controller, generate a view from the index method.
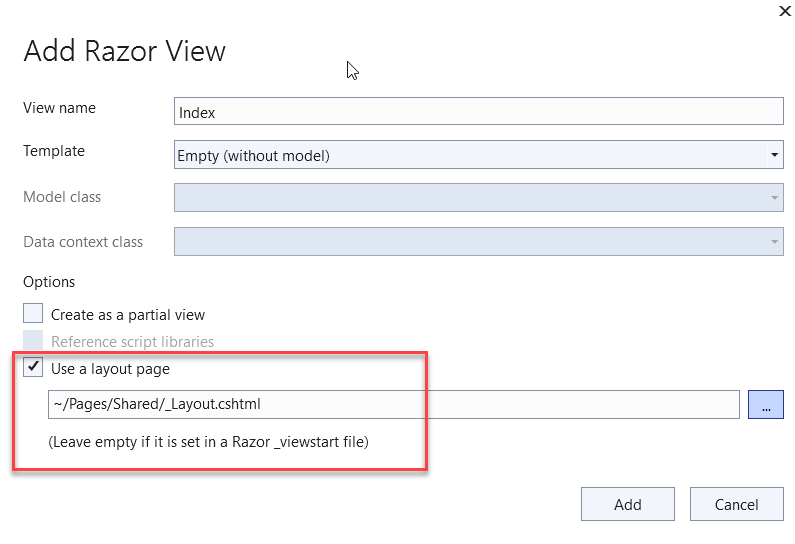
- To do this right-click on the index method and select Add View.
2. Select Razor View
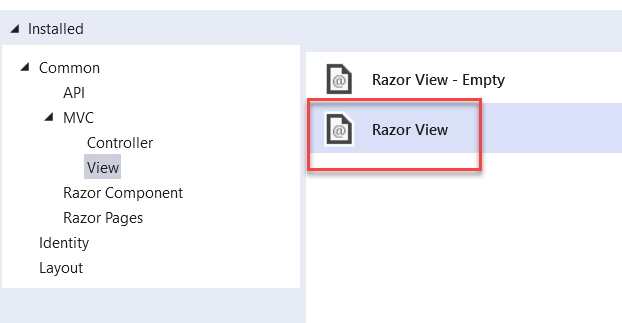
3. Add a layout page then click Add to finish generating the view.
A new view called Index.cshtml is generated as shown below.
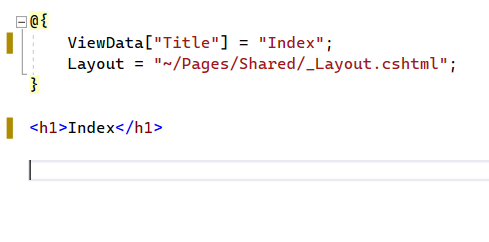
4. Add the following code to the index.cshtml view.
@{
    ViewData["Title"] = "Index";
    Layout = "~/Views/Shared/_Layout.cshtml";
}

<div>
    <div class="row">
        <div class="col-md-8">
            <div class="x_panel">
                <div class="x_title">
                    <h4>Products</h4>
                    <div class="clearfix"></div>
                </div>
                <div class="x_content">
                    <table class="table table-hover" id="tblProduct">
                        <thead>
                            <tr>
                                <th>#</th>
                                <th>Name</th>
                                <th>Category</th>
                                <th>Price</th>
                            </tr>
                        </thead>
                        <tbody></tbody>
                    </table>
                </div>
            </div>
        </div>


    </div>


</div>

@section Scripts{
<script src="~/lib/microsoft/signalr/dist/browser/signalr.js"></script>
}
The above code generates an HTML table that will display the data from our SQL database
e) HUBS
Create a new folder called Hubs. Inside Hubs create a new class called DashboardHub.cs and paste the below code.
public class DashboardHub : Hub
    {
        ProductRepository productRepository;
        public DashboardHub(IConfiguration configuration)
        {
            var connectionString = configuration.GetConnectionString("ProductDbContext");
            productRepository = new ProductRepository(connectionString);

        }
        public async Task SendProducts()
        {
            var products = productRepository.GetProducts();
            await Clients.All.SendAsync("ReceivedProducts", products);


        }
    }
The above method dashboard hubs connect to the database via a connection string then in SendProducts() method var products() gets products from product repository then details of products are sent to connected clients in our case the client is ReceivedProducts() which is a js function.
f) SubscribeTableDependencies
Create a new folder called SubscribeTableDependencies.Inside the folder create a new class called SubscribeTableDependency.cs and paste the below code.
public class SubscribeProductTableDependency : ISubscribeTableDependency
    {
        SqlTableDependency<Products> tableDependency;
        DashboardHub dashboardHub;

        public SubscribeProductTableDependency(DashboardHub dashboardHub)
        {
            this.dashboardHub = dashboardHub;
        }

        public void SubscribeTableDependency(string connectionString)
        {
            tableDependency = new SqlTableDependency<Products>(connectionString);
            tableDependency.OnChanged += TableDependency_OnChanged;
            tableDependency.OnError += TableDependency_OnError;
            tableDependency.Start();
        }

        private void TableDependency_OnChanged(object sender, TableDependency.SqlClient.Base.EventArgs.RecordChangedEventArgs<Products> e)
        {
            if (e.ChangeType != TableDependency.SqlClient.Base.Enums.ChangeType.None)
            {
                dashboardHub.SendProducts();
            }
        }

        private void TableDependency_OnError(object sender, TableDependency.SqlClient.Base.EventArgs.ErrorEventArgs e)
        {
            Console.WriteLine($"{nameof(Products)} SqlTableDependency error: {e.Error.Message}");
        }
    }
The above code generates events for table dependency onChange and onError, whenever data in the product table gets modified an event will be triggered. This event will call the signalR hub method to push the data to the client.
In the same folder add another class called ISubscribeTableDependency and paste the following code.
public interface ISubscribeTableDependency
    {
        void SubscribeTableDependency(string connectionString);
    }
g) Repository
To get data from the database we need to create repositories. To do this, Create a new folder called Repository. Inside, create a new class called ProductRepository.cs and paste the below code.
public class ProductRepository
    {
        string connectionString;

        public ProductRepository(string connectionString)
        {
            this.connectionString = connectionString;
        }

        public List<Products> GetProducts()
        {
            List<Products> products = new List<Products>();
            Products product;

            var data = GetProductDetailsFromDb();

            foreach (DataRow row in data.Rows)
            {
                product = new Products
                {
                    Id = Convert.ToInt32(row["Id"]),
                    Name = row["Name"].ToString(),
                    Category = row["Category"].ToString(),
                    Price = Convert.ToDecimal(row["Price"])
                };
                products.Add(product);
            }

            return products;
        }

        private DataTable GetProductDetailsFromDb()
        {
            var query = "SELECT Id, Name, Category, Price FROM Product";
            DataTable dataTable = new DataTable();

            using (SqlConnection connection = new SqlConnection(connectionString))
            {
                try
                {
                    connection.Open();
                    using (SqlCommand command = new SqlCommand(query, connection))
                    {
                        using (SqlDataReader reader = command.ExecuteReader())
                        {
                            dataTable.Load(reader);
                        }
                    }

                    return dataTable;
                }
                catch (Exception ex)
                {
                    throw;
                }
                finally
                {
                    connection.Close();
                }
            }
        }


           }
h) Middleware extensions
We need to create a middleware to subscribe to table dependency. Create a new folder called MiddlewareExtensions. Inside the folder create a new class called ApplicationBuilderExtension.cs then paste the following code.
public static class ApplicationBuilderExtension
    {
        public static void UseSqlTableDependency<T>(this IApplicationBuilder applicationBuilder, string connectionString)
           where T : ISubscribeTableDependency
        {
            var serviceProvider = applicationBuilder.ApplicationServices;
            var service = serviceProvider.GetService<T>();
            service.SubscribeTableDependency(connectionString);
        }
    }
i)	Program.cs
Go to program.cs and replace with the following code
using ProductsUI.Hubs;
using ProductsUI.MiddlewareExtensions;
using ProductsUI.SubscribeTableDependencies;

var builder = WebApplication.CreateBuilder(args);
builder.Services.AddControllersWithViews();
builder.Services.AddSignalR();
builder.Services.AddSingleton<DashboardHub>();
builder.Services.AddSingleton<SubscribeProductTableDependency>();
var app = builder.Build();
var connectionString = app.Configuration.GetConnectionString("DefaultConnection");
if (!app.Environment.IsDevelopment())
{
    app.UseExceptionHandler("/Error");
    app.UseHsts();
}
app.UseHttpsRedirection();
app.UseStaticFiles();
app.UseRouting();
app.UseAuthorization();
app.MapHub<DashboardHub>("/dashboardHub");
app.MapControllerRoute(
    name: "default",
    pattern: "{controller=Dashboard}/{action=Index}/{id?}");
app.UseSqlTableDependency<SubscribeProductTableDependency>(connectionString);
app.Run();
VII. Testing the application
To run the project ensure you set the solution to run multiple startup projects.
- To do this right-click on the solution and select properties.
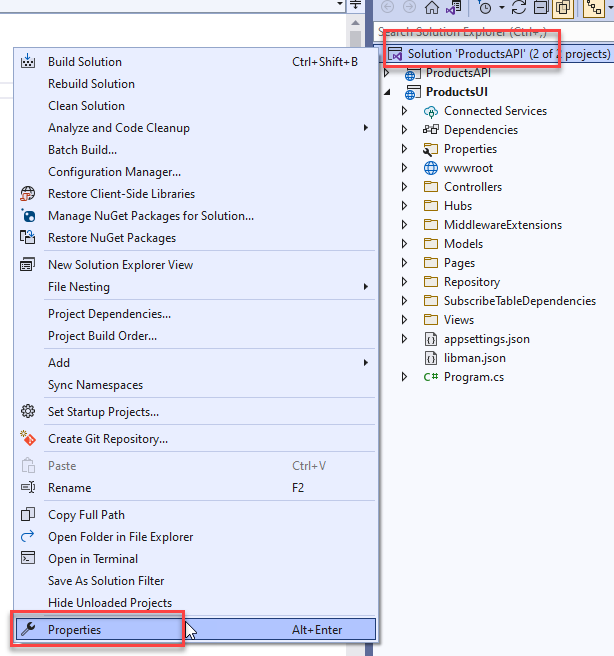
2. Select Multiple startup projects, change Action to Start then click Ok to apply the settings.
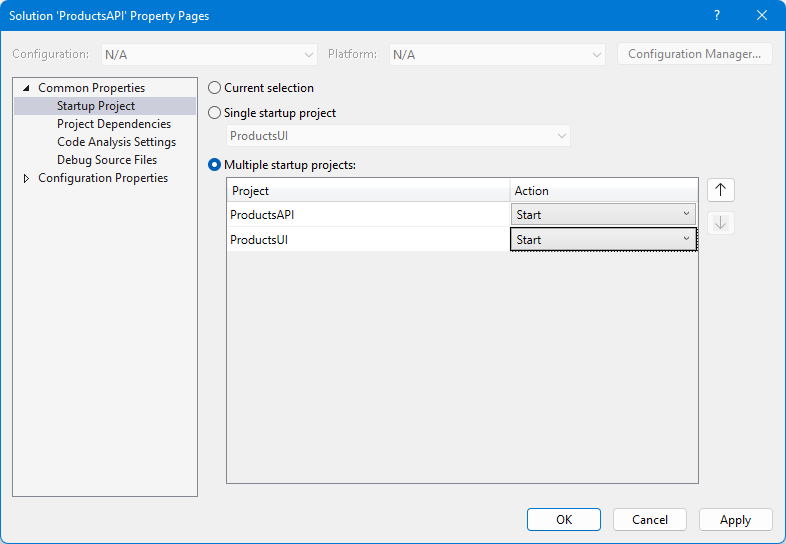
3. Next run the Project, you will notice that the two projects we created both launched at the same time.
4. Ensure you can view the two projects side by side as shown below.

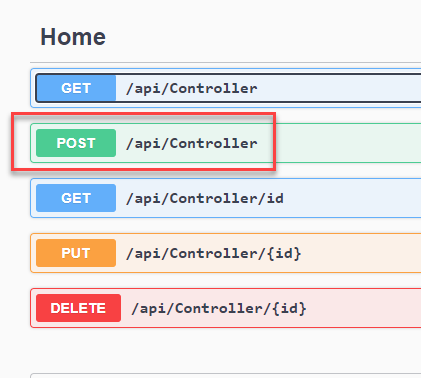
5. In the API application click on the post tab
6. Fill in the details as you like then click execute.
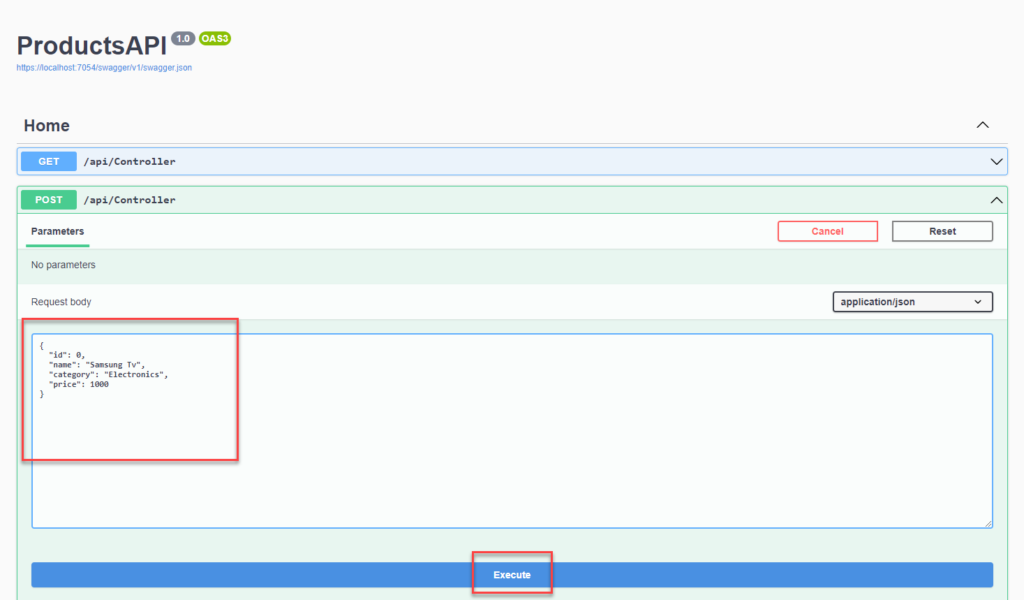
You will notice that the posted data is automatically shown in the UI app without refreshing the page.
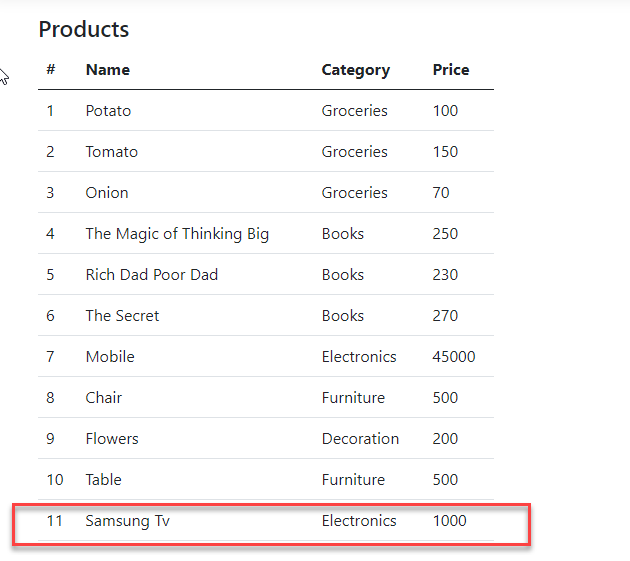
You can test with the other API operations and you will notice the same process happens, the data changes in the UI without having to refresh the page.
If something is not working on your end, you may download the source code from this Github repository.
Summary
In this tutorial, we have learned how to Display Database change notification using SignalR in ASP.NET Core. We created functionality that will display new data from an SQL database to an interface web page without refreshing the page. We also developed an API application for posting and updating data.
Check this other tutorial about utilizing Signalr using Visual Studio 2022 and using .Net 8 framework: Real-Time Database Updates in ASP.NET Core: Using SignalR with SQL Server
KEEP CODING!